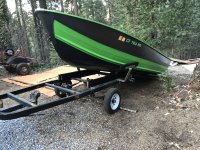
1979 Starcraft 16’ SS Refresh

SHSU

Lieutenant Junior+Starmada Splash Of The Year 2019
Joined
Mar 8, 2017
Messages
1,721
Ahhhh, the planning stage. That was a lot of fun. Mind ran wild and how much I was willing to spend seemed to keep climbing... lol

The cleats I got were from Gemlux. Spendy, but I have loved them. Thing to remember is anything that will be experiencing external torqueing, should have additional bracing added to help spread out the force.

As for painting, I wanted a mirror finish. I am glad by the time I started on paint I had gotten over that thought. We have a couple scratches and anchor "bumb" marks from our fishing and early boating experience. So just remember whatever finish you put on, it will experience a couple blemishes after a couple outings.

SHSU
 

Moserkr

Chief Officer + Starmada Splash Of The Year 2021
Joined
Nov 23, 2020
Messages
869
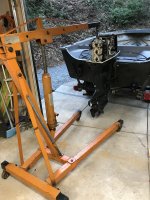
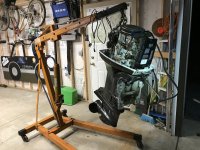
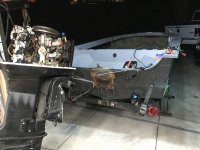
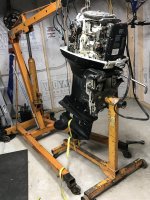
Got the motor off and on an engine stand, as well as parked the boat outside again. Garage is half empty!! Will have room to do some work now before she has to go back in. Clocks ticking against the snow coming one day... Just need to remove the remaining wires out of the hull then pull the transom wood out. Order some rivets/tools, get new transom wood/epoxy, and Im off to the races again!

Planning is mostly done in my head haha. Still need to decide where to run the gas line - under the floor or along the gunwale?? I will take a look at those cleats @SHSU . Budgets (im cheap) tight though, looking at around $1k right now. Guessing Ill hit $1500 by the end. Boat should be worth what I have into it by the time Im done, plus it will pay for itself in entertainment. Im waiting til after xmas to see what I got for the boat, before I order a bunch of stuff for it. Even found a spare head for the motor that I will order too.

Not going crazy on the paint either. Stripping the old paint was an extra project part, and will make is easier to paint new. Not sure what brand im using yet but will do it by hand and call it good. No hardeners or stuff that requires protection preferably. Time/money says keep it simple. I plan on it getting used and needing touch ups so only concerned that it meets the admirals approval initially. After we put it on the beach once it will be the beginning of the end haha.
 

Attachments

  • AC761F9F-7AF0-4D68-A304-1BC83E7C3460.jpeg
    AC761F9F-7AF0-4D68-A304-1BC83E7C3460.jpeg
    2.1 MB · Views: 19
  • 81C84F6C-F0EB-4452-987E-817B1427ACA3.jpeg
    81C84F6C-F0EB-4452-987E-817B1427ACA3.jpeg
    3.3 MB · Views: 16
  • 9F2BD343-18A2-43BE-BAFF-2029521939A9.jpeg
    9F2BD343-18A2-43BE-BAFF-2029521939A9.jpeg
    2.5 MB · Views: 19
  • D42A9EB8-0F20-4645-8467-23A0609386F5.jpeg
    D42A9EB8-0F20-4645-8467-23A0609386F5.jpeg
    1.6 MB · Views: 21

Moserkr

Chief Officer + Starmada Splash Of The Year 2021
Joined
Nov 23, 2020
Messages
869
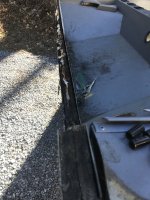
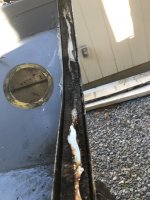
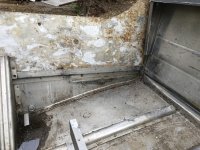
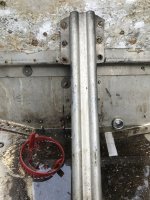
Moving along!! Removed 90% of the transom bolts, and the rear outside wood. Glad I did that. Lots of wrong/bad rivets to fix in the transom area. Transom is ready to come out, boats ready to be hosed down, and rivets are ready to be counted so i can order them.

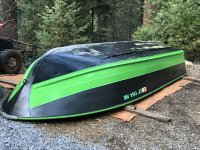
PO was over today and I was reminded that theres a kevlar sealant on the outside under the black green paint. BUT he never took off the original mustard yellow paint so... should I strip it down to bare metal? Im still leaning towards stripping the paint completely off since I will be sealing with coatit on the inside. Would also look nicer.

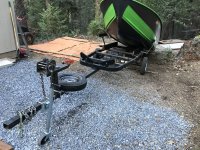
Included pics of my transom area and the current bunks. I actually dont have room for wider bunks the way my trailer is set up. I would hit the ribs along the bottom so i will just stick with 2x6’s and angle the top for more contact area.
 

Attachments

  • BE5E697E-D13C-489C-A42A-31522B7CAA33.jpeg
    BE5E697E-D13C-489C-A42A-31522B7CAA33.jpeg
    3.6 MB · Views: 29
  • 9C9B54D2-8C06-4786-8BB0-FA22F4C5D632.jpeg
    9C9B54D2-8C06-4786-8BB0-FA22F4C5D632.jpeg
    3.4 MB · Views: 29
  • 03B99FEE-6F17-43FD-A500-D9504D167D99.jpeg
    03B99FEE-6F17-43FD-A500-D9504D167D99.jpeg
    2.9 MB · Views: 28
  • 1583BD9E-584C-479E-9B2D-06A88CC7885E.jpeg
    1583BD9E-584C-479E-9B2D-06A88CC7885E.jpeg
    2 MB · Views: 33
  • 3EDCB06E-BDAC-4839-9A9E-0DD7DB5484B9.jpeg
    3EDCB06E-BDAC-4839-9A9E-0DD7DB5484B9.jpeg
    3 MB · Views: 34
  • 78752182-1FE7-4075-9650-14AD6FFB0CE4.jpeg
    78752182-1FE7-4075-9650-14AD6FFB0CE4.jpeg
    1.4 MB · Views: 33

SHSU

Lieutenant Junior+Starmada Splash Of The Year 2019
Joined
Mar 8, 2017
Messages
1,721
Now that is a motor stand! I wish I had something like that sitting around.

As for the Transom, when you remove that top transom cover, be careful. As others have told me, certain Starcraft parts are rarer then a live Dinosaur.

SHSU
 

Moserkr

Chief Officer + Starmada Splash Of The Year 2021
Joined
Nov 23, 2020
Messages
869
Now that is a motor stand! I wish I had something like that sitting around.

As for the Transom, when you remove that top transom cover, be careful. As others have told me, certain Starcraft parts are rarer then a live Dinosaur.

SHSU
Haha yes it is! Was not expecting it but he had 3... Once that motor is back on the boat ill switch the stinger over to it. Takes up a lot less space than the huge wooden one I built.

Thanks for the info about the rear transom cover. Will get to is Wednesday most likely, and its good to know before i break it!! I wasnt gentle take out any bolts from the rear lol. My transom has a lot of holes so im not happy about that. Stuck with what I got those so she will be well attached I guess.

PO told me he used kevlar coat-it on the whole bottom of the boat, then painted it. I would like to preserve the outer coat-it as best I can and also use coat-it inside. A lot of paint and coat-it has been taken off the outside just by running it up on the beach. I wanted to strip the paint but not sure if it will remove coat-it too. May just sand the bottom smooth of paint to preserve the coat-it, then paint over whats left. Will strip the paint off the sides and top, wire wheel the rough spots, then paint it nicely. Thats what im thinking at least as of now.

Cant wait to see what parts I get for xmas! Also if we get a stimulus of monopoly money from Uncle Sam, then hes paying for the build 😂😂.
 

Watermann

Starmada Splash of the Year 2014
Joined
Jan 12, 2013
Messages
13,786
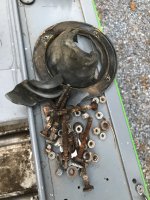
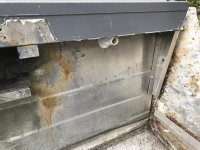
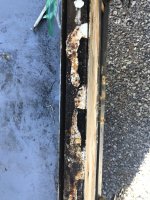
Good representation of how corrosion starts underneath those wooden motor pads and it always amazes me how much ferrous metal bolts end up in boats.
 

SHSU
Lieutenant Junior+Starmada Splash Of The Year 2019
Joined
Mar 8, 2017
Messages
1,721
Thanks for the info about the rear transom cover. Will get to is Wednesday most likely, and its good to know before i break it!! I wasnt gentle take out any bolts from the rear lol. My transom has a lot of holes so im not happy about that. Stuck with what I got those so she will be well attached I guess.
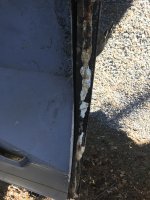
Depending on the size of the hole, you can get away patching them with a bolt, washer, and nut with 5200. If they are to big, then getting them welded would be the ideal choice.

PO told me he used kevlar coat-it on the whole bottom of the boat, then painted it. I would like to preserve the outer coat-it as best I can and also use coat-it inside. A lot of paint and coat-it has been taken off the outside just by running it up on the beach. I wanted to strip the paint but not sure if it will remove coat-it too. May just sand the bottom smooth of paint to preserve the coat-it, then paint over whats left. Will strip the paint off the sides and top, wire wheel the rough spots, then paint it nicely. Thats what im thinking at least as of now.
He used Coat-it on the exterior? Not sure how effective that really is. Just needs to be used along the seams and rivets. Otherwise you are just wasting product. As for the beach comment, I have thought of getting one of those Keel Guards but never pulled the trigger, don't do a lot of beaching. Would be interested to see what others say about the guard vs paint.

SHSU
 

Moserkr

Chief Officer + Starmada Splash Of The Year 2021
Joined
Nov 23, 2020
Messages
869
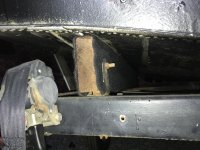
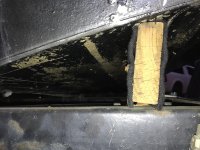
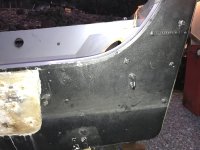
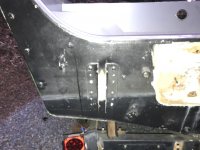
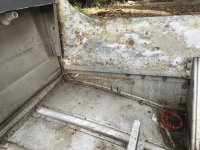
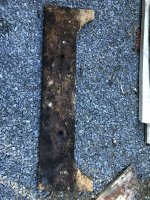
Transom is off!! Going to remove the SW too to address corrosion issues and make it easier to reinstall/fix/clean everything. SW removal and pressure wash happening after lunch. So glad I did not leave that transom intact - it would not have been long before it was rotten. Came out in one piece but weighed close to 50lbs!! Completely soaked and Ive been out of the water for months.

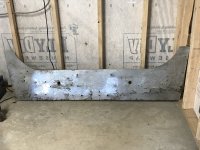
@Watermann I can see how rusty bolts cause corrosion but it looks like i caught it in time. From what Ive read I need to use a wire wheel and clean it up? Then use stainless bolts in the future? Grade 8? @SHSU im not going to weld any holes, I will just put bolts back through since they arent huge holes. Plus I may want a kicker in the future which is why there was the mounting brackets in place for it. Other holes that are small can be riveted, and everything with a dab of 5200 of course. You can also see the pic of that extra inside AL transom piece that is not factory original. I like it and its probably not necessary but Id like to keep it. Any reason not to?

Please help me with this list too!
Tools I need to pick up:
Angle grinder
Wire wheel
Drill bit from rivet sticky notes
Bucking bar
(Borrowing rivet gun/air compressor)

I will readily admit that I dont have a lot of knowledge or tools. Never was taught to do this kind of work, just learned from friends and myself. So, forgive me if I seem ignorant. Without help here I would be doing a lot more wrong and a lot less right. Many thanks to you guys for inspiration, advice, and encouragement.

Will count rivets today and get an order started. Im happy that most of my rivets are in good shape so its not too many from what I can see so far. Also, what thickness wood does the transom need? Looks like 2x 3/4” ply pressed together. Ive read about spar and epoxy for it, and Im guessing glue together?? Will replace any hardware with brand new stuff. More pics to come after SW is off and she has had her first naked bath haha.
 

Attachments

  • 54002470-B0CA-4BB3-B031-7224EB12D1C9.jpeg
    54002470-B0CA-4BB3-B031-7224EB12D1C9.jpeg
    2.3 MB · Views: 21
  • 43FB9F7C-0500-49D4-A47A-69B2A18001E4.jpeg
    43FB9F7C-0500-49D4-A47A-69B2A18001E4.jpeg
    1.2 MB · Views: 19
  • BC6AA991-DC13-4029-927D-8F875BC57CE0.jpeg
    BC6AA991-DC13-4029-927D-8F875BC57CE0.jpeg
    1.8 MB · Views: 19
  • 906B96C5-0539-43C5-BDF5-05894507FD94.jpeg
    906B96C5-0539-43C5-BDF5-05894507FD94.jpeg
    1.7 MB · Views: 20
  • B49FD5F2-833F-4349-A463-C180C4C48F49.jpeg
    B49FD5F2-833F-4349-A463-C180C4C48F49.jpeg
    4 MB · Views: 19
  • F772D0DA-6089-4983-ACF9-8334E083800F.jpeg
    F772D0DA-6089-4983-ACF9-8334E083800F.jpeg
    1.3 MB · Views: 20
  • E1DCBA1D-3AF7-4890-9AA6-B59D332243B5.jpeg
    E1DCBA1D-3AF7-4890-9AA6-B59D332243B5.jpeg
    1.8 MB · Views: 20
  • 64D71433-E69F-4583-99B3-89732B45FAF8.jpeg
    64D71433-E69F-4583-99B3-89732B45FAF8.jpeg
    1.7 MB · Views: 20
  • 98069761-21EA-4134-91CA-9722EE53D1F2.jpeg
    98069761-21EA-4134-91CA-9722EE53D1F2.jpeg
    1.1 MB · Views: 20
  • D174427C-3357-4DD8-9F03-A4865F7CA0D1.jpeg
    D174427C-3357-4DD8-9F03-A4865F7CA0D1.jpeg
    2.2 MB · Views: 21

Moserkr

Chief Officer + Starmada Splash Of The Year 2021
Joined
Nov 23, 2020
Messages
869
SW is still on for tonight but she got a bath. Much cleaner inside and will try again tomorrow on the SW. My drill bit did not want to go through the head of the rivets. Only 6 rivets are holding my SW on so many were missing lol. Reading up on removal and need it done tomorrow. Friday it starts raining and will turn to snow by sunday at the latest. At least temps will rise above freezing after that so i can keep the empty boat clear of snow/water as much as possible.
 

SHSU
Lieutenant Junior+Starmada Splash Of The Year 2019
Joined
Mar 8, 2017
Messages
1,721
@Watermann I can see how rusty bolts cause corrosion but it looks like i caught it in time. From what Ive read I need to use a wire wheel and clean it up? Then use stainless bolts in the future? Grade 8? @SHSU im not going to weld any holes, I will just put bolts back through since they arent huge holes. Plus I may want a kicker in the future which is why there was the mounting brackets in place for it. Other holes that are small can be riveted, and everything with a dab of 5200 of course. You can also see the pic of that extra inside AL transom piece that is not factory original. I like it and its probably not necessary but Id like to keep it. Any reason not to?
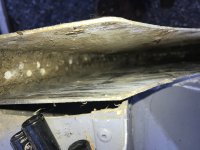
No need for Grade 8. Standard SS will be fine. As for the AL transom piece I don't see any issues with keeping it.

Please help me with this list too!
Tools I need to pick up:
Angle grinder
Wire wheel
Drill bit from rivet sticky notes
Bucking bar
(Borrowing rivet gun/air compressor)
Tools sound about right. Wire wheel there are different arguments for buying SS or brass to limit damage. In the end, you just got to decide if its worth it or if a $3 wheel from Harbor Freight will do the job too. Just have to make sure to do through cleaning after use to get all of the metal wire that will be slung off. Also have to be careful as it can cause damage to the aluminum skin since it is harder.

A couple good Cobalt Drill bits will make short work of any rivets. Just make sure to not mix them and use them for wood or other applications till your done. I still seemed to go through my fair share of them, but I also may have been pushing the speed.

For the rivets, make sure to buy extra and do some practice to get used to it. Also, you will need the correct brazier head adaptor for the rivet gun.

Also, what thickness wood does the transom need? Looks like 2x 3/4” ply pressed together. Ive read about spar and epoxy for it, and Im guessing glue together??
I used a sheet of 3/4 x 4 x 8 BCX (Or closest equivalent since they don't sell true 3/4 it seems anymore....) cut in half and glued together with Titebond 3. I used someone's suggestion, don't remember whos but also ran a bunch of screws through both to help keep the sheets together. Once it dried, I backed them out and filled with epoxy.

As for the final coating, there are mixed suggestions. Some just use spar and if you keep an eye on it and do maintenance you shouldn't have an issue. While others use epoxy, me included, there has been different suggestions on how to install. I just used straight epoxy with no glass, others suggest using epoxy with glass to ensure it doesn't crack over time. Up to you on which route you want to go.

My drill bit did not want to go through the head of the rivets. Only 6 rivets are holding my SW on so many were missing lol. Reading up on removal and need it done tomorrow.
Cobalt bit will cut them out once you get a new one.

The missing rivets, I think most of us have experienced finding a lot more missing rivets then we could have imagined. At least with the close inspection you are giving her and fixing her right, you know that she will be a fine craft when she is back in the water.

SHSU
 

classiccat

"Captain" + Starmada Splash Of The Year 2020
Joined
Dec 20, 2010
Messages
3,412
@SHSU covered your question thoroughly.
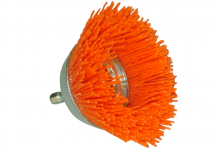
I really like the Nyalox (nylon) cup brushes. Grey (coarse), Orange (Medium), Blue (Light)...the orange one did most of the heavy lifting on my project.

One nice thing about orange is that it's relatively selective to aluminum...big advantage around rivets.

1608814868196.png
 

Moserkr

Chief Officer + Starmada Splash Of The Year 2021
Joined
Nov 23, 2020
Messages
869
@SHSU Thank you for the thorough response! Went to the big orange store last night and got the angle grinder, cutoff wheel, a nice cobalt bit, and a wire wheel.
For the transom, not sure I want to worry about maintenance with just spar. Was definitely leaning towards epoxying it at the minimum, may add fiberglass too but with that extra AL piece, the transom should be very solid. Would adding spar under the epoxy add any benefit or be an issue?

Should be able to get a rivet count today, and then will work on the new transom after xmas while my rivets are being shipped. Will see my FIL for xmas and make sure I have the rivet gun all lined up and properly set. Definitely need to completely remove and redo the knee brace on the back as its got many issues with broken rivets or bolts being used. Will try to reinforce with AL outside, i believe like you did @SHSU . With so many forums Ive read its hard to remember who did what haha.

@classiccat Thanks for the info! I like the idea of using something less abrasive to the AL. Was going to look at brass instead of the SS i got last night, but will see if I can find that orange nylon to start at my local hardware store. My little town has a pretty good one and the big orange is just 15 min away as well.

Forgot a step! Before I rivet, need to strip paint!! Read a number of different ways to do it, and cant say I like the idea of spreading the heavy goop on it. Is there any way that is better than the other? For the bottom i found it interesting that coat-it actually suggested using their product on the outside of the hull. When I strip the paint we will see if the coat-it the PO added stays on or comes off with whatever product I use.
 

classiccat

"Captain" + Starmada Splash Of The Year 2020
Joined
Dec 20, 2010
Messages
3,412
@SHSU Thank you for the thorough response! Went to the big orange store last night and got the angle grinder, cutoff wheel, a nice cobalt bit, and a wire wheel.

For the transom, not sure I want to worry about maintenance with just spar. Was definitely leaning towards epoxying it at the minimum, may add fiberglass too but with that extra AL piece, the transom should be very solid. Would adding spar under the epoxy add any benefit or be an issue?

Should be able to get a rivet count today, and then will work on the new transom after xmas while my rivets are being shipped. Will see my FIL for xmas and make sure I have the rivet gun all lined up and properly set. Definitely need to completely remove and redo the knee brace on the back as its got many issues with broken rivets or bolts being used. Will try to reinforce with AL outside, i believe like you did @SHSU . With so many forums Ive read its hard to remember who did what haha.

@classiccat Thanks for the info! I like the idea of using something less abrasive to the AL. Was going to look at brass instead of the SS i got last night, but will see if I can find that orange nylon to start at my local hardware store. My little town has a pretty good one and the big orange is just 15 min away as well.

Forgot a step! Before I rivet, need to strip paint!! Read a number of different ways to do it, and cant say I like the idea of spreading the heavy goop on it. Is there any way that is better than the other? For the bottom i found it interesting that coat-it actually suggested using their product on the outside of the hull. When I strip the paint we will see if the coat-it the PO added stays on or comes off with whatever product I use.
I believe it was an ACE hardware that carried the Nyalox.

the main reason for the glass cloth is to prevent plywood grain checking. It also adds strength to the board. I probably wouldn't epoxy over varnish; i'd worry about the epoxy adhering especially as you build up layers.
 

Moserkr

Chief Officer + Starmada Splash Of The Year 2021
Joined
Nov 23, 2020
Messages
869
Thanks @classiccat I will check the local true value. Big orange box was a waste of time looking for it. I kinda figured glassing over varnish wouldnt be the best idea. Will ponder what to do with the transom for a few days.

So this happened today!!! DF42F2D6-4C73-414B-9532-2B1C235A6D1D.jpeg

Boat is off the trailer and turtled! Incoming rain and snow this weekend so figured why not. Put the last roller back on the trailer and she slid right off. Then muscled her over and she laid down nice n easy. Also got the SW off. Having the right tools definitely makes life easier. Speaking of which...

Dropped off a cord of wood at my in laws today and talked to my FIL about paint stripping and riveting. For the rivets it turns out his work has the wrong gun, so I need to get one. Will reference the rivet-master @SHSU ’s thread haha. I know you went through 3 lol.

As far as paint stripping goes, FIL recommended the paste stuff i wanted to avoid. Oh well, now its the plan once the weather breaks. Also noticed on the keel where the PO applied coat-it heavily, that the paints gone but coat-it remains! Still going to attempt to preserve theas much as possible. Paints pretty thin on the bottom.

Will that paint stripper harm my rubber rub rails along the outer rail? They are painted so....

Y’all have a Merry Christmas!! Will be working on the boat after the weather clears next week.
 

Attachments

  • 925C5380-F447-4174-AFD1-03AA91D4792D.jpeg
    925C5380-F447-4174-AFD1-03AA91D4792D.jpeg
    3.1 MB · Views: 18
  • BDB20C88-1EA0-4F86-B850-D3609F6C85E3.jpeg
    BDB20C88-1EA0-4F86-B850-D3609F6C85E3.jpeg
    4 MB · Views: 17
  • E3598A87-036D-41E0-BBA5-626BB0506416.jpeg
    E3598A87-036D-41E0-BBA5-626BB0506416.jpeg
    4 MB · Views: 19
  • 505A6DBB-BFD3-4600-8E94-9AB168AD216C.jpeg
    505A6DBB-BFD3-4600-8E94-9AB168AD216C.jpeg
    3.7 MB · Views: 21
  • 206092E2-4A75-492C-9A23-47D9C417D1F6.jpeg
    206092E2-4A75-492C-9A23-47D9C417D1F6.jpeg
    2.4 MB · Views: 21
  • 149C1E19-7B1E-4FCD-9ECD-4FA3C9FF9A03.jpeg
    149C1E19-7B1E-4FCD-9ECD-4FA3C9FF9A03.jpeg
    6.3 MB · Views: 22
  • 724EF406-2D95-4822-BBD6-9CD2E9A715BE.jpeg
    724EF406-2D95-4822-BBD6-9CD2E9A715BE.jpeg
    5.4 MB · Views: 22

SHSU

Lieutenant Junior+Starmada Splash Of The Year 2019
Joined
Mar 8, 2017
Messages
1,721
@classiccat Thanks for the info! I like the idea of using something less abrasive to the AL. Was going to look at brass instead of the SS i got last night, but will see if I can find that orange nylon to start at my local hardware store. My little town has a pretty good one and the big orange is just 15 min away as well.
As @classiccat suggested, ACE had it for me as well. I tried it but was not thrilled with the progress it made. I tried to get an adapter for my angle grinder to run it, but finding a chuck was proving to be more difficult then it was worth for me. Hence a wire wheels was the method I chose.

Definitely need to completely remove and redo the knee brace on the back as its got many issues with broken rivets or bolts being used. Will try to reinforce with AL outside, i believe like you did @SHSU . With so many forums Ive read its hard to remember who did what haha.
Yep, followed the advise from @Watermann. It really makes it sturdy and I will do it again on my next project if it has a similar brace.

I believe it was an ACE hardware that carried the Nyalox.

the main reason for the glass cloth is to prevent plywood grain checking. It also adds strength to the board. I probably wouldn't epoxy over varnish; i'd worry about the epoxy adhering especially as you build up layers.
+1
That is what I have been told as well for why the glass cloth.

Boat is off the trailer and turtled! Incoming rain and snow this weekend so figured why not.
Nothing like a turtle in the yard!! :D

Dropped off a cord of wood at my in laws today and talked to my FIL about paint stripping and riveting. For the rivets it turns out his work has the wrong gun, so I need to get one. Will reference the rivet-master @SHSU ’s thread haha. I know you went through 3 lol.
Don't think anyone with riveting experience would call me master. lol
That being said, if you have to get a rivet gun, see if you can get a used aircraft rivet gun. The harbor freight route wont work, or at least it didn't for me....

As far as paint stripping goes, FIL recommended the paste stuff i wanted to avoid. Oh well, now its the plan once the weather breaks. Also noticed on the keel where the PO applied coat-it heavily, that the paints gone but coat-it remains! Still going to attempt to preserve theas much as possible. Paints pretty thin on the bottom.

Will that paint stripper harm my rubber rub rails along the outer rail? They are painted so....
See a lot using the paint stripper route. I opted for media blasting and if you have that option it makes it easier. Not surprised the Coat-It has held up really well. I have heard salmon fishing guides use it/gluvit on the bottom of their flat bottom boats to slide over rocks without damaging the hull. Paint will scrape off easy, but the Coat-It/Gluvit are designed to take that abuse.

As for your rub rail, you should be able to test a section to see if there is any reaction. Also may try just a power washer turned up and see if you can blast it off.

In the end sounds like you got a good action plan and way to move forward. Enjoy seeing the progress.

SHSU
 

Moserkr

Chief Officer + Starmada Splash Of The Year 2021
Joined
Nov 23, 2020
Messages
869
Thanks @SHSU One day Ill learn to quote convos lol. Im a 35 year old, technically millennial, thats still electronically challenged haha. I will plan on adding fiberglass cloth to my transom when it comes time. Ill see what kind of rivet gun i can afford/track down too. Other FIL has an airplane he rebuilt with a co-owner so maybe theres a way to call in a favor there. Been reading @classiccat ’s resto in my down time as well. Weatherman was wrong as usual so should have a few days to go to town for supplies and get work done.

Been thinking I need a plan of attack written down, besides ordering parts/tools, and keep forgetting so here it goes.

Strip boat and turtle - Im here now lol
Strip paint
Fix trailer bunks
Fix rivets/knee brace
Wire/nylon wheel rough spots
Coat-it
Paint boat
Build new transom, gunwales, console dashes, casting deck/hatch, and prep reused deck
Install transom and SW
Install foam
Install deck/gunwales - tie together w/AL
Install motor
Install gas tank, consoles, batteries, wires, electronics, driver/passenger seats
Install front casting deck over gas tank
Add foam “wood” flooring to deck and rails
Build folding rear bench seat
Build bow seats
Engine work:
Rebuild carbs
Fix tach
Check for other issues
Splash??
Rebuild Stinger 75
Install Stinger?
Resplash??

Theres the rough plan, finally written down haha. Im getting old and CRS can get me at anytime. If each point takes a day, thats a minimum 18 days of work, but most likely more. If I get 1-2 days a weekend of work in, thats 2-4+ months of work! Goal will be to be splashed by the end of April at the latest then, near my birthday. Off to go get some materials - bunk wood, spar, paint stripper, nylon brush. Then order rivets and a rivet gun so I can keep the project moving.
 

Mikesta

Petty Officer 3rd Class
Joined
Mar 15, 2018
Messages
86
Harbor freight sells the nylox brushes. They have the cup brushes and regular wheels but they're red, not any of the colors mentioned above. I've been using them on my boat and am pretty happy with them so far. The cups do most of the work but the wheels get into the tight spaces. The cup has lasted longer and covered significantly more surface area than my milwaukee wire wheel which wore out already. The wire wheel on the angle grinder is much much much quicker than the nylon cups on the drill. Also harbor freight sells wire wheels for angle grinders and they 1/5 the price as home depots stuff and have lasted me equally as long.

As for paint removal I used citrus strip, the orange bottles at home depot, and it worked really well for me. I power washed it off instead of scraping because that just seemed like way to much work. It got most of the paint off down to bare aluminum but there are a few tough spots that didn't come off but I'll just sand them down. I think total to my 18 footer I used 3 jugs of it and I still have about half a jug left. I did this multiple times though, not just once.....paint it on with a paint brush (took about 15-20 minutes per coat), let sit for several hours and then power wash off. I did this 3 times I believe and every time got quicker and quicker as more bare aluminum was showing.

I bought an actual rivet gun from an aircraft supply place after my harbor freight air hammer turned out to be not working so well for rivets and what a difference it made. A quick zap and it sets the rivets perfectly every time. It wasn't cheap but I figured since I'm doing all the rivets it would be a wise investment, If you only have a couple rivets to do it probably wouldn't be worth it. I also bought a rivet removal tool from the same aircraft supply place and that has made a world of difference as well. Drilling out the rivets straight was harder than I thought so the tool makes drilling the heads off really easy, then tap out the tail, and run the appropriate size drill bit through the hole to clean it up and pop a new one in
 

Moserkr

Chief Officer + Starmada Splash Of The Year 2021
Joined
Nov 23, 2020
Messages
869
@Mikesta thanks! Just ordered a rivet gun, nylox brush set, and some other stuff. Also got spar, mineral spirits, paint stripper, and more to get going! Unfortunately I do not have a harbor freight nearby so half my stuff has to come from online. Kinda live in the stix of CA.

Currently boat has paint remover soaking in on it! Learned a few things lol. Besides thick coats, learned the rub rail does not react with the paint remover. Should have tested it instead of ripping half of it off lol. Another issue to deal with later... also cracked my front bow nose piece trying to remove it. So it will stay put and ill fix it the best I can. Stupid me. Having a beer, waiting for paint to dissolve... if Im lucky ill see a lot of aluminum tonight. Any tips on getting the rub rail back in would be appreciated, or if its better to replace it, Im not opposed if anyone has a lead on the right one. Thanks. Will share pics tonight!
 

SHSU

Lieutenant Junior+Starmada Splash Of The Year 2019
Joined
Mar 8, 2017
Messages
1,721
You can easily reinsert rubrail with a flat head screwdriver or a putty knife. As for getting a new one, http://wefcorubber.com/extrusions_marine_rub_rails.asp is the place I got mine. Below is the info I got back when I did my order for a new rub rail.

"The part is 1 1/16" wide X 3/8" tall
$ 3.00 per foot plus shipping.
2 week delivery"

SHSU
 
Top