1979 26' Commander gas & H2O tank replacement & ?

Mikeopsycho

Senior Chief Petty Officer
Joined
Feb 6, 2014
Messages
738
I like to call that "trial fitting" :rolleyes:. I do it frequently:facepalm:
She is looking good! can't wait for the splash video!

Haha! :pound: Yeah, Mr Clamp-it, I'm afraid I've done a bit too much "trial fitting" for my own good lately. But, splash day is in site :high5:.
 

Mikeopsycho

Senior Chief Petty Officer
Joined
Feb 6, 2014
Messages
738
Excellent. Just flipped back to where you started - looking good.

Thanks pckeen. It feels good to be in the final push now. Now if I would just quit finding extra things to fix :rolleyes:.........
 

Mikeopsycho

Senior Chief Petty Officer
Joined
Feb 6, 2014
Messages
738
Ah come on. Splash it and find the fixes on the water.... lots more interesting :D

LOL, I hear you Rick :), it's tempting. If I didn't have the steering pumps out I'd just polish up to the rub rail and throw her in the water.
 

Mikeopsycho

Senior Chief Petty Officer
Joined
Feb 6, 2014
Messages
738
I got the Wagner seal kits in the mail,


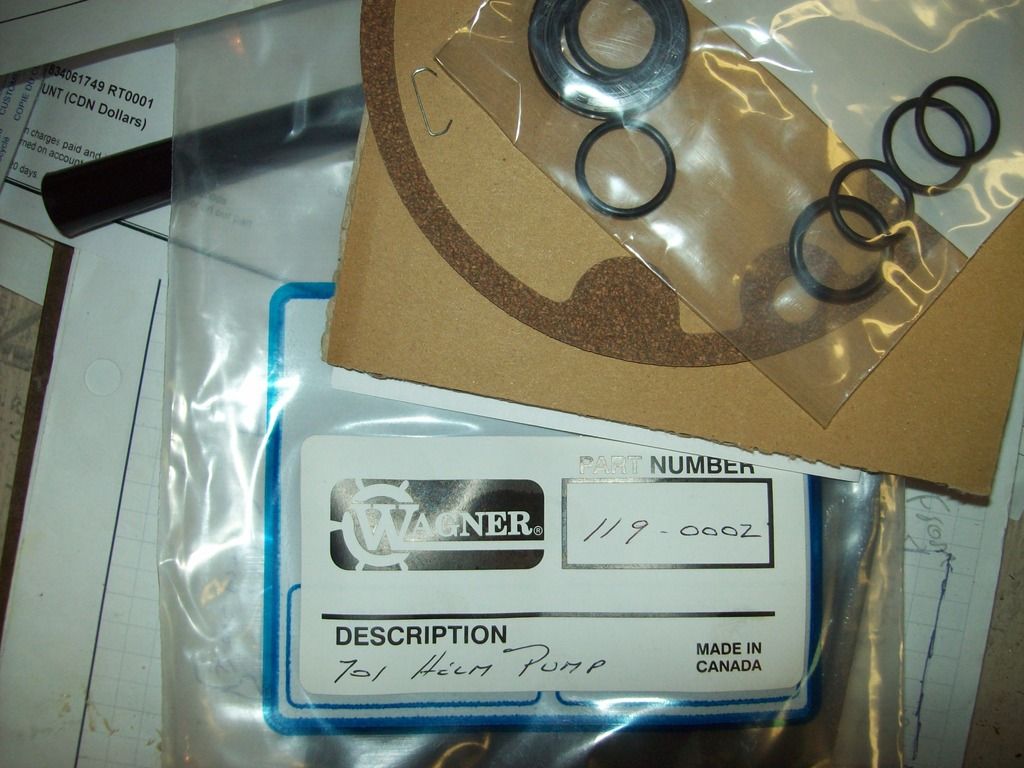
There are three helm pumps in the Wagner 700 series line-up, the 701, the 702, and the very rare 703, which was built for the military. My lower helm pump is a 703, and I'm not sure what my upper pump is (no visible numbers on it). The difference between the 701 and 702 is a mystery to me, although the Wagner tech asked me weather the shafts are aluminum or brass. Both my pumps have brass shafts. The way the 703 differs is it pumps more oil per turn of the wheel, reducing the number of turns from stop to stop. It achieves this by having more of a slope to the bearing seat which is machined into the housing. If my upper pump isn't a 703 I will notice a slightly different number of stop to stop turns, I'll check this out after reassembly. Maybe that's the difference between the 701 and 702? :noidea:. All the 700 series pumps use the same seal kit.

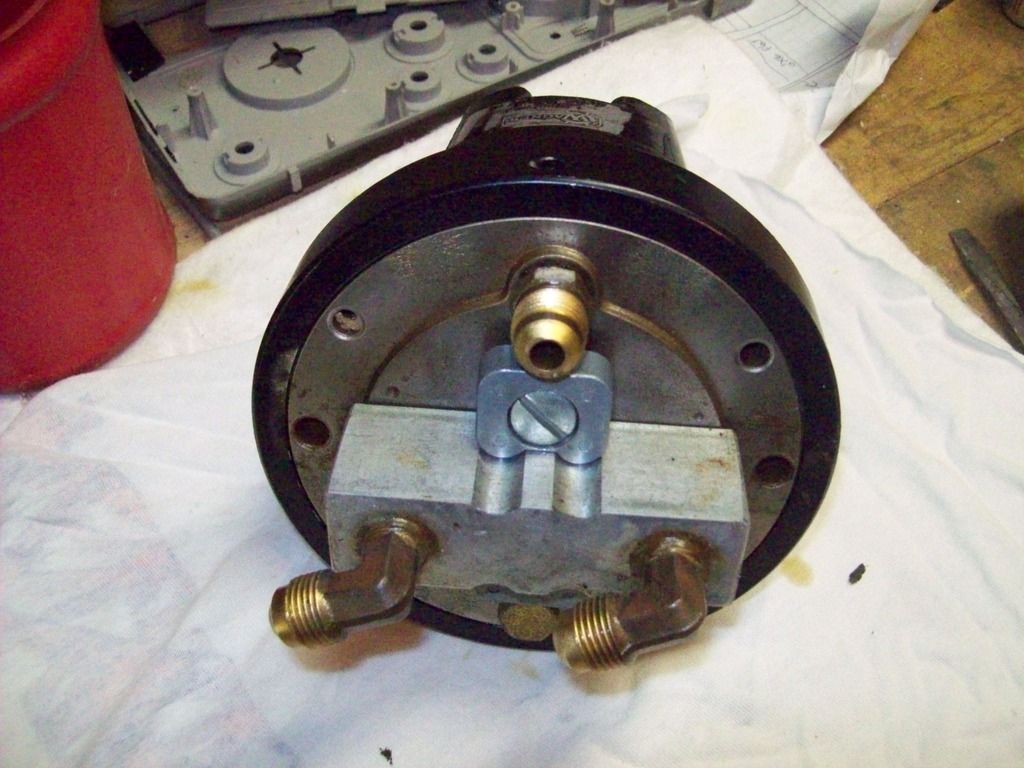
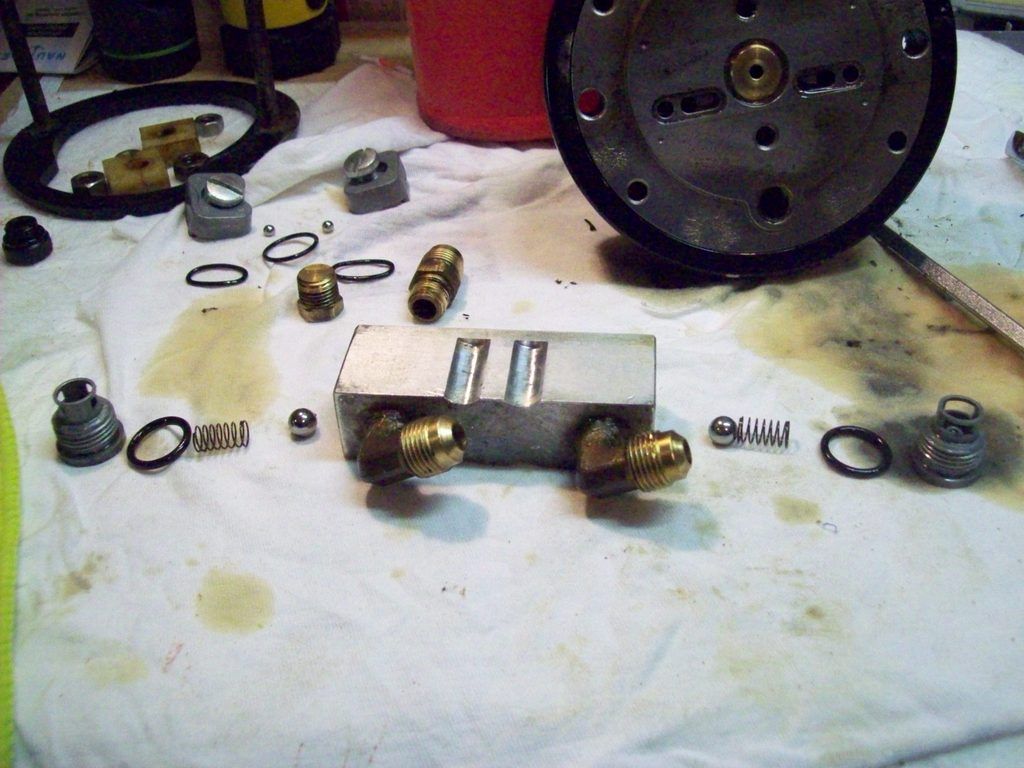
I took lots of pictures which really helped during reassembly. Here's the underside,


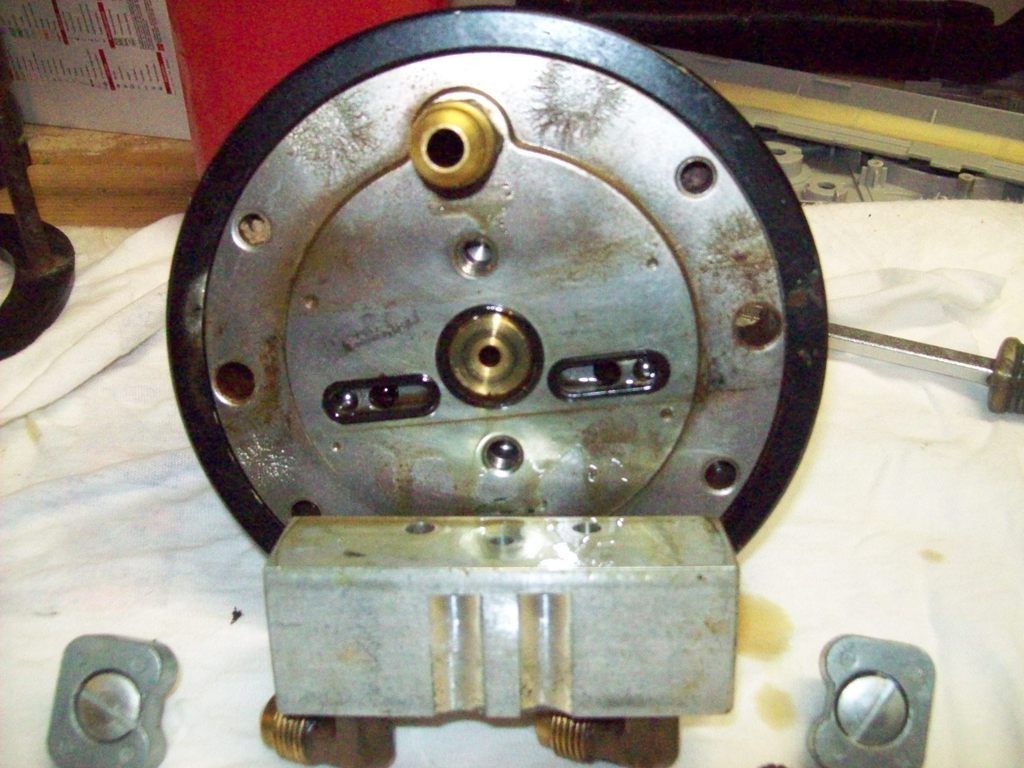
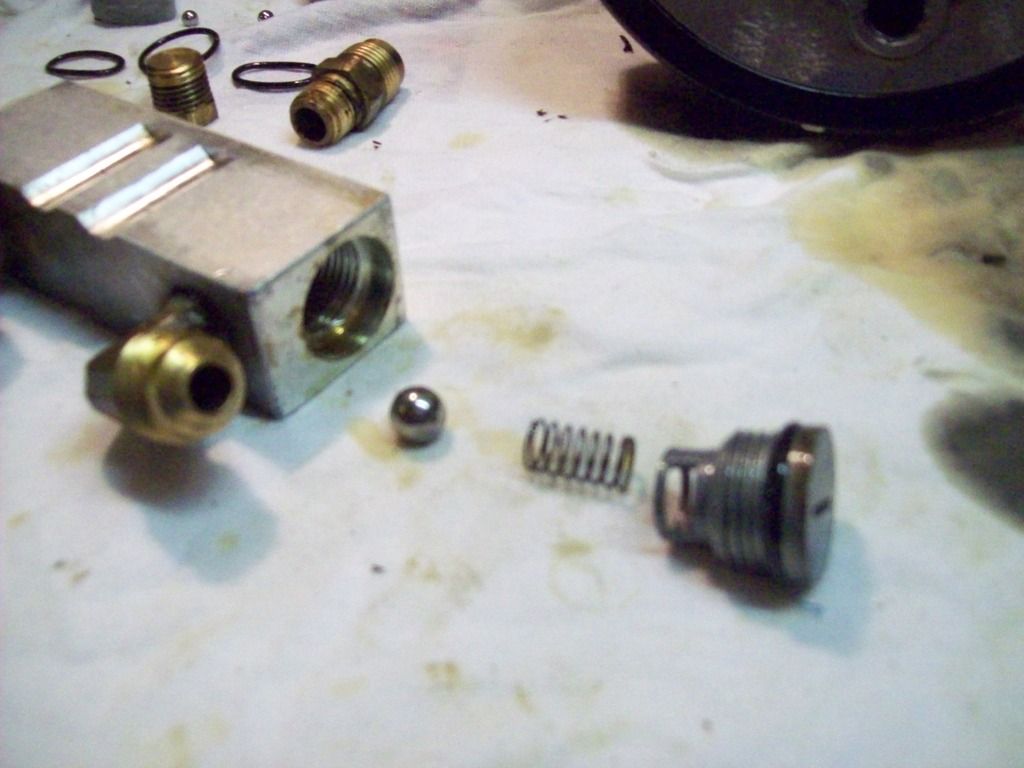
And the underside with the lockvalve removed. The clamp bars and cap screws are all aluminum, as is the lockvalve body. You can see three O-rings here, two little check balls, and the end of the shaft,


O-rings and check balls removed,


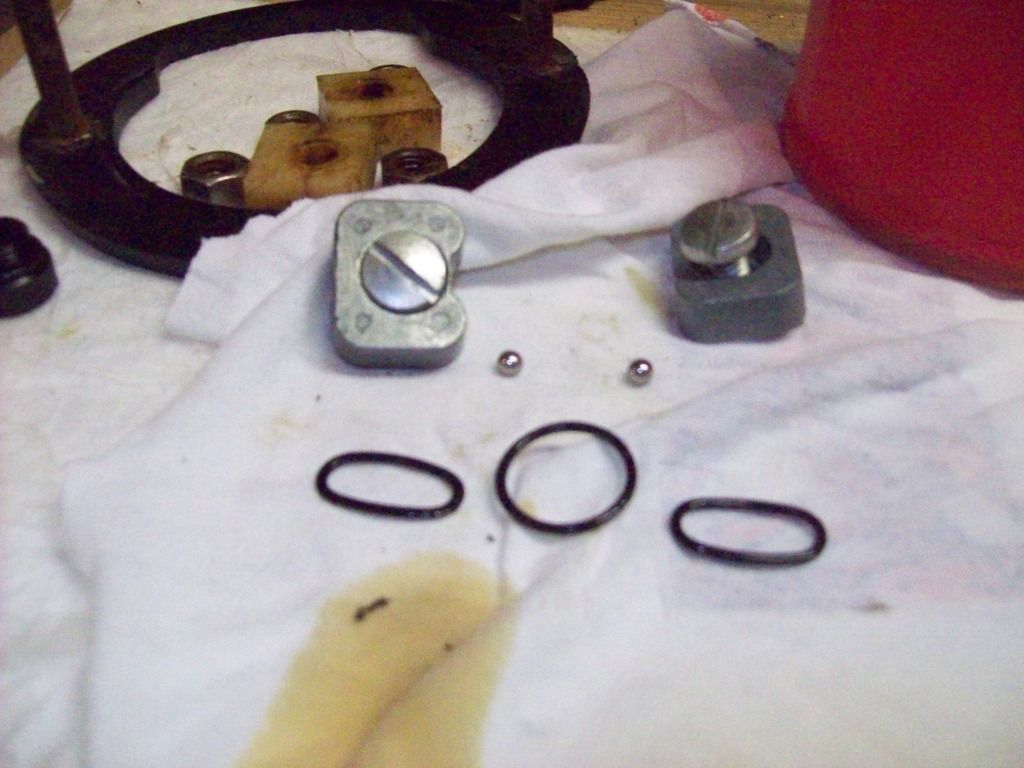
Here's what's in each end of the lockvalve; the end insert (their terminology) with o-ring, a spring and check ball,


I removed the end nut,
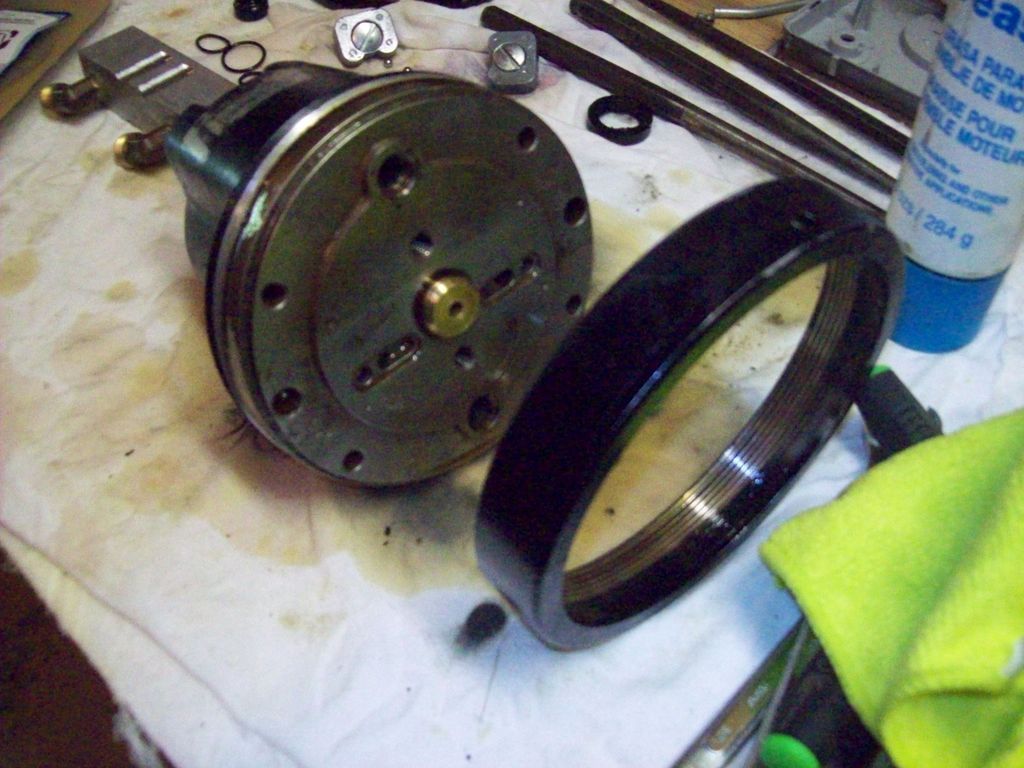
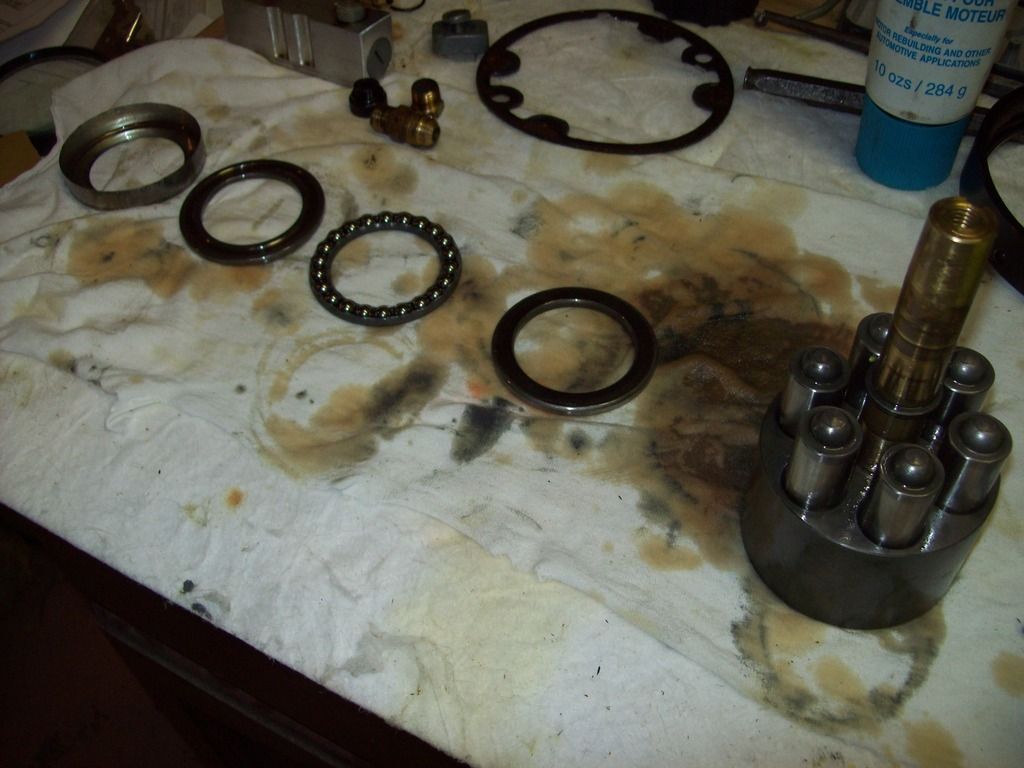


And the backplate,


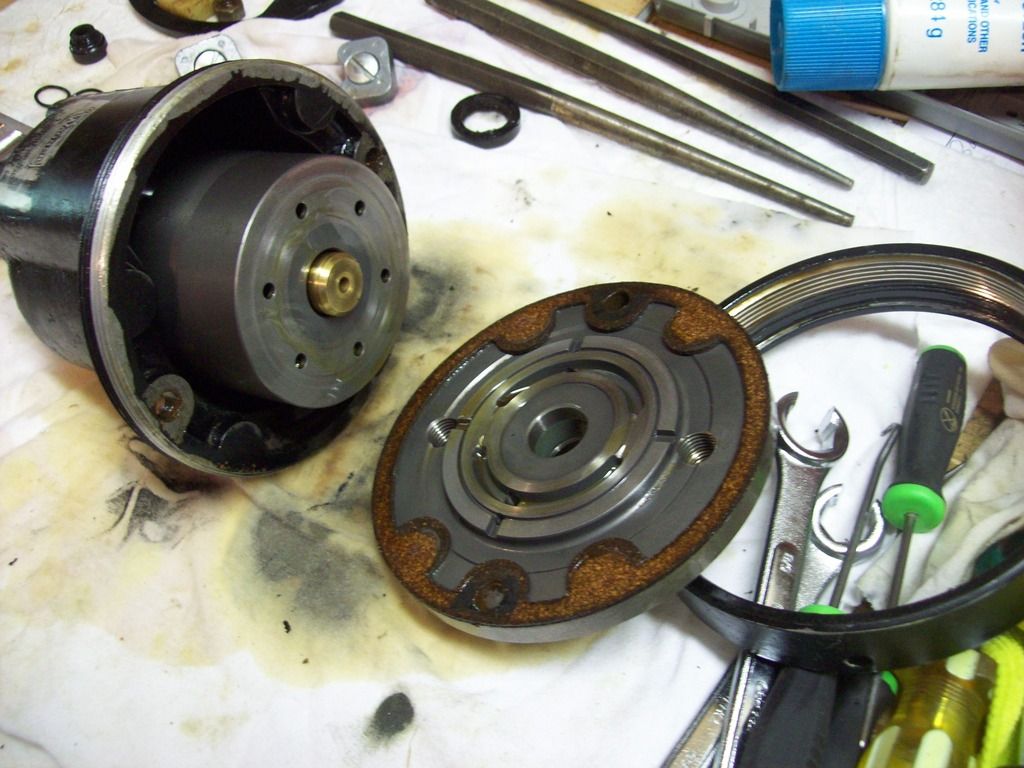
This shot shows the rotor removed with the pistons in place and the bearing with bearing cage resting on top,


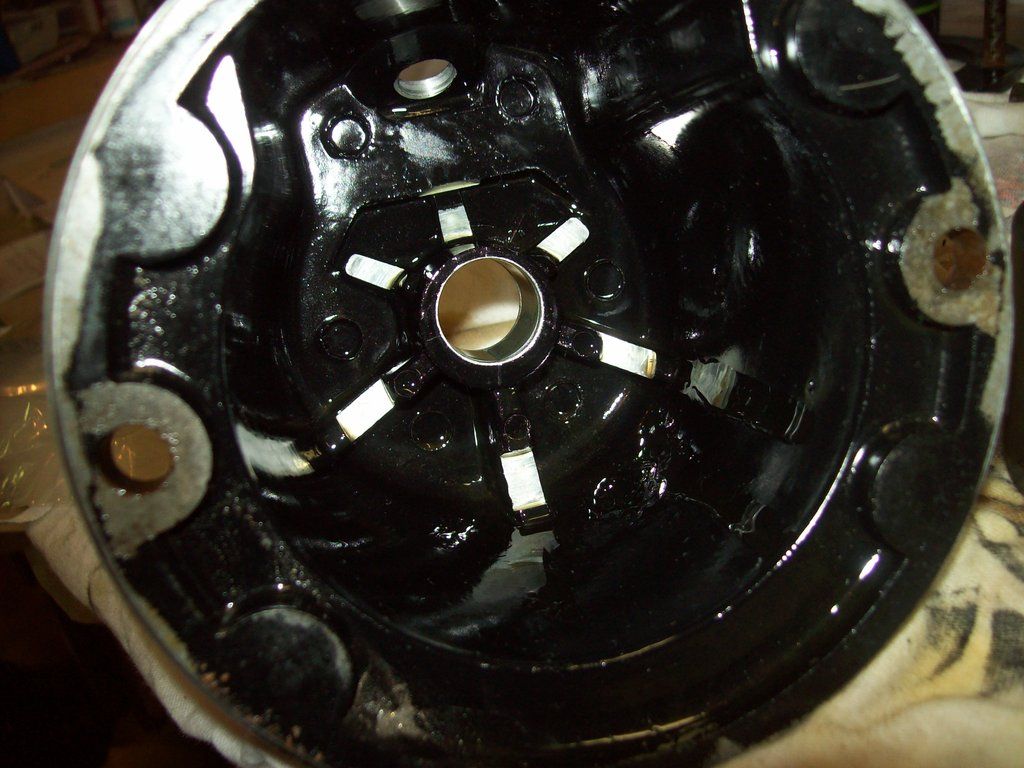
Inside the housing you can see how the bearing seat is machined at an angle which causes the bearings to push on subsequent pistons as the wheel is turned, which of course pushes oil through the system for steering,


You can see the woodruff key and snap ring on the shaft,


the bearing set is four pieces,


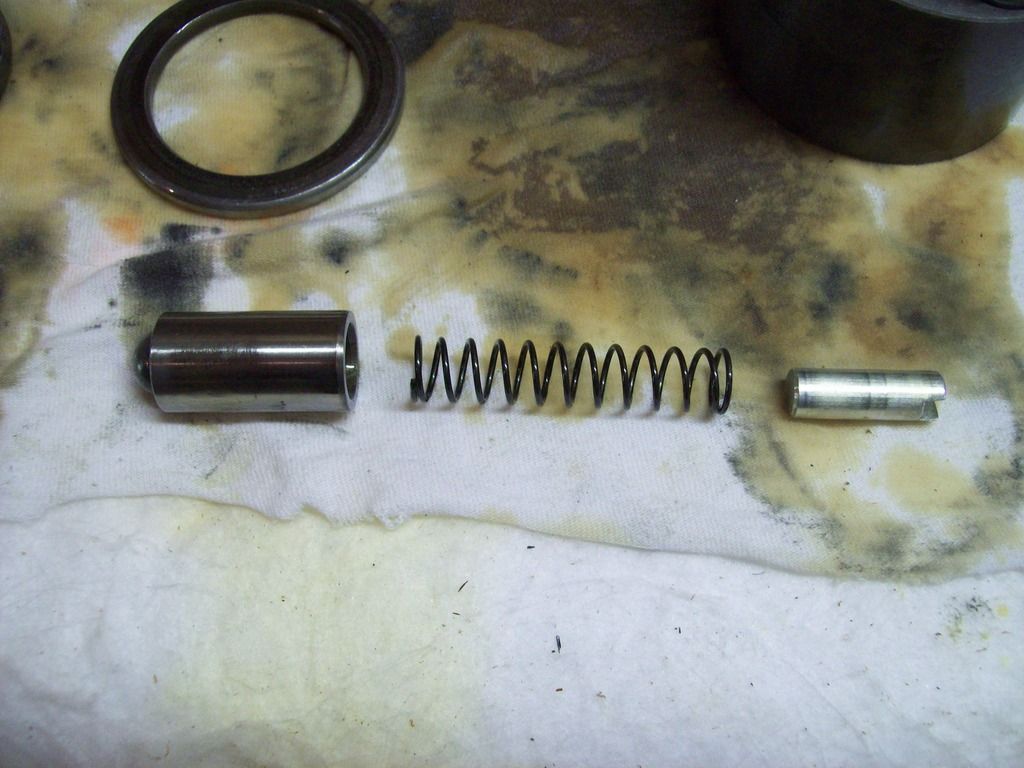
This is what makes up the piston assembly; the piston, spring, and piston insert,


I removed the piston assemblies, cleaned them, and re-inserted them in their original place in the rotor one at a time as advised by the tech at Wagner. I cleaned everything with solvent before putting it all back together. I used Lubriplate 101 on the seals and O-rings and sprayed form-a-gasket on one side of the body gasket to hold it in place. The last thing I installed was the shaft seal at the front (steering wheel) end of the housing using an impact socket of the right size and a hammer to tap it in straight and even. I got both pumps done and ready to go (fingers crossed).
 
Last edited:

Mikeopsycho

Senior Chief Petty Officer
Joined
Feb 6, 2014
Messages
738
Yesterday I reinstalled the helm pumps. I replaced all the oil in the lines with Seastar hydraulic steering oil by blowing out the lines and gravity feeding oil through the pump fill caps. Then I turned the upper wheel back and forth to bleed the air through the fill cap, and through a hose connected to a home made funnel (an inverted old oil bottle with the bottom cut out), which I kept filled with oil. After a few rotations of the wheel everything was working fine and no more air burped out through the oil. I left the funnel hooked up and rotated the lower helm wheel several turns to bleed the system. Hmmmm, doesn't quite feel right. It's taking about 6 turns stop to stop and feels like it's skipping or something. When I had things apart I did notice one piston was kind of sticky in the rotor, but I rotated it and it seemed to move in and out freely. I'm thinking my steering feels like I would expect it to feel if one piston was stuck down. :facepalm: Noooooooo! I'm gonna have to take it out and open it up to see what's happening. :faint2: I see an oily mess in my future.
 

Rick Stephens

Admiral
Joined
Aug 13, 2013
Messages
6,118
That sucks, unfortunately, literally. Need to figure out how to make this stuff pay by the hour.
 

Mikeopsycho

Senior Chief Petty Officer
Joined
Feb 6, 2014
Messages
738
That sucks, unfortunately, literally. Need to figure out how to make this stuff pay by the hour.

LOL, even at minimum wage I'd be making a fortune! :laugh:

So, I removed the lower pump again and opened her up....everything seems fine. I can't even tell which piston had been sticking, they're all moving in and out freely. I reassembled and reinstalled it. Now I'm thinking maybe air in the system is the culprit. I ordered more oil, which should be in today, so I can try to bleed the system at the cylinder end. We'll see how it goes....
 

Mark72233

Ensign
Joined
Jul 11, 2014
Messages
926
Mike after your done getting yours up and running come on down to the Florida Panhandle and get mine going its would be easy compared to yours. And I will pay you more than minimum wage :lol::D
 

Mikeopsycho

Senior Chief Petty Officer
Joined
Feb 6, 2014
Messages
738
Mike after your done getting yours up and running come on down to the Florida Panhandle and get mine going its would be easy compared to yours. And I will pay you more than minimum wage :lol::D

Deal! But you gotta take me tarpon fishing too :fish2: :D.
 

Mark72233

Ensign
Joined
Jul 11, 2014
Messages
926
Never done any Tarpon fishing, I don't think they are very prevalent around here. That's a South Florida thing. We can always trailer this thing down to the Keys and go get stuck on the Flats though.
 

Mikeopsycho

Senior Chief Petty Officer
Joined
Feb 6, 2014
Messages
738
Sounds like fun, I'll bring the beer. :)

I think I got the steering issues sorted out. I tried bleeding out the air at the ram while the Admiral turned the wheel for me, but I really didn't notice any air coming out. Then, with the oil funnel hooked up to the upper helm fill hole, I had the Admiral turn the lower helm to port while I turned the upper wheel to starboard and vice versa, which creates a continues flow of oil through the system. This seemed to do the trick. We got quite a bit of air to burp at the upper helm. The steering feels OK now.

Here's the oil I used,


I needed to touch up the bottom paint, especially at the water line, so I ordered this stuff,


To prep the hull I pressure washed it, trying to blow off any loose paint. then I wash with soapy water and a scrub brush, and hosed off really well. after that I scraped off all around the water line edges. I then sanded everything down to 220 grit, wiped clean with Interlux 216 solvent, and masked with Frog tape.

Here it is ready to paint,


And after the first coat (kote),


I left the masking tape on because I was going to roll on a second coat this morning, but it's raining here today :nightmare:. I was also going to do some polishing between the water line and the rub rail. If the rain stops this afternoon I'll get her done, fingers crossed. I'm not worried about under the bunks because I'm going to be in fresh water, so the bottom kote touch-up is mostly all about aesthetics.

I've been loading up the boat with all the tons of stuff I took out a couple years ago. Dishes, pots and pans, tools, spare parts, fishing gear, rum (for crew rations), etc., etc., etc.. A couple more loads up the ladder and I'll be ready. Anything else that need done will have to get done on the water. I've got my brother in law and his truck lined up for launching tomorrow, yeehaaaa!
 

nurseman

Lieutenant Junior Grade
Joined
Jun 2, 2013
Messages
1,045
:clap2: :thumb: Here is hoping that everything goes smoothly!
 

kcassells

Fleet Admiral
Joined
Oct 16, 2012
Messages
8,611
Float da boat! That means you are on the water now as I type this. CoooooNNNGGggggrats!
 

Mikeopsycho

Senior Chief Petty Officer
Joined
Feb 6, 2014
Messages
738
I had enough rain free hours to apply the second coat of bottom kote, and I removed the masking tape,


I think it came out really nice,


Here's a random shot from the swimgrid,


Got the rest of the stuff loaded, the bar-b-que, fenders, down riggers, dinghy, back tie-down strap, etc.,


Then the BIL showed up with his truck and off we went. Filled her up at the local gas station with boat gas (marked), it's way cheaper than fuelling up at the marinas. Here we are at the boat launch. That's the BIL at the back of the boat, and on the other side of the ramp is my wife, her sister, our daughter and our grandkids. The grandkids were almost as excited as I was, lol.


And it's splashed!


The Admiral and I had the pleasure of having our youngest daughter and our grandkids visiting for the weekend, and it was pretty nice having them there for the momentous event. It was a very rainy wet day, but we went out for a couple hours bucktailing for rainbows, (no luck). Here she is tied up at the marina in a temporary spot. They are getting some new slips in next week, and our boat is going to be in a 12' wide slip with fingers on both sides.


Thanks to all my iboats family and friends for the support and encouragement over the past couple of years! :yo: This is a great site with great, generous, sharing folks and I appreciate every one of you for your assistance and comments. All the best of luck to those of you who are still rebuilding your boats or about to start a rebuild, I'll try to be of any help I can.

Cheers, Mike.
 
Top