1977 Crestliner Muskie 7**, Outboat Restore Project

jimmbo

Supreme Mariner
Joined
May 24, 2004
Messages
13,446
Don't put that liner crap in a boat. Ever since the Flex-Seal infomercials aired, ideas like this keep popping up
 

todhunter

Canoeist
Joined
Sep 15, 2020
Messages
1,308
You should fill the gaps under your stringers. PB is harder than pine, hands down. It's not a hard vs soft thing. The reason you hear people say to leave a gap is so that you can have room to fill it with a bedding material (PB) and get a consistent contact patch between the stringer and hull. If you tried to cut the stringer to the exact hull shape and not use bedding, you would inevitably have small gaps here and there. Gaps = flexible spots, and flexibility leads to fatigue.

Bedliner is a bad idea. If you want a grippy surface, use a traditional non-skid additive to either marine paint or even better, gelcoat. If it were me, I'd look at SoftSand.
 

Baylinerchuck

Commander
Joined
Jul 29, 2016
Messages
2,726
Thanks for the reply Baylinerchuck,

Do you need to bed the stringers in PB? or PL Premium etc.

I have spent several hours on this site and others trying to find out what is what, concerning the hardiness, and flexibility of PB, and whether you should or need to fill any voids. One person will say PB is softer than wood and a minute later someone is saying it’s harder, I’m thinking in terms of hardspoting in the stringer. In many cases I read, nothing is used and an empty gap is preserved. I ended up cutting all of my stringers yesterday, so that ship has sailed in terms of bedding them in anything, I could cut new ones but I don’t think it is needed, but I don’t have long term experience in this regard.

Although the manufacturers work looks a bit sloppy, it has held up great for 45 years with over 2” gaps in places with no filler. For my current plan, I bought 3 studs to use to suspend the stringers at deck height and tab them in one side at a time; however I am still up in the air about whether I should be using PB to fill the void, either fully, not at all, or enough to encapsulate the stringer for water resistance, as that seemed to be the main point of contention regarding leaving a void.

The stringers I cut were meant to preserve a ½” gap throughout; as I thought that anything more would be overkill. I do understand the science behind very large gaps, in that the larger the gap the wider the force of the load is spread out into the glass. So I guess my concern is would I be creating hard spots by filling the void completely?
The stringers should always be bedded with something, otherwise pockets under the stringer will flex in some spots, and will be hard in other spots. As you can imagine any voids will attract water, as in condensation or that being the lowest point and will start the rot cycle. Using PL is fine, however if it takes a week or so for it to gas off before you can start your tabbing. I prefer to use thickened, reinforced resin to bed stringers and cross members to the hull. A 1/2” gap is fine, most prefer a 1/4” gap to conserve resin. Most will use a pastry piping bag to force the resin under the stringer, then use a tool of your choosing, like a spoon to smooth the resin into nice fillets while it cures. The smooth fillets will help transition the 1708 from stringer to hull as you tab. You always want to fill those gaps under the stringer completely.
 

Baylinerchuck

Commander
Joined
Jul 29, 2016
Messages
2,726
You should fill the gaps under your stringers. PB is harder than pine, hands down. It's not a hard vs soft thing. The reason you hear people say to leave a gap is so that you can have room to fill it with a bedding material (PB) and get a consistent contact patch between the stringer and hull. If you tried to cut the stringer to the exact hull shape and not use bedding, you would inevitably have small gaps here and there. Gaps = flexible spots, and flexibility leads to fatigue.

Bedliner is a bad idea. If you want a grippy surface, use a traditional non-skid additive to either marine paint or even better, gelcoat. If it were me, I'd look at SoftSand.
I’ve used the rust oleum marine paint with their grip additive and it worked awesome in a Bayliner I restored.
 

jimmbo

Supreme Mariner
Joined
May 24, 2004
Messages
13,446
Hulls have to have an itty bitty of Flexibility, and consistently as well, as one extremely Rigid Stringer will end up being a Tear Line
 

adament

Cadet
Joined
Jun 24, 2022
Messages
17
Thank you everyone for the valuable input. Unfortunately I didn’t realize my thread had a second page and didn’t see any responses after my last post, so I ended up buying 2 gallons of Hurculiner. After seeing the posts I tried to return it, but apparently flammable substance can’t be returned.

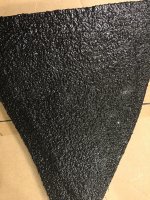
I am currently leaning towards the softsand route with gelcoat as that seems to be a similar route concerning my original thought of using Herculiner. I am having considerable difficulty choking down the fact I just flushed 200 bucks down the toilet unless I can think of a useful return on investment for it. My curiosity is peaked as to why there is so much hate for bedliners, Herculiner in particular, as all bedliners are not the same. As I can’t return it, I used a scrap piece of marine plywood and some 1708 to see what it would look like. I’ll give it a good 5 days to cure before I start beating the holy hell out of it for fun and to evaluate possible alternate uses.

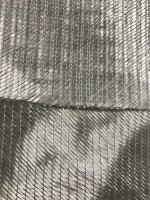
Regarding current progress with the stringer layups, as I understand my ignorance with fiberglass shines, I didn’t realize why I was having such a hard time saturating my first batch of 1708 during the layups. It wasn’t until I had got into my second batch of 1708 that I noticed how much less resin was required to saturate it, and how it was much easier to work with. Then I took a closer look, and noticed the doubles stitching. I would like to think that the stitching used is fiberglass, but it is more than likely not and likely not adding any structural benefit. After doing layups with the correctly manufactured 1708, I am fairly certain I have wasted about 3 gallons of resin working with the double stitched, ouch more money down the toilet with no conceivable benefit.

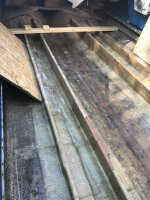
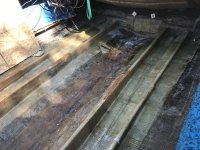
There are a few pictures of what is now my Frankenstein SNAFU project. These are from about a week ago, and have since added 4 watertight bullheads (as opposed to the original 1 at the bilge), and just finished all of the bulkhead and stringer layups. I was on the fence about an open bilge throughout the boat, or watertight below deck and ended up committing to water tight with compartments to minimize the eventual water infiltration damage.

That’s what I have so far, but I would like to hear more about why bedliner is so despised, since I’m stuck with it, and I would like better digest the monetary loss of not using it.

As a side note, if any moderator could update my title to be more accurate, my boat is a 770, I used wildcards ** as I didn’t know for sure which model it was, not on the title, not on the registration. While staring off into space looking at my boat, I noticed a small emblem on the side, haha.
 

Attachments

  • IMG_0290.JPG
    IMG_0290.JPG
    3.3 MB · Views: 10
  • IMG_0289.JPG
    IMG_0289.JPG
    2.3 MB · Views: 9
  • IMG_0284.JPG
    IMG_0284.JPG
    2.5 MB · Views: 10
  • IMG_0285.JPG
    IMG_0285.JPG
    4.1 MB · Views: 10

Baylinerchuck

Commander
Joined
Jul 29, 2016
Messages
2,726
The bedliner is just not my first choice. There are so many other options out there that will flex a little better and in my opinion look better, and are easier to repair. It’s not that it has never been done before, it’s just there are better coatings. In my opinion, since you already bought it, use it.
 

Wildey

Petty Officer 1st Class
Joined
Nov 24, 2021
Messages
202
It wasn’t until I had got into my second batch of 1708 that I noticed how much less resin was required to saturate it, and how it was much easier to work with. Then I took a closer look, and noticed the doubles stitching. I would like to think that the stitching used is fiberglass, but it is more than likely not and likely not adding any structural benefit. After doing layups with the correctly manufactured 1708, I am fairly certain I have wasted about 3 gallons of resin working with the double stitched, ouch more money down the toilet with no conceivable benefit.
I don't see why there would be much difference, just from the stitching, if they are both the same weight. The amount of resin to saturate should be the same ... or very close. Work-ability also.
I don't get that part.
Good work so far, keep it up !
Cheers
 

adament

Cadet
Joined
Jun 24, 2022
Messages
17
Finally! I was able to throw out my fiberglass work cloths today, so am quite happy.

I have added three addition bulkheads in the center bilge as opposed to the original one at the stern.

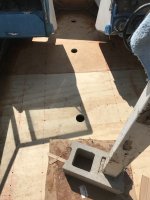
The deck is on and 2lb foam is done. Originally I had purchased 3 sheets of ¾ inch marine plywood but need to get one more, however I could not get any and ended up using what I think was ACX. I read a post from someone here mentioning Arucaply and it nearly as good as marine grade but with more voids and same glue; however I found it to have fewer voids and was quite happy with it.

I used a 3” hole saw and drilled holes in each bulkhead and was hoping to only need one hole in each stringer section to allow the foam to flow forward. I drilled small relief holes at the bow section of each stringer so I could be sure foam was reaching all the way up the bow. Unfortunately one section didn’t have a good enough seal in between the stringers at the stern and the foam overflowed into that section forcing me to plug it and cut another hole further up the bow. Overall it turned out well; I think I used about 6.5 gallons out of the 8 I had ordered. Now what do I use the other gallon and a half on?

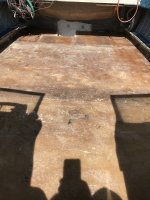
I had a heck of a time glassing the deck. I had read about using 2 layers of 1.5 oz CSM with a finishing layer of 6oz woven roving. The CSM was easy but I borked up the woven roving all over the place. I think the problem was working with much too large of sections, 72 inches by 50 inches. Everything went fairly well until I dropped a section into the resin where it shouldn’t have been, then all I did was screw it up more trying to fix it. I ended up sanding down all the way to the deck in several places and needed to build it back up. As an afterthought I had read on the forums about using 1708 on the deck before mounting it and finishing with CSM, darn that would have made life easier.
 

Attachments

  • IMG_0291.JPG
    IMG_0291.JPG
    2.5 MB · Views: 8
  • IMG_0296.JPG
    IMG_0296.JPG
    1.5 MB · Views: 8
  • IMG_0298.JPG
    IMG_0298.JPG
    2.3 MB · Views: 8

adament

Cadet
Joined
Jun 24, 2022
Messages
17
I had a question about how to seal screws that need to go back in the deck, and the screws may be removed at some point. I have silicon and Marine PL, but was wondering if I shouldn’t use anything or maybe there is something better. I have battery trays and panels to reattach and I hate the thought of putting holes in my new deck but it needs to happen, I would just like to make sure I am not allowing any moisture to enter the deck.
 

Baylinerchuck

Commander
Joined
Jul 29, 2016
Messages
2,726
I had a question about how to seal screws that need to go back in the deck, and the screws may be removed at some point. I have silicon and Marine PL, but was wondering if I shouldn’t use anything or maybe there is something better. I have battery trays and panels to reattach and I hate the thought of putting holes in my new deck but it needs to happen, I would just like to make sure I am not allowing any moisture to enter the deck.
I predrilled and countersunk all my holes, then dipped each screw in resin making sure to get a good coat. Used thickened resin to fill all the countersinks, then glassed over the deck.
 

adament

Cadet
Joined
Jun 24, 2022
Messages
17
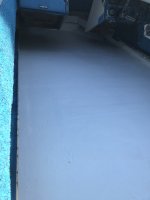
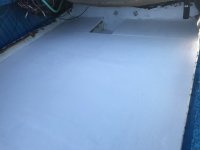
Here are a few shots of the deck. I used a squeegee to try and even out low spots and then 2 coats of non-waxed gel-coat. During the second coat I sprinkled soft-sand on the top and followed with waxed gel-coat.
 

Attachments

  • IMG_0309.JPG
    IMG_0309.JPG
    1 MB · Views: 10
  • IMG_0310.JPG
    IMG_0310.JPG
    1.6 MB · Views: 10

todhunter

Canoeist
Joined
Sep 15, 2020
Messages
1,308
I had a question about how to seal screws that need to go back in the deck, and the screws may be removed at some point. I have silicon and Marine PL, but was wondering if I shouldn’t use anything or maybe there is something better. I have battery trays and panels to reattach and I hate the thought of putting holes in my new deck but it needs to happen, I would just like to make sure I am not allowing any moisture to enter the deck.
I didn't want to put holes in my beautiful sealed deck either, so what I did was make some "pads" out of solid mahogany and PB'd those in place, tabbed them in with 1708, then covered in 1 layer of 1.5 oz CSM, and finally gelcoat. Mahogany is a rot-resistant wood and can take a screw very well. I built them for my trim pump, batteries, and captains chairs. Just make sure to never use a screw longer than the pad thickness, or you'll punch through into the deck below. You can see what I did here.
 

Baylinerchuck

Commander
Joined
Jul 29, 2016
Messages
2,726
I didn't want to put holes in my beautiful sealed deck either, so what I did was make some "pads" out of solid mahogany and PB'd those in place, tabbed them in with 1708, then covered in 1 layer of 1.5 oz CSM, and finally gelcoat. Mahogany is a rot-resistant wood and can take a screw very well. I built them for my trim pump, batteries, and captains chairs. Just make sure to never use a screw longer than the pad thickness, or you'll punch through into the deck below. You can see what I did here.
I definitely like this idea. I did something similar but I did bolt through the deck. The captain chairs for example. I placed the pedestal bases on an encapsulated plywood disk that was PB’d to the floor. The thought here was that the bolt holes securing the pedestals were higher than the deck, so water wouldn’t penetrate into the deck since the disk was completely sealed. All screw penetrations into the deck were sealed with resin on the threads and countersunk.
 

adament

Cadet
Joined
Jun 24, 2022
Messages
17
Thanks todhunter, I had thought of something similar for the 2 pedestal plates and 1 chair I have. I must say yours looks way nicer than what I had in mind. Although I must say that I am really into what the previous owners did with the combo seats.

These are original front and back 2 person seats that were removed and attached on the bottom to a sheet of OSB wrapped in outdoor carpet upsidedown (OSB is evil I know). Wow though, with a deck coated in softsand and gelcoat this is amazing. I only store life preserves inside the seats so they are very light weight, but if you sit down in one you don’t move at all. Very happy with the softsand and gelcoat idea mentioned. I may put those pedestal plates back in similar to what you did todhunter, but for now I really like what I have.

Its really ingenious, it works similar to velcro, but with weight via friction as the bond. That and I find them very comfotable and familiar as I spent the majority of the summer sitting in those chairs in my garage while taking a break or swearing for how things with the boat where going. On my first trip out, I have to say I love those seats, very comfortable.

I have been pretty busy. I had her out for the first time and had a heck of a good time! Some fishing, but mostly screwing around.

I had a Minn Kota 65lb thrust trolling motor on the front I have just fished reinstalling today ( I had thought it would rip itself out and end up in the drink). I should have taken pictures of the CFM, 26 screw holes they had, granted I did put 7 more in, but I secured my holes with fender washers and nylon lock nuts as opposed to the original 3” brass screws just stuck in there willy nilly 26 times.

I’ll try and get some pictures every time I mess with something, as always thanks for the input.
 
Top