1976 Tom Boy Boat, 1976 40 HP Johnson Outboard and who knows what Trailer

gm280

Supreme Mariner
Joined
Jun 26, 2011
Messages
14,604
by the way how do you prep for the powder coating? Media blast first?

Prepping for powder coating is actually easier then regular paint. Because when you powder coat, there is no need for primer. So bare metal is the usual prep. Sandblasting or mere sanding will prep any metal item. As long as the metal and/or remaining paint on the metal can withstand the 450 degrees, you can powder coat over it. I usually sandblast because I like to start out with bare metal. But fillers and any primer that can take the initial 450 degree baking is perfectly okay. I have used mere blue masking tape before and it worked without any issues. You can powder coat any material that can withstand the temps to cure it.

Once I sandblast the item, I then use acetone to clean off any media that may be left on the item. But a mere air hose would work okay too. Powder coat is merely very fine plastic material. And when you spray it, you charge the part you are coating with a electrostatic charge to attract the plastic material on to the item. So it merely is stuck on the item via an electrostatic charge. And any air hose will clean it off again instantly. So you have to be careful not to touch it or bump it when putting it into the oven to cure. And since the powders usually are matt as they go on, you can tell when the temps are correct seeing it turn glossy. Then you time the cure for whatever the manufacture suggests. Really is easier then trying to explain it all....really. To clean up the spray gun and equipment, you use just an air hose. It blows the powder out of the gun and no chemicals are ever used anytime. So cleanup is seconds.

Hope that explains it some. You really need to try it. The colors pallets are amazing and there seems to be an endless array of colors to include metallic, sparkles, candies and about anything you can dream up even chrome! And the chrome has to be seen to believe too.
 

gm280

Supreme Mariner
Joined
Jun 26, 2011
Messages
14,604
Well as strange as this new setup is, I am going to try and make a post with pictures. Well first thing is, I will be foregoing cleaver little smiley faces since my usual's are yet to be found or swapped with new versions.

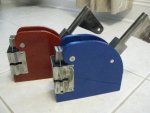
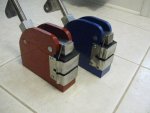
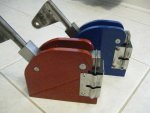
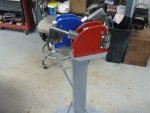
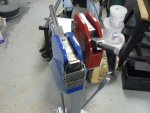
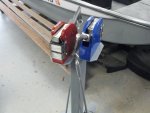
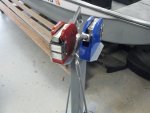
As promised, I have stretcher/shrinker pictures with them both finished and powder coated. You tell me which one is factory, and which one is my version?

I gave them distinct colors for a good reason. If not for the colors, you would not know which was a metal shrinker and which was a stretcher, without literally looking closely in the jaw sections to see. So red and blue were my way to know. Red to stretch, blue for shrink. Sounds logical...well at least to me.

Now I can work on the transom cap and hopefully get this loonnngggg over due boat project finished. I have so many other projects stacking up, so I need to get the boat finished and out of the shop.

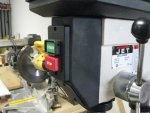
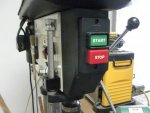
I had my floor model drill press break on me. The on/off switch cracked in a lot of places that were not visible until I had a screw fall out while using it. Once I seen that all the screws had broken plastic under them (the factory switch assembly was made of plastic), it was time to replace it. So I order a replacement, but thought, I could make one as well. And that is exactly what I did. I got some pretty stout metal and welded up all the sides and front areas and then grinded them down and lightly rounded over all the edges. And I made one that will not break ever again. I attacked that picture as well. So I THINK I canceled the previous order. We'll see...
The on off plate is mounded on the new metal switch assembly now. That entire flat blat area was all plastic...not anymore.
Did you guess the correct one of the shrinker/stretcher units? My version is the red colored...
SS pics (1).JPG
SS pics (2).JPGSS pics (3).JPG
SS pics (4).JPG
SS pics (5).JPG
 

gm280

Supreme Mariner
Joined
Jun 26, 2011
Messages
14,604
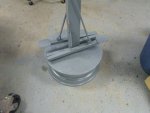
Last couple days I've been working on the NEW stretcher/shrinker stand. Why a new stand you ask? Because the initial stand was built using a mere 12" or 13" rim. And if I really pressed on the foot pedal hard, the stand would tip up. So I decided to get a large diameter rim. I got a 17" rim, cleaned it up and oddly enough, the 13" rim actually fit inside the 17" rim. So all I had to do was weld the 13" rim inside the 17" rim and fill it up with more concrete. I really don't think this setup is going to tip up now. It is very heavy and that is what you need building things like this.
I started priming the setup yesterday but ran out of primer. So I will finish up today after buying some more. Then a quality paint finish and we are in business again.
I still need to bend the remaining aluminum for the transom cap and then the live-well cushion. Of course, mount the engine. But other then that, there really isn't much other work to do to the boat now.
We'll pop up pictures as I go... Have a great fall day...
 

gm280

Supreme Mariner
Joined
Jun 26, 2011
Messages
14,604
Well @sphelps, I tried to make them red for hot which means expand, and blue for cold which mean contract. I think most guys understand the cold shrinking issue... :unsure:
 

gm280

Supreme Mariner
Joined
Jun 26, 2011
Messages
14,604
The last few days I tackled a huge project that I have been putting off for a couple years. Seems every year around fall time I think about if our chimney is okay/safe to burn wood fires in it still. And I always worry that it could be filled up with creosote, even though we only burn hardwoods in it.
Well the last few days, with the temps dropping, I made the decision to get the ladder out and craw up there and remove the top and run the stainless steel fitted brush through the flu and chimney pipe.
Well seem the entire top of the chimney was completely rusted and what paint remained was flacking off. So I had to remove everything and rework the entire chimney top.
That was certainly not a project I really wanted to do right now, but I was too far into it to stop now. So everything was removed brought down and the wire wheeling/sanding/sandblasting commenced.
Amazing how much time it took to get all that steel back to usable bare metal to reprime and paint. It took two full days of wire brushing, media blasting and even sanding to be able to refinish the entire top plates. The louvers were the worst. And there were lots and lots of louvers. The sand blasting took hours. I'm surprised the compressor didn't give out.
I primes everything and that took a lot of primer. There is a lot of surface area on those things. Then I used very high temperature capable paint on the flue top section. I also bought all new hardware and finished that project today at lunch time. Glad that is done. And surprisingly, there was barely any creosote at all. But now I have a like new chimney top and a clean flue.
Then I switched back to finishing the stretcher/shrinker stand. I finally got it all painted and was very pleased with how it came out. I should be able to bolt everything together tomorrow.
So I am tired now and not looking forward to any sanding, wire wheeling or sandblasting anything anytime soon...
I would post pictures but who wants to see a chimney top...
 

archbuilder

Vice Admiral
Joined
Sep 12, 2009
Messages
5,697
I need to do some work on my fireplace, but it is masonary. I picked up some fire set from one of my brick reps to point a few places.
 

gm280

Supreme Mariner
Joined
Jun 26, 2011
Messages
14,604
I need to do some work on my fireplace, but it is masonary. I picked up some fire set from one of my brick reps to point a few places.
Arch, not sure but I thought even masonry fire places still use stainless steel pipes inside. And it that is true for yours, then it needs maintained as well. IDK
 

archbuilder

Vice Admiral
Joined
Sep 12, 2009
Messages
5,697
No this is an old school full masonary fire place with a clay tile flue and fire brick box..
 

gm280

Supreme Mariner
Joined
Jun 26, 2011
Messages
14,604
No this is an old school full masonary fire place with a clay tile flue and fire brick box..
WOW, didn't know they still existed. But for sure it is a well built fireplace. If you are worried about creosote build up, you could get a good light and either look up through the firebox area or climb up there and look down. I am sure there will be some build up, but probably not a dangerous situation. But it never hurts to check out.
 

gm280

Supreme Mariner
Joined
Jun 26, 2011
Messages
14,604
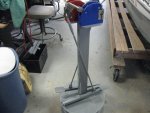
Here is the final S/S project...I hope!
Yesterday I sprayed painted this stand using Rustoleum Professional paint (because I had it in the paint cabinet already) and Majic Catalyst hardener and of course some thinner (Acetone per instructions). And to my surprise it came out pretty well.
I painted this after finishing up the chimney top, and of course I painted it outside like I do everything. Well I didn't think much about it until we got TWO rain storms. This is the driest month of the year for us, and it had to rain the very day I decided to paint...
Well seems the rain didn't effect the paint. I guess it was pretty much dry already... Sometimes luck is better then skill!
So here is that project, hopefully, finished...
Maybe be the next posting will be the transom cap finished bent

NSS (1).JPGNSS (2).JPGNSS (3).JPGNSS (4).JPGNSS (5).JPGNSS (2).JPG
 

archbuilder

Vice Admiral
Joined
Sep 12, 2009
Messages
5,697
Looks really great on the Shrinker Stretcher! I am not to worried about creasote, I will check however. I don't burn it that often....but it is nice a few times a year. I just have a couple of joints that need a little repointing in the firebox. That is all that was made here in OK till the mid-90's or so. Most of the newer "fire places" are a gas log insert these days.
 

sphelps

Supreme Mariner
Joined
Nov 16, 2011
Messages
11,462
Very nice on the S/S Stand ! But I do have a? Won‘t the turnbuckles be in the way of whatever you run through it ?
 

gm280

Supreme Mariner
Joined
Jun 26, 2011
Messages
14,604
Very nice on the S/S Stand ! But I do have a? Won‘t the turnbuckles be in the way of whatever you run through it ?
Answer...well yes and no. If I get a stronger spring it will make the adjacent unit's turnbuckle move inwards a heck of a lot more. But as it sits, the turnbuckle setup merely slides into the block assembly and therefore if you need to use either of them, the other one can easily be removed out of the way. So it is all covered presently.
Problem is, I watched a new attachment yesterday on Youtube from a guy who is a master at metal works. He came up with another neat accessory for these shrinker stretchers that I will also build for my setup. The guys name is Ron Covell. Take a look at what the older guy can do with a shrinker stretcher setup. Absolutely amazing...
But I presently can do what I set out to do weeks ago now.
 

Baylinerchuck

Commander
Joined
Jul 29, 2016
Messages
2,726
It must be the season of chimney fixing. I just repaired my parents chimneys. Yep two of them. One with a terra-cotta insert for the oil fired furnace, the other is older, all brick, no insert. Believe it or not, that’s the wood burning chimney. Both chimneys required that several courses needed taken down and laid back up. I convinced my dad that this spring the older chimney needs taken down completely and rebuilt around a stainless insert. That will be a fun project.
 

gm280

Supreme Mariner
Joined
Jun 26, 2011
Messages
14,604
It must be the season of chimney fixing. I just repaired my parents chimneys. Yep two of them. One with a terra-cotta insert for the oil fired furnace, the other is older, all brick, no insert. Believe it or not, that’s the wood burning chimney. Both chimneys required that several courses needed taken down and laid back up. I convinced my dad that this spring the older chimney needs taken down completely and rebuilt around a stainless insert. That will be a fun project.
WOW Arch, that is certainly an ambitious spring plan there. I can honestly say, I'm really not a fan of heights. But sometimes you have to fight that fear and do things anyway. I will admit, the roof was built on two angles with my chimney. First was a mere 4 1/2" pitch (the roof over the screened in back porch) while the second was 7 1/2" pitch. A 4 1/2" is a cake walk. But the 7 1/2" certainly was not. And of course the entire chimney and the rest of the house is on the 7 1/2" pitch. Can't imagine a 12" pitch. But those pitches are only on our dormers...
 
Top