1976 Tom Boy Boat, 1976 40 HP Johnson Outboard and who knows what Trailer

gm280

Supreme Mariner
Joined
Jun 26, 2011
Messages
14,604
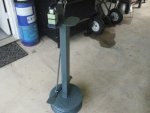
I have been doing a few hours here and there in between the heat and humidity and have made pretty good progress on the stand. It is near finished with only a couple parts left to weld up. Then I think I will bent the transom metal before cleaning up the Stretcher/Shrinker stand for primer and paint.

I have to admit, this really did come out way better then I thought it would. And I didn't buy even one piece of metal to build it. Scrape metal is always a good idea to hold on to.

However, I made this stand setup to work with two units. One setup for the Stretcher and one for the Shrinker. That way I don't have to switch the jaws over every time I want to do either bend. But I only have one unit with two sets of jaws. So I either will be looking for another jaw-less unit, or build one myself. There doesn't seem to be much to the head unit and making one doesn't seem to be difficult. We'll see.

I'll post the initial finished pictures once I get the final parts welded up. Now If I can push through the heat and humidity one more time to do the finish welding...:pray:
 

gm280

Supreme Mariner
Joined
Jun 26, 2011
Messages
14,604
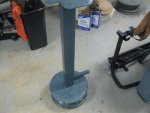
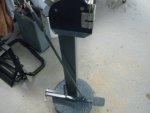
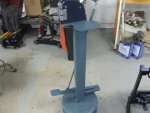
Okay, I have it all welded up finally. I did go back out for about an hour and a half (soaked again, as usual with sweat) and finished everything so it basically can be used now. No, it is not sanded, blended, primed or painted. But it is usable and I can work the transom angle aluminum now. Here is the final welded pictures for those wanting to see it. I'll post the absolute finals when I get it finished with paint.

I spent a little time making the foot pedal so that It didn't look just like a flat piece of steel. And it seems to allow your foot to grip it very nicely as a bonus too. Also, I used some 1/2" hollow steel tube to fit through the 1" square tubing for the pivot points so that a 3/8" bolt will slide through and not pivot only on the square tube edges. That also allows for some grease inside the tubes on the unthreaded section of the bolt. That should keep wear down significantly as well and a much smoother operation. Using lock nuts allows me to tighten up the pivots without interfering with the actual movement. And they won't work loose over time either.

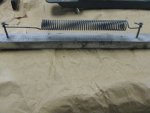
I luckily had two springs that came in perfectly for this type project. Yes, I seem to keep every type hardware when I disassemble things. Never know when you will need them later on.
Considering these stands are extremely costly for what the really are, I figured I save lots of money making one myself.

Now back to the transom top cap...
 

Attachments

  • new (1).JPG
    new (1).JPG
    104 KB · Views: 2
  • new (2).JPG
    new (2).JPG
    113.6 KB · Views: 2
  • new (4).JPG
    new (4).JPG
    89.8 KB · Views: 2
  • new (3).JPG
    new (3).JPG
    90.9 KB · Views: 2
  • new (5).JPG
    new (5).JPG
    81 KB · Views: 2
  • new (6).JPG
    new (6).JPG
    99.9 KB · Views: 2

Willyclay

Captain
Joined
Sep 8, 2006
Messages
3,257
I luckily had two springs that came in perfectly for this type project. Yes, I seem to keep every type hardware when I disassemble things. Never know when you will need them later on.
Attaboy, I knew you could do it! Loving everything about your project and the boat also.
 

gm280

Supreme Mariner
Joined
Jun 26, 2011
Messages
14,604
Thanks Willy and Sam. I appreciate the kind words and it encourages me along to finish things.

I can't figure it out. The temps are very high along with the humidity and I once again faced such things and cleaned up the Stretcher/shrinker stand and even primed it all. I would have posted pictures, but I am certain everyone has seen primed metal parts before. So I will post the final painted results. :)

I am also thinking about building another base unit that holds the jaw pieces so I can have both ready to use when needed. But that isn't a short term project presently. I'll work on that along the way while waiting for other things to cure, dry, fix it's self or whatever...

We are supposed to get a break from the high temps and actually get lots more rain. But I'll take the rain and lower temps right now. I just got to get the fertilizer out before that rain starts. But even with rain, I can bend the transom cap and get it finished now. Then the only other still-left-to-do-project for the boat is the live-well seat cushion. :facepalm:

I am teetering with making a new engine wiring harness. Why you may ask? Because when I rebuilt that engine, I basically used wire I had laying around the shop. Some of it is Teflon coated wire, some plastic, some rubbery. But since I made that harness, I bought all the colors needed to make a marine grade wire harness. So I am thinking about removing the one I initially built and making a marine grade wire harness. Haven't decided for sure, but it is on my mind. I bought the exact gauges and colors just for such a wiring harness. We'll see... :decision:
 

gm280

Supreme Mariner
Joined
Jun 26, 2011
Messages
14,604
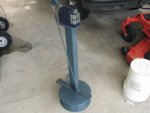
Well finally a finished stand to report. Dodging the rain the last few days, I managed to get all the parts painted and today I assembled it for a final. And since it never happened without pictures, here they are.

I hope the next update will be the bent to shape transom cap. At least that is what I am shooting for...

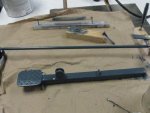
You can see the parts painted laying around. In the second shot, if you ever have to clean a spring or sand blast one or even prime and paint one, this idea works very well. Just stretch it between two screws in a scrap piece of wood so that it is open. Then clean, prime and spray away.

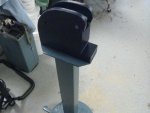
The rest of the pictures are the entire stretcher shrinker assembled and finished. No, I didn't spray paint this. I did prime spray it, but used a paint brush for the finish because that is the exact same paint I used in other shop projects and it seems to fit and match into the shop well. So it isn't going to have that high gloss finish. But it does what it was designed to do.

Oh I also filled the rim with concrete for the weight. Believe me, it is very solid and heavy too.
 

Attachments

  • Finsihed stand (3).JPG
    Finsihed stand (3).JPG
    89 KB · Views: 1
  • Finsihed stand (4).JPG
    Finsihed stand (4).JPG
    89.6 KB · Views: 1
  • Finsihed stand (2).JPG
    Finsihed stand (2).JPG
    81.2 KB · Views: 1
  • Finsihed stand (1).JPG
    Finsihed stand (1).JPG
    90.3 KB · Views: 1
  • Finsihed stand (5).JPG
    Finsihed stand (5).JPG
    84.6 KB · Views: 1
  • Finsihed stand (6).JPG
    Finsihed stand (6).JPG
    92.2 KB · Views: 1
  • Finsihed stand (7).JPG
    Finsihed stand (7).JPG
    86.6 KB · Views: 1
  • Finsihed stand (8).JPG
    Finsihed stand (8).JPG
    91.9 KB · Views: 1

sphelps

Supreme Mariner
Joined
Nov 16, 2011
Messages
11,462
Awesome stuff as usual Gm !!
New Gravely zero turn in next to last pic ?
 

gm280

Supreme Mariner
Joined
Jun 26, 2011
Messages
14,604
Awesome stuff as usual Gm !!
New Gravely zero turn in next to last pic ?

Very perceptive there Sam. Yes and No. It is in it's second season. But yes, it is a Zero Turn Gravely/Ariens Icon X52 mower. We bought it last year via an online source. Saved $1k doing it that way. Icon and Gravely are the exact same mower built at the exact same factory. There is only a color difference between the two. I got the Kohler 24HP engine being how I've had decades of get service from my old Craftsman mower with a 15 HP Kohler Command series engine. I gave my old mower to my younger adult son. He is using it and says it runs like a dream.

I have to say, this Zero Turn makes mowing a real pleasure and very quick too. Hate to admit it, but it is actually fun to mower now. Don't let that get out though. It was shipped directly from the factory to our house via a truck. But the driver used his lift gate and mobile pallet jack and moved it right into our breeze way by the shop. Then all I had to do was uncrate it and install the foot pedal and arms. A mere 15 minute assembly total.

If I'm not mistaken, the deck has a five year warranty on it. Something like that anyways. The deck is a manufactured deck and not a stamped out type. Very thick and solid.

Hope the shrinker/stretcher stand now allows me to finish up the transom cap and move on... Of course I had to disassemble the shrinker/stretcher to see how it was built. Not much to them and pretty easy to duplicate. And I will make the second unit to put the second jaw set in so I can easily switch from one to the other without changing jaws. Yes, another project down the road. So I repainted the unit before reassembling it. I figured blue for the shrinker and red for the stretcher jaw sets. Cold blue shrink, hot red stretch... That is all I am saying about those colors...
 

archbuilder

Vice Admiral
Joined
Sep 12, 2009
Messages
5,697
Lol funny how we end up on other topics. I have a 34hp Farris, wouldn't have anything else other than a zero turn if you have very many trees. I always joke I can out run small cars :D. Used to have a turff tiger, great mower....but I love the coil over shocks on the Farris. Not exactly the 1980 Cadillac ride, but not bad! I hate going to the lake to mow.....push mower!
 

gm280

Supreme Mariner
Joined
Jun 26, 2011
Messages
14,604
Lol funny how we end up on other topics. I have a 34hp Farris, wouldn't have anything else other than a zero turn if you have very many trees. I always joke I can out run small cars :D. Used to have a turff tiger, great mower....but I love the coil over shocks on the Farris. Not exactly the 1980 Cadillac ride, but not bad! I hate going to the lake to mow.....push mower!

Yes seems we do drift off topic so often. But that is how real life goes. But we always come back to the actual project...eventually. :D

I always seem to have that "domino effect" that drags me off the boat project. I have to do this, so I can do that, which will allow me to be able to do this, for the project. And then yard work and house projects get thrown in there as well.
 

gm280

Supreme Mariner
Joined
Jun 26, 2011
Messages
14,604
A little info about the Trolling Motor fiasco...

If you remember, I ordered a Motor Guide X3 trolling motor from The Factory Outlet Store. I wanted a 42" or even a 45" shaft model. But they sent a 50" version and it was way way too big for the boat. It actually hit the stick steering arm. So I asked them about sending it back and they stated that due to the Corona Virus they would not except any returned items.

Well I pushed that issue and finally got them to take it back. However, I had to pay return shipping. Well that amounted to $125 dollars and some change. They finally agreed to refund my money MINUS the return shipping cost. So I got my money back, but am out $125 dollars for that lesson learned.

I guess I need to shop for a trolling motor again. I honestly would buy one here on "iboats" store, but their shipping cost makes the Factory Outlet shipping cost half "iboats" amount. Actually "iboats" store wants more then double that amount for shipping. So I guess I will look locally and pay the lesser amount now...

But I guess it could have been worst... Not sure how right now, but I am sure there is some way!
 

gm280

Supreme Mariner
Joined
Jun 26, 2011
Messages
14,604
Well did you use the metal bender do-hickey yet?

Actually I have, but not to finish making the transom cap yet. And I have learned so much about bending metals. If you really get into it, you will break/split the metal trying to stretch it. At least with thin aluminum. Probably takes a heck of a lot more effort to do that to thin steel, but I could see that happening as well. And if you really want to stretch metal, don't install the metal part all the way into the jaws as far. The metal bends a lot easier if you bend it about 1/3 to 1/2 the depth of the metal. If you install the metal as far as it can go into the jaws, it take a heck of amount effort to bend even a little. So things you don't normally read about with stretchers and shrinkers. Having one to play with teaches you pretty quickly all about bending metals. I am sure different metals have different bending characteristics as well. Even different gauges should pose different bending situations. But fun learning.

Once I get some time and temps lowered, I will continue with the project and post their results. I am also thinking about making another housing unit for the second set of jaws. Since I totally disassembled the one I presently have, there is really not much to them. A few pieces of 1" x 1" x 5" square steel bar and a couple 6" x 5" x 3/8" plate steel parts and you could easily make the housing part.

I am actually drawing such part plans up for future projects.
 

gm280

Supreme Mariner
Joined
Jun 26, 2011
Messages
14,604
Okay I got some things done, but not towards the boat. Yes, some more house projects.

We reworked the front room of the house to make it look somewhat like it was built in this century. Scraped the popcorn ceiling off and repainted, painted the walls and installed chair-rail and crown moldings. The closet was interesting since it was 10 feet deep but only 2 feet wide. And that was because we extended the wall when they built the house to give another adjacent room a larger footprint. Then we had real looking wood ceramic tile installed that even has the hand hewn look as well. Very nice, so I had to do wainscoting to top it off. Lots of painting and tons more work cutting and fitting all the finish woodworking.

Now that all that is finished, I when back to bending the transom cap. The shrinker/stretcher works great with one exception. When you are bending the angled aluminum to fit exactly like you want it, you need to work back and forth with shrinking and stretching along the way. But since I only have one main block, I have to swap over every time I need to change to the other jaws. That takes a little time doing that. So I am looking to build another body to give me both any time I need them. Just need to gather the material and assembly one.

Of course once the HEAT AND Humidity breaks, that effort will get a lot easier too...
 

gm280

Supreme Mariner
Joined
Jun 26, 2011
Messages
14,604
Okay, I broke down and ordered in all the metal needed to build the second stretcher/shrinker block. The metal should be here in a day or so. Then I can build that second block and work with both shrinker and stretcher, like I need. I have already drawn up the plans and this really isn't that hard to make...IF you own a welder. Other wise I guess you could make one using bolts. But since I now have about every type welding capability I will ever need, welding it is. I'll post the build pictures in case anyone is interested.

Have a great day all! And please be safe...
 
Top