1976 Tom Boy Boat, 1976 40 HP Johnson Outboard and who knows what Trailer

gm280

Supreme Mariner
Joined
Jun 26, 2011
Messages
14,605
archbuilder, I received the shrinker/stretcher and I can honestly say it works amazingly well. What I was trying to do with the TIG welder was weld up all the relief cuts I made in the 1" x 1" x 1/16" angle aluminum. And while I had it curved to fit perfectly, once I was through with it trying to weld those relief slits up, it looked like an over baked pretzel...okay a totally burnt pretzel with holes all over it.

However, I had a pretty good section of that angle aluminum and tried that shrinker/stretcher on it and amazing how easy it is to curve it either direction. I can do it pretty easy and with a little polishing, it will match all the other aluminum on the boat. I say money very well spent. And I get to keep the new (old) tool as well.

I am not forgetting the weld though, because I still need to be able to weld thin aluminum flawlessly still. Seems the thicker aluminum I can work with pretty well. But I have to get better with the foot controller to weld the thin stuff.

Just thought I'd give an update on the shrinker/stretcher for anyone wondering how those tools work. They are well worth the money! And even better when you get them for a extremely great price too. Oh and the US Industries Shrinker/Stretcher Tool is made in America also, not some Chinese knock-off junk!
 

gm280

Supreme Mariner
Joined
Jun 26, 2011
Messages
14,605
Today I went and bought two more 1" x 1" x 1/16" x 6' angle aluminum strips...again. So with the latest shrinker/stretcher tools, I can now bend those strips to fit the transom perfectly. I will post some pictures to show how the tools bent the aluminum to fit. hopefully tomorrow... :D
 

gm280

Supreme Mariner
Joined
Jun 26, 2011
Messages
14,605
Okay some good news and some not so great news. First the good news. This is for you @archbuilder!
The stretcher/shrinker works great! That is.IF you don't add an extension pipe on the handle to get greater stretches all at once. First lesson learned. :rolleyes:

I started with the new angle aluminum today and all was going great, UNTIL I had this hair-brain idea I needed more leverage to help stretch the metal easier. Well even that worked pretty good until I get into it really hard, Then I heard a popping sound and the lever was easy to push down. And that is because I snapped the aluminum where I was trying to make a harder outward bend, stretching, if you will. :facepalm:

I am sure that will be fixable. but I did learn that slow and easy is the way to go from now on. Other then that, the stretcher/shrinker does what it was designed to do very well. And I really don't see any further issues now that the learning curve/experience was accomplished. I always have to learn things the hard way before getting it right. :frown-new:

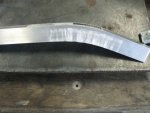
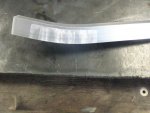
I attached some pictures of it and some inside and outside bends. Notice the metal grip marks on the aluminum. They will be a breeze to polish out without any issues. Not very deep, more surface marks. So if you need to bend metal and aluminum specifically, they work great...:D

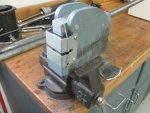
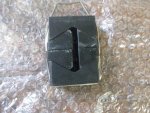
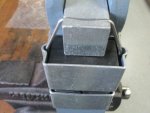
First picture is the setup with the stretcher jaws installed. That makes the outside bends. The second picture is the shrinker jaws. They make the inside bends. How they both work is by pinching the two sides of the metal before either forcing it apart or squeezing it together. That is what makes those marks. it doesn't move the metal very far each time, but enough to start your bends. Then you work along the bend until you get what you want. But DON"T add a longer pipe over the handle for more leverage... :eek:
 

Attachments

  • Shrinker-stretcher (1).JPG
    Shrinker-stretcher (1).JPG
    97.6 KB · Views: 1
  • Shrinker-stretcher (2).JPG
    Shrinker-stretcher (2).JPG
    106.3 KB · Views: 1
  • Shrinker-stretcher (3).JPG
    Shrinker-stretcher (3).JPG
    81.1 KB · Views: 1
  • Shrinker-stretcher (4).JPG
    Shrinker-stretcher (4).JPG
    98.5 KB · Views: 1
  • Shrinker-stretcher (5).JPG
    Shrinker-stretcher (5).JPG
    91.5 KB · Views: 1
  • Shrinker-stretcher (7).JPG
    Shrinker-stretcher (7).JPG
    98.8 KB · Views: 1
  • Shrinker-stretcher (6).JPG
    Shrinker-stretcher (6).JPG
    77.8 KB · Views: 1

gm280

Supreme Mariner
Joined
Jun 26, 2011
Messages
14,605
With the current temps and humidity, I can work until the temps get to about 85 degrees inside the shop. Then with the 80% humidity, I'm soaked and the work efforts come to an end. I usually start out with great hopes to work through the temps and humidity every time I start out. But once the sweat is dripping off me, for some reason I don't have that same mindset drive anymore. :confused:

However, today I pushed the aluminum welding practice again. Got to keep at it to master it. Well I think I finally got to where I can weld 1/8" thick aluminum. I realize that doesn't sound like much. But I was blowing holes through .125" thick aluminum before. So after about four or five reasonable weld strips, seems I didn't blow out anything this practice time. Yea! :high5:

So I pushed it further. I tried 1/16" thick aluminum. Well we won't talk about that at this time. Not pretty, not pretty at all... More practice... :whistle:

They are talking about lower temps with lower humidity for next week. I can only hope that happens. I can then work a little long before being soaked... :joyous:

So few little things to do to float a boat. But since the summer heat is upon us now, not much push to get the boat floated at this time. I don't ski, don't tube, don't swim, I only fish. And any fish worth their weight are not going to be easy to catch with temps up. That is if I remember right...been a very long time! :fish2:
 

gm280

Supreme Mariner
Joined
Jun 26, 2011
Messages
14,605
Well here is an update even though it doesn't seem to be associated with the boat project. I can assure you it is.

I decided to make a foot control stand for the stretcher/shrinker tool. And after looking and pricing those extremely simple stands, I know I will make my own. Some of those factory built stand reach the $1000 price tag. And that is beyond ridiculous. Most are in the $300 to $500 range which is too pricey for what they really are.

I already measured and cut and drilled the head plates and down metal beam for the stand. I am going for a 36" height to the mounting plate assembly. That is about the comfortable position to work the metals. And since I already have most everything laying around, It really isn't costing me anything. I cut metal this morning until I was soaked with sweat and dropped it for today. Temps are not so bad, but humidity gets me every time. Once it gets to where I am soaked, the oomph in me drains out. But I will get to work on it again shortly.

Now some are asking how does making a stretcher/shrinker stand have anything to do with the boat. It allows me to bend the aluminum angle to fit exactly on the transom like it was made for it. And that is because it will be made for it. Then I can mount the corner parts and engine. So in a round about way, it is to help with the boat project.

I'll post picture when I have them ready.
 

Willyclay

Captain
Joined
Sep 8, 2006
Messages
3,259
Temps are not so bad, but humidity gets me every time. Once it gets to where I am soaked, the oomph in me drains out. But I will get to work on it again shortly.

Please be careful out there and hydrate! Looking forward to seeing this side-project.
 

gm280

Supreme Mariner
Joined
Jun 26, 2011
Messages
14,605
Yes Willyclay, you can bet I am careful every time I am out if high temps and/or humidity. I sweat a lot. It is a hereditary condition that I, my two adult sons and at least one grandson has as well.

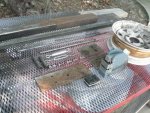
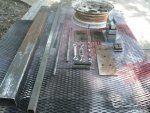
Well I have already worked towards the Stretcher/Shrinker stand. I attached a few pictures of the metal I rounded up. But I have since cut parts out, wire brushed the surface rust off the metal and made a lot of the parts already. Almost ready to weld them all together. Then prime and paint and use...

After seeing so many different models that are available, and their unbelievable prices, I used ideas from them, but certainly building my own. With a little thinking and looking around for the metal it takes, It really isn't that hard to scrounge up the metal to build one. And since I had everything I needed sitting on my metal stock pile this is only costing me labor and paint. But I like making such things so it isn't what you would call work.

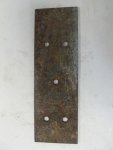
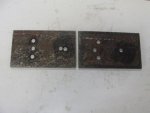
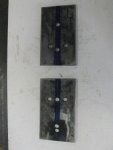
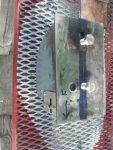
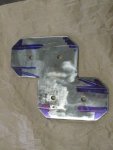
The first two pictures are most of the metal I gathered together. The third picture is some thicker metal I am going to use for the top plate. The next two are that top plate cut ready for welding, and holes drilled to mount the unit. The last picture shows the holes drilled and mount the stretcher/shrinker to the top plate. The extra holes will be filled in with weld and smoothed into the plate before welding it on the metal post.

I realize it doesn't look like much, but it will...

Lots more to come soon.
 

Attachments

  • Stretchers-shrinker stand (1).JPG
    Stretchers-shrinker stand (1).JPG
    138.3 KB · Views: 2
  • Stretchers-shrinker stand (2).JPG
    Stretchers-shrinker stand (2).JPG
    125.8 KB · Views: 2
  • Stretchers-shrinker stand (3).JPG
    Stretchers-shrinker stand (3).JPG
    67.8 KB · Views: 2
  • Stretchers-shrinker stand (4).JPG
    Stretchers-shrinker stand (4).JPG
    69.4 KB · Views: 2
  • Stretchers-shrinker stand (5).JPG
    Stretchers-shrinker stand (5).JPG
    70 KB · Views: 2
  • Stretchers-shrinker stand (6).JPG
    Stretchers-shrinker stand (6).JPG
    112.5 KB · Views: 2

archbuilder

Vice Admiral
Joined
Sep 12, 2009
Messages
5,697
It will be interesting to see the finished product. I see you are using the old "wheel" base stand lol!
 

gm280

Supreme Mariner
Joined
Jun 26, 2011
Messages
14,605
It will be interesting to see the finished product. I see you are using the old "wheel" base stand lol!

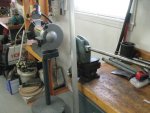
Yes such a base when filled with concrete makes for a very heavy and solid base. I used one for my bench grinder setup. It doesn't move and makes for a great solid grinder.

Yesterday I spent removing all the paint from that wheel. The paint remover did a great job getting the paint off to the bare metal. Very little remains for a wire brush to take off. Then it can be welded with the center post. I will post as it gets built.

Still working around the heat and humidity but still getting some things done. This is one of those domino effect things. Build this so I can make the transom cap so I can install the engine.
 

gm280

Supreme Mariner
Joined
Jun 26, 2011
Messages
14,605
I had to post this as an update to the trolling motor fiasco. Seems I tried again to get the "TheFactoryOutletStore" to allow a return. Well they emailed me back stating that I had to call in person for that request. So after trying for a few days, I finely got to talk to a person...even if that person was in India (sounds like it anyways with the two second delayed voice echo and accent). And after some iffy conversation because of the accent, he took my info and I received an email with how to sent it back. But it looks like it will be on my dine (lots of dollars actually).

So maybe I can either get the correct size OR a refund. IDK And the short bow mount bracket I ordered from another place has been backed up two time now because they haven't received any from the factory, I decided to cancel that as well. That leaves me to buy another trolling motor that IS the correct one. I am sure this will cost me some money, in the long run, but better then many hundreds with out a usable TM

But it could be worst...I think... :whistle:
 

gm280

Supreme Mariner
Joined
Jun 26, 2011
Messages
14,605
That sucks but sometimes it seems to be par for the course lol!

Yes, some times that "great deal" turns out to be so much more costly then ever expected. Live and learn...

Speaking of learning, I had a revelation yesterday. I relearned that grinding metal makes it really really hot. A very very quick lesson to relearn...again!

While I was cleaning the rim off of the last remaining paint, (paint stripper worked amazingly well with only a very few small spots left) I was grinding the rim edge and even though I was doing the opposite side at the time, the edge I tried to turn the rim with was still HOT from doing that edge a minute before. Amazing how friction works. I'll live, not real damage, but that lesson I really already knew...

I did a lot of MIG welding on the Stretcher/Shrinker stand. Coming along very nicely I might add. The top plate is welded flat with the extra holes filled in and feathered down. I can't even tell where those extra hole were now myself. And a few parts welded up for that project. Maybe today I get to weld the post to the rim and top plate. I'll post some pictures of the project.

You all have a wonderful day...
 

gm280

Supreme Mariner
Joined
Jun 26, 2011
Messages
14,605
An update...

Well fighting the heat and humility I have make some pretty good progress with the Stretcher/Shrinker stand. Not yet finished, but getting really close now.

The metal prep was the most work. Since all the metal was laying on my outside metal rack (okay some saw horses), all of it needed cleaned before cutting it up for parts. Well that part is over and I have cutout almost all the parts now. I only have a very few to cut out remaining. But I proceeded to welding it up.

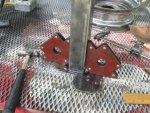
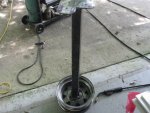
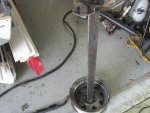
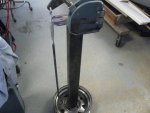
The only parts I was concerned with was getting the top plate square to the post so that when it was finished it wasn't leaning to the side or any other angle. I got that welded. And then the post to the cleaned rim. That too is welded. So most of the parts are assembled now and welded in place.

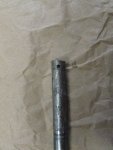
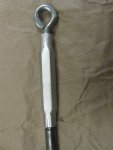
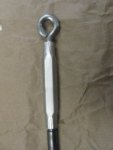
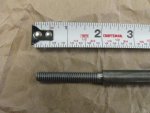
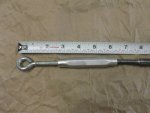
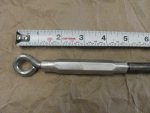
I needed a long rod to go from the top unit to the foot section. I found one I had sitting around. But I also wanted some way to adjust the length if need be. I decided to use a turn buckle. I also had a few laying around. BUT, how to connect it to the rod was the next issue.

Well just so happens that the rod diameter was larger in diameter then the turn buckle threaded portion. So I used my metal lathe to turn it down to the proper diameter size and used a "die" to make the threads. Now the rod threads into the lower portion of the turn buckle.

A few remaining parts to cut and weld, and then it is primer, sand and paint time. Oh, I also have to mix up some concrete to fill the rim. That is where the real weight come in to stabilize the stand. And I usually put three short split rubber tubing around the lower rim to the floor in three places. That keep is from wobbling and moving around too.

I probably will draw up all the drawing for it because I usually do that after the fact.
 

Attachments

  • IMG_0001.JPG
    IMG_0001.JPG
    84.7 KB · Views: 1
  • IMG_0002.JPG
    IMG_0002.JPG
    83.8 KB · Views: 1
  • IMG_0003.JPG
    IMG_0003.JPG
    82 KB · Views: 1
  • IMG_0004.JPG
    IMG_0004.JPG
    69.4 KB · Views: 1
  • IMG_0007.JPG
    IMG_0007.JPG
    93.3 KB · Views: 1
  • IMG_0005.JPG
    IMG_0005.JPG
    91.1 KB · Views: 1
  • IMG_0006.JPG
    IMG_0006.JPG
    84.1 KB · Views: 1
  • IMG_0008.JPG
    IMG_0008.JPG
    137 KB · Views: 1
  • IMG_0009.JPG
    IMG_0009.JPG
    106.9 KB · Views: 1
  • IMG_0010.JPG
    IMG_0010.JPG
    100.2 KB · Views: 1
  • IMG_0011.JPG
    IMG_0011.JPG
    90.6 KB · Views: 1
Top