1976 Tom Boy Boat, 1976 40 HP Johnson Outboard and who knows what Trailer

archbuilder

Vice Admiral
Joined
Sep 12, 2009
Messages
5,697
GM can put put the glue on both sides, let it tack then put something on the floor before you put the carpet down. Then pull out your spacer after you get the carpet placed? Sort of like doing plastic laminate?
 

gm280

Supreme Mariner
Joined
Jun 26, 2011
Messages
14,605
GM can put put the glue on both sides, let it tack then put something on the floor before you put the carpet down. Then pull out your spacer after you get the carpet placed? Sort of like doing plastic laminate?

Yea, I thought of that as well. I actually did that when laminating the surfaces around my table saw extension table and other laminated surfaces. But I think I have the boat carpet all figured out now.

Put glue down in the two center sections. The sections between the front seat and the live well, and the rear seat and the live well. Then do the same to the carpet as well. And since it is already cut out, those sections are easy to identify upside down.

Then lay the carpet in and secure those two sections while the remaining carpet is unglued. Then take one side and fold it up from the front to the rear and glue the floor and the carpet and put them together. Do the same with the other side and it is in without any problems. And when you fold the side carpet up, also do the very front and rear sections at the same time. I think that will work. We will see shortly because I am going out to do just that now.

I'll post the results later... Thanks arch for the idea. It is how it can be accomplished as well. Thumbs Up to you!
 

gm280

Supreme Mariner
Joined
Jun 26, 2011
Messages
14,605
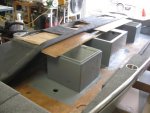
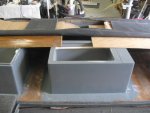
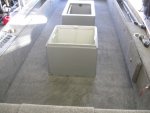
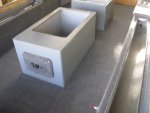
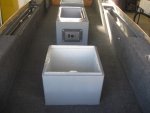
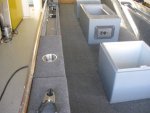
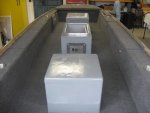
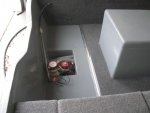
Okay, I got the floor carpet installed. And for the most part, it worked out like I thought it would. In fact it was easier to do then the sides.

Of course I attached pictures. And there is a few little issues I have to do yet, like cut some carpet threads off here and there, and basic cleanup. And now there is almost no areas left to carpet. A few very small areas and it will be completely carpeted. I probably do that tomorrow.

Weather has totally cooperated to allow me to do this. And with the sides and floor finished now, I can proceed with the add on hardware. I see an engine install coming very soon now.

One thing I will say. If you don't keep an insanely sharp carpet knife blade, it will not cut the carpet. And that is because when trimming of the carpet, it is usually from the front side and that really works very quickly on the blades. I went through about 5 or 6 blades doing the carpeting. And if you can't make a single cut and have the excess carpet come off clean, you need a new blade. Other wise it will reek havoc trying to cut the excess carpet off.

I used a few plywood panels to lay the carpet on (upside down) and then coated the carpet and the deck for the two areas in the center section. That way I could install the entire carpet and not have to worry about it attaching all over until I could coat each long side separately.

The center areas were attached and rolled with a "J" roller and then I flipped up each long side and coated the carpet and deck areas for that side. The I attached one side at a time and rolled it as well. Worked very well.

I like what I am seeing now. It is turning out like I planned....YEARS ago! :)
 

Attachments

  • photo307731.jpg
    photo307731.jpg
    84.1 KB · Views: 1
  • photo307732.jpg
    photo307732.jpg
    78.6 KB · Views: 1
  • photo307733.jpg
    photo307733.jpg
    77.2 KB · Views: 1
  • photo307734.jpg
    photo307734.jpg
    65.1 KB · Views: 1
  • photo307735.jpg
    photo307735.jpg
    68.2 KB · Views: 1
  • photo307736.jpg
    photo307736.jpg
    83.3 KB · Views: 1
  • photo307737.jpg
    photo307737.jpg
    80.4 KB · Views: 1

oldrem

Commander
Joined
Nov 7, 2013
Messages
2,002
Looks great! I know what you mean with going through a lot of blades with carpet from when I used to do it at my rentals. When I did my Sylvan, I used a Pink Power cordless electric scissors on both the vinyl and carpet. Worked so much better for me than doing it with a knife.
 

gm280

Supreme Mariner
Joined
Jun 26, 2011
Messages
14,605
Thanks mickyryan.

I did get some more work done today. I carpeted the front section where a few panels will mount and installed a few more hardware items now that I can install them without waiting for carpeting.

I wired up the rear Anchor light fixture and installed the stainless steel drain covers forward and aft. And even the carpet stop metal strip in the rear.

However, I realized I wanted special type hardware to install the courtesy lights and other hardware items. So I ordered all the hardware in to install other things as well. That should show up in a day or so.

Oh, I did receive the new rub rail insert as well and it is black and looks like it will fit perfectly too. Before I install it, I want to re-polish the rail again and then install the rubber. It will only take a light polishing to have it looking great again. Climbing in and out of the boat creates some marks on the aluminum rail. Nothing major.

And I still need to install the two battery boxes also. A lot of little things that I now can do with the carpet near finished. I'll post picture later on...
 

gm280

Supreme Mariner
Joined
Jun 26, 2011
Messages
14,605
Very comfy looking . I believe I would have to go bare foot ! :watermelon:

Yea that was one reason for the carpet. The other being how quiet the boat becomes. Another is the wife likes the soft carpet.

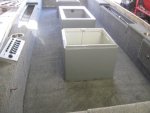
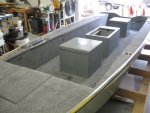
Well with the exception of a 2" or so carpet piece that goes on the very top above the side storage sections to the run rail, the carpet is complete.

Now I am going to tell on myself again. :cold: :facepalm:

I installed one of the side rod box lid carpet backwards again. But I have a good reason, and already fixed it. The reason was, I thought I was carpeting the port side rod box lid, and found out it was the starboard lid after I finished it. It does effect how the carpet runs from one side to the other if you think about it.

You can only imagine my let down and at that point I was finished for the day. I didn't laugh this time, and that was because I was really tired working no the boat. So today, I removed that carpet, yeah sheep sheering again, and installed carpet the correct direction for both rod boxes.

I also installed a carpet stop strip in the rear. It is just some "Z" bar that is used for house carpet installs. Being aluminum it worked out really well. And I drilled a few small holes on the curved edge to allow any water to drain though. It gives it a more finished look...I think?

I have some more stainless steel hardware on order and it is supposed to be here tomorrow. And that allows me to install a lot more items now that the carpet is done. Odd how you think you purchased all the hardware, and then you realize you need more. So install most everything and finish the wiring for all the installed things, and then time to install the engine.

It is starting to look like a fishable boat. Now If I only remember how to fish... :doh:

I added a few pictures with the main carpet finished. Some of the panels are just sitting they to give me an idea how it all is going to look. I haven't set in there yet and made broom broom sounds, but close... Once th actual seats are installed, that is a pretty good possibility though. :D
 

Attachments

  • photo307799.jpg
    photo307799.jpg
    96.3 KB · Views: 0
  • photo307800.jpg
    photo307800.jpg
    68.6 KB · Views: 0
  • photo307801.jpg
    photo307801.jpg
    72.6 KB · Views: 0
  • photo307802.jpg
    photo307802.jpg
    63 KB · Views: 0

kcassells

Fleet Admiral
Joined
Oct 16, 2012
Messages
8,737
GM what fish are you going for? That boat looks so comfy they might just jump in there to sleep.:joyous:
 

gm280

Supreme Mariner
Joined
Jun 26, 2011
Messages
14,605
GM what fish are you going for? That boat looks so comfy they might just jump in there to sleep.:joyous:

Well I hope so, because it has been so long since I fished, I'm not sure I remember how to anymore.

As for the species, most of the time anything that bites! But in reality, I like Crappy, Brim, and Bass fishing the best, and not necessarily in that order. Catfish can be interesting as well. Strippers, and Hybrids also can be great fun too. :D

But that is about all I know about. Fresh water Southern fishing is all I have ever done. Don't know about any saltwater species whatsoever. I'd probably get into serious trouble if I fished the salt waters. Probably catch something that was a serious NO NO to catch. :nono:

But that really is assuming I could possibly catch any find now. :facepalm:
 

Pusher

Lieutenant
Joined
Sep 2, 2014
Messages
1,273
Looks great GM! I've been away for about a year and you've really done some nice work (as usual) despite family issues. Keep up the good work. Soon you'll be fishing and spending guilt-free time with family and working on other projects.

I really like the wiring label idea. Does the clear heat shrink tubing use heat activated glue, or is it no gluing?

Btw, I'm sure you have looked into battery connectors, but I just learned about anderson clips. I used a set on my camper van project and am playing with the idea of doing it to the boat's too.

Can't wait for you to light all the switches up :)
 

oldrem

Commander
Joined
Nov 7, 2013
Messages
2,002
I really like the wiring label idea. Does the clear heat shrink tubing use heat activated glue, or is it no gluing?


Can't wait for you to light all the switches up :)

No glue - in just shrinks down tight to the wires and protects the labels. I did the same on mine.
 

gm280

Supreme Mariner
Joined
Jun 26, 2011
Messages
14,605
No glue - in just shrinks down tight to the wires and protects the labels. I did the same on mine.

Yes I used the no-glue clear heat shrink tube. You can get glue-inside type of heat shrink as well. But I though the glue may interfere with the printed labels, so I bought 3:1 clear 1/4" diameter (before shrinking) no-glue tube. It will shrink down to most any wire you are trying to label.

For larger wires you can buy larger clear tube. It is everywhere and very cost effective as well. Nice when you are tracing a wire problem to know where each wire goes. No guess work ever.

I guess while I am on here, I can give a little update. Since all the carpet is totally finished, I turned my attentions to hardware. I have installed all the hinges on everything that had a hinge. And that becomes a lot more interesting when you have carpet over the hinge holes.

So I used a very thin scribe to help locate the holes. Once you get two or three located, the rest fall into the hole locations on the hinges. So that's done.

I still have to run the engine wiring harness and the battery main runs. But a few more days, I'll have all the rest of the wiring finished....I hope! I still have to install the control cables and control unit. But the PVC tube is installed for those runs as well. So It will be more of a slide through install. Again, I hope.

I need to do a serious wash of the trailer and after it dries, spray all the bunks with lots of silicon spray before sliding the boat on. Since it has been merely sitting under an oak tree, It really needs a very good cleanup now. Once the boat slides on, it won't be sitting under any tree again.

Until next time, you all have a great day...
 

Ciera2450

Lieutenant Junior Grade
Joined
Apr 8, 2011
Messages
1,049
Progress GM! Did y’all get much of that storm today? It was crazy in Perry for a while not long ago. Branches down all over.
 

gm280

Supreme Mariner
Joined
Jun 26, 2011
Messages
14,605
Progress GM! Did y’all get much of that storm today? It was crazy in Perry for a while not long ago. Branches down all over.

Yes we did. I was actually working in the shop on the boat when the wind came up . It was pretty scary and I headed back in to the house. With the heavy rain and high wind, I wasn't sure I was going to make it into the house. And as quickly as it came, it left as fast. Temps dropped and I decided to not go back out to the shop again. There is always tomorrow... :eek:
 

gm280

Supreme Mariner
Joined
Jun 26, 2011
Messages
14,605
A little update...

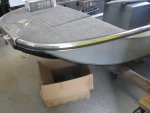
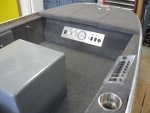
I have been working on the boat. And I installed the rub rail insert after polishing the aluminum rub rail up...again. It fits and looks great. Wefco actually sent almost 10-12 feet extra insert. So you can trust you will not be cut short if you use their products. And it was a piece of cake to install as well. I didn't have to use any tools to install it or slide it in either. I simply squeezed it together and it popped into place like magic. So easy...

I also did some more wiring and installed the spec plate and some other hardware. It really is starting to look like a boat. I still have a lot of little things to install, but it is getting ready for the engine really quickly now.

However, as usual other things can and do stop progression on the boat project. My younger adult son helped me remove and install new rear end wheel bearings and seals on our '98 Blazer. And I have to say that went extremely well and quick. We had two hiccups.

First was removing the little bolt that holds in the cross pin in the read carrier assembly. While that is only suppose to be merely lightly torqued in place, this one was frozen pretty solid. And the typical sockets were starting to round off the edges. Fearing that would be a very bad thing to happen, we switched to a six point socket and played with it for a while and it finally broke loose. And there was some wear on the little bolt. But then the Blazer has near 200,000 miles on it and has never been addresses ever before.

Second hiccup was the bearings themselves. Yes getting the old bearings out was very interesting. After thinking about it for a few minutes, I rigged up a little tool to remove them and it did the job in seconds without any problems. Don't know why they don't sell such a simple tool like that. All I've seen were slide hammer removal tool setups. But it is so much easier with our tool and nothing gets damaged or even marked removing them either.

The new bearings and seals were a snap to install and we finished the job in record time. So back to the boat again now.

I'll post some pictures of the rub rail insert later. The wiring isn't much to see though.
 

Willyclay

Captain
Joined
Sep 8, 2006
Messages
3,259
My younger adult son helped me remove and install new rear end wheel bearings and seals on our '98 Blazer.

Silly me thinking I was the last guy still driving a '98 Blazer. Only 127,500 on my old beauty and going strong. Just returned from an interstate 600+ mile trip loaded to the max with over 20MPG average. Good luck with yours and the boat project!
 

gm280

Supreme Mariner
Joined
Jun 26, 2011
Messages
14,605
Willyclay Yes that is our newest vehicle too. But it looks and drives like new. I keep it in absolutely perfect condition and it really does run great...still!

Problem with buying something to replace it is, they don't make anything to replace it. There is not one American brand mid-size rear wheel drive SUV anymore. There are tons of front wheel drive without frames under them. But no chassis on frame mid-size rear wheel drive SUV. So the ability to pull even typical abilities, is not too good with those front wheel drive offerings. :focus:

Okay here are a few pictures that show some of the rub rail insert. Still working on wiring and such.
 

Attachments

  • photo308211.jpg
    photo308211.jpg
    75.8 KB · Views: 2
  • photo308212.jpg
    photo308212.jpg
    79.1 KB · Views: 2
Top