1976 Tom Boy Boat, 1976 40 HP Johnson Outboard and who knows what Trailer

Mark72233

Ensign
Joined
Jul 11, 2014
Messages
926
Sphelps I have family in Jax I could just trailer the boat there and make it easy on gm😜
 

gm280

Supreme Mariner
Joined
Jun 26, 2011
Messages
14,605
Ha Sam and Mark, I'll put you both on my list of things to do. But mind you, that list is very long presently. I'll let you know when I get close to your times. :pound:

Sam, I didn't put the poly on the cut foam parts in the pictures. I put in on a piece I had laying around. But I do like your idea of the tape, or plastic. I didn't think about that. I was actually thinking about coating them with epoxy and then make the form with polyester. But the tape or plastic sounds doable and easier. We'll see.

Suppose to be a very nice day today with near 70 degree sun shiny weather. So everything is wide open to do. I did do some much needed yard work yesterday as well as boat work. And I still have a little left to do yet with the yard too. So nice weather gets divided attention between all the projects most of the time. Yea that's life. :thumb:
 

gm280

Supreme Mariner
Joined
Jun 26, 2011
Messages
14,605
Okay I am about to make one of the last expensive purchases for this boat project either today or tomorrow. That is when I get the final price and measurements for it. I am buying the Ezy-Glid system and the tilt tube adapter for this boat/motor combination. And it is one of the last two costly purchases I know I have to make yet. So once this comes in, the marine caret is the last item...I think. :eek: :noidea:
 

gm280

Supreme Mariner
Joined
Jun 26, 2011
Messages
14,605
I have an interesting story, but it really isn't about any boat work, well not directly anyways. My Band Saw started acting up throwing pieces off from the wheels. The pieces were actually parts of the tires on the wheels that were old deteriorating and cracking and slinging off when running. Now I have had this band saw for a long time and it has served me very well without any issues over the many years.

So I bought new tires for this band saw. It is a Grizzly 17" 2 HP band saw so parts were very easy to find and order. I removed all the old tire material. It actually wasn't that hard to remove the remaining tire because it was coming off in pieces. Then I cleaned the wheels and they were ready for new tires. The new tires arrived quickly and the instructions stated that you have to take the wheels off, put the new tires in a pot of water and heat them up to at least 150 degrees before TRYING to install them on the wheels. Yea right.

Well I did that thinking this was going to be a piece of cake. Oh man was I so very wrong. :nono: I heated the tire up, took it out of the hot water and tried to install it on the wheel. :frusty: Now I had to use gloves because the tire was hot and I tried to stretch the tire over the wheel. Not going to happen...at least not easily, that 's for sure. It is like you are trying to stretch 14" tire over a 17" wheel. But the package did state it was for a 17" wheel and in particularly my band saw as well. :eek:

So back into the pot to reheat up again. This time I heated them up a little hotter in hopes that the tire got softer and allowed me to stretch it more. :noidea:

I fought with this back and forth a few times of reheating them and stretching them. And finally After many tries, I got ONE of them installed. :clap2:

But I had another one to go yet. :violin:

As expected, it was as unwilling too. Many times of reheating it to try without accomplishing the install. :deadhorse:

Finally I ask my wife to assist and between four hands and stretching until I think brain material was coming out of my nose and ears, we got the second one installed. I can tell you, those tires are not ever coming off those rims...ever. :censored:

So now my band saw is back in operation again. :bounce:


I just had to post this knowing others have band saws and didn't know if they had as much problems with replacing the tires on their wheels.
 

nurseman

Lieutenant Junior Grade
Joined
Jun 2, 2013
Messages
1,045
LOL! that made me chuckle.:lol: Glad you got it back in action.
 

gm280

Supreme Mariner
Joined
Jun 26, 2011
Messages
14,605
LOL! that made me chuckle.:lol: Glad you got it back in action.

Yea nusrseman, some times the little things we do, that are supposed to be so easy, are the ones that create the most difficult scenarios. I honestly thought replacing old worn out tires was going to be so easy. WOW I am now educated. The tires, as they are called, are actually urethane flat material about 1/4" thick and an 1" across. And while they are suppose to outlast the typical rubber versions, they are not very stretchable. Just glad I won't have to deal with them for a decade or two now. :smile:
 

gm280

Supreme Mariner
Joined
Jun 26, 2011
Messages
14,605
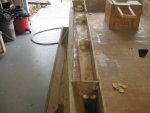
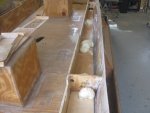
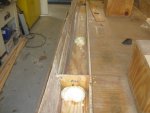
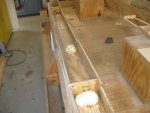
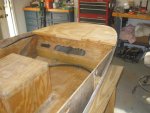
Well I did get some progress towards the boat today. I mixed up some mix and pour foam and poured the rod boxes and storage areas. So now I can seal them up and poly/CSM them and paint. Another of those little issues that I was waiting for warmer weather to do. We managed to up to 72 degrees toady. While that is perfect temperatures for mix and pour foam (optimal is supposed to be 75 to 80 degrees), it is real close and I took the chance. It worked out very well. And being how these rod box areas are really hard to calculate the area to get the mixtures close, I didn't waste too much.
IMG_0099.JPG
Yes I did get some mushrooms, but not too much over fill.
IMG_0100.JPG
Probably could have cut back just a little. But even after doing the floor/hull areas and these boxes, I still have some left over.
IMG_0101.JPG
And the port side too.
IMG_0102.JPG
So now some cleanup and Poly/CSM and ready for paint before I install the top sections and lids.
IMG_0103.JPG
And a shot of the bow platform with the store lid laying in place.

Until next time, you all have a great day... :thumb:
 

gm280

Supreme Mariner
Joined
Jun 26, 2011
Messages
14,605
Yea Sam, I don't think I wasted too much. I will say it is amazing how solid the sides of this hull has become now. And that was what I was hoping for as well. Getting closer to flipping this boat over now. :Smile:
 

gm280

Supreme Mariner
Joined
Jun 26, 2011
Messages
14,605
Today I used a Multi-Max tool to cut the foam mushrooms off and that was probably the best tool I ever used to cut off those mushrooms. It was like cutting air, and absolutely flat and smooth too. Then I used a pneumatic angle grinder with a rotary file bit to grind the foam down low enough to fit the wood plugs back in place. I was going to use the router like before, but the space was limited and therefore the rotary file worked perfect.

Next I mixed up some Poly and Cabisol (yea Peanut Butter but without the hair, chopped fiberglass) and PBed the plugs back in place. So tomorrow I will do a final sanding and then those sections are ready for painting. I also contoured the Master Switch panel section to get ready to do the final finish with that as well. I removed the Styrofoam and replace them with some of the mix and pour foam mushrooms material I cut off the rod box holes. So multi use does it again. So little by little it is coming along. :smile:
 

gm280

Supreme Mariner
Joined
Jun 26, 2011
Messages
14,605
Well I haven't posted in a few days, but I have been doing work on the boat. Amazing how the little things take so much time. I installed more cleats for the rod box openings and am making the actual opening frames now. I think I have them all cut out and built. But now I have to poly and CSM them and then install the lip structures in those frame openings.

I am trying my best to mimic Red Herring's superior work, but probably won't come close. But I have to try. I have read a lot about such things and the tools used to do those things. There is a market for fillet wax or clay and the filleting tools as well. I never knew such things ever existed until reading his boat project and seeing his progress pictures. And I like that a lot.

I tried to see how the typical stainless steel cup holders used the drain feature that they come with. It is a black plastic threaded thing but I can't see how anything would connect up to them. And I searched but no luck. SO..., I decided to take some 1/4 x 20 stainless steel carriage bolts, cut them off to about an inch long, and then drilled a ~ 9/64" holes straight through them and use them for the drain fixtures in the bottom of the cup holders.

Luckily I own a metal lathe and that surely helps with the center hole drilling. Once a drilled the center hole for the drain tube, I then faced the carriage bolt for a total flat face. They actually look and work perfectly. And since they are Stainless steel, no worries either. And I can channel any water out from the holders to keep water out of the boxes now.

So a lot of little things in the work. And with each little thing built, amazing how much dust and such gets in the boat. I must have vacuumed that boat out at least 40 or 50 times now. But if I make any table saw cut, the dust gets thrown everywhere and the boat is a great collection port for it. But my latest Dust Deputy setup sure does help.

I am at the point to paint the storage areas and boxes, but am steal thinking about bed liner coating even though a already bought the paint and hardener for them.

Maybe pictures next update if there is something large enough to show. You all have a wonderful day... :thumb:
 

gm280

Supreme Mariner
Joined
Jun 26, 2011
Messages
14,605
Dust Deputy ? What did I miss ? :noidea:

Sam, After looking for a way to keep the shop vac from clogging up the filter, I saw a video of a "Dust Deputy" cyclone setup for a shop vac. It removes the dirt and dust from even getting to the shop vac. So I bought one and built a setup and I am truly amazed how well it works. I vacuumed for about two hours cleaning up the shop. I vacuumed everything from saw dust to polyester dust and wood chip and you name it. And not any debris was in the shop vac. It all was in the Dust Deputy 5 gallon bucket. For $45 dollars, it will surely pay for itself because you don't have to clean or replace the shop can filters now. I actually posted a Dust Deputy thread on here is you want to see it. I highly recommend buying one. Especially if you are grinding fiberglass. :thumb:
 

TruckDrivingFool

Lieutenant Commander
Joined
Jul 30, 2007
Messages
1,818
GM said:
But my latest Dust Deputy setup sure does help.

Dust Deputy ? What did I miss ? :noidea:

It's basically a small version of a cyclonic dust collector works good for keeping debris out of the filter media in whatever provides the suction in a dust collection system.

Looks different but here's the principle.


Nice one GM, on the woodworking forum I used to visit they would of called that a stealth gloat. Ya know when you slip in a new tool you got by nonchalantly dropping the name of said tool in your post.
 

gm280

Supreme Mariner
Joined
Jun 26, 2011
Messages
14,605
It's basically a small version of a cyclonic dust collector works good for keeping debris out of the filter media in whatever provides the suction in a dust collection system.

Looks different but here's the principle.


Nice one GM, on the woodworking forum I used to visit they would of called that a stealth gloat. Ya know when you slip in a new tool you got by nonchalantly dropping the name of said tool in your post.

TDF, I did an entire thread on my newest Dust Deputy for my shop. If you look you can see the entire start to finish thread on it here on iboats. It is only about couple weeks old if that.

Search; Cyclone Vacuum Design anyone?

And the entire thread is there to read and see. I will admit, I am really glad I chose to just buy one instead of trying to build it from scratch. And it does work amazingly well too! I would most certainly recommend one for even the person just starting out on their boat refurbishing. Grinding fiberglass plugs the typical Shop Vac filter real quick. This removes that dust before it gets to the Shop Vac. :thumb:
 

Woodonglass

Supreme Mariner
Joined
Dec 29, 2009
Messages
25,928
You can make these things really inexpensively if you want out of almost any trash can our bucket and a few fittings.

FSRP8CKGSVJVDYT.MEDIUM.jpg


http://www.instructables.com/id/Cyclonic-Dirt-Separator-Using-Off-the-Shelf-Parts/?ALLSTEPS

As we all know the bigger problem is collecting the dust when it come off the Grinder/Sander and getting it to the collector!!! Sorry for the HI Jack!!!
 

gm280

Supreme Mariner
Joined
Jun 26, 2011
Messages
14,605
You can make these things really inexpensively if you want out of almost any trash can our bucket and a few fittings.

FSRP8CKGSVJVDYT.MEDIUM.jpg


http://www.instructables.com/id/Cycl...arts/?ALLSTEPS

As we all know the bigger problem is collecting the dust when it come off the Grinder/Sander and getting it to the collector!!! Sorry for the HI Jack!!!

Ha WOG, I like the side inlet part. Where did you get that? With my bought cyclone Dust Deputy, you can see through it somewhat and you can see the debris spinning around very fast as it goes into the bucket. Actually fun to watch.
 
Last edited:

TruckDrivingFool

Lieutenant Commander
Joined
Jul 30, 2007
Messages
1,818
GM said:
Search; Cyclone Vacuum Design anyone?

Sorry I don't get out of the dry dock very often, Nice job, looks like it works quite well (didn't doubt it would) and still gloat worthy.
 

Woodonglass

Supreme Mariner
Joined
Dec 29, 2009
Messages
25,928
Ha WOG, I like the side inlet part. Where did you get that? With my bought cyclone Dust Deputy, you can see through it somewhat and you can see the debris spinning around very fast as it goes into the bucket. Actually fun to watch.
The link is at the bottom of the post!!!http://www.instructables.com/id/Cyclonic-Dirt-Separator-Using-Off-the-Shelf-Parts/?ALLSTEPS

I have a bunch of these!!! The Thein Dust Collector is the Ultimate DIY'r shop built and you and google that as well. I'ts fairly easy to construct and he did a TON of research to get the measurements just right to provide ultimate suction power.

http://www.jpthien.com/cy.htm
 
Last edited:

gm280

Supreme Mariner
Joined
Jun 26, 2011
Messages
14,605
The link is at the bottom of the post!!!http://www.instructables.com/id/Cycl...arts/?ALLSTEPS

I have a bunch of these!!! The Thein Dust Collector is the Ultimate DIY'r shop built and you and google that as well. I'ts fairly easy to construct and he did a TON of research to get the measurements just right to provide ultimate suction power.

http://www.jpthien.com/cy.htm

Ha WOG, I didn't know you liked Instructables. That is one of my favorite sites to visit daily. Between iboats and instructables, I can read for hours on end.

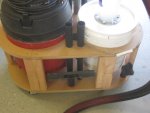
This is what a finished up with for my Dust Deputy build. I may paint it one day after all the other projects start to whine down. But this works really well for me. DD-1.jpg

I built a unit that holds the shop vac and the Dust Deputy so it won't be pulled over and it is on castors and rolls around with ease. DD-2.jpg

A couple more different views. I even drilled holes for all the usual attachments to keep everything in one unit. IMG_0108.JPG

As you can see I even made some holders for the smaller attachments as well. I bought a nice 12' hose and it works with all the attachments.

In order to get the PVC sections to friction fit, I bought some 2" thick wall PVC and then turned pieces down on the lathe to fit perfectly. And then I used standard 2" 90 degree elbows to plump the setup.I've been using it now for a week or so and love it. Very rugged and very portable. :thumb:
 
Last edited:
Top