1976 Tom Boy Boat, 1976 40 HP Johnson Outboard and who knows what Trailer

hadaveha

Petty Officer 1st Class
Joined
Mar 17, 2009
Messages
389
I have not looked at your boat in awhile great job, she's really looking good. Would you say so far it's cost your about what you would have thought to fix her up
 

gm280

Supreme Mariner
Joined
Jun 26, 2011
Messages
14,605
hadaveha, that is a very good question. I haven't actually kept the sales receipts but I'm thinking somewhere between$1500 and $2000 dollars total for everything including the trailer, engine and boat.. I have only a few items to finish purchasing yet and that is the stick steering assembly and the carpet. Everything else is near about all ready bought. Just a few small hardware items and that's about it... So totally finished, probably between $2000 and $2500 to $2800... And if you've recently looked at most any boat, new or used, that is a very good price for a totally solid refurbished boat, engine and trailer without any problems these days. As for what I thought it would take to do this project. I have to honestly say, I really had no idea going into it. And that is because I had no idea what things really cost. I never ever bought Polyester 435 laminate resin and 1708 clothe and CSM or even Cabisol and things like that. So the cost wasn't any issue with me starting ou,t. And the cost still isn't an issue with me as well. I look at this like a hobby/project. Because that is how I see it. Have I truly enjoyed this project? Yes and no. YES when everything seems to be moving along nicely, and NO when there are stop gaps that make me wonder what am I really doing. But that is the same with most any long project. Would I do it again? Absolutely! In fact I am looking for a true Bass Boat for the next project...only after I finish remodeling the inside of the house first.

Today I started making the rod boxes' side supports between the side of the hull and the side of the rod box. And as usual, the hull side is anything but straight. So little side supports are in the make. I would have finished them up, but we have a really bad storm presently so I quit for today...
 

gm280

Supreme Mariner
Joined
Jun 26, 2011
Messages
14,605
As everybody can see, it has been a while since my last post. But it isn't that I haven't been working. Just that I have been work on four projects at the same time...and I really really don't like doing that. BUT, the weather has been really nice with low humidity and temps as well. So I decided to get everything I have sitting around and do the final sanding, priming and painting on them. So I have been working my tail off doing just that. I have a trolling motor primed and painted now with my 27 year old edger engine being rebuilt from a broken rod and case. It is primed and painted as well (I actually bought all the parts for it for a song). I also have a mower deck that I disassembled and cleaned, sanded, primed and painted too. And of course I am building the rod boxes in the boat. So my days have been filled with tons of things going on. Oh I forget, I also painted my portable compressed air tank as well. So I have five projects going on. But, after tomorrow, I should be near finished with a few of the projects and can go full time on the rod boxes again. It is just the weather has been perfect for painting and I decided to get all those parts primed and painted. Tomorrow all I have to do is shoot the clear coat and I am done with all those parts. Then merely assembly everything and that really does clear my schedule of project sitting around waiting for good weather... YEA! :whoo:
 

gm280

Supreme Mariner
Joined
Jun 26, 2011
Messages
14,605
Well once again all didn't go as planned. :facepalm: I did clear coat a lot of items, but ran out about half way through. Imagine that! I was thinking I had more in that gallon can of clear coat, but I got one 28oz cupful for my HVLP spray gun. Soooooo, I have to wait until tomorrow morning when the PPG Auto paint store opens and buy some more JC661 clear coat to finish the job... :frusty: I do have a quart of JC630 clear coat material, but I have no idea if those two clear coat materials are compatible. And since they both take totally different hardeners, I better wait and do this right... Both clear coats are two part finishes and are amazing how shiny they come out. The parts look like you dipped them in glass when they are cured... So until tomorrow.............

You all have a great evening... :thumb:
 

sphelps

Supreme Mariner
Joined
Nov 16, 2011
Messages
11,468
Well if the lawn equipment turns out half as nice as your o/b it will be a shame to use em and get them all dirty !
 

gm280

Supreme Mariner
Joined
Jun 26, 2011
Messages
14,605
Yea Sam, I realize that what I'm painting really isn't worthy of such finishes. But I am hooked on doing things that way now and the practice is helpful. I have bought more JC661 clear coat this morning and already sprayed the first coat on a lot of parts. As they cure off, I will flip them and coat the other side. I'll post some pictures, but they are really a lawn mowing deck, a 3HP old Tecumseh engine, a converted Propane tank to an portable air tank, and a Minn Kota trolling motor. Some of those parts have been cleaned and primers for months, waiting for the paint and clear coat finishes. So this should clear out my shop space once they are reassembled again... I do things like that because it is a major event to get everything out and spray any type primer, paint or clear coat. So I let things accumulate to the point that it is worth the time to get everything ready.

So until pictures are ready to post, you all have a wonderful day...:thumb:
 

bonz_d

Vice Admiral
Joined
Apr 22, 2008
Messages
5,276
gm, following your paint jobs and explanation of these little jobs makes me think of where I'm at. I bought a spray gun last year and haven't used it much but I'm nearing a point to do so. Not a lot of experience with it yet and have been a little reluctant to try it on the boat for fear of messing it up. Though the old metal cabinets I'd done for the garage didn't turn out too awful.

Soon I'll be ready to paint the Sea Nymph, I hope, starting in the interior. Though I haven't tried it yet I was thinking of trying some of that DTM Rustolium that my wife is able to bring me from work. It's a water based acrylic enamel which is why I haven't used it yet in a boat though it seems to work very well on all the trailers I've used it on so far. Would like to try spraying this as a test and also for practice though I've also thought about trying the roll and roll method also because I'm thinking of using that method on the exterior with a 2 part paint. So still undecided as to which method I'll use.
 

gm280

Supreme Mariner
Joined
Jun 26, 2011
Messages
14,605
bonz_d, I say go for it. Just remember, the worst you can do is mess it up. And that is all that can happen is everything fails. And then you can easily sand it and try again. That's the beauty of it. I say if I can do it, anybody can. And who knows, you may be a natural and love spraying things like I do. I like using the automotive PPG paints because you have total control over every aspect of the finish. If you like, they make every color you can ever think of in any quality type paint you want. And they have every type weather possibility covered with the proper primers, paints and clear coats for hot humid days to cooler dry days. They even have one stage paints if that's the way you want to go. I like the two stage, base coat clear coat, because I can see the finish is superior to any thing out of a rattle-can type paint. The finishes are so nice that oil and gas doesn't even phase them... So go for it bonz_d... :thumb:

I did finish up with almost everything now. I still have a few small parts that are for my metal lathe yet to paint and clear coat. But I can easily do them with a small air brush setup. So I am attaching some pictures for you all to see. And as you look, they are merely general parts for the engine, the lawn mower, the air tank, and the Minn Kota trolling motor. I bought the trolling motor for a song and totally disassembled it and bought new bearings and parts to refurbish it back to new looks and operation. I know I will take it and blue light it with the Motor Guide III I did the same things too. So here are the shots:
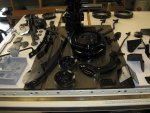
Paint (6).JPG
Here are some of the many parts I did...Yea a mixture of everything...
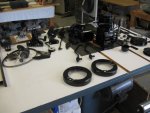
Paint (1).JPG
Different angle...
Paint (2).JPG
Some of the Minn Kota parts.
Paint (7).JPG
Some more Minn Kota parts. You can see the air brushed labels and the LAZER cut nomenclature plates on the head unit.
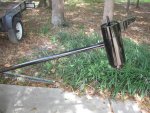
Paint (4).JPG
The lower foot section curing...
Paint (3).JPG
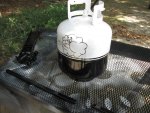
My converted Propane tank to an air tank. Seems they wouldn't refill this one because of the new regulation on propane tanks now. o I converted it to a portable air tank for filling tires and such. Just need to install the top fittings now.
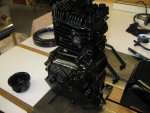
Paint (5).JPG
And of course the 3HP Tecumseh engine I am rebuilding for my broken edger. I had a rod break in multiple places and come out of the casing. So all the new parts were bough and ready for reassembly now...
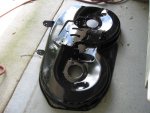
Paint (8).JPG
And last the lawn mower deck. Yes it was an old one with much rust and pits, but I cleaned it, sanded it, and primed it, painted, it and clear coated it. I should get a few more years out of it now...I hope.

So there it all is. And now I can get back to finishing the rod boxes and flip the boat hull for its' boat paint job...

Until next time, you all have a magnificent day... :thumb:
 

gm280

Supreme Mariner
Joined
Jun 26, 2011
Messages
14,605
I have a great question for the experienced ones on these forums. I finally was able to locate a tube of 3M 5200 Marine adhesive, and that was a real search around where I live. My question is, I know for certain I won't use the entire tube the first time I open it. So how do I keep it from turning solid in the tube until I can use it again? I have tried so many things suggested from different folks about keeping such tubes sealed until future use, but nothing has really work very well. And good ideas? :noidea: :help:
 

sphelps

Supreme Mariner
Joined
Nov 16, 2011
Messages
11,468
Well I usually just stick a screw in the plastic tip and throw it in the drawer . If it sits for a long time it usually only hardens in the tip so I just dig it out and keep using it .. I have used several tubes over the years and I can't ever recall having to throw any away ...
Home Depot usually has it on the shelf ....
 

Woodonglass

Supreme Mariner
Joined
Dec 29, 2009
Messages
25,928
Golf Tee with vaseline in the end, Saran Wrap (the entire tube to get a total air tight seal), Zip Loc Bag, Refrigerate. That's worked best for me!!
 

gm280

Supreme Mariner
Joined
Jun 26, 2011
Messages
14,605
Well I usually just stick a screw in the plastic tip and throw it in the drawer . If it sits for a long time it usually only hardens in the tip so I just dig it out and keep using it .. I have used several tubes over the years and I can't ever recall having to throw any away ...
Home Depot usually has it on the shelf ....

Thanks Sam. Actually Home Deport is where I found this tube. Other stores don't carry it around where I live and we usually shop Lowes. They don't carry it either. I am thinking about something like you suggested and then put it in a sealed Z-lock type plastic bag and such the air out and store it until I need it again... Might work... :noidea:
 

bonz_d

Vice Admiral
Joined
Apr 22, 2008
Messages
5,276
Our Home Depot doesn't carry it. They have a Loc-Tite product. To find it locally I have to go to the Big Box Marine store.
 

gm280

Supreme Mariner
Joined
Jun 26, 2011
Messages
14,605
WOG, your idea sound doable as well. I think anything that can keep air from entering the glue is the way to go. Between tube glues (liquid nails, caulk, silicones, 5200, etc.) and PVC glues, Gorilla glue, Super glues and things like that, most folks get one usage from them. But the second time we need to use them...all dried up or gone solid! And notice how you have to buy such produces in certain size tubes and cans sizes as well. Marketing...isn't it amazing and such a waste.

bonz_d, Our local Lowes is suppose to carry the 3M 5200. But looking for it as often as I have, they are a no go! The local Home Deport did have it and shockingly was cheaper then online. I think it cost me $17.48... So I need to use it, but don't want to have it cure up between uses. So it is not only 3M 5200 I am concern with, but a lot of such products and their packaging. JMHO!
 

gm280

Supreme Mariner
Joined
Jun 26, 2011
Messages
14,605
Here is a little progress for today...

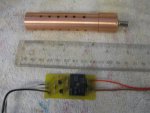
As I was looking around the shop today, I decided to assemble my auto bilge pump circuit assembly. I posted this previously, but without any parts to show or back up circuitry. So here is what I did to build an electronic auto bilge pump system. And before anybody gets too excited thinking such a system will drain the battery, it doesn't draw any current unless it senses water...period. So it can sit there for months or more without any battery drain... Here it is and I've used this same circuit for decades without even one issue before...
Auto Bilge (1).JPG
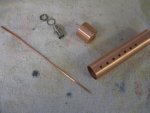
I started with a piece of 1" standard copper tube/pipe, 3/4" or even 1/2" would work also. And cut it off for the size I needed for my boat. Then I drilled (28) 1/8" size holes through it at 90 degree marks. If you set it up to drill one set, you simply drill through both sides so it goes really quick. And the reason for so many holes is so it can allow water in quickly and drain quickly as well, but still keep out leaves, lures, hooks and whatever that could be in any boat. Then I bought a copper top cap. And I bought a standard BNC type connector. Usually you don't see such a connector in a boat environment, but since the current for this circuit is so minuscule, it worked great for what I wanted to do.
Auto Bilge (4).JPG
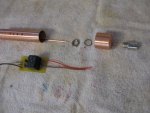
Then I drilled the top copper cap out so that the BNC connector would fit in it. And I took a piece of standard house wire (the bare 12 or even 14 gauge ground works great) and straighten it out to fit the BNC center pin. As you can see that allows me to assembly the sensor with very little effort. And then I built the support circuit for this system. You can see the little PC board I made and stuffed with the few parts needed. The little board is really small and I will probably encapsulate it in some polyester risen in a small plastic box to water proof the entire system.
Auto Bilge (2).JPG
A little closer picture of the small circuit. A total of six parts and easy to make...
Auto Bilge (6).JPG
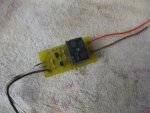
Here is the circuit board, and the assembly together. As you can see it is very compact and ready to do its' job. The actual circuit board mounts inside the helm with wires going to the sensor assembly.The center pin in the BNC connecter has a copper wire sitting in the center of the copper tube. When water gets in side and contacts the wire, it singles the circuit to turn on the bilge pump and it drains the water out of the boat. And once the water falls below the wire again, it turns off. So easy to use and so much better then any float switch I've ever seen... But that is just my opinion. You can control the level it turns on with trimming the center wire height/length. Can't get any easier. If anybody wants the schematic or board layout, let me know and I will post it...

You all have a great day... :thumb:
 

bonz_d

Vice Admiral
Joined
Apr 22, 2008
Messages
5,276
We used that same setup on my old job for the water tanks that would supply the cooling towers on our evap units. Nice job!
 

Woodonglass

Supreme Mariner
Joined
Dec 29, 2009
Messages
25,928
Now THAT, my Friend, is FREAKING KOOL!!! Send me a PM with the Details!!! NOW !!!!!
 

gm280

Supreme Mariner
Joined
Jun 26, 2011
Messages
14,605
Okay, I will post the actual schematic and PC board layout for those wanting to duplicate the circuit.

Auto Bilge Switch.gif

As you can see the circuit is merely a very high gain Darlington Pair Configuration amp that turns on a relay when water is sensed at the water sense probes. Most any NPN type transistor can be used. The R1 and R3 resisters are 1k ohm and 1/4 watt type. Those resisters are there to control the current at the base of Q1 transistor. R3 is there so that if there is a short circuit, it won't draw much current and fry the circuit. R2 is also a 1k ohm 1/4 watt type. It controls the collector current to the base of Q2. So the current at the water sensing probes is very miniscule, typically 6 milliamps. When transistor Q1 turns on, it also turns on transistor Q2 and that transistor pulls in the relay to power up the bilge pump. The diode is there to dampen the back EMF that develops across the replay coil that could damage the transistor. So all in all, a very simple effective and cheap circuit that when water touches the sensing probes, the bilge pump turns on and pumps the excess water out. And without any water contacting both sensor probes, there is ZERO current draw. It just sits there waiting... The reason I decided to use a standard BNC type connector is because you can buy pre-made molded BNC cables that will attach at the probe sensors and go to the circuit board input. The actual circuit board measurements are 1" by 2.25". So if you enlarge the pattern to that size, the parts will fit perfectly. I will wire mine up using a SPDT switch for both manual operation and auto operation. And of course via a fused power input as well. I have used this circuit for decades and never has any problems with it. A very nice easy setup.

Have a wonderful day... :thumb:
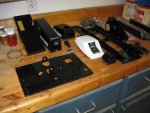
 

sphelps

Supreme Mariner
Joined
Nov 16, 2011
Messages
11,468
Okay, I will post the actual schematic and PC board layout for those wanting to duplicate the circuit. So all in all, a very simple effective and cheap

Have a wonderful day... :thumb:
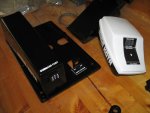
Uhmm , simple .... :twitch: For you yes ! I got lost right after "As you can see " ... :lol:
Very cool stuff gm ...
I have decided I'm gunna load up the Manatee and haul it to your place and let you wire it up in your spare time ... ;)
 

gm280

Supreme Mariner
Joined
Jun 26, 2011
Messages
14,605
Uhmm , simple .... :twitch: For you yes ! I got lost right after "As you can see " ... :lol:
Very cool stuff gm ...
I have decided I'm gunna load up the Manatee and haul it to your place and let you wire it up in your spare time ... ;)

Sorry Sam :sorry: I didn't mean for it to be complicated and was thinking it was simple. But that is because the circuits I usually design and built are so much more complicated, that this seemed really simple to me, and the usual other Engineers I use to work around when I was still working. I am certain they make a marketable version for the consumer to simple buy and hook up if you want such a system. It is just that I've heard so make folks talk about their float switch didn't work and their boats were full of water, or the float switch got stuck on and drained their batteries. So this type sensor can't do those things and works without moving parts... :noidea:
 
Last edited:
Top