1976 Tom Boy Boat, 1976 40 HP Johnson Outboard and who knows what Trailer

gm280

Supreme Mariner
Joined
Jun 26, 2011
Messages
14,605
Murphy's or Mabry's law, one of them gets it every time... :facepalm:

Today instead of a usual update I have a question needing some ideas and/or suggestions. I am presently at a point with the seat boxes to install them. But I also want to wire them before hand for the reed switches and LED lights. But I also want to sand them and paint them (inside) as well for a nice smooth interior. Problem is, I still haven't polyed them in. So if I paint them, the polyester will not secure them as well (at least in my thinking). So what are my options here, install and then paint, or wire and install and paint later on, or what? :noidea:
 

bonz_d

Vice Admiral
Joined
Apr 22, 2008
Messages
5,276
I think I would install then paint. Only because you are glassing them in. If this was a screw down or rivet in I would paint 1st.
 

gm280

Supreme Mariner
Joined
Jun 26, 2011
Messages
14,605
Yea guys that's what I thought this morning while getting my shower as well. Otherwise the poly PB and tabbing wouldn't work as well. So I think I will fix everything in to where it will go and then sand them smooth inside and then install. Then paint later on and wire the parts in for final... Thanks for the ideas and suggestions. Seems we all agree on it! :happy:
 

gm280

Supreme Mariner
Joined
Jun 26, 2011
Messages
14,605
Yesterday I did order a lot more stainless steel hardware for the boat, of course, to keep things rolling alone. I just finished cutting the yard for this week so now I get back to working on the boat after lunch. I plan on sanding the seat boxes and hope I can get them PBed in place. But I still have to make some little angled attachments for the LEDs I am installing so when it gets dark out, I can open the seats and see inside. I am also installing individual reed switches to control the lights when opened. Same ideas for the front storage, live well and rod boxes. But everything will be LEDs that I already purchased, and I will also have them all switched via the master panel switch at the helm, so they can't accidently be left opened and run the battery down... So we will see how far I get. I also have to cut out the panels for the rod boxes too... :whoo:

You all have a great day... :thumb:
 

gm280

Supreme Mariner
Joined
Jun 26, 2011
Messages
14,605
Daily update...

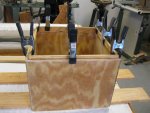
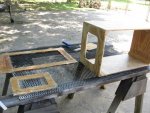
It seems you get to a point that there are a lot of little things that needs done. And I am at that point presently before starting to cut out the rod boxes. The last two days I did some things to get the seat boxes further along to installation. I took my 2" sanding disks (36 grit) on the pneumatic angle grinder and sanded down the high prickly spots with the 1708 poly reinforcements to the inside of the seat boxes. And then I cut some strips and glued them in place so once they cure, I can sand and seal them to help keep water out of the seat box storage areas. Little things. But they do add up to a lot of time consumed. I also finished 1708 and poly reinforcements to the inside of the live well box as well. So it is like a rock now and near ready to be installed too. Once I get these boxes to the point of needing paint, then I will install and PB them in place with tabbed too... So here are the little things pictures...
Seat base tabs (1).JPG
Oh yea clamps, you can never ever have too many clamps. That lip around the seat box will get poly sealed and then will make it extremely hard for water to get inside. Not impossible, but hard...
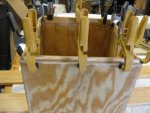
Seat base tabs (2).JPG
All types of clamps used. I also cut some angle sections out of the lower edge of the wood strips for the LEDs to fit. So when you open the seat box, a reed magnetic switch will switch on the LED lights and it will light up without glaring you in the face because of the slight angle they will be installed... Little things...
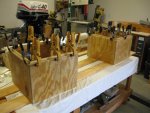
Seat base tabs (3).JPG
You can see a very cluttered shop and of course the Johnson engine waiting for this boat to get finished... I try really hard to keep it in some type order, but just one wood cut and out goes that effort... Sure do need to invest in a good dust collection system...
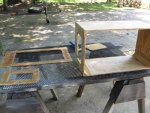
Seat base tabs (4).JPG
At least I was able to poly and 1708 this outside and keep a lot of dust at bay. You can see some parts with their hair that needs cut yet...
Seat base tabs (5).JPG
Another angle so you can see the access panel hole for the live well. I thought if I included a nice access panel to get to the hoses and drain, it would make things better if I ever needed to access them. I also have a panel going in there for the person at the read seat to use a power outlet or USB charging port.

So a lot of little things, but they make the boating experience a little better and more comfortable...hopefully... :noidea:

Until next time, you all have a wonderful day... :thumb:
 

sphelps

Supreme Mariner
Joined
Nov 16, 2011
Messages
11,468
Lots of little things add up to a few big things ! Keep on truckin gm ! ;)
 

jigngrub

Fleet Admiral
Joined
Mar 19, 2011
Messages
8,155
I'm sorry to see that you opted to install the decking before pouring the foam, you could've deleted the voids, pits, and unfilled spaces that collect water and promote rot. But since this is your first resto, you'll learn from your mistakes.
 

gm280

Supreme Mariner
Joined
Jun 26, 2011
Messages
14,605
I'm sorry to see that you opted to install the decking before pouring the foam, you could've deleted the voids, pits, and unfilled spaces that collect water and promote rot. But since this is your first resto, you'll learn from your mistakes.

jigngrub, that's odd you would say that being how months ago I suggested doing exactly that. I wanted to pour the mix and pour foam and even asked about that option on here to see what others thought. And the overwhelming response was to not do that. And the reason was that when you pour the foam, it creates a skin like surface. And that skin like surface actually helps with sealing against water intrusion. But if you cut that skin surface off, water could soak in easier. So the opinions were to not pour and trim the top. In fact it was suggested to do exactly like I've done. So it is interesting now to hear you say differently. I also watched friscoboater's videos and thought that was a good way to do the pour as well... So now I have mixed feelings. How does a newbi seriously know what to do with different opinions? :noidea:
 

sphelps

Supreme Mariner
Joined
Nov 16, 2011
Messages
11,468
Gm , I'm thinking jig was suggesting installing the deck temporary . with plastic wrapped under it to keep the foam from sticking . It will still form a skin . Then take the deck up to check for voids and fill if any .
IMHO the way you have done it is fine I see no mistake ... You should have plenty of foam in there to float it if something were to happen on the water ...
 

gm280

Supreme Mariner
Joined
Jun 26, 2011
Messages
14,605
Gm , I'm thinking jig was suggesting installing the deck temporary . with plastic wrapped under it to keep the foam from sticking . It will still form a skin . Then take the deck up to check for voids and fill if any .
IMHO the way you have done it is fine I see no mistake ... You should have plenty of foam in there to float it if something were to happen on the water ...

Thanks Sam, I guess I could have done that, but I guess that isn't going to happen now... :facepalm: So maybe it will still work out okay. Hate to know I didn't do this properly and it will not last long... :noidea:
 

Dixiedawg

Cadet
Joined
Jul 27, 2015
Messages
12
Hi gm280, I'm new here to iboats and a fellow middle Georgian (Macon). I found your thread a few days ago, and have read all through it and your trailer and Johnson outboard rebuild threads. I am impressed with your work and attention to detail! Looking forward to seeing the finished product! Good luck!
 

gm280

Supreme Mariner
Joined
Jun 26, 2011
Messages
14,605
Hi gm280, I'm new here to iboats and a fellow middle Georgian (Macon). I found your thread a few days ago, and have read all through it and your trailer and Johnson outboard rebuild threads. I am impressed with your work and attention to detail! Looking forward to seeing the finished product! Good luck!

Ha Dixiedawg, thanks for the complements. I try to do good work and the way I would like things to be. Some times it works out well and other times not so good. But I enjoy doing the work and fixing things back to new or better... Tag along, I have lots more coming...
 

gm280

Supreme Mariner
Joined
Jun 26, 2011
Messages
14,605
I have to say that most of my working career was geared around designing and manufacturing both electronic circuitry and equipment design. And I love doing that and enjoyed my career very much. And for the most part, really didn't have too much trouble designing things that others were very well pleased with. However, I am presently at near a standstill with the panel designs for this boat. I know what I will have as gauges and circuits, but for some reason I can't layout a design that both pleases me and really looks good. So I am still designing those panels being how I am at a point to finish building the supporting structures for them. So as I layout a panel and then re-layout it out again and again, I still haven't hit the nail on the head yet... I guess I'll work on other things while I can and the panel designs in the evening... Wish me luck... :thumb:
 

Woodonglass

Supreme Mariner
Joined
Dec 29, 2009
Messages
25,928
May the Panel Design GODS look favorably down upon you and open your eyes to a Heavenly Design!!!!:hail::angel::pray:
 

gm280

Supreme Mariner
Joined
Jun 26, 2011
Messages
14,605
May the Panel Design GODS look favorably down upon you and open your eyes to a Heavenly Design!!!!:hail::angel::pray:

Ha Thanks WOG, I can certainly use everybody's help...

I layout the panel with Toggle type switches (all Marine types), and then change to Rocker type switches, and then the latest designed Marine Rocker switches, then Oval switches and then back to toggle switches. And nothing hits me as nice looking like it usually does. But I have everything in the computer program and can manipulate things fairly easy. So back to the program. :facepalm: Oh, did I tell you we have a huge LASER cutter/engraver? So I can literally make most anything with these designs. I'll get there... :thumb:
 

bonz_d

Vice Admiral
Joined
Apr 22, 2008
Messages
5,276
I'm too simple minded to do all that! I just like the old fashioned 3 position push/pull switch for my lights.
 

sphelps

Supreme Mariner
Joined
Nov 16, 2011
Messages
11,468
Its still gunna be a stick steer right ? Kinda curious on where the panel is going .. Somehow I picture an air boat kind of setup ...
 

gm280

Supreme Mariner
Joined
Jun 26, 2011
Messages
14,605
Its still gunna be a stick steer right ? Kinda curious on where the panel is going .. Somehow I picture an air boat kind of setup ...

Yes Sam, It is still going to be stick steering setup for certain. But I need three panels (at least ) designed. One at the throttle control area. That one will allow me to control the starting of the engine, choke control, horn, all the lighting capable circuits and of course the master power switch for everything and the kill switch. One for the gauges and other circuits like trolling motor outlet, tachometer, battery voltage levels, fuel level, live well timer, a power outlet, PWM circuit for the trolling motor, and Depth finder and things like that. And then one at the live well for the rear passenger to have access to a powered outlet for standard 12 volt cigarette lighter and USB port for plug in accessories. I have a general idea, but making it all fit AND look proper is still up in the air. But I have to get it finish so I can build the back supporting structures as needed. I'll get it all together, just have to do a little more thinking so I don't forget anything...
 

Woodonglass

Supreme Mariner
Joined
Dec 29, 2009
Messages
25,928
Hey, I was thinkin, why don't you make it black box wireless and then you could control it all from your iPhone/iPad!!!!:D:eek::facepalm:
 
Top