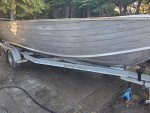
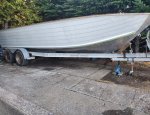
1976 Mariner Rebuild

Watermann

Starmada Splash of the Year 2014
Joined
Jan 12, 2013
Messages
13,787
I painted all my removable parts like consoles and SW outside the boat, way easier to get a good paint job having 360 walk around ability. What are you using to apply the paint with?
 

HypnoCraft

Petty Officer 3rd Class
Joined
Aug 30, 2018
Messages
94
I painted all my removable parts like consoles and SW outside the boat, way easier to get a good paint job having 360 walk around ability. What are you using to apply the paint with?

ah that makes a lot of sense. I figured if its in place I am less likely to scratch it. I was going to spray it but I decided to roll and tip. Although rolling only has left me with a better finish. I thinned with 5% mineral spirits per instructions in hot weather. I'm not going for an amazing showroom finish, just coloured. I am also planning on a cut and wax after if i feel like it later on. We will see how it turns out!
 

classiccat

"Captain" + Starmada Splash Of The Year 2020
Joined
Dec 20, 2010
Messages
3,412
Lookin' good! :thumb:

I had a heck of a time with roll-n-tip on the splashwell due to all of the angles.
 

HypnoCraft

Petty Officer 3rd Class
Joined
Aug 30, 2018
Messages
94
Lookin' good! :thumb:

I had a heck of a time with roll-n-tip on the splashwell due to all of the angles.

Yeah, the splashwell and back of the transom are hard to paint. I wish I had an enclosed booth to spray in. I have all the other equipment, I just can't spray out in the open and get paint everywhere. Plan is to try my best and live with the scrappy looking back area.
 

HypnoCraft

Petty Officer 3rd Class
Joined
Aug 30, 2018
Messages
94
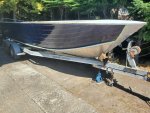
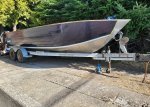
I primed both sides today with Rustoleum Marine Metal Primer. First I scuffs the entire surface with green scotchbrite pads, then rinsed, sprayed with vinegar, rescuffed, rinsed, dried, wiped with wax and grease remover, then rolled and brushed on the primer.

20200718_173710.jpg

20200718_200759.jpg

It didn't go on flawlessly, but based on the splashwell it looks like 2 or 3 coats of colour really flow out nicely. You really feel the size of a 22" boat when your hand rolling it... :chargrined:
 

SHSU

Lieutenant Junior+Starmada Splash Of The Year 2019
Joined
Mar 8, 2017
Messages
1,727
Man, I had a time hand rolling my 16ft with epoxy. 22 doesn't sound like fun either...

Looks good though and we are are own best critics.

SHSU
 

Watermann

Starmada Splash of the Year 2014
Joined
Jan 12, 2013
Messages
13,787
My hats off to you doing that work outside using a roller over rivets and on lap sides. I'd have a huge mess. :eek:
 

HypnoCraft

Petty Officer 3rd Class
Joined
Aug 30, 2018
Messages
94
My hats off to you doing that work outside using a roller over rivets and on lap sides. I'd have a huge mess. :eek:

Its quite a job! The 5% mineral spirits really helps roll it out though!

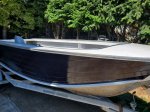
I put the first coat on a day ago. Looks nice!

Click image for larger version  Name:	20200720_122059.jpg Views:	1 Size:	914.8 KB ID:	10904531Click image for larger version  Name:	20200720_141645.jpg Views:	1 Size:	808.5 KB ID:	10904530

Quick question as well...

What is the usual material for the interior sides? I was thinking 1/2"
 

Attachments

  • 20200720_122059.jpg
    20200720_122059.jpg
    914.8 KB · Views: 7
  • 20200721_092831.jpg
    20200721_092831.jpg
    1 MB · Views: 7

SHSU

Lieutenant Junior+Starmada Splash Of The Year 2019
Joined
Mar 8, 2017
Messages
1,727
Looks really good. The shine can really be seen.

As for Orange peel, its done for "Non Slip" grip. lol

Sides I used left over 1/2 BCX

SHSU
 

Watermann

Starmada Splash of the Year 2014
Joined
Jan 12, 2013
Messages
13,787
Yeah that looks really good from here :thumb: I know about pics making things look off but that's crazy!

Same here 1/2" ACX with batting and vinyl
 

HypnoCraft

Petty Officer 3rd Class
Joined
Aug 30, 2018
Messages
94
Thanks for the compliments and confirmation on 1/2"! I have a kind of wacky idea and I am not sure if it will cause any problems. I would like to bring the sides up and attach them to the top rail of the boat to cover the corrosion holes left from steel fasteners. Is this a terrible idea or worth trying? I don't plan on upholstering the top rail anytime soon so I thought that might be a nice cover up. Also, it would make the boat more ridged, but that could be bad as its transferring force into 1/2 ply, not sure..

image_335932.png
 

Watermann

Starmada Splash of the Year 2014
Joined
Jan 12, 2013
Messages
13,787
My V5 was designed factory just like that with the side panels from deck to gunnel and a storage pocket cut out. Really adds rigidity if you ask me.
 

SHSU

Lieutenant Junior+Starmada Splash Of The Year 2019
Joined
Mar 8, 2017
Messages
1,727
I did the something similar with my SS16, but mine was at the bottom where you have foam.

SHSU
 

HypnoCraft

Petty Officer 3rd Class
Joined
Aug 30, 2018
Messages
94
Thanks for the opinions, I will have to think on it a bit and then make up my mind I suppose.

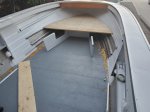
I took my RR and gutter rail and painted them with an aluminum coloured spraypaint and then clear coated them with a 2K to make them look uniform and new. The 2K should help the paint hold up for some years to come I hope, we will see. I then put the gutter rail on and temporarily put the RR on. I need to pickup some 1" rivets to put the RR on because I am not fond of the long SS bolts they originally used.

Click image for larger version  Name:	20200725_141522.jpg Views:	1 Size:	661.8 KB ID:	10906477
That RR and gutter rail really makes the boat look sleek.


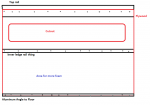
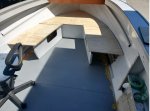
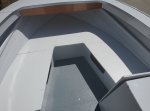
Also, today I got to work on cutting out the plywood for the bow seat. Half of it is fit and cut, I still have to cut wings and biscuit them together to get the full seat. I will also cut out the center section once its all together. I used a radial method for laying out the shape of the bow.

Click image for larger version  Name:	bow.png Views:	1 Size:	7.8 KB ID:	10906479


Once the bow seat is done I can work on getting the starboard console put in place and the plywood cut for that. I am just going to leave the other side as is because I don't have a console for it yet, but I will get one made eventually here.
 

Attachments

  • bow.png
    bow.png
    7.8 KB · Views: 7

SHSU

Lieutenant Junior+Starmada Splash Of The Year 2019
Joined
Mar 8, 2017
Messages
1,727
When coming back together the boats starts to look good! You will be out on the water soon enough.

I like the radial method you used for the bow. I tried and don't think I was as successful as you. Then again, its only my "builders" eye that sees it. Everyone else says it looks good.

SHSU
 

HypnoCraft

Petty Officer 3rd Class
Joined
Aug 30, 2018
Messages
94
Alright, little update before I go on a road trip for 10 days

I got the wings made, painted it all, and installed it.

20200726_142139.jpg

20200728_131000.jpg

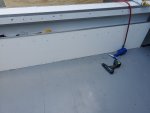
I also decided to go with the original side wall pieces that only come up half way.

20200728_175953.jpg

So the majority of the boat is together and its just finishing strips, seats, and etc to go on. I still have to get the other console made but that may be a while away.

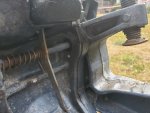
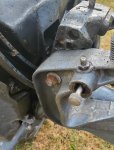
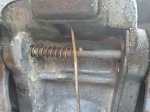
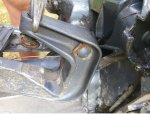
I am running into a slight problem with my motor, I know I should probably post it in the motors sections but I will put here too because its part of this build.

I bought a cable steering kit from UFlex and I went to look how it would attach to my 1970's evinrude... There is no tilt tube, only a tilt bolt. I have seen people put in tilt tubes after the fact but I am not sure mine allows it. What is the best way to rig up cable steering for this motor? Should I get a tube clamp that mounts on the transom? Or what other options do I have?

I know I really should upgrade my motor now but I cant afford to buy a new motor yet and plan on just putting around with a 40hp for a little while.

20200731_091948.jpg20200731_091939.jpg20200731_091953.jpg20200731_092000.jpg
 

Attachments

  • 20200729_122627.jpg
    20200729_122627.jpg
    498.7 KB · Views: 7

SHSU

Lieutenant Junior+Starmada Splash Of The Year 2019
Joined
Mar 8, 2017
Messages
1,727
Moving right along!

I will have to wait for others to comment, but I would guess the 40 HP would have a tough time, if at all, getting that size boat up on plane.

Sorry I can't be more helpful, but may be better to wait until you get a bigger motor to install the steering cable.

SHSU
 

Watermann

Starmada Splash of the Year 2014
Joined
Jan 12, 2013
Messages
13,787
The transom clamp mount would be the easiest method of moving forward rather than trying to find the correct tilt tube and getting it installed may be a a bit of a hassle.
 

HypnoCraft

Petty Officer 3rd Class
Joined
Aug 30, 2018
Messages
94
Moving right along!

I will have to wait for others to comment, but I would guess the 40 HP would have a tough time, if at all, getting that size boat up on plane.

Sorry I can't be more helpful, but may be better to wait until you get a bigger motor to install the steering cable.

SHSU


The transom clamp mount would be the easiest method of moving forward rather than trying to find the correct tilt tube and getting it installed may be a a bit of a hassle.


Thanks for the help. Thinking about it more and more I think I may be better off selling the 40hp right now and getting a proper sized motor from the start. I will just look for a cheaper old 2 stroke. I may look into the transom clamp and see how much it would be. if its 100 bucks I may do it but they look quite expensive.

As far as powering a 22ft... what is the smallest motor I would want? I know the rated max is 150hp. based on yamahas chart for a 115hp on a 19 foot newer starcraft, a 115 could push my boat up to 40mph which already seems beyond fast enough. I was thinking look for a 90hp+? or should i be looking for a 115+?
 
Top