1976 Mariner Rebuild

Watermann

Starmada Splash of the Year 2014
Joined
Jan 12, 2013
Messages
13,787
If the stainless is isolated from the AL with something like 5200 it should be fine.
 

SHSU

Lieutenant Junior+Starmada Splash Of The Year 2019
Joined
Mar 8, 2017
Messages
1,725
So as Watermann stated, I used a lot of 5200 plus run with Zinc anode in salt and Magnesium in fresh water.

To answer your question about fixing it in the future I think I will have many other things that would fail before that. With that said, I pray to God I don't have to..... As you stated I would need to get creative with how I installed it. I used stainless steel bolts with nylon lock nuts. I no longer have easy access to the nylon lock nuts as I installed before I reinstalled my knee brace. I might be able to get away with cutting out a small access panel that low down, but don't think I will ever need to.

SHSU
 

HypnoCraft

Petty Officer 3rd Class
Joined
Aug 30, 2018
Messages
94
So as Watermann stated, I used a lot of 5200 plus run with Zinc anode in salt and Magnesium in fresh water.

To answer your question about fixing it in the future I think I will have many other things that would fail before that. With that said, I pray to God I don't have to..... As you stated I would need to get creative with how I installed it. I used stainless steel bolts with nylon lock nuts. I no longer have easy access to the nylon lock nuts as I installed before I reinstalled my knee brace. I might be able to get away with cutting out a small access panel that low down, but don't think I will ever need to.

SHSU

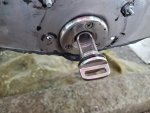
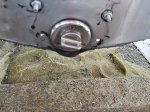
Thanks guys! I made up my mind and put in a stainless drain plug dead center. covered it in sikaflex and let it set up briefly and then tightened it down a little bit and am waiting for it to cure, then I will do a final tighten. Great drain plug. should never lose that thing.

Click image for larger version  Name:	20200610_141620.jpg Views:	1 Size:	1.38 MB ID:	10880252


I put the final coat of epoxy on the edges of the transom, so now it is ready to go in and have its holes drilled into it, then I will take it out oversize the wholes and coat them with epoxy to seal it all off. missing pictures, sorry.

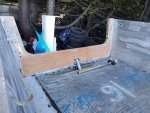
I still need to take the Z-piece to a welder to fix the crack in it, but once that is done it will be smooth sailing as far as putting the transom back in. Today I wire wheeled the aluminum mating face for the transom, still need to wire wheel a bit more and then sandblast out any deep holes.

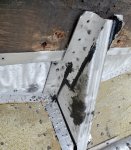
I have also been working on rebuilding the angle pieces for the knee. finally finished that today, all riveted and ready to go in. I couldn't wait and put everything together with the old transom to see how it all fits!

Click image for larger version  Name:	20200610_141613.jpg Views:	1 Size:	1.25 MB ID:	10880251
 

Attachments

  • 20200610_141613.jpg
    20200610_141613.jpg
    1.3 MB · Views: 7
  • 20200610_141620.jpg
    20200610_141620.jpg
    1.4 MB · Views: 9

SHSU

Lieutenant Junior+Starmada Splash Of The Year 2019
Joined
Mar 8, 2017
Messages
1,725
Looks very familiar!!!! I really like having the self retained drain plug. Plus with it at the bottom, you really get most of the water drained.

SHSU
 

HypnoCraft

Petty Officer 3rd Class
Joined
Aug 30, 2018
Messages
94
The self retained plug is going to be amazing. In my old boat, the brass rubber turn plugs always broke on me.

This last weekend I finished up putting in the rest of the solid rivets.

20200615_191937.jpg20200616_192138.jpg20200616_192145.jpg


The plan is to take it to the lake this weekend and see if it leaks. If it somehow doesnt leak I will be staying out on the water for a few hours of the day just to be sure. Once I know it has no leaks I am going to wire wheel the rest of the boat to see if i can find any more corrosion and fill it with G-flex, and then gluvit all the rivets. Then its just cleaning up the outside of the hull and putting the thing back together!

On a side note, my sister suggested I paint it. I was just going to leave it 100% bare. is bare ok? or would painting it be a good choice?
 

Attachments

  • 20200615_191458.jpg
    20200615_191458.jpg
    772.2 KB · Views: 6
  • 20200615_191916.jpg
    20200615_191916.jpg
    740.1 KB · Views: 5
  • 20200615_191548.jpg
    20200615_191548.jpg
    792.9 KB · Views: 5
  • 20200616_192132.jpg
    20200616_192132.jpg
    1.3 MB · Views: 6

Watermann

Starmada Splash of the Year 2014
Joined
Jan 12, 2013
Messages
13,787
I would paint the transom for sure, I sealed mine, primer and 2 coats of paint. The bow supports aren't as much a worry.

y4mbp0qKFhvM58ws2UHxiP6dcN6XsBJ4oDFe2-ZjC_QiLgHkiK-JpmKuz3Kta7hZI73yLzC67NRKkeT2uhfPi3u-phnCbV9IDxIbaxsw_vLPPoYt32yvlrMJgcHV1ejCEuLk6SUFJG2LmiVGrz3qagQNxQ-7DyD9j5RH24PKc4TjHtDBmlRpi9mk3Yp9HZh72k_-IQS1Ctj_lKT19Qdwcx8fw
 

HypnoCraft

Petty Officer 3rd Class
Joined
Aug 30, 2018
Messages
94
I would paint the transom for sure, I sealed mine, primer and 2 coats of paint. The bow supports aren't as much a worry.

[IMG2=JSON]{"data-align":"none","data-size":"full","src":"https:\/\/fpni8g.bn.files.1drv.com\/y4mbp0qKFhvM58ws2UHxiP6dcN6XsBJ4oDFe2-ZjC_QiLgHkiK-JpmKuz3Kta7hZI73yLzC67NRKkeT2uhfPi3u-phnCbV9IDxIbaxsw_vLPPoYt32yvlrMJgcHV1ejCEuLk6SUFJG2LmiVGrz3qagQNxQ-7DyD9j5RH24PKc4TjHtDBmlRpi9mk3Yp9HZh72k_-IQS1Ctj_lKT19Qdwcx8fw?width=1024&height=577&cropmode=none"**[/IMG2]

Does it need to be fully painted if it is 100% covered in epoxy? I was thinking I will just paint the exposed part to protect from UV. Also I noticed I made a comment about my sister recommending I paint "it" without saying I meant my hull. my bad.
 

Watermann

Starmada Splash of the Year 2014
Joined
Jan 12, 2013
Messages
13,787
Paint is cheap easy protection why would you only paint a little section?

Yes paint the boat, 44 year old paint is always nasty looking.

IMAG2310.jpg
 

Attachments

  • IMAG2310.jpg
    IMAG2310.jpg
    262.9 KB · Views: 3

HypnoCraft

Petty Officer 3rd Class
Joined
Aug 30, 2018
Messages
94
Paint is cheap easy protection why would you only paint a little section?

Yes paint the boat, 44 year old paint is always nasty looking.


Fair enough on it being cheap protection. The only thing is that when I put the Z piece and knee in I had to leave them loose, put the transom in and then rivet. The Z piece was kind of tight on the transom so thats how I did it. I know that if i really wanted to I could get the transom piece in and out no problem, but the paint past the Z piece may scrape off on the reinstall. I think I will paint everything I can get to and leave it at that. The transom has a layer of 4oz cloth on each side plus 2 coats of epoxy over top so I think I can skip the paint this time. Silly mistakes from being excited... :facepalm:

Painted hull sure looks nice! maybe I will go ahead and give it some paint, it looks too nice not to.
 

Watermann

Starmada Splash of the Year 2014
Joined
Jan 12, 2013
Messages
13,787
The knee brace also likes to gouge the sealer and paint off too. What to do is start saving milk jugs (rinse them out) and when ready cut them down so you can use them as a buffer between the scratchy parts and the nice painted transom. Makes it easier to insert and when done pull the pieces out.
 

HypnoCraft

Petty Officer 3rd Class
Joined
Aug 30, 2018
Messages
94
The knee brace also likes to gouge the sealer and paint off too. What to do is start saving milk jugs (rinse them out) and when ready cut them down so you can use them as a buffer between the scratchy parts and the nice painted transom. Makes it easier to insert and when done pull the pieces out.

That is a great idea! I will be doing that. Thanks
 

SHSU

Lieutenant Junior+Starmada Splash Of The Year 2019
Joined
Mar 8, 2017
Messages
1,725
Coming along nicely.

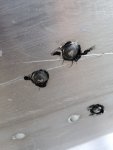
I ran into the same issue with 5200 covering all the rivets I redid. I took an angle grinder with a wire brush and it came off nicely. Looking at the picture, are those gauges or cracks in the aluminum?

As for paint, as Watermann says paint is cheap. With all the effort you are already putting into it why skip on an easy addition that will make it last longer.

...Funny thing, i remember trying to find short cuts and now I am saying no... lol How times change. Plus not my project and I am chomping at the bit to get done.

SHSU
 

g0nef1sshn

Lieutenant
Joined
Feb 24, 2015
Messages
1,291
Painting entire transom is best practice. But my last one i sealed it good, put it in and only painted the exposed pieces. When i removed it to redo it the sealed non painted portions were still solid. Which is why i short cutted again. I specifically checked that area on my old wood to see if i needed to paint it all first this time. I didnt need to, although it would have been the "better" choice.
 

HypnoCraft

Petty Officer 3rd Class
Joined
Aug 30, 2018
Messages
94
Coming along nicely.

I ran into the same issue with 5200 covering all the rivets I redid. I took an angle grinder with a wire brush and it came off nicely. Looking at the picture, are those gauges or cracks in the aluminum?

As for paint, as Watermann says paint is cheap. With all the effort you are already putting into it why skip on an easy addition that will make it last longer.

...Funny thing, i remember trying to find short cuts and now I am saying no... lol How times change. Plus not my project and I am chomping at the bit to get done.

SHSU

You know, I never really looked closely... always assumed it was a scratch. Had me worrying last night, but all of them are only scratches. The boat was previously used as transport from a private island to the main island here, so its got some bruises. I am going to paint the hull so maybe I will fill in all the scratches... but at the end of the day who cares... paint will make it look 100X better.


Painting entire transom is best practice. But my last one i sealed it good, put it in and only painted the exposed pieces. When i removed it to redo it the sealed non painted portions were still solid. Which is why i short cutted again. I specifically checked that area on my old wood to see if i needed to paint it all first this time. I didnt need to, although it would have been the "better" choice.

Well that's good news! We will see what I end up doing, haven't fully decided yet. going to get the water test done and then decide haha.
 

SHSU

Lieutenant Junior+Starmada Splash Of The Year 2019
Joined
Mar 8, 2017
Messages
1,725
Sorry to worry ya, I know how that goes. Miss something and someone points it out on the thread and then you worry about it until you can go check. Will not lie, I got out of bed a couple times just to double check what I knew...

As you said, paint will make it look 100 X better. Just don't get hung up on it and the scratches... No matter how hard I tried I couldn't keep a couple from happening even before I got to splash her. Once I splashed her, scratches galore but fun abounds.

SHSU
 

HypnoCraft

Petty Officer 3rd Class
Joined
Aug 30, 2018
Messages
94
Sorry to worry ya, I know how that goes. Miss something and someone points it out on the thread and then you worry about it until you can go check. Will not lie, I got out of bed a couple times just to double check what I knew...

As you said, paint will make it look 100 X better. Just don't get hung up on it and the scratches... No matter how hard I tried I couldn't keep a couple from happening even before I got to splash her. Once I splashed her, scratches galore but fun abounds.

SHSU

Haha, no problem!


It has been a while since an update, I went camping and got caught up in some other activities. Anyways.

Click image for larger version  Name:	20200621_115122.jpg Views:	1 Size:	1.32 MB ID:	10894411Click image for larger version  Name:	20200704_174042.jpg Views:	1 Size:	661.8 KB ID:	10894409

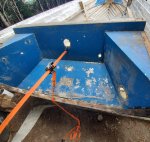
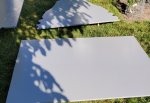
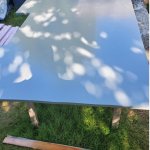
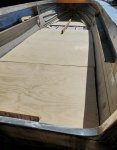
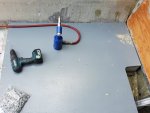
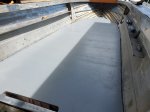
And right now I am just painting the floor pieces. I thought about doing a nice epoxy plug system for the rivets but decided I was happy with drilling the holes in place and then sealing the holes with epoxy when I put the rivets in.


Next up is finding the correct rivets. the oversized head 3/4 to 1 inch grip range is proving hard to find. I can easily find the regular head, but that is probably too small for plywood.

Before putting the floor in I will put in a floss cord through the limber holes for future cleaning.


Also, in recent findings.... I believe I do not have a mariner. I think I have a 1977 22' Supersport. Click image for larger version  Name:	Untitled.png Views:	1 Size:	120.5 KB ID:	10894413

The reason I think this is because the 1976 year did not have a mariner. My center length is about 21-7. the interior colour of my boat was blue and came with the same window configuration and bow rail. Any thoughts on that?

Anyways, more updates to come once more is done! It is starting to look like a boat.


Edit: Also, since doing the test I have decided to leave the transom in place and paint what I can. The water test is done and successful so I decided to press on.
 

Attachments

  • 20200629_115407.jpg
    20200629_115407.jpg
    597.5 KB · Views: 6
  • 20200629_105327.jpg
    20200629_105327.jpg
    642.1 KB · Views: 7
  • 20200621_115136.jpg
    20200621_115136.jpg
    892.3 KB · Views: 8
  • 20200621_115122.jpg
    20200621_115122.jpg
    1.3 MB · Views: 10
  • 20200625_173542.jpg
    20200625_173542.jpg
    1.4 MB · Views: 9
  • Capture.PNG
    Capture.PNG
    16.7 KB · Views: 8
  • Capture.PNG
    Capture.PNG
    16.7 KB · Views: 6

classiccat

"Captain" + Starmada Splash Of The Year 2020
Joined
Dec 20, 2010
Messages
3,412
Congrats on the dry test run! build is coming along great; thanks for the update and pics! :madgrin:
 

SHSU

Lieutenant Junior+Starmada Splash Of The Year 2019
Joined
Mar 8, 2017
Messages
1,725
Love the test run. Always good to mix projects with fun days.

As for the foam, you are way beyond a lot of those on the forum (including me). With your calculations, I am 4 sheets light..... Well, I guess if I sink its a good excuse to get another project boat. LOL

SHSU
 

HypnoCraft

Petty Officer 3rd Class
Joined
Aug 30, 2018
Messages
94
Love the test run. Always good to mix projects with fun days.

As for the foam, you are way beyond a lot of those on the forum (including me). With your calculations, I am 4 sheets light..... Well, I guess if I sink its a good excuse to get another project boat. LOL

SHSU

Well that's great then! I plan on jamming some in the lower side panels as well. Also my calculations are based on a 3" x 2' x 8' sheet, so maybe your not that far off? Also the calculations are very conservative.

As far as what has been done up until today, quite a bit I feel.

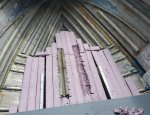
I fit in the original 5 or so sheets of foam.
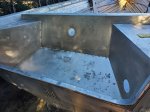
Click image for larger version  Name:	20200708_143954.jpg Views:	1 Size:	1.02 MB ID:	10901551

Then I ground out all the bits of corrosion and whatnot, sprayed with vinegar, rescrubbed, washed, dewaxed and filled the holes in the splash well.

Next, I ground the epoxy flat then scuffed the whole splashwell with a scotchbright and water. I rinsed the water/aluminum dust off and then sprayed with vinegar and re scuffed. Then I rinsed yet again, dried, then wiped down with dewax-degreaser, let flash, and then primed with rustoleum marine metal primer.
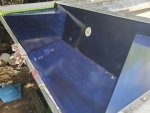
20200716_162456.jpg

I also threw in the old console and V -seating to see how it feels. It's starting to look like a boat.
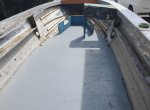
Click image for larger version  Name:	20200716_130347.jpg Views:	1 Size:	1.01 MB ID:	10901553

Unfortunately I only have the one console. Luckily... I have that one to mirror and make the other side from!

As far as paint scheme... I have a general idea of what I would like to do.

Click image for larger version  Name:	20200715_120919.jpg Views:	1 Size:	1.23 MB ID:	10901556

I am leaning on the one of the right, and the bottom area will not be painted. The only thing I am not sure about is how I will do the white swoosh. I don't think I will be able to paint white over dark purple. It might be a vinyl decal.

All in all I am happy. The boat is coming along nicely. One day it might even get splashed!
 

Attachments

  • 20200708_143954.jpg
    20200708_143954.jpg
    1 MB · Views: 6
  • 20200708_160808.jpg
    20200708_160808.jpg
    1,008.7 KB · Views: 5
  • 20200712_140843.jpg
    20200712_140843.jpg
    1 MB · Views: 5
  • 20200709_133709.jpg
    20200709_133709.jpg
    1.1 MB · Views: 6
  • 20200715_181059.jpg
    20200715_181059.jpg
    420 KB · Views: 7

SHSU

Lieutenant Junior+Starmada Splash Of The Year 2019
Joined
Mar 8, 2017
Messages
1,725
A lot of good work done!!!
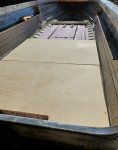
I counter sunk my rivets when I put in the floor as well and epoxied over them If I have to ever redo it, it will be with another boat.

SHSU
 
Top