1976 Mariner Rebuild

HypnoCraft

Petty Officer 3rd Class
Joined
Aug 30, 2018
Messages
94
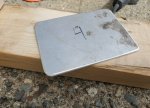
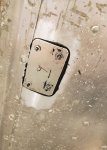
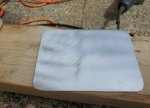
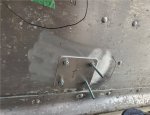
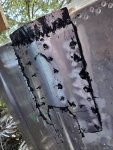
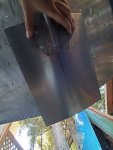
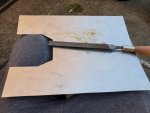
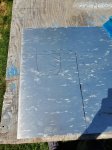
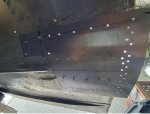
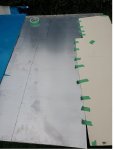
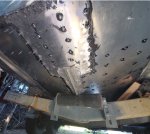
Little update from today. I preped all the patches and got 8 out of the 11 small ones put on. other than that there is the large bilge area patch that needs to be done still and 2 spray rail patches.

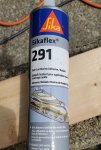
I cut them out, rounded all the corners, and filleted the edges to at least lower drag a little bit. then I put them in place, drilled one hole, bolted it into place and drilled the rest of the holes, then I took the patch off, ground the boats skin and the patch with a stripping wheel, applied Sikaflex, and rebolted it all. Once its cured and I have a partner all of the bolts will be replaced with solid rivets.
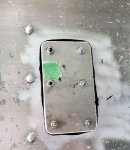
Click image for larger version  Name:	20200514_120905.jpg Views:	1 Size:	945.2 KB ID:	10864517

Have a good long weekend everyone!
 

Attachments

  • 20200514_120905.jpg
    20200514_120905.jpg
    945.2 KB · Views: 5
  • 20200514_125706.jpg
    20200514_125706.jpg
    1,004.2 KB · Views: 4
  • 20200514_120910.jpg
    20200514_120910.jpg
    997.3 KB · Views: 5
  • 20200514_133120.jpg
    20200514_133120.jpg
    1 MB · Views: 6
  • 20200514_120933.jpg
    20200514_120933.jpg
    1.3 MB · Views: 7

HypnoCraft

Petty Officer 3rd Class
Joined
Aug 30, 2018
Messages
94
Nice work!

I did the same in a couple areas like that. Just a thought, but if you are already doing the work/riveting, you think about adding an extra plate on the knee brace for support?

Example: Post #318
Found classiccat post on my build sooner

https://forums.iboats.com/forum/own...tton-for-punishment-splashed-july-2019/page22


SHSU

Thanks!

For the knee brace area I will be going way overboard. I am making a 3 piece patch that will extend 4 feet from the transom up along both sides of the keel plate, and then the third piece will be covering the knee brace area. on top of that I think I am going to almost completely reskin the transom.

The corrosion around the bilge area was pretty significant so I think its mandatory. I will definitely be taking inspiration from how you reinforced your knee brace!
 

ShoestringMariner

Lieutenant Commander
Joined
Apr 18, 2015
Messages
1,593
Did you find your rivets? Try Spae-Naur. I got my solids from Jay-Cee online. They were fast and reasonably priced for shipping to Canada, Canadian Tire has Allens cleaning vinegar also which is twice the strength of normal. Looking forward to watching your build
 

HypnoCraft

Petty Officer 3rd Class
Joined
Aug 30, 2018
Messages
94
Did you find your rivets? Try Spae-Naur. I got my solids from Jay-Cee online. They were fast and reasonably priced for shipping to Canada, Canadian Tire has Allens cleaning vinegar also which is twice the strength of normal. Looking forward to watching your build

I bought my rivets from hanson rivet in the states. It cost me about 80 CAD dollars, shipped to my door, for 1000 2117T4 rivets and a rivet set for my pneumatic hammer. Thanks for the suggestion about the vinegar I will look into that.

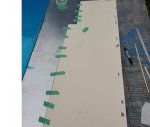
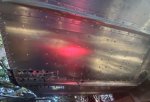
I made and attached the brace patch today. That leaves the two large patches that will go along the stern left to do. I also found another through-hole from corrosion in the bow that I will need to patch, but everything is looking good so far.

20200520_163214.jpg
 

Attachments

  • 20200519_144414.jpg
    20200519_144414.jpg
    1 MB · Views: 7
  • 20200519_141702.jpg
    20200519_141702.jpg
    1.1 MB · Views: 5
  • 20200519_132436.jpg
    20200519_132436.jpg
    1.2 MB · Views: 5
  • 20200520_123404.jpg
    20200520_123404.jpg
    1.2 MB · Views: 7

SHSU

Lieutenant Junior+Starmada Splash Of The Year 2019
Joined
Mar 8, 2017
Messages
1,725
Looking good!

Are those just temporary fasteners in the center? Are you planning to replace those with solid rivets? If not, that is a lot of stem that might get sheared off accidentally on something.

SHSU
 

HypnoCraft

Petty Officer 3rd Class
Joined
Aug 30, 2018
Messages
94
Looking good!

Are those just temporary fasteners in the center? Are you planning to replace those with solid rivets? If not, that is a lot of stem that might get sheared off accidentally on something.

SHSU

Looks like the are clecos (??)


Yeahhhh lets just call those clecos. I looked into buying clecos and decided that they cost to much for what they do. So instead I bought 200 zinc coated steel #8 machine screws with washers and nuts and just put them all in the holes, slid the patch on, then took an impact screw driver and but some side force on the nuts to get them to tighten. worked really well and cost me no more than 15 dollars!
 

SHSU

Lieutenant Junior+Starmada Splash Of The Year 2019
Joined
Mar 8, 2017
Messages
1,725
Sweet!!! I did similar with mine. Clecos are awesome, but for the one time I would be using it.... Looking back now though all the other tools I bought for one time projects....

LOL

SHSU
 

HypnoCraft

Petty Officer 3rd Class
Joined
Aug 30, 2018
Messages
94
Got the major patches on! Everything just needs to be riveted now

Click image for larger version  Name:	20200522_134127.jpg Views:	1 Size:	464.5 KB ID:	10871788Click image for larger version  Name:	20200522_134410.jpg Views:	1 Size:	626.8 KB ID:	10871790 Click image for larger version  Name:	image_331039.jpg Views:	1 Size:	1.03 MB ID:	10871796


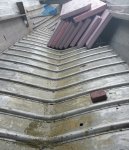
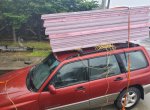
Also managed to find 3" X 2' X 8' XPS foam for 35CAD per sheet on facebook marketplace. Picked up 10 sheets which is roughly 1500lb of floatation. Had some funny looks driving home with it hahaha.

Click image for larger version  Name:	20200525_103318.jpg Views:	1 Size:	1.05 MB ID:	10871794
 

Attachments

  • 20200522_134410.jpg
    20200522_134410.jpg
    626.8 KB · Views: 5
  • 20200525_103318.jpg
    20200525_103318.jpg
    1 MB · Views: 5
  • image_331039.jpg
    image_331039.jpg
    1 MB · Views: 6

Watermann

Starmada Splash of the Year 2014
Joined
Jan 12, 2013
Messages
13,787
She should be a floater with that. The foam stuff is expensive up north isn't it?
 

HypnoCraft

Petty Officer 3rd Class
Joined
Aug 30, 2018
Messages
94
She should be a floater with that. The foam stuff is expensive up north isn't it?

Hopefully its a floater! I am not sure what foam costs in the states, but for the 3" X 8' X 2' its about 60-70 dollars a sheet new, so about 50USD a sheet. I live in a pretty urban area so I believe it is priced fairly. I think up in northern Canada in very rural and wild areas it gets pretty expensive like everything else up there.
 

SHSU

Lieutenant Junior+Starmada Splash Of The Year 2019
Joined
Mar 8, 2017
Messages
1,725
Man that is a huge patch. Any reason for such a big one?

SHSU
 

HypnoCraft

Petty Officer 3rd Class
Joined
Aug 30, 2018
Messages
94
Man that is a huge patch. Any reason for such a big one?

SHSU

Well, the back end was pretty far gone from corrosion. large amount of pitting about 1/16th of an inch through. I figure I might as well just go for a patch thats too big then to patch only the holes and have more holes in a few years. I could have made them smaller for sure, but I figured if I am going to patch that area, I am going to go overboard.
 

HypnoCraft

Petty Officer 3rd Class
Joined
Aug 30, 2018
Messages
94
The quote of many on the forum!!!! Did the same thing on different installs. LOL

SHSU

Hopefully that's only something I say on land!


Recently I have swindled my sister into coming over and riveting with me in return for boat rides. We have riveted all the patches, so all that's left is any rivets that were removed because of corrosion. I think we probably set around 150 or so on the patches in a day or so. Quite the mess with sikaflex flying everywhere haha.

Click image for larger version  Name:	20200601_171445.jpg Views:	1 Size:	1.04 MB ID:	10876288

Then it was glued on with sikaflex and will then have all its rivets put on.

Click image for larger version  Name:	20200603_134144.jpg Views:	1 Size:	577.5 KB ID:	10876285

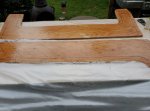
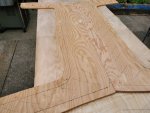
Next I picked up some marine grade fir... at 100$ a sheet. I managed to get the two pieces for the transom out of one sheet which was nice. I cut them roughly then put a 2.5oz cloth in between them and epoxied them together.

Click image for larger version  Name:	20200604_110903.jpg Views:	1 Size:	936.1 KB ID:	10876287

Click image for larger version  Name:	20200604_115818.jpg Views:	1 Size:	1.02 MB ID:	10876289

Epoxy is setting up now! Once its cured I will layout the transom piece with the old transom piece plus extend the arms up so its a one piece transom. Then I will lay 2.5oz glass on the front and back and also fiberglass tape around all edges.

I am slowly coming up on actually installing the transom, but had a question. I took off the Z piece and the knee. The Z piece has a crack in it where the knee sits under it. Should I just get the crack welded? I cant really add more aluminum because it would be in the way of the knee. Also... what is the order of operation to install the Z, Knee, Transom, Etc?

Oh also, I remember seeing a sealing mixture used to seal ACX plywood for the flooring. I can't seem to find it. Off the the top of my head its boiled linseed oil, urethane, and something else? Does anyone happen to know where that post is? Or would a simple spar varnish/urethane coating be fine? I am looking to either glue down carpet/vinyl or possibly paint it with sand for grip. Not entirely sure what I am doing to coat the floor yet. Easier would be better.
 

Attachments

  • 20200604_110903.jpg
    20200604_110903.jpg
    936.1 KB · Views: 5
  • 20200601_171445.jpg
    20200601_171445.jpg
    1 MB · Views: 5
Last edited:

SHSU

Lieutenant Junior+Starmada Splash Of The Year 2019
Joined
Mar 8, 2017
Messages
1,725
Looking good!!

I remember the 5200 flying as well when the Admiral and I riveted!

For the Z bracket I would get it welded just to keep the crack from growing.

I installed the Z bracket first then the knee brace. If you install the knee brace first, pretty sure you cant buck some of the Z bracket rivets properly.

As for WOGs formula, Post 7

https://forums.iboats.com/forum/boa...ed-in-wog-s-secret-wood-sealer-but-a-question

SHSU
 

HypnoCraft

Petty Officer 3rd Class
Joined
Aug 30, 2018
Messages
94
Looking good!!

I remember the 5200 flying as well when the Admiral and I riveted!

For the Z bracket I would get it welded just to keep the crack from growing.

I installed the Z bracket first then the knee brace. If you install the knee brace first, pretty sure you cant buck some of the Z bracket rivets properly.

As for WOGs formula, Post 7

https://forums.iboats.com/forum/boa...ed-in-wog-s-secret-wood-sealer-but-a-question

SHSU

Thanks a lot! I am kind of thinking of just using straight spar and then painting the floor with alkyd enamel. I see people say that mixture can catch on fire, so I am not too sure about it, and spar+alkyd seems cheaper and easier.

Just purchased a Moller drain kit and the die set from Ontario, so should be here in a week or so. I realized today I can't install the knee until I get that drain in. I can't think of too many downsides to having the drain in the center other than if you need to fix it you now need to rip out your transom and knee brace.. hmmm maybe I will put it in the original position.
 

HypnoCraft

Petty Officer 3rd Class
Joined
Aug 30, 2018
Messages
94
I moved mine to the bottom behind the knee brace. Since I run in mostly salt (Texas, Galveston bay) I need to make sure I am able to drain out as much water as possible after run/cleaning. The side drain leaves way to much water in the hull for my liking.

You can see what I did in post #387
https://forums.iboats.com/forum/own...tton-for-punishment-splashed-july-2019/page26

SHSU

Thanks for the direction. I will be between ocean and lake. I was thinking if I stick with the side drain I could just hang a rag in the drain tube the siphon out the water and rinse the boat well when I get home. hmmm. I will have to think on this. Did you have any problems with using a stainless drain piece? if something was to happen is that one able to be pulled out and replaced without deconstructing the boat?
 
Top