1976 AeroCraft Fishmaster - Complete Restore

UConnMRB

Petty Officer 2nd Class
Joined
Jul 18, 2014
Messages
119
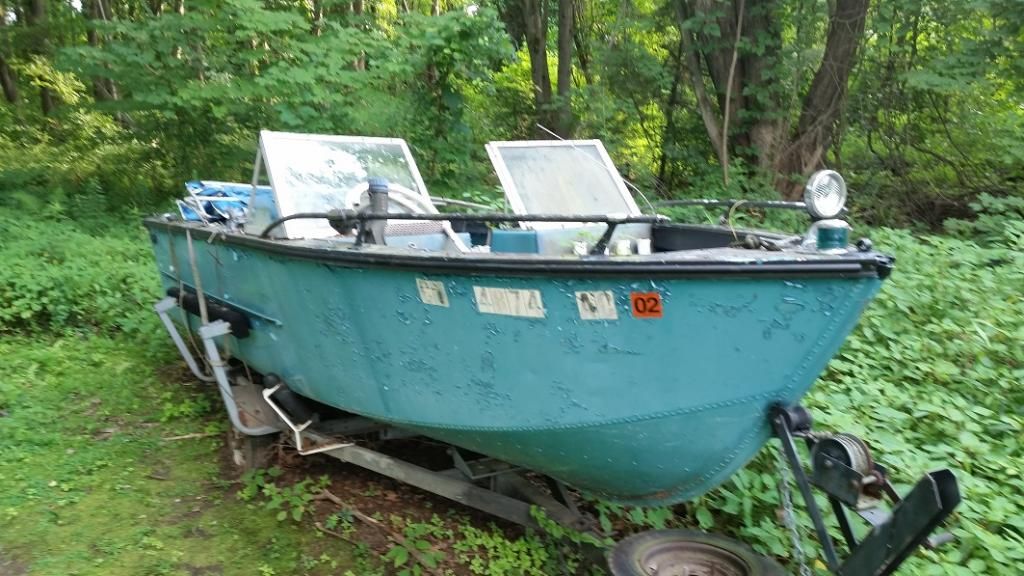
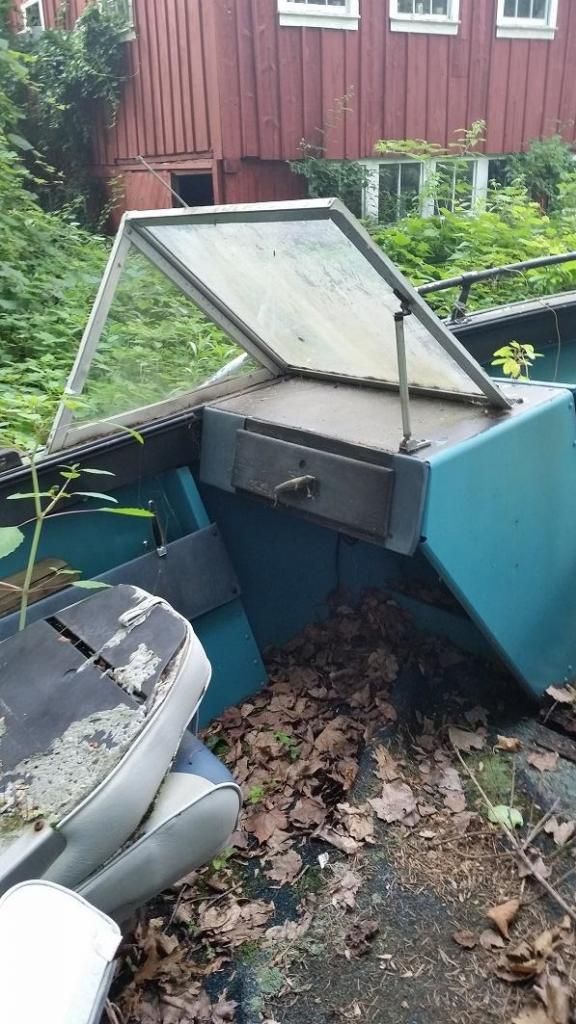
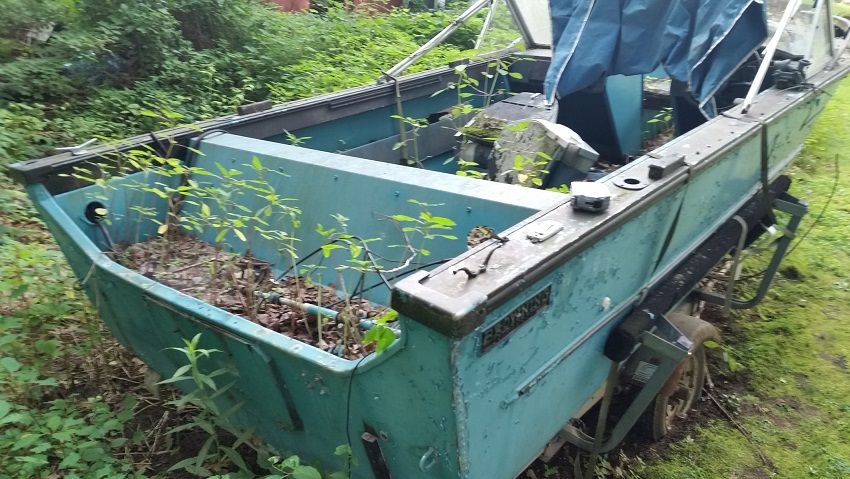
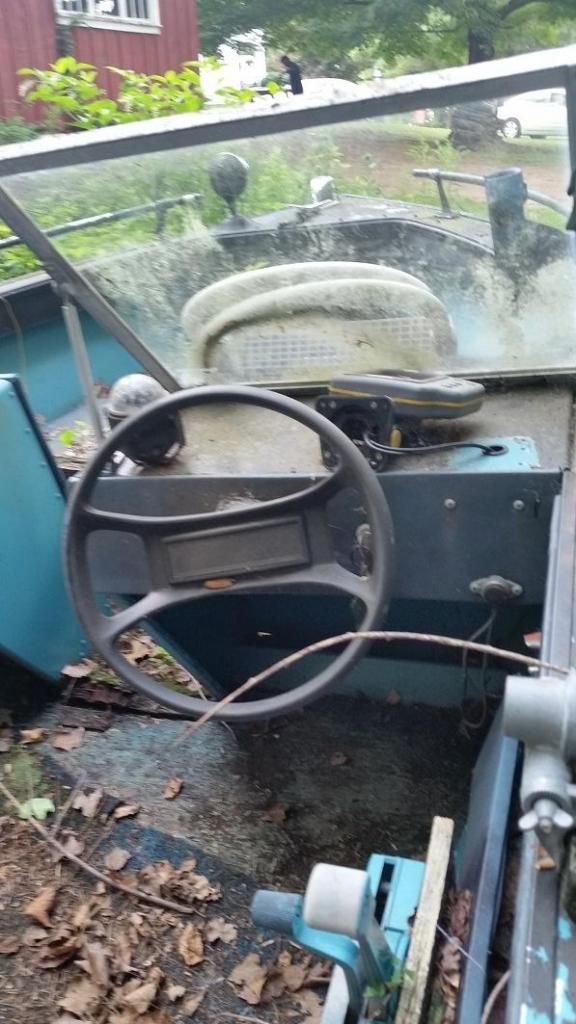
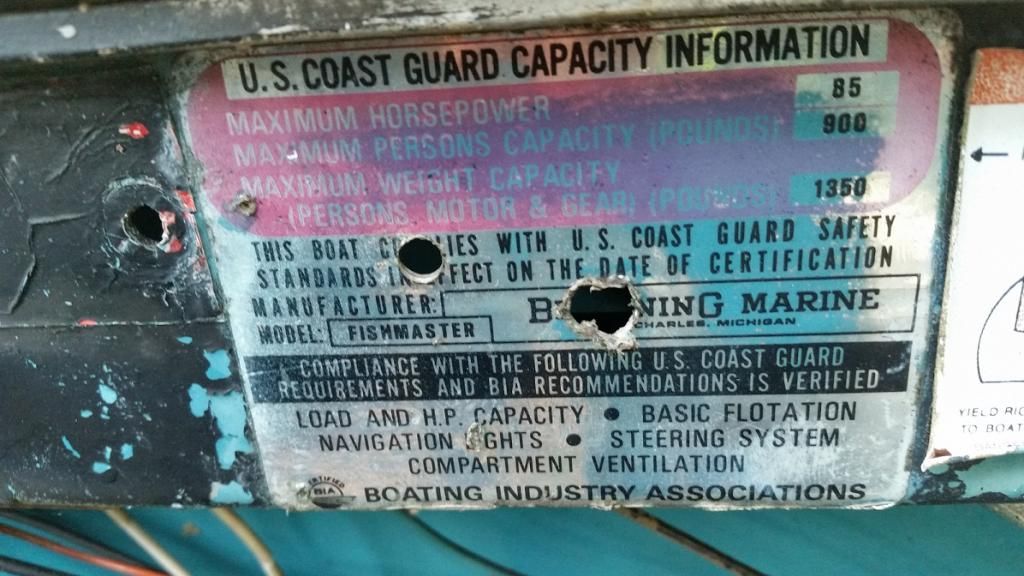
Ok, so here I am the new proud owner of a tin boat. I have no idea what I am doing. That is where I lean on you tin-America. I have zero- I repeat- zero experience in restoring boats. This 1976 Browning Aerocraft Fishmaster was my grandfathers who passed years ago. For about 10 years it has been sitting neglected. I plan on changing that.
 
Last edited:

jbcurt00

Moderator
Staff member
Joined
Oct 25, 2011
Messages
24,829
Post some pix of your grandfather's boat. Great to hear you're planning to rehab it & keep it in the family.

Lots of great tin boat projects have been thru the iboats dry dock, many of them here:
Starcraft Boats

Plenty of great tin boat building tips that will work on your Browning

Welcome to iboats.

Now, about those pix.... :watermelon:
 

Bwana Don

Lieutenant Commander
Joined
Oct 20, 2009
Messages
1,951
We're experts and love projects. Come aboard and learn to work on your tinny. We require pictures though. Grandpa will be proud, let's get started.

How long is she? What motor?

Don
 

UConnMRB

Petty Officer 2nd Class
Joined
Jul 18, 2014
Messages
119
Thanks for the replies. It is 16' feet in length. It had an older 40 HP (Johnson I think) but I am not using that. Once the project is farther along I will stop shopping for power. It is sitting in the Grandmothers lawn right now, which is where it has sat for 10 years or so. She just wants to get rid of it and was elated that I wanted it, so win-win. My plan is to just hook up the trailer, inflate the tires and drive it (all back roads, about 10 minutes) to my house saying a prayer or two whilst driving. From there it will go into my garage where the work will be done.
20140718_173243_zpsa3bb4eb0.jpg


03769865-e410-4579-8b4b-7ff189ba38fd_zpsee9a3461.jpg


Pic1_zps395b1976.jpg
 
Last edited:

UConnMRB

Petty Officer 2nd Class
Joined
Jul 18, 2014
Messages
119
She looks way worse than she is. Hull is in good shape. I dont know if it was fresh water only but I dont anticipate any corrosion under any foam. The lights and windshield are in good shape, just need polishing. Wiring is a mess, but I would want to redo that anyway. The plants growing out of it are just deck level. I actually think 2 of the seats will work well enough for trial runs they just need a real cleaning. This is a long post but thanks for hanging in there with my ramblings. I spent all day Sunday rearranging my garage to be my work space. I also started building a 15'x7' wooden frame that the boat will sit in. I bought 7 wheels that swivel (look like roller blade wheels) and those are going on the bottom of the frame. That way i can easy roll into into and out of the garage when its nice out. I will modify the frame for when i flip the boat over for paint. Good news is all the lumber I had. When i finish the frame I will post pics.
 

Bwana Don

Lieutenant Commander
Joined
Oct 20, 2009
Messages
1,951
Good bones is all you need. It's hard to kill a tinny. All the wood needs to come off. Epoxy any new wood and if it's exposed to sunlight several coats of spar varnish. Looks good plus UV protected and water proof too.

Man I hope we get to do rivets and foam! Pour in foam would be my recomendation. I see paint in your future, you hit the jackpot dude!

Good luck,

Don
 

saginawbayboater

Senior Chief Petty Officer
Joined
Mar 8, 2012
Messages
677
Few more:

Following along uconnmrb. She looks like a diamond in the ruff! I appreciate the history of the Browning Aerocraft boats having grown up and still living near the original factory which also eventually was taken over by the Thompson boat company.

Can't be much help with the tinny, but there are many great folks here that live, eat, breath this stuff!

Looking forward to seeing her come back to life!!!!:eagerness:

SBB
 

UConnMRB

Petty Officer 2nd Class
Joined
Jul 18, 2014
Messages
119
Thanks for the replies. I dont want to mention what I am going to use for flotation...that seems to start off quite the debate here on Iboats. I have read all the pros and cons to pour in, foam boards, pool noodles, etc, and I will just wait til I get there and price it all out. Deconstruction will start this weekend. One question I have is, if the floors are riveted down, do I drill through the existing rivets, or do they pry off?
 

jigngrub

Fleet Admiral
Joined
Mar 19, 2011
Messages
8,155
You can drill out the deck rivets if you want, but I think your deck wood is going to crumble pretty easy and you may end up just cutting the rivets off after the deck is out.
 

Fleetwin

Lieutenant Junior Grade
Joined
Nov 23, 2011
Messages
1,141
I remember those boats. They were built in my hometown of St. Charles, MI. We knew the owners family before they sold to Browning. Before Browning took over, that model was called the "Coho" under the Aerocraft name.

They resembled Starcraft models except they did not have lapstrakes rolled into the side panels. Other than that, very similar.

I'm glad to see one resurrected.
 

UConnMRB

Petty Officer 2nd Class
Joined
Jul 18, 2014
Messages
119
Advice needed. Tomorrow is deconstruction day which I am sure will lead to days. I noticed that the console and whatever its called across from it (where firstmate sits) is all aluminum with rivets. I am going to want to keep that and just repaint it. So do i drill through center of the rivets? Is there any advice in doing that?
 

REdington

Seaman
Joined
Apr 22, 2014
Messages
69
Yes, just drill the rivet heads off and the consoles will come loose. I used a 1/4" drill bit to do mine. Then you'll take a punch and drive the rest of the rivet out.
 

jbcurt00

Moderator
Staff member
Joined
Oct 25, 2011
Messages
24,829
I like to use a split point (135*) drill bit. W/ gentle application of the trigger on a variable speed drill, I don't typically have to use a center punch to keep the bit from wandering as I start to drill the rivets.
 

UConnMRB

Petty Officer 2nd Class
Joined
Jul 18, 2014
Messages
119
Thanks for the advice guys. I am not going to keep the floor for templates. There was the factory floor and then another 1/4 inch layer on top of that. Both were completely soaked through. Both layers just crumbled apart. I will have pics later.
 

UConnMRB

Petty Officer 2nd Class
Joined
Jul 18, 2014
Messages
119
Also, the P and S consoles are completely aluminum. All the framing is Al, no wood at all. As are the frames for the bow seating/storage. There are also hinges built in the the port and starboard bow seating frames for seating to be mounted to ad easy access storage. I have to resize the photos on my PC. I will do that at work tomorrow.
 

UConnMRB

Petty Officer 2nd Class
Joined
Jul 18, 2014
Messages
119
20140727_164912.jpg
20140727_164926.jpg
20140727_115932.jpg


The first pic is the almost complete cradle. The others I took during my progress working on it yesterday. I felt like I lost a few hours just getting the trailer up to speed with a new tire, new coupler and new jack.
 
Last edited:

jigngrub

Fleet Admiral
Joined
Mar 19, 2011
Messages
8,155
That'll be a good boat when you're finished with her, I like the stringer and framing layout. Good and deep, lots of room for adequate floatation foam.
 

UConnMRB

Petty Officer 2nd Class
Joined
Jul 18, 2014
Messages
119
The aluminum console framing and bow seat framing is riveted to the hull and each other and then it was screwed down the floor, meaning there is a gap that the new floor can slide under. I have to look at it a little closer, but I am wondering if I can actually just slide the new flooring under the framing and gunwale aluminum without removing it. The foam that I pulled out were giant blocks of basically styrofoam, each weighing about 100 pounds per stringer, completely soaked. I remember riding in this boat and it used to be only inches above the water in the stern (I guess I now know why).
 
Top