1975 Starcraft Mariner 18'

yooperangler

Senior Chief Petty Officer
Joined
Sep 17, 2010
Messages
721
Re: 1975 Starcraft Mariner 18'

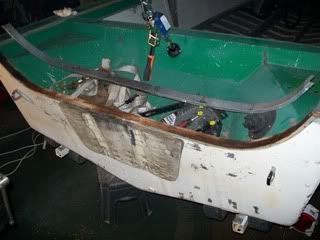
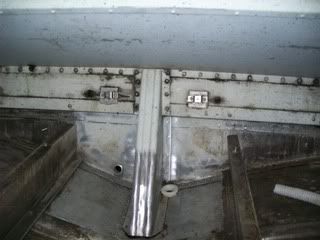
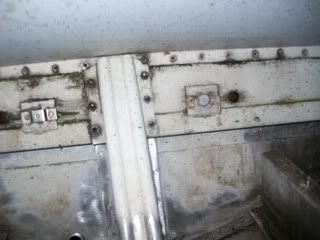
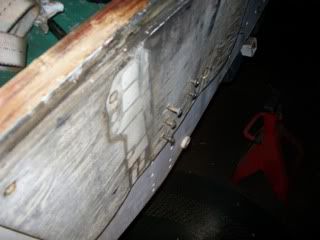
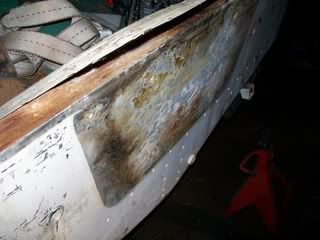
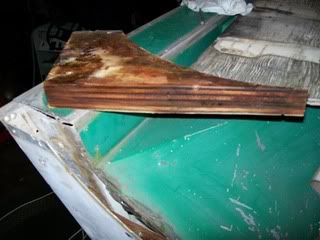
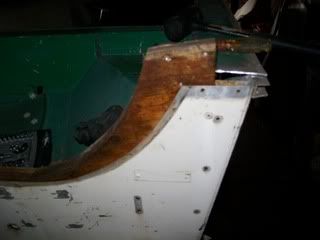
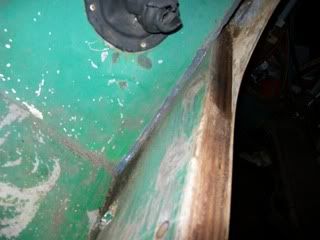
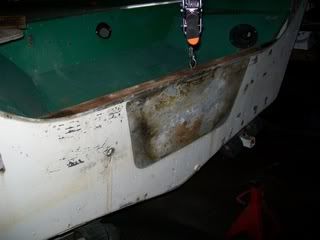
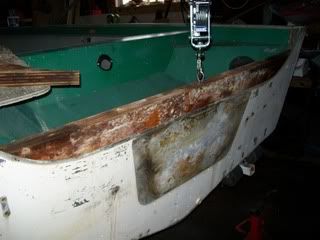
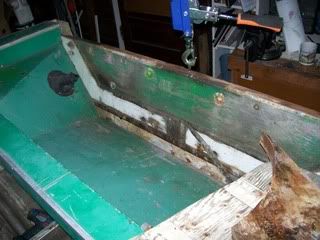
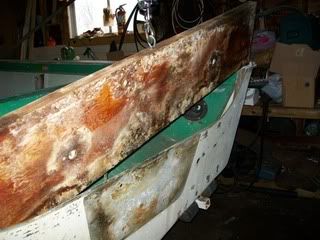
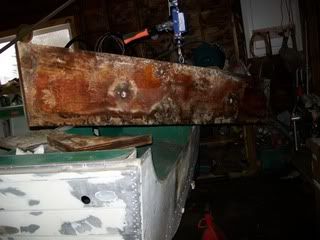
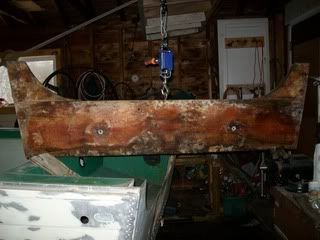
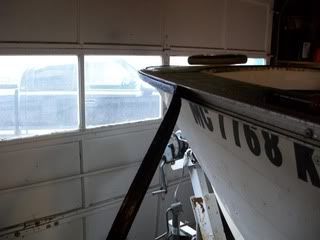
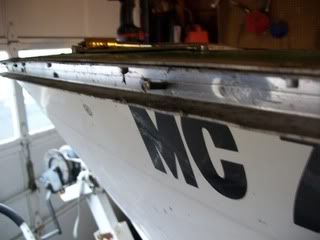
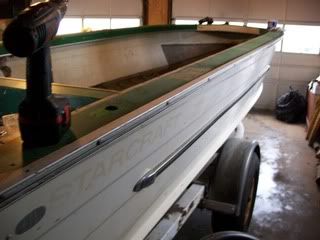
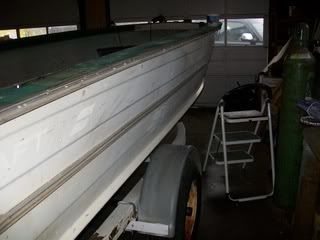
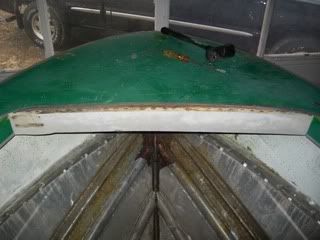
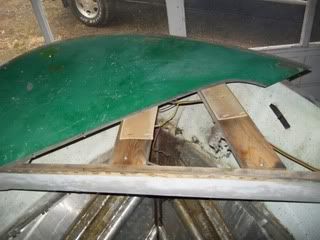
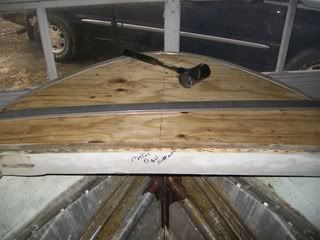
Thanks for stopping by Jas. I decided to tackle the rub rail and bow cap today
100_0549.jpg


100_0552.jpg

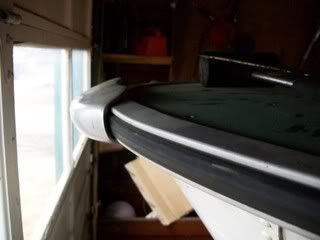
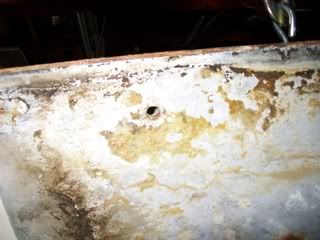
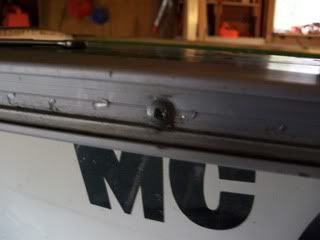
Rubber seemed really dry and brittle

100_0553.jpg

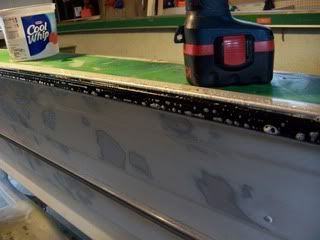
So I mixed up a whole bunch of dish soap with a little bit of water and worked it into the seams

100_0554.jpg

Seemed to work well and rubber seemed to soften after soaking a few times

100_0555.jpg


100_0558.jpg

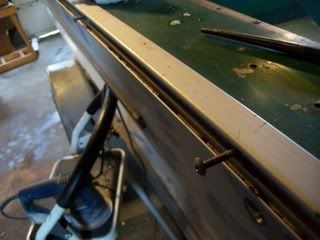
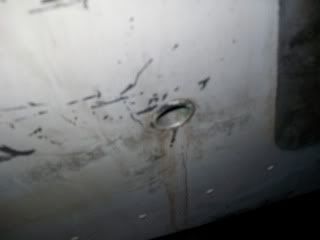
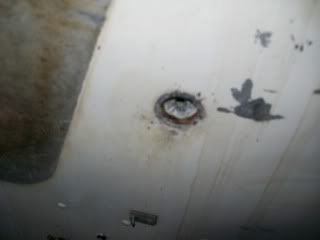
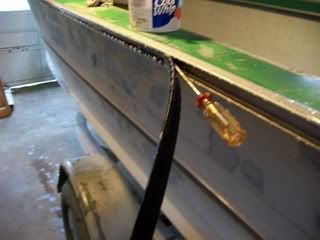
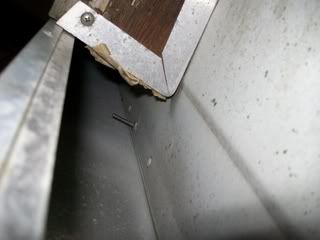
Then I removed approximately 4 million screws that are at least a foot long for no reason
 

yooperangler

Senior Chief Petty Officer
Joined
Sep 17, 2010
Messages
721
Re: 1975 Starcraft Mariner 18'

100_0560.jpg


100_0561.jpg

Last 5 screws near bow didn't have nuts on them but refused to come out so had to drill these then after channel was removed I bent them back and forth using a screw driver and hammer until they broke off and drove them through hull with a punch . I had to do the same thing on both sides last few near tip of bow had to be removed later as they were in line with bow support boards and couldn't drive them through.

100_0563.jpg


100_0564.jpg

Headless screws I was talking about.

100_0568.jpg

Repeat on starboard side, rubber here came off easier after letting soapy mess soak in for 15 minutes or so .

100_0570.jpg

I pulled caps and rubber off lower bumper/trim as well still haven't decided what to do with these.
 

yooperangler

Senior Chief Petty Officer
Joined
Sep 17, 2010
Messages
721
Re: 1975 Starcraft Mariner 18'

100_0571.jpg

Then I decided to tear apart bow cover and look at my support problems

100_0576.jpg

Pretty simple just drill out a few rivets and wallah

100_0577.jpg

Boards were all cracked and rotten and most didn't even have nuts on the bolts anymore .

100_0582.jpg

I removed the boards and was able to remove the last few rub rail screws with vise grips.

100_0583.jpg

I decided this was a good time to make a pattern for later so used a piece of the 1/2" ply that was thrown over floor it was badly warped but clamped it down and got under bow and marked with a sharpie.

100_0586.jpg

No room in the garage so hauled it outside for cutting
 

yooperangler

Senior Chief Petty Officer
Joined
Sep 17, 2010
Messages
721
Re: 1975 Starcraft Mariner 18'

100_0587.jpg

And surprise it actually fits pretty good I made a couple marks to trim later but can definitely use for a pattern will probably make this piece out of 3/4 and add at least one support along center or may use 1/2" and some foam as there was some under there originally to keep cover from rattling I suppose. That's how I left it for today hoping to get the rest of the bow ripped apart and start on transom tomorrow before work.
 

jasoutside

Supreme Mariner
Joined
Dec 20, 2009
Messages
13,269
Re: 1975 Starcraft Mariner 18'

Good move on soaping those rubrail, very smart! I shredded mine as I skipped that step.
 

Huron Angler

Admiral
Joined
Apr 7, 2009
Messages
6,025
Re: 1975 Starcraft Mariner 18'

Nice work, I have not touched my rub rails. They are pretty expensive and I figured I'd damage them beyond repair. You guys are braver than me:)

The bow should be extra strong with the new plywood in there. Sounds like you are almost done with the teardown.
 

yooperangler

Senior Chief Petty Officer
Joined
Sep 17, 2010
Messages
721
Re: 1975 Starcraft Mariner 18'

Yeah getting close to the end of tear down still have the transom the rest of the bow and decide what to do with those lower trim/rub rails and of course the trailer:eek:Started making a list of stuff I need to order/find/scrounge and its a long one. Even longer if I move console forward a little. Still waiting on a bit warmer weather before ordering epoxy,gluvit etc.. No point in having it until I can use it . If I don't get distracted I should be able to get tear down and most of the sanding done before weather cooperates enough for anything else to happen:)No rush anyway as hope to splash her sometime before 2020 or so :cool:
 

yooperangler

Senior Chief Petty Officer
Joined
Sep 17, 2010
Messages
721
Re: 1975 Starcraft Mariner 18'

Jas the soap really seemed to do the trick was actually able to roll the rubber up after removal without it cracking and hope to reuse it and since it was palmolive I was able to soften my hands while working on my boat:D
 

jasoutside

Supreme Mariner
Joined
Dec 20, 2009
Messages
13,269
Re: 1975 Starcraft Mariner 18'

Can't wait to shake your hand at the Great Lakes Starcraftapalooza....

"Hey yoop, great to meet ya.... oh, do you moisturize????"


:D
 

yooperangler

Senior Chief Petty Officer
Joined
Sep 17, 2010
Messages
721
Re: 1975 Starcraft Mariner 18'

Yeah you guys have me figured out:rolleyes: I got a little bit done yesterday so I guess the moisturizing paid off in the end ;)

100_0589.jpg

Decided to pull the transom apart I think the worse part was all the little spiral shank nails that held this strip on fought with those for way too long.

100_0594.jpg

Then it was just a matter of removing 4 million screws these ones go through to corner brackets on inside just stuck some vise grips on the nuts and ran em out with my drill. It would have been a bit easier with an extra set of hands but not bad really.

100_0596.jpg

More screws under splashwell and machine screws for knee brace. I was amazed to see that the knee brace screws were the only hardware on the boat that were actually too short:confused:Starcraft felt it was necessary to use four inch long machine screws for the rubrails but here I had less than 2 threads past nuts and 3 had fallen right off over the years
 

yooperangler

Senior Chief Petty Officer
Joined
Sep 17, 2010
Messages
721
Re: 1975 Starcraft Mariner 18'

100_0597.jpg

Lower motor mounting bolts

100_0598.jpg

More pics of those knee brace screws they weren't the best hardware but found them to be strangely photogenic for some reason:)

100_0599.jpg

Not sure if I'll replace this with plywood again or look for some diamond plate definitely needs to be a little solider as screws were pulling through in places.

100_0600.jpg

Lots of white powdery stuff under the plywood guessing it was some type of sealant also may be a little pitting but nothing too serious.

100_0601.jpg

Tried really hard to get these splashwell drain tubes out in one piece but eventuall gave up and just bent them into transom . I'll need to find some thing to replace them with in new transom.
 

yooperangler

Senior Chief Petty Officer
Joined
Sep 17, 2010
Messages
721
Re: 1975 Starcraft Mariner 18'

100_0602.jpg


100_0604.jpg

Top corner pieces came right out doesnt seem these were ever glued or sealed to bottom part of transom.

100_0607.jpg


100_0608.jpg

I think I should by stock in this blue silicone stuff. Cut it loose from inside of splashwell after my first failed attempt to remove bigger part of transom.

100_0610.jpg

Scrounged around and found a screw in hook about 4" long screwed it into transom and hooked up the come along picked the boat up off the trailer and started beating on everything with my deadblow hammer ( see how sensitive I am now:cool:)
 

ezmobee

Supreme Mariner
Joined
Mar 26, 2007
Messages
23,767
Re: 1975 Starcraft Mariner 18'

Here's your new transom drain tubes http://www.wholesalemarine.com/p/S-D-520320-1/Sea+Dog+Molded+Nylon+Motorwell+Drain+Tube.html

I didn't replace the wood plate on the backs of either of my projects. In my opinion it doesn't serve much of a purpose other than to leak and/or cause corrosion. My SS had a piece of diamond plate there and I didn't reinstall that either. The new boats don't have them and fiberglass boats don't have them. I just filled the unused holes with JB Weld with a little square of aluminum flashing as a backer.
 

yooperangler

Senior Chief Petty Officer
Joined
Sep 17, 2010
Messages
721
Re: 1975 Starcraft Mariner 18'

100_0615.jpg

Its moving a little !!!!!!

100_0616.jpg

So I jumped up in the boat and jumped around a little. Alternated between raising come along and jumping in boat (better than sweating to the oldies )

100_0617.jpg

More movement !!

100_0619.jpg

Repeat multiple times in and out of boat jump up and down raise boat jump some more. This is a really high tech operation so make sure you do it in the proper order.:)

100_0620.jpg

VICTORY!!!!
 

yooperangler

Senior Chief Petty Officer
Joined
Sep 17, 2010
Messages
721
Re: 1975 Starcraft Mariner 18'

100_0621.jpg


100_0622.jpg

Good enough for a pattern

100_0623.jpg


100_0626.jpg

also found cracks on splashwell will probably reinforce corners with angle where possible.
 

yooperangler

Senior Chief Petty Officer
Joined
Sep 17, 2010
Messages
721
Re: 1975 Starcraft Mariner 18'

Here's your new transom drain tubes http://www.wholesalemarine.com/p/S-D-520320-1/Sea+Dog+Molded+Nylon+Motorwell+Drain+Tube.html

I didn't replace the wood plate on the backs of either of my projects. In my opinion it doesn't serve much of a purpose other than to leak and/or cause corrosion. My SS had a piece of diamond plate there and I didn't reinstall that either. The new boats don't have them and fiberglass boats don't have them. I just filled the unused holes with JB Weld with a little square of aluminum flashing as a backer.

Thanks for the link and the info EZ. I kind of thought (again not my strong suit) that plywood was there in order to space out the motor a bit to make lip on front of mount fit tighter to transom ? If I don't need it I'm with you on eliminating it.
 

CBGale2

Lieutenant Junior Grade
Joined
Apr 22, 2009
Messages
1,026
Re: 1975 Starcraft Mariner 18'

Making some good progress Yooper, be fishing in no time!!!!
 

yooperangler

Senior Chief Petty Officer
Joined
Sep 17, 2010
Messages
721
Re: 1975 Starcraft Mariner 18'

Yeah starting to get a bit excited about ordering the plywood, gluvit etc but weather isn't cooperating at all teens and 20's again and a little snow today. I will probably finish tearing things down and cleaning up in the next week or so but don't want plywood laying around soaking up moisture before I can epoxy it so will probably have to wait a few weeks to get to the fun stuff:(
 

yooperangler

Senior Chief Petty Officer
Joined
Sep 17, 2010
Messages
721
Re: 1975 Starcraft Mariner 18'

100_0277.jpg

OK since I'm obviously not getting anything done today figured I would ask some questions. Having owned quite a few different boats over the years I shouldn't have so many. I will at some point be mounting a kicker as well and have no worthwhile experience at doing this properly. Looking at transom with motor on it seemed difficult to establish if I have enough room and the ideal mounting location. It seems that in order to install a kicker bracket I will be getting pretty far over toward edge of transom. I'm not sure if I need to add some internal support as well ? It also seems difficult to establish proper mounting height for a bracket any suggestions for this would be helpful. Also could use some input on how many horsepower roughly folks think would be neccessarry for trolling/emergency get her home as I have no Idea what it will take to move this boat at this point? Keep in mind she will primarily be used for trolling bays and such on superior on nicer days but sometimes takes a bit of oomph to keep a boat tracking even in mild swells. Also is a long shaft kicker an absolute must? as motor will be to side and not at deepest part of keel ?

100_0464.jpg


Next question How much foam? Having some extra won't kill me but definitely want enough to pack in under floor and along sides if I add side panels? I'll probably get this and plywood and everything else I can from menards about 75 miles away so really don't want to make an extra trip:) Also approximate amounts for gluvit, epoxy (both sides of floor,bow wood, console, and maybe side panels) would be really helpful. I know I have seen much of this in other threads but can't seem to track it down at the moment.

Lastly Bilge pump recommendations? Not going cheapest route but wanting a good dependable product may not require the most expensive either. Whats a good one ?

Thanks in advance for the help guys ( and for taking the time to read all of this :D)
 
Top