1974 Starcraft SS16 Restortation

FIGMO

Petty Officer 1st Class
Joined
Jun 18, 2017
Messages
321
Hey Gents,

It has been a while, but I have been busy. Now its time to catch you up on some things:

I sorted out the steering cable for my boat. As it turns out the math was wrong, and I did not need a 13 foot cable. So the guy at the marine shop exchanged it for me for a 12 foot with no grief. I did require the adapter for the snap fit. No big deal it all went together nice and smooth.

I took Watermann's suggestion and cleaned out the tilt tube with a gun cleaning brush and some WD40. I will lube it up with some of that marine grade grease when I get to that point.

Some pictures:


59a.jpg
Tried the steering cable through the tilt tube seem to work quite nicely.


60.jpg
 

FIGMO

Petty Officer 1st Class
Joined
Jun 18, 2017
Messages
321
Here is a really blurry picture of the seats my wife got me. She was quite adamant about picking out the seats, so I let her run with it.

To be honest I really like them.

61a.jpg
 

FIGMO

Petty Officer 1st Class
Joined
Jun 18, 2017
Messages
321
And now for some wiring. I didn't take pictures of everything as some of it is pretty straight forward. Most of the pictures capture the process I used and how I ran the wiring.

I have broken this down into two parts. Part One:


62a.jpg
I used the black retainers along the stern and underneath the gunnels to allow me to fish the line around the boat. This is the initial stages where I have wired in the bilge pump and live well pump.

62b.jpg
I decided to raise the wiring higher up and use the lower retainers for the bilge pump hose, and live well pump hose.


62bb.jpg
I harnessed all the wiring to protect it and to keep it orderly under there.


62bc.jpg
More of the same

62c.jpg
Shot of the retainers and wiring under the gunnel on the starboard side of the boat.


62d.jpg
This is the junction point where most of the wiring comes off of the gang switch and negative leads to the bus bar and fuse box. It can get convoluted pretty quick under there, so you have to keep track and stop the wiring from getting all tangled up.


62e.jpg

Under the gunnel on the port side that is my 2 AWG wiring for starting the motor. Worked out to be under 17 feet so I am confident this will work.

End Part One of wiring.
 

FIGMO

Petty Officer 1st Class
Joined
Jun 18, 2017
Messages
321
Part Two of my wiring job:

Click image for larger version  Name:	62f.jpg Views:	1 Size:	172.6 KB ID:	10924616
I started the wiring from the gang switch to all the components. After I had that sorted out, I ran the wiring from the gang switch to the fuse box.


Click image for larger version  Name:	62g.jpg Views:	1 Size:	174.9 KB ID:	10924617
Initial stages of the wiring and it started to get out of control so I had to stop and rethink the routing and control of where the wires were going to run.


Click image for larger version  Name:	62h.jpg Views:	2 Size:	160.1 KB ID:	10924621
This is nearing completion. It looks a bit messy, but I can make sense of it. Anything running through the gang switch does not have a built in fuse, and goes directly to the fuse box. Anything that has a built in fuse goes right to the bus bars.


Click image for larger version  Name:	62i.jpg Views:	1 Size:	203.9 KB ID:	10924619
The gang switch got pretty fugly once everything was wired in. To make my life easier a put a service loop on every major component include the gang switch to make servicing it later down the road easier.

Click image for larger version  Name:	62j.jpg Views:	1 Size:	201.8 KB ID:	10924620
This is the connection point for the motor. The only other item running from the starting battery is the bilge pump with a floater switch. It is both hard wired to the starter battery and I put a manual on/off switch to it as well.


I lied, there is a Part Three sequel....
 

Attachments

  • 62h.jpg
    62h.jpg
    160.1 KB · Views: 17

classiccat

"Captain" + Starmada Splash Of The Year 2020
Joined
Dec 20, 2010
Messages
3,412
The admiral has great taste in seats! :D:D

That's some tidy wiring ...should make troubleshooting & modifying down the road a breeze in addition to the loom being an extra layer of protection against mice! :thumb:
 

SHSU

Lieutenant Junior+Starmada Splash Of The Year 2019
Joined
Mar 8, 2017
Messages
1,749
Really nice work there!!

Your wiring looks a lot tidier then mine. Plus the loom really makes it look professional

SHSU
 

FIGMO

Petty Officer 1st Class
Joined
Jun 18, 2017
Messages
321
Hey Classic and SHSU, appreciated. Yes I really like those seats they go well with the interior.

I had some wiring shots, but not quite as many as I thought I did. So I threw in some fuel tanks pictures.

63a.jpg
Port side storage for the starter battery. you can see the battery switch there for the initial installation. Everything pretty smoothly on the wiring.

63b.jpg
Starboard side with the house battery. The fuse box there is the 60 Amp Minn Kota fuse for the trolling motor. Its pretty good, no major issues getting installed, however the Minn Kota MKR adapter is not so user friendly. Apparently there is a MKR 18A 6 Gauge adapter. So you need three separate parts to make it work. Not impressed.

63ba.jpg
More loom. This is to gather the battery lines for the starter battery coming up underneath the console.


63c.jpg
I debated on how to best run the wiring from the house battery to the battery switch and came up with this. I have retainers on it and it is up out of the way so the wiring should be relatively safe.


63d.jpg
I was just going to run one strap over the fuel tanks under the splash, but that seemed kind of flimsy. So I ran two straps on each tanks.


63e.jpg
Front anchor point


63g.jpg
and both straps installed. I will be honest, it is a bit of work to get them strapped in there with the splash well now mounted, and the front panels in place. However, it is doable. I have to start with the strap on the width, and then run the strap that goes lengthwise.

Some structure pictures coming next I think???
 

Watermann

Starmada Splash of the Year 2014
Joined
Jan 12, 2013
Messages
13,804
Nice work, wiring looks tidy and the seats are super nice. :thumb:

My last boat that had a portable tank was my Sea Nymph and it made me hate those leaky messy things. Just an idea to keep things clean is a vehicle drip pan from the parts store under the tank to catch any spillage. I put a nylon buckle on my hold down strap so it was easier to remove and replace the tank for filling on the ground.

y4mNEC114hMlcX70Gll7NQWEHBm54xk09wvJdZY_k0RV1Ht2F_IUpWTWLBcJv9ZWLC1hYHRTwZE-LyFpORIsL0veFaQJ7A6pXFFLVmlItljpjeiuu4hnxBA4jCWslGYXdDQxl_sh91bSZkloTNB6vKDTdUIYiAii6BwL4r2NLMxjrlTT_rdhL1r1WYWHRJn44ZdwrATHiDqSw3F00maIiCmew
 

SHSU

Lieutenant Junior+Starmada Splash Of The Year 2019
Joined
Mar 8, 2017
Messages
1,749
I like the added strap, but agree it is going to be a bear. I wonder after a couple runs if you will feel comfortable with just one. I can see crawling around and trying to get the second strap under the splashwell very tiring.

SHSU
 

FIGMO

Petty Officer 1st Class
Joined
Jun 18, 2017
Messages
321
Nice work, wiring looks tidy and the seats are super nice. :thumb:

My last boat that had a portable tank was my Sea Nymph and it made me hate those leaky messy things. Just an idea to keep things clean is a vehicle drip pan from the parts store under the tank to catch any spillage. I put a nylon buckle on my hold down strap so it was easier to remove and replace the tank for filling on the ground.

[IMG2=JSON]{"data-align":"none","data-size":"full","src":"https:\/\/6z3h1w.bn.files.1drv.com\/y4mNEC114hMlcX70Gll7NQWEHBm54xk09wvJdZY_k0RV1Ht2F_IUpWTWLBcJv9ZWLC1hYHRTwZE-LyFpORIsL0veFaQJ7A6pXFFLVmlItljpjeiuu4hnxBA4jCWslGYXdDQxl_sh91bSZkloTNB6vKDTdUIYiAii6BwL4r2NLMxjrlTT_rdhL1r1WYWHRJn44ZdwrATHiDqSw3F00maIiCmew?width=1024&height=577&cropmode=none"**[/IMG2]

I really like the idea of the drip pan underneath the tank. I will check into that!

Thanks for that :)
 

FIGMO

Petty Officer 1st Class
Joined
Jun 18, 2017
Messages
321
I like the added strap, but agree it is going to be a bear. I wonder after a couple runs if you will feel comfortable with just one. I can see crawling around and trying to get the second strap under the splashwell very tiring.

SHSU

Hey SHSU,

Oh ya! After I got the corner panels in I experimented with strapping down an empty tank and it is a bit of a challenge. However, I do like the security that comes from having two straps holding those tanks in place.
 

FIGMO

Petty Officer 1st Class
Joined
Jun 18, 2017
Messages
321
Seeing as how we were on the topic of straps. Here is how I am securing the battery cases in the front of the boat:

Click image for larger version  Name:	64.jpg Views:	1 Size:	163.7 KB ID:	10925941
I had thought about securing the battery boxes to the floor, but due to the angle that the boxes sit in the storage area I would have had a devil of a time getting the lids off of the boxes. As such I am only using the straps to hold the batteries in place. That way I can loosen off the straps and slide the boxes around to get the lids off.

You can see the stainless steel tie downs that I used. They seem fairly sturdy.


Click image for larger version  Name:	64a.jpg Views:	1 Size:	172.4 KB ID:	10925942
Front of the house battery.


Click image for larger version  Name:	64b.jpg Views:	1 Size:	145.8 KB ID:	10925943
Just a close up.


Click image for larger version  Name:	64c.jpg Views:	1 Size:	155.3 KB ID:	10925944
And the back. I put 5200 on everything that I secure to the deck.
 

FIGMO

Petty Officer 1st Class
Joined
Jun 18, 2017
Messages
321
I have a question for the experts!

I need to add ventilation for the space under the splashwell. I am wondering how much ventilation I need to have?

Also wondering what others have used to provide ventilation for their splashwells?
 

SHSU

Lieutenant Junior+Starmada Splash Of The Year 2019
Joined
Mar 8, 2017
Messages
1,749
I had thought about securing the battery boxes to the floor, but due to the angle that the boxes sit in the storage area I would have had a devil of a time getting the lids off of the boxes. As such I am only using the straps to hold the batteries in place. That way I can loosen off the straps and slide the boxes around to get the lids off.

You can see the stainless steel tie downs that I used. They seem fairly sturdy.

I got the Attwood Battery boxes with strap. They work like yours, but it had plastic hardware. I was torn on upgrading to SS, but decided I would try what it came with first. Haven't had an issue yet.

As for ventilation, isn't it an open area or you going to seal it?

SHSU
 

FIGMO

Petty Officer 1st Class
Joined
Jun 18, 2017
Messages
321
Hey Guys,

It's been a while, but the weather is starting to warm up so it will be out to the garage soon. I have to get the garage cleaned up after the winter, its pretty messy in there. Until then I have a few photos to post from last year to get things caught up.

64d.jpg

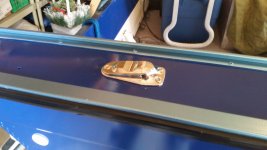
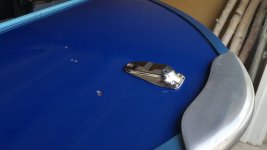
As part of the wiring, I have the stern nav light mounted and wired. Tested it and its working fine.

64e.jpg

Bow Nav light is good to go as well.

64g.jpg

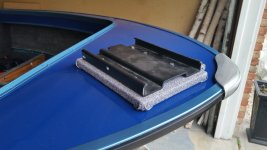
Mount for the trolling motor is fitted in place.

65.jpg

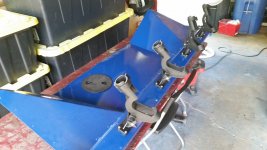
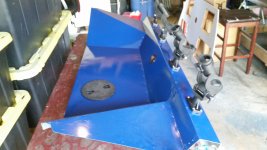
I decided to add "rocket launcher" fishing rod holders to the splashwell. I also added an access plate that John Snr provided to me. It should make it easier accessing the bilge pump wiring once everything is together.

65b.jpg

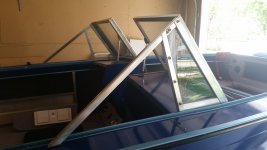
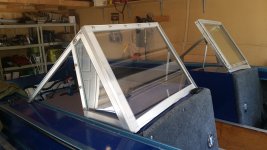
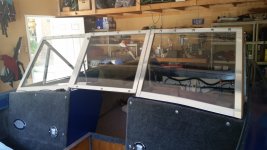
Windows after fitting and lining with weather stripping along the bottom. It seems to be nice and tight.

65c.jpg

You can see the GPS sensor for my speedometer just to the front of the starboard window. It is mostly out of the way there, and in the right position to get a good signal.

65d.jpg

The windows fit really well when closed. All in all I am happy with with how that has turned out. More to follow.

Cheers
 

Attachments

  • 65a.jpg
    65a.jpg
    4.3 MB · Views: 4

Watermann

Starmada Splash of the Year 2014
Joined
Jan 12, 2013
Messages
13,804
Very nice, looks like you're going to be out cutting a wake this spring. (y)
 

FIGMO

Petty Officer 1st Class
Joined
Jun 18, 2017
Messages
321
Very nice, looks like you're going to be out cutting a wake this spring. (y)
Hi Watermann,

Long time no see, but that was winter. This spring might be a bit optimistic. I am thinking more about mid to late July. I still have a few things to do:

- livewell installation,
- main hatch on the front deck,
- door for under the splash well,
- front speaker mounts and speakers,
- fix the paint job......
- paint the motor, and
- fix up the trailer.

There are some other minor items, but nothing that stops me from putting the boat in the water, so fingers crossed. Its been almost four years on this rebuild. The boat has to get back in the water this year!
 

FIGMO

Petty Officer 1st Class
Joined
Jun 18, 2017
Messages
321
Hello Gents,

Some more progress shots:

66.jpg

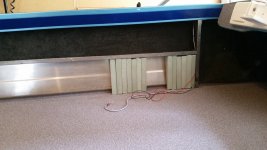
I cut up and inserted more of the foam along both sides. I had to leave a gap for the speaker. Same on both sides.

66a.jpg

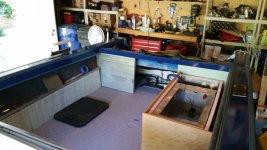
You can see the foam on the starboard side as well. Note I forgot to gap it for the speaker. With the excess foam I cut templates for the wood going under the splash well. That actually worked really well. Foam is cheaper than marine grad plywood if you make a mistake. I also had the live well fitted. I'm thinking its too big so I might have to have another one built (time to go see John Jnr, again).

66b.jpg

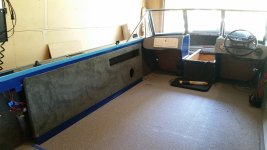
Checking out the side panels for fit before the splash well goes back in. I had to make sure that it will marry up to the wood supports under the splash well. Note the sexy blue paint on the leg supports for the side panel. I like it!

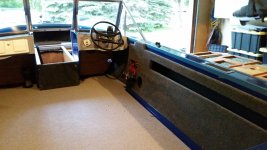
Below more of the same for the starboard side. I also did a test for the dashboard panels on the consoles.

Note the 6 screws in the decking for the pedestal mount. It took me well over 30 minutes to find the first hole! Once I had that one though it went pretty quick. I left the screws in so crap didn't fall into the holes and plug them up.

66c.jpg
 

Moserkr

Chief Officer + Starmada Splash Of The Year 2021
Joined
Nov 23, 2020
Messages
870
Nice work @FIGMO I started my own 16’ SS restomod last fall and just got caught up on your work. Really like the casting deck frame and paint scheme. Mine will be similar in color but with white/blue. Thanks for the inspiration and get her splashed!!
 
Top