1974 Starcraft SS16 Restortation

FIGMO

Petty Officer 1st Class
Joined
Jun 18, 2017
Messages
321
I got the Attwood Battery boxes with strap. They work like yours, but it had plastic hardware. I was torn on upgrading to SS, but decided I would try what it came with first. Haven't had an issue yet.

As for ventilation, isn't it an open area or you going to seal it?

SHSU
Hey SHSU,

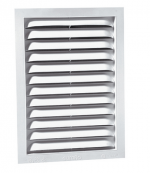
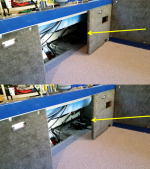
This is a rather late reply, sorry about that. I intend on closing off the area under the splash well with a door. I also plan on mounting vents in the door to create some air flow so that gas vapors don't collect under the splash well. As such I need to figure out what would be a good sized vent to allow for good air flow.
 

SHSU

Lieutenant Junior+Starmada Splash Of The Year 2019
Joined
Mar 8, 2017
Messages
1,749
Hey SHSU,

This is a rather late reply, sorry about that. I intend on closing off the area under the splash well with a door. I also plan on mounting vents in the door to create some air flow so that gas vapors don't collect under the splash well. As such I need to figure out what would be a good sized vent to allow for good air flow.

No worries.

As for vent size, you could always use a couple roof eve vents. Cheap and easy to get your hands on. Just need to make sure they are aluminum or some form of plastic.

SHSU
 

FIGMO

Petty Officer 1st Class
Joined
Jun 18, 2017
Messages
321
No worries.

As for vent size, you could always use a couple roof eve vents. Cheap and easy to get your hands on. Just need to make sure they are aluminum or some form of plastic.

SHSU
Hey SHSU,

That is a perfect idea. I never thought to use Gable Vents. Lots of different sizes and in white plastic so I can paint to match the boat. Brilliant!
 

FIGMO

Petty Officer 1st Class
Joined
Jun 18, 2017
Messages
321
Nice work @FIGMO I started my own 16’ SS restomod last fall and just got caught up on your work. Really like the casting deck frame and paint scheme. Mine will be similar in color but with white/blue. Thanks for the inspiration and get her splashed!!
Hi Moserkr,

Thanks for that. It has been a long haul. Mind you I only get about 5 months to work on the boat in a given year. Winter in Canada does that.

I had a look at your rebuild. It brings back some memories of the tear down and stripping. That green and black was quite something to behold! Best of luck with your rebuild. It must be nice living in California, and an extended working season.

Cheers
 

FIGMO

Petty Officer 1st Class
Joined
Jun 18, 2017
Messages
321
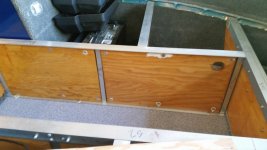
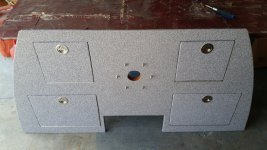
Some more progress shots. Fitting the hatches to the casting deck:

01.jpg

I riveted half inch marine grad plywood to the aluminum supports to give it strength and provide separation to the different storage areas. Plenty of 5200 with every rivet and screw.

02.jpg

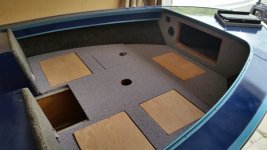
Testing the fit of the hatches to the deck. You can see that I have one already installed as a test. Everything lined up well enough.

Below, some more of the same. I will have some piano hinge installation shots next.

03.jpg
 

Attachments

  • 04.jpg
    04.jpg
    243.9 KB · Views: 2
Last edited:

MNhunter1

Lieutenant Junior Grade
Joined
May 12, 2014
Messages
1,062
Nice work! How much of a gap are you leaving for the Nautolex on the hatches? I'm debating making my own as you have, or just installing some pre-fab flush mount ones like the Tempress or DPI Marine.
 

FIGMO

Petty Officer 1st Class
Joined
Jun 18, 2017
Messages
321
Nice work! How much of a gap are you leaving for the Nautolex on the hatches? I'm debating making my own as you have, or just installing some pre-fab flush mount ones like the Tempress or DPI Marine.
Hey MN,

About a quarter of an inch, maybe a tiny bit more. What I did as a test fit was to lay some Nautolex down over the deck opening, and then wrap some Nautolex over the edges of the hatch to test the fit. It gave me a good idea as to whether or not it was too tight. But about a quarter of an inch. don't forget that the coating on the wood will take up some of that gaping. Give or less. In my next post you can see how much of a gap I left before applying the Nautolex. you know what, I'll post them now.
 
Last edited:

FIGMO

Petty Officer 1st Class
Joined
Jun 18, 2017
Messages
321
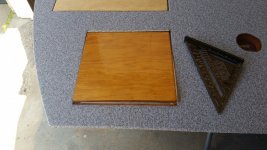
Here are some images of fitting the hatches with the Nautolex covering:

05.jpg

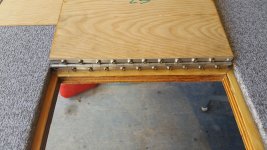
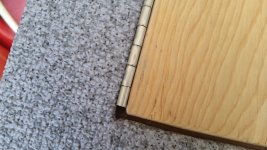
I applied a coating to all of the hatches before covering them with Nautolex, and then securing them with the piano hing. I did not align the screws properly on the first attempt and had to redo the piano hing mount. The screws were hitting each other stopping the hatch from closing properly.

06.jpg

I had to pre-drill all the holes for the screws. which required some care to ensure proper spacing. I had to make sure that the screw heads I used were not as deep as the as the gap in the hing itself.

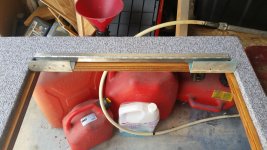
Below, I was trying to use some aluminum pieces to create a gap at the bottom of the hing to ensure that the hatch would close all the way properly. At the end of the day this wasn't really required. I ended up just sinking the piano hing to the wood trim in the opening and then securing the hatches. It seemed to work out nicely.

08.jpg
 

Attachments

  • 09.jpg
    09.jpg
    127.4 KB · Views: 6
  • 11.jpg
    11.jpg
    227.2 KB · Views: 5

FIGMO

Petty Officer 1st Class
Joined
Jun 18, 2017
Messages
321
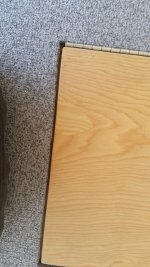
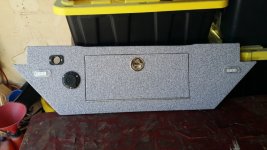
Here are some pictures of the hatches finished with the latches put in place. It actually turned out really nice. They are a bit tight, but they will break in with time and use.12.jpg


13.jpg
 

FIGMO

Petty Officer 1st Class
Joined
Jun 18, 2017
Messages
321
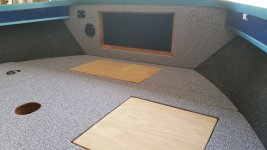
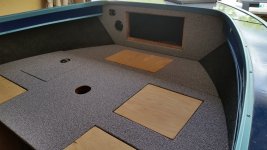
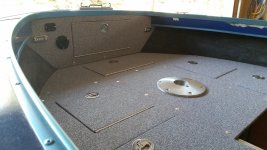
In the spirit of helping MN make his decision as to whether or not to go with wood hatches as I have done, here are some pictures of the deck installed with the wood hatches covered with nautolex vice a prefab hatch:

16.jpg

Aside from my paint that peeled away with the tape, Grrrr. You can see the casting deck installed, and riveted in place. I will fix the paint at a later date.

17.jpg

At the end of the day I was quite happy with the end results. I think it is both aesthetically pleasing and functional. They are a bit tight, but will loosen with time and use.

18.jpg
 

Moserkr

Chief Officer + Starmada Splash Of The Year 2021
Joined
Nov 23, 2020
Messages
870
Hatches and deck too great!! Glad I get to watch you do it before I stumble through it haha. Im only planning one main and an access to my fuel tank. Way to maximize your storage though!! 👍👍
 

FIGMO

Petty Officer 1st Class
Joined
Jun 18, 2017
Messages
321
Some more progress shots. Fitting the hatches to the casting deck:

View attachment 336669

I riveted half inch marine grad plywood to the aluminum supports to give it strength and provide separation to the different storage areas. Plenty of 5200 with every rivet and screw.
View attachment 336670

Testing the fit of the hatches to the deck. You can see that I have one already installed as a test. Everything lined up well enough.
Below, some more of the same. I will have some piano hinge installation shots next.

View attachment 336671
Point of note: I stated that I used half inch plywood for the supports under the deck, it was actually three quarter inch plywood (marine grade).
 

FIGMO

Petty Officer 1st Class
Joined
Jun 18, 2017
Messages
321
Hatches and deck too great!! Glad I get to watch you do it before I stumble through it haha. Im only planning one main and an access to my fuel tank. Way to maximize your storage though!! 👍👍
Hey Moserkr,

There is almost zero storage space in these boats. After reading through a number of posts, this is what I came up with to maximize my storage space. One of the driving factors in determining the size of the main storage space was the size of the ladder I use for swimming. It had to fit the central storage space, so it is purpose built. Its one of those folding side ladders, and it fits nicely in the center stowage. I test fitted that thing a number of times to make sure I didn't screw it up.
 
Last edited:

ShoestringMariner

Lieutenant Commander
Joined
Apr 18, 2015
Messages
1,605
Some more progress shots. Fitting the hatches to the casting deck:

View attachment 336669

I riveted half inch marine grad plywood to the aluminum supports to give it strength and provide separation to the different storage areas. Plenty of 5200 with every rivet and screw.

View attachment 336670

Testing the fit of the hatches to the deck. You can see that I have one already installed as a test. Everything lined up well enough.

Below, some more of the same. I will have some piano hinge installation shots next.

View attachment 336671
Beautiful job!
 

FIGMO

Petty Officer 1st Class
Joined
Jun 18, 2017
Messages
321
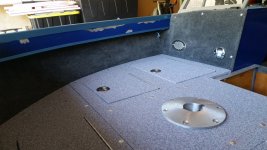
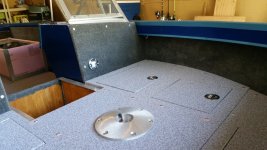
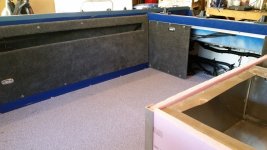
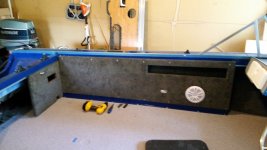
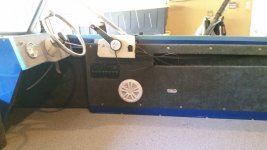
Some more progress shots. I have the side and rear panels riveted in place:

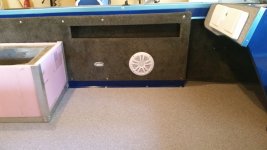
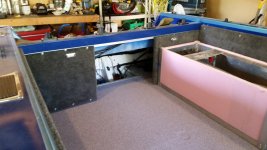
24.jpg

Starboard side panels and back panel. It went in pretty smooth no major issues. I used some angled aluminum on the tops and bottoms for support. I left about a half inch gap at the bottom of the back panels to allow water to flow off, and stop the carpet from soaking up water.

25.jpg

Pretty much the same on the port side. I did not make as long of a hole in the side panel, as I figured the live well might interfere with it. I am wondering if I should not have just taken it as far back as the other side.

27.JPG

Reference to where the live well will sit.

28.JPG


29.JPG


Initial installation of the throttle control, and the fancy new steering wheel my wife bought for me. I like it!

Next up will be some light pictures!
 

sidingguy

Petty Officer 2nd Class
Joined
Nov 3, 2017
Messages
136
Regarding venting for transom area; I have used the round aluminum soffitt vents. they are available in different diameters to fit your areas.
 

FIGMO

Petty Officer 1st Class
Joined
Jun 18, 2017
Messages
321
Regarding venting for transom area; I have used the round aluminum soffitt vents. they are available in different diameters to fit your areas.
Hello Sidingguy,

I had a look at some of those on line as well the the gable vents. I found one that looks like a good size at 12" x 18". I like that fact that I can paint them as well.gable_vent.PNG
 

FIGMO

Petty Officer 1st Class
Joined
Jun 18, 2017
Messages
321
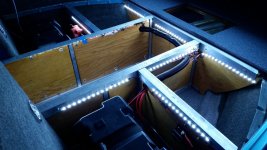
Some lighting pictures. I have quite a few of these, so subsequent posts to get all of them:

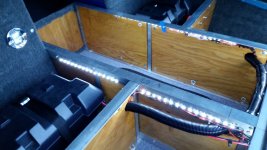
30.jpg

I ran strip LED lighting in all of the storage areas. I figured it would be beneficial hunting for stuff in the dark. The strip lights I used are rated for marine use. This was taken just prior to installing the deck.

20.jpg

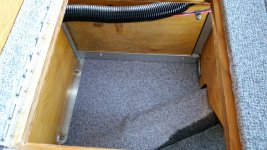
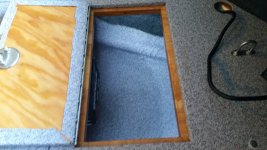
A couple of daylight pictures, but you can still that the LEDs light up the storage space well.

21.jpg


21a.png

You can see in the bottom photo that it is a lot brighter under the splash well with the LEDs on. That should help when I am struggling to secure those gas tanks in place.

Next up will be the deck lights.
 

Attachments

  • 31.jpg
    31.jpg
    202.6 KB · Views: 4

mattsteg

Petty Officer 2nd Class
Joined
Mar 25, 2019
Messages
177
In the spirit of helping MN make his decision as to whether or not to go with wood hatches as I have done, here are some pictures of the deck installed with the wood hatches covered with nautolex vice a prefab hatch:

View attachment 336718

Aside from my paint that peeled away with the tape, Grrrr. You can see the casting deck installed, and riveted in place. I will fix the paint at a later date.

View attachment 336719

At the end of the day I was quite happy with the end results. I think it is both aesthetically pleasing and functional. They are a bit tight, but will loosen with time and use.

View attachment 336720
Great looking hatches. I'm also right at that hatch-building (and laying-out) stage on my SS. How large did you make your livewell?
 

SHSU

Lieutenant Junior+Starmada Splash Of The Year 2019
Joined
Mar 8, 2017
Messages
1,749
Really nice work!!!

Boating is really coming along and you will be in the water shortly!!

SHSU
 
Top