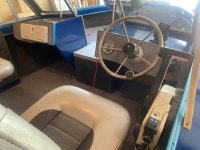
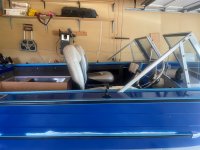
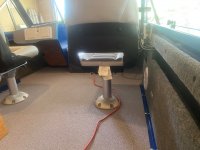
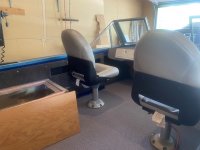
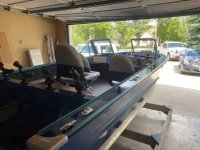
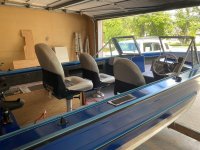
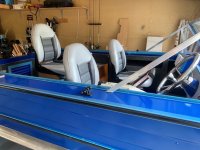
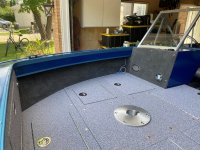
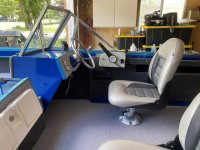
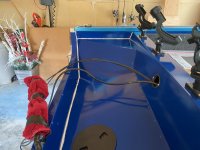
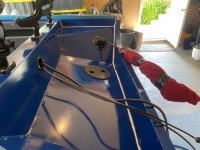
1974 Starcraft SS16 Restortation

FIGMO

Petty Officer 1st Class
Joined
Jun 18, 2017
Messages
321
Very nice work, everything is looking top notch!

y4mUx-QlmUmNRuGNeBC5R1T9BFRlbr8xD7nlCdkdslyyniOVw-kppaIavCE-WCKIHQ_NIfiHktZ4PiuHojCjNk3vVzJ-Oa88BK6ohmh7h-vr-735YNCm8-Pf5RImT4xbZ56cpwBLtoGpIr4zd_g4862TEq6tq7d3s5Ct2nIYDXDUsLCDmYGfaeX8FBTXWwmRPXo
Thank you Mister Watermann. Cool graphics!
 

FIGMO

Petty Officer 1st Class
Joined
Jun 18, 2017
Messages
321
Hello Gents,

So I cleaned the garage out a couple of weeks ago to get back at the restoration. I have things pretty much ready to go and this started yesterday morning, and hasn't stopped. 🤬

A view of my back deck.IMG_0114.JPG

There is at least a foot of snow with more on the way. So much for an early start to the season....

IMG_0115.JPG
 

Moserkr

Chief Officer + Starmada Splash Of The Year 2021
Joined
Nov 23, 2020
Messages
869
Ouch! I live at 4,000’ in Ca and its an early spring here. Very mild winter. Looks like my yard a month ago though! Hope it warms up for you soon.
 

FIGMO

Petty Officer 1st Class
Joined
Jun 18, 2017
Messages
321
Hey Gents,

So it has been almost two months since the last post. Sadly I haven't gotten much done. Covid-19 has certainly curtailed some of the progress. However, I have gotten some things done, and I am hopeful that my productivity will pick up in the next few weeks.

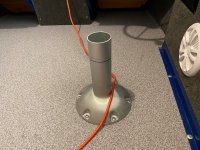
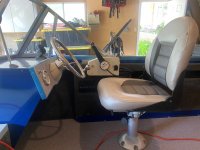
I was fitting my boat seats to their posts for the driver and the passenger, and realized that the seat posts are way too high. Have a look at the pics:

71.JPG

I figure that I need to cut about 5 inches off of the top of the posts. The question is what is the right way of doing that?

72.JPG

You can see in the picture above that there is little to no room for my knees/legs

73.JPG

Same as above, no leg room!

74.JPG

I sit so high in the boat that the wind screen is pretty much useless

74A.JPG

A couple of shots from the back. The passenger side is the same.

I tried contacting some laser cutting shops in the city, but one place wanted 150.00 to cut one post. I will take a hack saw to them before I pay that much money.

Has anyone else found themselves in this situation, and if so what did you do about it?

74B.JPG
 

FIGMO

Petty Officer 1st Class
Joined
Jun 18, 2017
Messages
321
Hello again!

I ordered and received the pedestal mount for the front. It can be adjusted manually, naturally it is not speed rated. This is the sit in the front comfy chair while trolling or casting.

75.JPG


76.JPG


77.JPG
 

FIGMO

Petty Officer 1st Class
Joined
Jun 18, 2017
Messages
321
Okay, one more post for the day.

If you recall from last year when I finished painting the trim, the tape I was using pulled some of sapphire blue paint off.
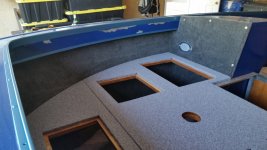
80.jpg

I have to fix this, but I can't use the big spray gun as the over spray is horrendous. I do however have a small airbrush that I use for the scale models I build. So I decided to give that a try.
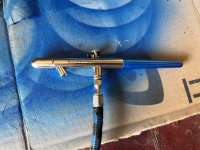
81.JPG

This is my Badger 150 airbrush. It comes with three sizes of spray needles and heads. I decided to use the large size needle for the job.
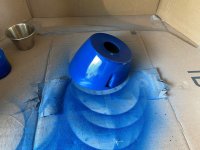


82.JPG

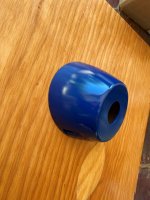
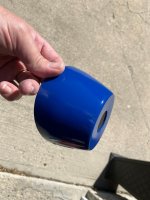
I decided to experiment with a couple of smaller items on the boat that I want to match with the overall scheme. This is the cover that sits under the steering wheel over the the console. This is after one coat, its actually finished now. I will post a finished photo shortly.

The best thing about the airbrush is that there is very little over spray, and I can regulate the air pressure down to about 15 to 20 PSI to control the flow of the paint. I am confident that this will solve my paint issues.
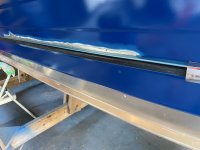
83.JPG

The following images are a series of shots after I sanded all the spots that were damaged when I removed the tape from the trim. I used a combination of 180 to 600 grit sandpaper to try and "feather" the sanding of the layers so when I repaint it should not stick out like a sore thumb.
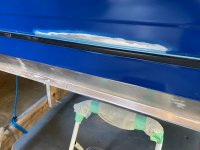
84.JPG

I also found a new masking tape that is rated for gentle/sensitive surfaces. Hopefully I will not have a repeat of last time.
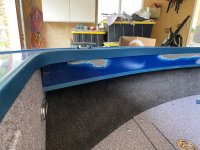
85.JPG

When I do get around to painting the boat, I have a number of tarps in the garage that I will use to cover everything. I see this being a lot like surgery, so only the injured area that I am painting with the airbrush will be exposed. That's my plan to mitigate any over spray.
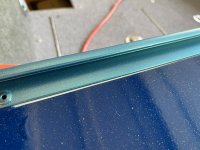
88.JPG

Picture with the new camera. That is a lot of dust! My masking job when I painted the trim was not the best. There are about a half dozen spots like this on the gunnel. I have some super fine brushes that I will use to fix areas like this.

When that is about it. I hope enjoyed looking at my failures!!!! ;)
 

BOYS & TOYS

Petty Officer 2nd Class
Joined
Mar 1, 2008
Messages
149
Looks good. You should be okay cutting with a saw. Take care to cut square and file smooth. Some seat bases have a plastic trim ring on top for the swivel to rest on that would allow a less than perfect finish.
Measure twice, cut once🙄
 

Attachments

  • Screenshot_20210612-100605_Chrome.jpg
    Screenshot_20210612-100605_Chrome.jpg
    823.4 KB · Views: 2

Watermann

Starmada Splash of the Year 2014
Joined
Jan 12, 2013
Messages
13,794
Really looking good and ready for some water. (y)

What is that post made of? As thin as it is it looks steel with an AL base. I would use a Sawzall and cut it and then be sure to vacuum up all the shavings from inside. Also I would prime and paint the raw cut edges.
 

FIGMO

Petty Officer 1st Class
Joined
Jun 18, 2017
Messages
321
Really looking good and ready for some water. (y)

What is that post made of? As thin as it is it looks steel with an AL base. I would use a Sawzall and cut it and then be sure to vacuum up all the shavings from inside. Also I would prime and paint the raw cut edges.
It is solid aluminum. So I may just take to the hack saw to this after all. There is one more shop I might check out before I do that.
 

FIGMO

Petty Officer 1st Class
Joined
Jun 18, 2017
Messages
321
Looks good. You should be okay cutting with a saw. Take care to cut square and file smooth. Some seat bases have a plastic trim ring on top for the swivel to rest on that would allow a less than perfect finish.
Measure twice, cut once🙄
Hey B&T,

Likely the way to go. Cheers
 

sidingguy

Petty Officer 2nd Class
Joined
Nov 3, 2017
Messages
136
It is solid aluminum. So I may just take to the hack saw to this after all. There is one more shop I might check out before I do that.
check with a plumber, he probably has a pipe cutter that would likely cut straight and clean thru the post for a case of adult beverages!
 

SHSU

Lieutenant Junior+Starmada Splash Of The Year 2019
Joined
Mar 8, 2017
Messages
1,741
On the SS16 the windshield does nothing. I wear sunglasses and have goggles for when we are in rough waters.

As for the post, check the size at the top and where you want to cut. I found mine the top was slightly tapered (I couldn't see it before I cut it). So when I tried to put the seat back on it wouldn't fit...

SHSU
 

FIGMO

Petty Officer 1st Class
Joined
Jun 18, 2017
Messages
321
On the SS16 the windshield does nothing. I wear sunglasses and have goggles for when we are in rough waters.

As for the post, check the size at the top and where you want to cut. I found mine the top was slightly tapered (I couldn't see it before I cut it). So when I tried to put the seat back on it wouldn't fit...

SHSU
Hey SHSU,

That is a damn good recommendation!
 

FIGMO

Petty Officer 1st Class
Joined
Jun 18, 2017
Messages
321
Hello,

Some more updates. I was able to get some work done on the door for the splash well, and the last storage hatch in the front deck is done (forgot to take a picture). I also have my new seat post for the back seat, and some painting progress.

90.JPG

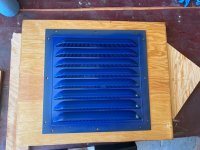
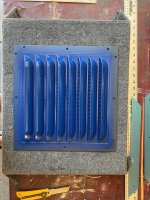
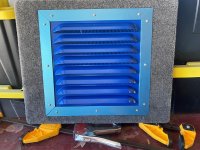
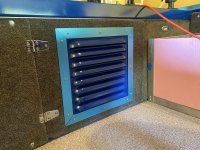
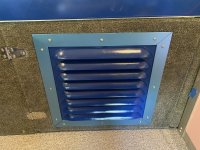
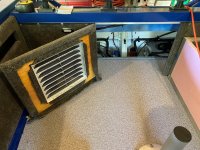
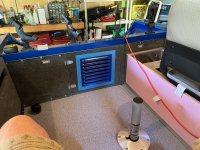
This is my system for getting ventilation into the space under the splash well. It was white, I painted it sapphire blue.

92.JPG

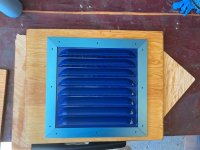
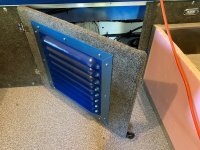
I had some aluminum trim cut to dress it up, paint metallic Maui Blue to match the trim on the rest of the boat. This has now been carpeted and I tested fitted the door only to find out the the deck floor slopes up. As such I had to cut another half inch off the bottom so it would open properly. I'll post the some finished images once I get that sorted out.

93.JPG

My new rear seat post, speed rated for passengers. I tested it out and it does not interfere with the livewell, so I am sticking with the livewell as is.

94.JPG

More than enough clearance.

95.JPG


96.JPG

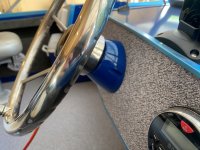
I finished the final coat on the cover for the steering wheel on the dash. I worked out quite well. I found the airbrush was very effective with the rear air vent as well. So the boat is next once the weather cooperates.

97.JPG

Looks nice and shiny in the sun light!

98.JPG

I am quite happy with the appearance. Makes me feel better about touching up the spots that the taped pulled off.

99.JPG

Well that is it for now. I have a list of 13 things I have to do before I pull the boat out of the garage and get started on the trailer and the motor. With any luck I am hoping for mid-August splash (fingers crossed).
 

SHSU

Lieutenant Junior+Starmada Splash Of The Year 2019
Joined
Mar 8, 2017
Messages
1,741
Very nice!!
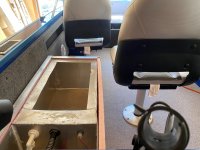
What kind of seats did you get? They look very robust and won't bend if someone were to lean back in it. I have had to jerry rig some straps to help "Support" the back as the seat would bend to easily on the ones we have.

SHSU
 

FIGMO

Petty Officer 1st Class
Joined
Jun 18, 2017
Messages
321
Very nice!!
What kind of seats did you get? They look very robust and won't bend if someone were to lean back in it. I have had to jerry rig some straps to help "Support" the back as the seat would bend to easily on the ones we have.

SHSU
Hey SHSU,

They are Tempress seats. My wife actually picked them up from Cabelas (Canada). I nearly choked when she told me how much she spent, but like you said they are sturdy and comfy! This is the exact model we got: Tempress.PNGCheers!
 

FIGMO

Petty Officer 1st Class
Joined
Jun 18, 2017
Messages
321
I have some vent pictures and a pic of the last hatch going onto the casting deck:

120.JPG

As indicated the airbrush worked really well on the plastic. I like the neutral grays with the blues. I think it pops!

122.JPG


123.JPG

Some nice stainless steel fixtures for the door. This was the test fit after I cut another half inch of the bottom. I still need to fix the epoxy and carpet, and then put the latch on the upper right side of the door.

124.JPG

125.JPG

126.JPG

127.JPG

128.JPG

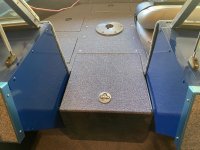
Last hatch. Not happy about the gaps near the consoles. I think I have an idea on how I can dress those up. At the end of the day, pretty happy. I am satisfied with how the casting deck turned out.

129.JPG

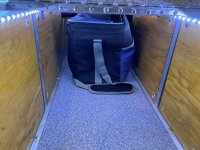
A couple of shots in the main storage area under the cast deck. I am very happy that I put lights in the storage area.

130.JPG

There is a fair amount of room under there.
 

SHSU

Lieutenant Junior+Starmada Splash Of The Year 2019
Joined
Mar 8, 2017
Messages
1,741
Love the finishing touches you are adding. The extra time on the hardware/paint/SS really makes the boat look professionally done.

I agree, the lights in the forward storage area was a great idea. Will let you find that one item tucked all the way at the end without having to go find a flashlight.

SHSU
 

FIGMO

Petty Officer 1st Class
Joined
Jun 18, 2017
Messages
321
Hey Gents,

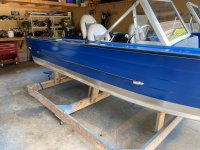
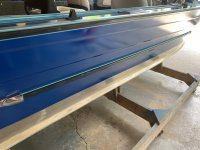
I have been touching up the paint on the boat. If you will recall when I removed the tape from the trim paint job, it took a bunch of the paint with it. I have been fixing those areas. Its not the best touch up, but it will do. The airbrush left a slightly different texture to the paint. You never know I might be able to buff that a bit to hide it, but it doesn't look too bad.

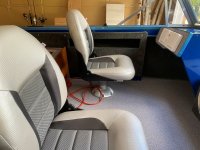
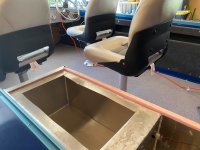
I also got the seat posts cut down for the driver and the passenger. Plus I put the 5200 marine sealant around the splashwell. Not a pretty job, but I am happy with it. Here are some pics:

131.JPG

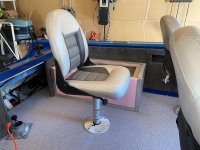
You can see the driver and passenger seat posts are now cut down to size. I am happy with the fit!

132.JPG

Another shot of the same.

133.JPG

The paint on the side above the rub rail was the problem area that has now been sorted out. Like I said not pretty, but it will do.

134.JPG

Better shot of the height of the seats.

136.JPG

Another shot of the paint above the rub rail.

136a.JPG

More of the same.

137.JPG

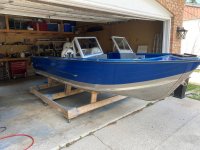
Full view, she is starting to look pretty!

138.JPG

The side of the gunnel is where the paint peeled off. Better now.

139.JPG

Just a shot of the driver seat cut down to size.

141.JPG

The 5200 sealant on the splashwell. I have already put a coat of paint on it, but it needs a second coat. Will post some pics once the second coat is down.

142.JPG

That is it. The next project is to get the livewell put in place. As stated before I am going as is. Its a bit big, but that just means more room for fish!
 
Last edited:
Top