1974 Starcraft 21’ Holiday

Crankerbait

Seaman Apprentice
Joined
Nov 5, 2021
Messages
31
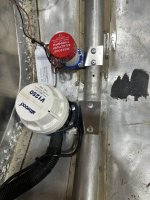
I made mounting plates from thin sheet aluminum that I mounted the bilge pump bases to. I then riveted the plates to the rear most rib. I attached the pic that shows these best.
I like it. I was imagining something similar. I want to get them as low as possible but also want to have access to the drain hole at the base of the rib.
 

Watermann

Starmada Splash of the Year 2014
Joined
Jan 12, 2013
Messages
13,787
That will for sure help with deck mounting and should keep rib end cracks from forming.

On the bilge pump I did this in my SS.

UQTdIVqyAiaEIID8jAwAAAAAAAxaSlsxmJC382M
 

classiccat

"Captain" + Starmada Splash Of The Year 2020
Joined
Dec 20, 2010
Messages
3,412
Nice chine supports & patches...a hull after my own heart 😍!!
 

Crankerbait

Seaman Apprentice
Joined
Nov 5, 2021
Messages
31
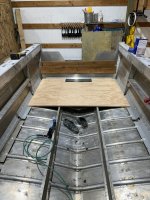
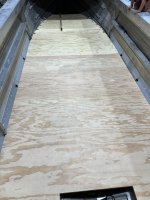
Both bilge pumps are mounted. Floor is cut and fitted. We are getting the first coat of old timers sealer on them today. How many coats of sealer do I realistically need? We will be wrapping each piece in Vinyl we picked up from Defender. IMG_0290.jpegIMG_0288.jpeg
 

SHSU

Lieutenant Junior+Starmada Splash Of The Year 2019
Joined
Mar 8, 2017
Messages
1,722
We are getting the first coat of old timers sealer on them today. How many coats of sealer do I realistically need?
2-4 coats depending on how thick you want it.

Which vinyl did you go for? Nautolex Shark?

SHSU
 

Watermann

Starmada Splash of the Year 2014
Joined
Jan 12, 2013
Messages
13,787
2 good coats of OTF should be good.

Double pumps, I find the bilge pump to be the least used device in my trailered boat. Only time mine runs is when I check it before heading to the water.
 

Crankerbait

Seaman Apprentice
Joined
Nov 5, 2021
Messages
31
2 good coats of OTF should be good.

Double pumps, I find the bilge pump to be the least used device in my trailered boat. Only time mine runs is when I check it before heading to the water.
I tend to agree. We plan to have this boat out on the ocean doing some near shore fishing. Plus we’ll occasionally moor the boat when we camp in the summer. I knew I wanted one on a float switch and I figured a second pump is cheap insurance especially because we won’t be adding foam floatation.
 

Crankerbait

Seaman Apprentice
Joined
Nov 5, 2021
Messages
31
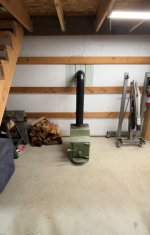
Don’t have a lot of progress but a small update. It been cold and wet here (usually in the 40s). I was afraid paint and glue would not cure properly at those temperatures. I snagged a wood stove from my dad’s basement and installed it in my shop. My shop is uninsulated but the stove seems to keep things at a workable level.
IMG_0315.jpeg

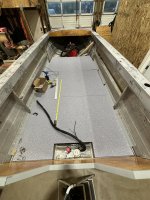
I was able to get some of the floors wrapped and installed.
IMG_0314.jpeg

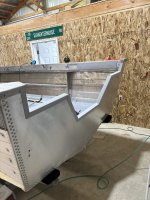
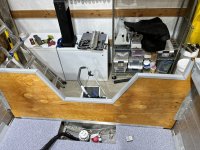
I got the transom in place and bent some aluminum to cap the transom. The pieces are not perfect and not attached. I’m still trying to figure out how or if I want to attach them together and to the boat. IMG_0303.jpegIMG_0304.jpeg
 

BWR1953

Admiral
Joined
Jan 23, 2009
Messages
6,178
When I added the transom cap to my Kingfisher, I slathered the transom with 3M 5200 and glued it down. Then, I drilled small holes through the aluminum and about 1/2" into the wood. Next, I filled those holes with 5200 using a syringe and then used stainless finishing nails to secure the cap. Worked for me.
Duh. I forgot something. I hadn't had my coffee when I made this post earlier. :coffee: :sneaky:

I used the finishing nails on the sides of the aluminum cap, as well as along the top. Plus, at the end of the cap, where the transom cap meets the sides of the hull, I used long stainless wood screws.

I hope I didn't forget anything else. 🙃
 
Top