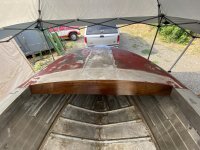
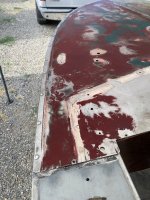
1974 Starcraft 21’ Holiday

BOYS & TOYS

Petty Officer 2nd Class
Joined
Mar 1, 2008
Messages
144
That's what I did to my transom skin. Link below__
Oops that was the last post, the transom stuff is in the beginning of the thread.
As you will see I'm not a fan of sandwiching new aluminum over old corroded transoms. It is a perfect spot for more corrosion to continue.
 

Crankerbait

Seaman Apprentice
Joined
Nov 5, 2021
Messages
30
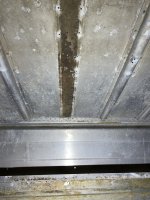
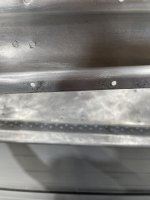
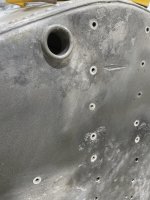
I’m having to remove a few ribs to get the rib ands and hull back to shape. After removing the first rib I found a lot dirt, grime and corrosion between the hull and the ribs. It’s cleaning up pretty well, but there is some shallow pitting around the rivets where the rib and hull are sandwiched together.

Any suggestions on reassembly? I plan use 5200 between the rib and the hull. Is there another product better suited for this purpose such as Coat-it or gluvit?
 

Attachments

  • 32C21924-4A78-4C6E-9BF7-31F7661ADE20.jpeg
    32C21924-4A78-4C6E-9BF7-31F7661ADE20.jpeg
    2.2 MB · Views: 17
  • C96D66DB-7BCE-4D93-9E9A-DBCE6399C94F.jpeg
    C96D66DB-7BCE-4D93-9E9A-DBCE6399C94F.jpeg
    2.3 MB · Views: 16
  • C714E33C-11C7-4F56-B734-6E6124AB2DB4.jpeg
    C714E33C-11C7-4F56-B734-6E6124AB2DB4.jpeg
    1.6 MB · Views: 16

BOYS & TOYS

Petty Officer 2nd Class
Joined
Mar 1, 2008
Messages
144
Epoxy products should be used after riveting and metal work. Seams are the best applications for them. 3m 5200 for everything else
 

SHSU

Lieutenant Junior+Starmada Splash Of The Year 2019
Joined
Mar 8, 2017
Messages
1,719
JB Weld to cover the pits and 5200 to seal the rivet.

SHSU
 

Crankerbait

Seaman Apprentice
Joined
Nov 5, 2021
Messages
30
I hacked at it with a saw for a while and got it out. Is there a preferred method for cutting sheet aluminum. Angle grinder? Circular saw with metal blade?
 

SHSU

Lieutenant Junior+Starmada Splash Of The Year 2019
Joined
Mar 8, 2017
Messages
1,719
A metal sheer machine would be the easiest, but I have done both angle grinder and metal saw. Both work.

SHSU
 

BOYS & TOYS

Petty Officer 2nd Class
Joined
Mar 1, 2008
Messages
144
I cut aluminum with all kinds of woodworking tools. Jig saw, circular saw,bandsaw and even oscillating saws when no other saw will work.
WD 40 makes a good lube for cutting aluminum. It keeps the cutting teeth from loading up.
 

Crankerbait

Seaman Apprentice
Joined
Nov 5, 2021
Messages
30
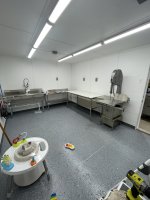
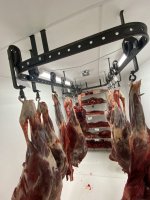
Back after a long break, been really busy on our little homestead. Ended up spending the last year building and using a hanging cooler and processing room so we can handle the processing of all our own food.

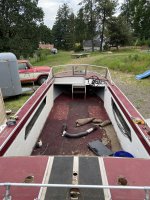
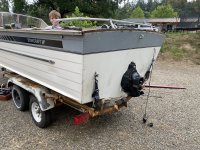
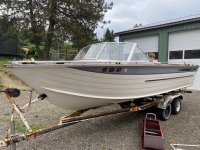
I got to work on the boat and found I was pretty overwhelmed with the amount of pitting and damage to the hull. With what felt like no end in sight, I stumbled across another 1972 Starcraft Holiday 21’. I went to take a look, the trailer was in poor condition and the motor had been pulled. Thankfully I have a basically new trailer that I know with fit perfectly and a nearly new motor!

The boat had some small cracks at the ends of the ribs but the over all condition of the boat seem to be much better that the one I was currently working on. The price was right so I decide to buy the hull and restore it. It will require some reworking of the transom as I will convert it to an outboard.

Not completely sure what I will do with the old boat yet. I imagine it will become scrap metal. I’m working on tearing it apart today. Hopefully I’ll have more pictures for you this evening.
 

Attachments

  • IMG_0416.jpeg
    IMG_0416.jpeg
    3 MB · Views: 18
  • IMG_0415.jpeg
    IMG_0415.jpeg
    5.3 MB · Views: 16
  • IMG_0414.jpeg
    IMG_0414.jpeg
    5.2 MB · Views: 18
  • IMG_5477.jpeg
    IMG_5477.jpeg
    2 MB · Views: 17
  • IMG_0224.jpeg
    IMG_0224.jpeg
    1.5 MB · Views: 16
  • IMG_0083.jpeg
    IMG_0083.jpeg
    1.6 MB · Views: 18

Moserkr

Chief Officer + Starmada Splash Of The Year 2021
Joined
Nov 23, 2020
Messages
869
Thats a nice new hull and butcher room you got there!
 

Doh

Petty Officer 2nd Class
Joined
Aug 12, 2008
Messages
193
Went through a similar episode back in 1982 with Dad's 1975 18'SS. Rib Cracks, not the Corrosion. Dad spent big cash having it repaired, reriverted and Braced, only to have it leak again in a few months.

I think the V5 Hulls had the Rib Cracking remedied, and my Uncles older 1964 Holiday never had a problem, but early-mid 70's Watch out on them Starcrafts.
 

Crankerbait

Seaman Apprentice
Joined
Nov 5, 2021
Messages
30
Went through a similar episode back in 1982 with Dad's 1975 18'SS. Rib Cracks, not the Corrosion. Dad spent big cash having it repaired, reriverted and Braced, only to have it leak again in a few months.

I think the V5 Hulls had the Rib Cracking remedied, and my Uncles older 1964 Holiday never had a problem, but early-mid 70's Watch out on them Starcrafts.D

Seems to be a theme I’m hearing about the V5 hull. Do you happen to have any photos of the bones of one? I’m curious to see the structural and support difference.
 

Doh

Petty Officer 2nd Class
Joined
Aug 12, 2008
Messages
193
Seems to be a theme I’m hearing about the V5 hull. Do you happen to have any photos of the bones of one? I’m curious to see the structural and support difference.
No sorry I don't, but my Uncle had a 21' Holiday V5 and never seemed to have the issue.

I think that if you support the Rib Ends, to the Gunnels, instead of just ending short of them, the Rib Crack issue would disappear
 

Crankerbait

Seaman Apprentice
Joined
Nov 5, 2021
Messages
30
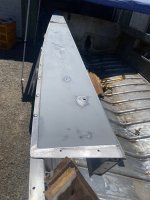
Well I’m on vacation now and feel like I’m finally starting to make some headway with the boat. I got the new hull torn apart the existing gunnels were in rough shape. They hade some cracks and existing patches. We decided to remove the gunnels from the old hull and place them on the new one. I got them sanded down, trim removed and ready for paint. When we removed the gunnels there were several of the small pop style rivets which were missing, broken, or loose. I decided to use solid aluminum rivets to attach the gunnels to the new hull, I’m not sure if it was psychological but it did seem to improve the structural integrity. A196D9C7-5142-4BD5-987A-318E0D184F66.jpegF782F51B-6D28-4291-9A7A-278911CBAB2D.jpeg
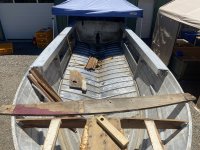
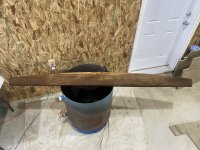
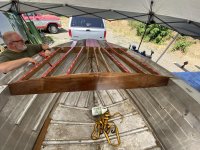
Most of the wood supports under the bow skin appeared to be original and in great shape. I’m not sure of the species, maybe mahogany? The larger price which stretched the width of the boat just behind the dash was cracked and in rough shape. We went down to a local lumber store and found some black walnut. I decided to use the wood and keep it exposed because I love the look of the wood grain. It got it’s first coat of marine varnish today. I plan to use the walnut for the console and other exposed wood at the front of the boat.BFC364A4-B800-4877-94F5-C585A7BC002E.jpeg

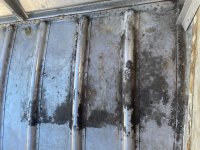
As I apply more coats and prepare the bow for reassembly, I am trying to prioritized the cleaning of the interior hull. There is a lot of dirt and grime on the interior. I have tried a few methods but find the progress to be slow. My next attempt will be heavy duty degreaser scrub brush, maybe also a nyalox wheel. C4CE4743-E2BD-404E-82E1-981F000E76F3.jpeg
 

MNhunter1

Lieutenant Junior Grade
Joined
May 12, 2014
Messages
1,053
Great work! Of note, the heads of the solids might give you fits when you go to reinstall the trim. Might want to give it a test run beforehand just to make sure you have enough clearance. The heads of the blinds don't sit quite as proud, but I also recall having enough clearance on my 16SS when I covered the gunnels/rivet heads with Nautolex and the trim still slid over it all just fine.

Yep, nylox cup brush and/or stainless cup brush, pressure washer, and some good old elbow grease to get the inside hull cleaned. I kept a spray bottle of 50/50 cleaning vinegar and water I'd hit a few spots with before hitting with the cup brush as well. Just make sure to give it a good rinse afterwards.
 

SHSU

Lieutenant Junior+Starmada Splash Of The Year 2019
Joined
Mar 8, 2017
Messages
1,719
Second MNHunter1's concern on the solids vs blind. If your worried about strength, just add more blinds in between.

SHSU
 

Crankerbait

Seaman Apprentice
Joined
Nov 5, 2021
Messages
30
Great work! Of note, the heads of the solids might give you fits when you go to reinstall the trim. Might want to give it a test run beforehand just to make sure you have enough clearance. The heads of the blinds don't sit quite as proud, but I also recall having enough clearance on my 16SS when I covered the gunnels/rivet heads with Nautolex and the trim still slid over it all just fine.

Well, I hadn’t thought of that and I didn’t read your post until I finished putting on the bow skin back together with solid aluminum rivets. The good news is, I test fit the trim and it fits! I’ll wait to reinstall the trim until I get the topside painted.


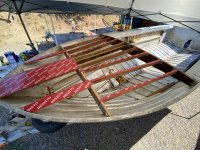
We got the wood replaced in the bow and added a couple extra pieces. Again, it feels much tighter than it did before. We also used a flashing tape on the top of the wood supports to act as a barrier between the bow skin and wood.
IMG_0468.jpegIMG_0467.jpeg

The bow skin is back on. There are several holes through the gunnel and bow skin we will want to fill. What’s the best way to fill these holes?

IMG_0475.jpegIMG_0476.jpeg

Also, I’m ordering parts for the glue up of my transom. I ordered epoxy and cabosil. What is the consensus on fiberglass cloth? Do I just need one layer or multiple layers?
 
Top