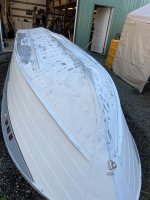
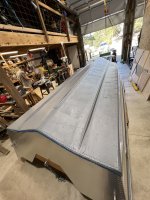
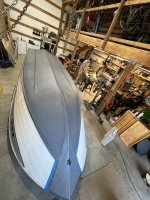
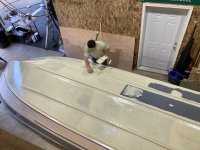
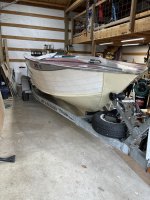
1974 Starcraft 21’ Holiday

SHSU

Lieutenant Junior+Starmada Splash Of The Year 2019
Joined
Mar 8, 2017
Messages
1,741
JB water weld works good, or JB weld with a backing plate for the holes. As for Fiberglass on the transom, usually 2 or three is all you need. Just make sure to account for the extra thickness of the fiberglass build up when cutting your transom.

SHSU
 

MNhunter1

Lieutenant Junior Grade
Joined
May 12, 2014
Messages
1,058
JB water weld works good, or JB weld with a backing plate for the holes.
I've used the JB water weld and it works good. When I have a lot of holes to cover over flat surfaces, I tend to lean towards MarineTex and tape up the topside/visible side of the hole with some wax paper to reduce the amount of sanding needed. The JB you can grab and use as "kneaded" (see what I did there) whereas the MT is typically mixed in a larger batch for multiple holes and spread on with a putty knife or similar. And yes, use a backing plate on any of the larger holes as mentioned b SHSU.

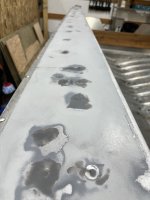
Either way, depending on the paint and how good you are at finish sanding/prep, I always seem to still be able to see where the holes were on the large, flat panels like the bow cover. I used the epihanes beads(credit to Watermann) mixed in with the paint for the final coat on my current boat for the gunnels and bow cap and it really helped to hide any imperfections and gave it some texture/non-skid. My last boat I covered the same with Nautolex and didn't even bother patching the smaller holes.
 

Crankerbait

Seaman Apprentice
Joined
Nov 5, 2021
Messages
31
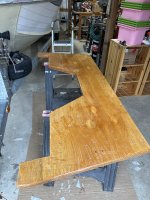
More progress, we got the transom skin on, most of the interior hull cleaned up and made a new Z channel for the base of the transom. The old Z channel was cracked and corroded. We ended up using 1 1/2”x 1/8” angled, T6 aluminum. We cut two lengths and riveted them together in opposing directions to recreate the Z channel. The bottom section of the transom feels like it will be solid. I still feel we will need additional support where the 115 motor mounts at the top of the transom. Thoughts on this? We plan to repair and reuse the original splash well, but that only seems to provide additional support about half way between the bottom and top of the transom. Will that be sufficient? I thought about using a piece of aluminum C-channel on the inside of the transoms, having the upper mounting bolts of the motor going through the C-channel to hold it the transom. The C-channel would be horizontal across the transom at the level of the top bolts. Is that unnecessary? Is it possible to make the transom too rigid which would put too much stress on the seems where the sides and transoms meet?
 

Watermann

Starmada Splash of the Year 2014
Joined
Jan 12, 2013
Messages
13,793
More progress, we got the transom skin on, most of the interior hull cleaned up and made a new Z channel for the base of the transom. The old Z channel was cracked and corroded. We ended up using 1 1/2”x 1/8” angled, T6 aluminum. We cut two lengths and riveted them together in opposing directions to recreate the Z channel. The bottom section of the transom feels like it will be solid. I still feel we will need additional support where the 115 motor mounts at the top of the transom. Thoughts on this? We plan to repair and reuse the original splash well, but that only seems to provide additional support about half way between the bottom and top of the transom. Will that be sufficient? I thought about using a piece of aluminum C-channel on the inside of the transoms, having the upper mounting bolts of the motor going through the C-channel to hold it the transom. The C-channel would be horizontal across the transom at the level of the top bolts. Is that unnecessary? Is it possible to make the transom too rigid which would put too much stress on the seems where the sides and transoms meet?

I added brackets to strengthen the stern corners of my SS, they bolt through the transom and are solid riveted on the sides. The V5 models don't have the channel for the transom to rest in or side brackets, the transom wood is merely bolted flat to the skin.
 

Crankerbait

Seaman Apprentice
Joined
Nov 5, 2021
Messages
31
Figured out how to upload some pictures, here are a few for reference.
IMG-0120.jpg
IMG-0121.jpg
IMG-0123.jpg


I’m planning to get the two pieces of transom together this afternoon, should I apply a thin layer of epoxy to both pieces of plywood prior to applying the thickened epoxy?
IMG-0157.jpg
 

SHSU

Lieutenant Junior+Starmada Splash Of The Year 2019
Joined
Mar 8, 2017
Messages
1,741
So pretty!!!!! Like the skin and remember all the 5200 with every rivet. lol

For its 2 cents... Internet suggests adding epoxy to prevent the wood from absorbing it all prior to glue up, but then I would want to apply my thickened epoxy when its still tacky so you get the chemical bond.

I just used Titebond III and worked fine for me with no pre soak of glue. Just make sure you have a lot of clamps/weight/or screws when you stick it together.

SHSU
 

Crankerbait

Seaman Apprentice
Joined
Nov 5, 2021
Messages
31
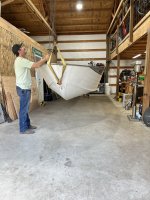
Did a leak test and found very few leaks. Got the boat moved in the shop and flipped. Went to work on several rib ends that that needed some patches. IMG_5912.jpegIMG_5916.jpegIMG_0194.jpeg

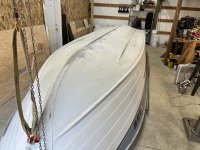
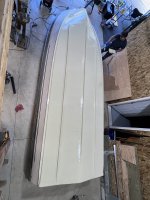
We then got the boat out of the shop and sanded it down, gave it a wash, and we are prepped for paint. We will hopefully get our first coat of primer on the bottom tomorrow. IMG_5922.jpegIMG_5921.jpeg
 

SHSU

Lieutenant Junior+Starmada Splash Of The Year 2019
Joined
Mar 8, 2017
Messages
1,741
Nothing like a Turtled hull. You going to use Gluvit/Coat it on the rivets/seams to help seal it?
SHSU
 

Crankerbait

Seaman Apprentice
Joined
Nov 5, 2021
Messages
31
We’ve been hard at work on the bottom paint. Sanded and cleaned the bottom and decked to paint over some of the current color. We used a self-etching primer. Then two coats of Majic oil based metal primer, and two coats of Majic oil based enamel. We will eventually get to the sides and top but wanted to get the bottom done so we could flip it again. We waited about a week and the final coat still seems fairly fragile. It’s been about 70 during the day and high 40s at night. Should I expect the hardness of the enamel to improve? IMG_5934.jpegIMG_5935.jpegIMG_3726.jpegIMG_5984.jpeg
 
Last edited:

SHSU

Lieutenant Junior+Starmada Splash Of The Year 2019
Joined
Mar 8, 2017
Messages
1,741
Did you use a hardener? If you can create a dent with a fingernail then it hasn't fully cured. My experience, paint always takes twice as long to cure as the manufacture says it will...

SHSU
 

Crankerbait

Seaman Apprentice
Joined
Nov 5, 2021
Messages
31
Did you use a hardener? If you can create a dent with a fingernail then it hasn't fully cured. My experience, paint always takes twice as long to cure as the manufacture says it will...

SHSU
Yes we did use hardener but I could still dent it with my fingernail. My hope is, it will harden up over the next couple weeks.
 

Crankerbait

Seaman Apprentice
Joined
Nov 5, 2021
Messages
31
The paint is definitely curing slowly but I’ve notice a significant change in the hardness since my last post.

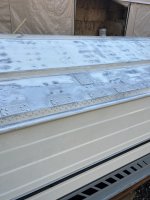
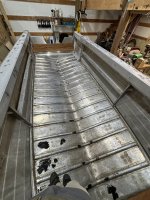
We got it right side up again. I applied Marine-Tex anywhere I found shallow pitting and gluvit on all the seams. We filled all unnecessary holes on the bow and gunnels with JB weld, using painters tape on the back side to keep it from falling through.

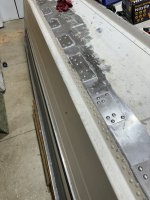
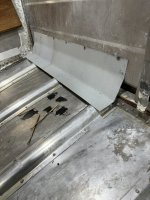
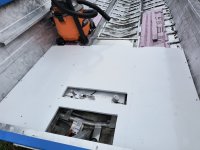
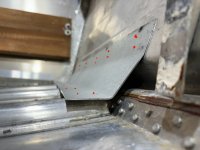
I was concerned about drilling out rivets from the seams to add Chine supports. I was also concerned about the number of holes in the end of the ribs from the previous flooring. Most rib ends already have 3 holes. I wasn’t sure how I would attach the floor without drilling new holes in the ribs and potentially compromising the structural integrity of the ribs. My solution was to create a plate that will span 3 ribs, I’ll have 4 plates on each side. The top with be secured through-hull above the chine with solids aluminum rivets and secured to the top of the ribs with 3/16 blind rivets. My hope is this will provide additional support for the chine while also reducing the stress on the rib ends. I think there will be less stress on the rivets at the end of the ribs and reduce the likelihood of future cracks at the rib ends. I’m only spanning 3 ribs at a time because that’s all my metal brake will allow. Thankfully I have plenty of scrap aluminum laying around from the scrap hull. These plates will also give me a fresh surface to mount the floor.

We made an attempt at fiberglassing the transom but it was beyond my abilities. We decided to do a couple coats of epoxy followed by paint that will match the hull to protect it from UV exposure.


image.jpgIMG_0275.jpegIMG_0276.jpegIMG_0277.jpegIMG_0278.jpegimage.jpg
 

Crankerbait

Seaman Apprentice
Joined
Nov 5, 2021
Messages
31
Oh, and any recommendations on mounting the bilge pump. I’m planning to do two pumps. One connected to constant power on a float switch and the other to a switch on the dash. I’d like to get them as low as possible, should I create a mounting plate?
 

BOYS & TOYS

Petty Officer 2nd Class
Joined
Mar 1, 2008
Messages
149
Oh, and any recommendations on mounting the bilge pump. I’m planning to do two pumps. One connected to constant power on a float switch and the other to a switch on the dash. I’d like to get them as low as possible, should I create a mounting plate?
I did a similar chine reinforcement with 1/8" but more like 8ft long. I made a removable plate to hold two bilge pumps with Pic in my thread
 

Crankerbait

Seaman Apprentice
Joined
Nov 5, 2021
Messages
31
I did a similar chine reinforcement with 1/8" but more like 8ft long. I made a removable plate to hold two bilge pumps with Pic in my thread
You must have had access to a pretty large metal break. My little harbor freight break is getting it done. Just a little slower and probably a little less pretty.
 

BOYS & TOYS

Petty Officer 2nd Class
Joined
Mar 1, 2008
Messages
149
You must have had access to a pretty large metal break. My little harbor freight break is getting it done. Just a little slower and probably a little less pretty.
My break is only 2ft but I have a friend in a huge machine/fab shop with at least a 10ft break. He helped me with my custom windshield too.
 

DWbaseball

Petty Officer 2nd Class
Joined
Aug 25, 2020
Messages
125
Oh, and any recommendations on mounting the bilge pump. I’m planning to do two pumps. One connected to constant power on a float switch and the other to a switch on the dash. I’d like to get them as low as possible, should I create a mounting plate?

I made mounting plates from thin sheet aluminum that I mounted the bilge pump bases to. I then riveted the plates to the rear most rib. I attached the pic that shows these best.
 

Attachments

  • IMG_20230701_185425227.jpg
    IMG_20230701_185425227.jpg
    2.7 MB · Views: 10
Top