1973 Starcraft SuperSport 16ft. restoration questions

BWR1953

Admiral
Joined
Jan 23, 2009
Messages
6,178
I just read about your health issues. Yikes! 😲 I'm glad you're still around and doing such a great job with the boat! (y)

I can totally relate to major health issues. Ugh. :rolleyes:

And I can also sympathize with having to get out of RC flying. I stopped back in 2014 due to health and medication issues myself. Suuucks! :cautious:

Keep on truckin'!
truckin.jpg
 

piperjoe

Chief Petty Officer
Joined
Jul 11, 2013
Messages
563
The Admiral and I went into town today and came home with a quart of the Gluvit epoxy resin and the catalyst plus a couple of "throw-away" bristle paint brushes. Tomorrow and Thursday are supposed to be 74 degrees so another new experience is scheduled with the boat.
Safe boating,
Joe
 

piperjoe

Chief Petty Officer
Joined
Jul 11, 2013
Messages
563
Thanks again BWR1953! Replaced the RC hobby with static plastic planes, cars and ships. Also have a few wood model boat and ship kits to build so there's plenty to keep me going at the workbench. I like the "Keep On Trucking" idea, too, as I drove the big ones including a 10000 gallon LNG tanker cross country during my younger years.
Safe boating,
Joe
 

piperjoe

Chief Petty Officer
Joined
Jul 11, 2013
Messages
563
Well, it's a beautiful day with bright blue sky, lots of sunshine and a very light breeze. Will wait until after lunch to allow the outdoor temperature to rise into the 70's.

Question: I plan on applying the Gluvit to the inside rivets and seams at the bow and transom as well as the entire length where the sides meet the hull floor. Then, to promote good water drainage, I will just go over the rivets on the ribs and not put the epoxy on the rib floor seams. Am I thinking correctly?

Also, am considering polyethylene foam board, cut to fit as required, and various sizes of pool noodle for floatation under the new decking. The new decking will be coated overall with West Systems epoxy. Anyone with experience installing such a design as described?
Safe boating,
Joe
 

classiccat

"Captain" + Starmada Splash Of The Year 2020
Joined
Dec 20, 2010
Messages
3,412
Well, it's a beautiful day with bright blue sky, lots of sunshine and a very light breeze. Will wait until after lunch to allow the outdoor temperature to rise into the 70's.

Question: I plan on applying the Gluvit to the inside rivets and seams at the bow and transom as well as the entire length where the sides meet the hull floor. Then, to promote good water drainage, I will just go over the rivets on the ribs and not put the epoxy on the rib floor seams. Am I thinking correctly?

Also, am considering polyethylene foam board, cut to fit as required, and various sizes of pool noodle for floatation under the new decking. The new decking will be coated overall with West Systems epoxy. Anyone with experience installing such a design as described?
Safe boating,
Joe
yeah doesn't make sense to put gluvit on the rib/floor seam... sounds like you're thinking correctly.

for foam, don't bother with pool noodles; they're great sponges and have poor buoyancy. Stick with XPS foam board (not to be confused with EPS).

If you're going the epoxy route, seriously consider incorporating glass cloth (I use 6oz cloth). Without the cloth, epoxy is prone to grain checking which exposes untreated/sealed wood to the elements. If incorporating cloth starts to blow the budget, Id recommend sealing the wood with "Old Timer's Formula" (OTF) followed up a few coats of Spar Varnish. The OTF penetrates...keep putting it on until the wood can't soak anymore up. The spar will be like a candy coating.
 

piperjoe

Chief Petty Officer
Joined
Jul 11, 2013
Messages
563
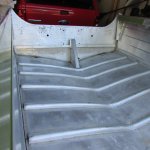
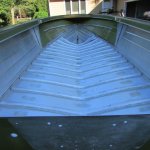
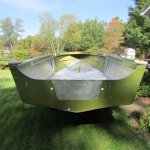
The Gluvit epoxy was applied via bristle brush this afternoon to the inside hull rivets and seams. Mixed the catalyst into the resin, stirring for four minutes, and went at it starting at the bow. When this epoxy starts to thicken it get really interesting in a hurry LOL! Finished up at the transom with a small amount of epoxy in the can so it worked out nicely. I'm going to let the boat sit in the shade for a day or so and allow my knees to recuperate...maybe mow some grass...

Safe boating,
Joe
 

piperjoe

Chief Petty Officer
Joined
Jul 11, 2013
Messages
563
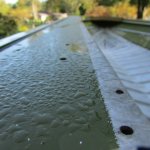
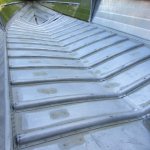
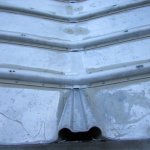
Hi Classiccat, had the Gluvit on the boat before your message posted. As for the ribs/floor seams, with the 1 1/2" brush I used, epoxy got onto the seams as the rivets were covered so I made sure to keep the rib openings clean/clear and stopped the epoxy application one rivet space away on each side of those openings. It is what it is.

Thank you for the suggestions regarding the floatation foam. I will looking into this further.

Safe boating,
Joe
 

Attachments

  • 002.JPG
    002.JPG
    84.6 KB · Views: 31
  • 006.JPG
    006.JPG
    85.2 KB · Views: 31
  • 010.JPG
    010.JPG
    87 KB · Views: 35
  • 013.JPG
    013.JPG
    94.9 KB · Views: 35
  • 015.JPG
    015.JPG
    98.9 KB · Views: 34
Last edited:

classiccat

"Captain" + Starmada Splash Of The Year 2020
Joined
Dec 20, 2010
Messages
3,412
your gluvit application is almost too pretty to cover-up!

I used a catheter syringe to apply it on my SS18...a little messy but good for "surgical" placement :ROFLMAO:
 

piperjoe

Chief Petty Officer
Joined
Jul 11, 2013
Messages
563
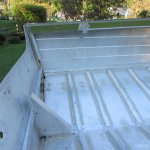
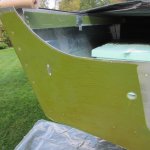
Went outside a few minutes ago to move the boat onto the driveway and into the shade. Checked on the Gluvit and it was hardening nicely albeit a few hardened drips on the inside of the transom under the horizontal aluminum piece that will hold the wood transom assembly. Darn...thought I'd brushed that out enough not to run/drip like that but I'll take of it after the epoxy dries for another day or so. Looks good to me and I noticed that the heavy dew that covered the inside of the boat was running down towards the rib openings and then to the bilge area. I had spent a lot of time cleaning those openings out and blowing the debris out of those ribs and was pleased to note the water was actually going to the bilge area. Might try some of the Aircraft Paint Stripper (bought a gallon of it) on the outside of the transom today and start getting the transom ready for the inside and outside wood pieces. And I still have to mow the yard after the heavy dew dries off later today...LOL!

Safe boating,
Joe
 

Attachments

  • 004.JPG
    004.JPG
    82.9 KB · Views: 15
  • 002.JPG
    002.JPG
    95.3 KB · Views: 15
  • 003.JPG
    003.JPG
    85.4 KB · Views: 15

piperjoe

Chief Petty Officer
Joined
Jul 11, 2013
Messages
563
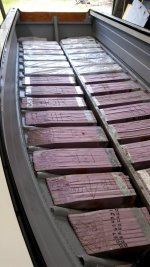
Question: how many 4x8 sheets of XPS foam insulation board would I be wanting to purchase to get started on the under deck area? And what thickness is recommended?

Safe boating,
Joe
 

classiccat

"Captain" + Starmada Splash Of The Year 2020
Joined
Dec 20, 2010
Messages
3,412
Question: how many 4x8 sheets of XPS foam insulation board would I be wanting to purchase to get started on the under deck area? And what thickness is recommended?

Safe boating,
Joe
I used 4 x 2" and 2 x 1" 4x8 sheets of XPS for my 18'. I liked the 2" alot; fewer cuts. It started going in around this point in my thread: Page66.
1633108822629.png
 

BWR1953

Admiral
Joined
Jan 23, 2009
Messages
6,178
I could only get 3/4" XPS locally, so I ended up using about five 4x8 sheets.

1.jpg
 

piperjoe

Chief Petty Officer
Joined
Jul 11, 2013
Messages
563
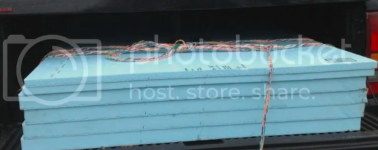
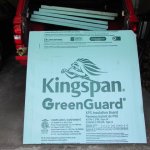
Thanks guys for the insulation answers and photos and I appreciate the help! I had to go into town this morning to get keys made (lost my Ranger PU keyfob) and thought what the heck...might as well stop at Lowes and pick up the Fall fertilizer for the yard. While driving out of the parking lot the idea hit me that it wouldn't hurt to check to see if they had XPS sheet insulation. Walked inside and right in front of me was a display of 4x8 XPS sheets. $32.95 a sheet! Wow! After talking to the sales associate for awhile, who thought my boat restoration project "neat", he said, "the top three 2" thick sheets have a few dings on the edges...can you use those if I cut a discount? A few minutes later and after he cut the 8' length in half using a straight edge (made six 4x4 sheets so I could load them easily in my Ranger pickup) I walked out with three 4x8 sheets of 2" thick XPS for $66.00 and have the source for more sheets when needed. So now I can get to work on the flotation installation and some paint stripping work on the boat. I'm having fun!!

Safe boating,
Joe
 

Attachments

  • 001.JPG
    001.JPG
    93.7 KB · Views: 8
  • 002.JPG
    002.JPG
    93 KB · Views: 6
  • 003.JPG
    003.JPG
    86.5 KB · Views: 7
  • 004.JPG
    004.JPG
    119.2 KB · Views: 8

piperjoe

Chief Petty Officer
Joined
Jul 11, 2013
Messages
563
Question: I am wanting to paint the aluminum on the inside transom area before installing the new marine plywood transom. Good idea? What is the best paint for this application? Should I paint the inside of the aluminum hull rib/floor also when I'm at it?

Classiccat, I am reading/studying your 18' SS thread and am realizing that I know about .002% of anything when it comes to restoring my boat! So much to learn and so many threads to read. I sure am glad you folks are here!

Safe boating,
Joe
 

piperjoe

Chief Petty Officer
Joined
Jul 11, 2013
Messages
563
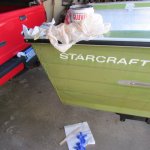
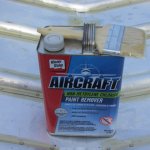
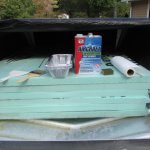
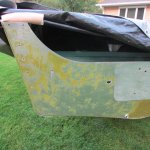
I could sure use some advise: today I decided to use the Aircraft Paint Remover to remove the paint from the outside of the transom before installing the new marine plywood transom pieces. Have never used this product before but it seemed a straight forward process. Placed a piece of plastic sheet under the transom, shook the gallon container of paint remover, poured the remover into an aluminum throw-away baking pan and laid the paint stripper over the transom as directed. Then, as stated on the container, I waited 45 min. for the "magic"...didn't happen. I applied a second coat and, again, waited 45 min. for the paint remover to work. Didn't happen. Put it on for a third try and waited 1 hour and 15 min. What you see in the last photo is what I got after scraping for the third time. What am I doing wrong? At $68.00 a gallon I'm not pleased. Also, I have a DeWalt 5" Orbital Sander; what grit and material type sanding wheel can I use on the aluminum boat to remove paint without damage to the boat material? Thanks in advance for your thoughts.

Safe boating,
Joe
 

Attachments

  • 003.JPG
    003.JPG
    87.7 KB · Views: 15
  • 004.JPG
    004.JPG
    86.5 KB · Views: 15
  • 005.JPG
    005.JPG
    111.9 KB · Views: 15

piperjoe

Chief Petty Officer
Joined
Jul 11, 2013
Messages
563
Has anyone following this restoration thread experience with soda (baking soda) blasting, either doing the work yourself or taking the boat to a shop? Your thoughts would be interesting.

Safe boating,

Joe
 

classiccat

"Captain" + Starmada Splash Of The Year 2020
Joined
Dec 20, 2010
Messages
3,412
I could sure use some advise: today I decided to use the Aircraft Paint Remover to remove the paint from the outside of the transom before installing the new marine plywood transom pieces. Have never used this product before but it seemed a straight forward process. Placed a piece of plastic sheet under the transom, shook the gallon container of paint remover, poured the remover into an aluminum throw-away baking pan and laid the paint stripper over the transom as directed. Then, as stated on the container, I waited 45 min. for the "magic"...didn't happen. I applied a second coat and, again, waited 45 min. for the paint remover to work. Didn't happen. Put it on for a third try and waited 1 hour and 15 min. What you see in the last photo is what I got after scraping for the third time. What am I doing wrong? At $68.00 a gallon I'm not pleased. Also, I have a DeWalt 5" Orbital Sander; what grit and material type sanding wheel can I use on the aluminum boat to remove paint without damage to the boat material? Thanks in advance for your thoughts.

Safe boating,
Joe
stripping paint is a rite-of-passage into the tinny cult :ROFLMAO:

some tricks to getting those strippers to work:
  • clean/degrease the surface
  • apply a thick/uniform coat over the area to be stripped
  • once applied, lay a piece of plastic wrap over it to prevent teh solvents from evaporating
  • scrape the bubbling paint with a plastic blade esp if you plan on polishing the aluminum later.
  • wear eye protection and cover all exposed skin...that stuff burns!

Has anyone following this restoration thread experience with soda (baking soda) blasting, either doing the work yourself or taking the boat to a shop? Your thoughts would be interesting.

Safe boating,

Joe
I've seen 1 or 2 members soda blast their hulls over the years. The majority of us have used chemical strippers.
 

piperjoe

Chief Petty Officer
Joined
Jul 11, 2013
Messages
563
Good morning Classiccat! Read your post and I did the steps you recommended. And, in the process, got a bit of the orange mess on my hand...it didn't burn at all. Interesting!

Safe boating,
Joe
 
Top