1973 Starcraft SuperSport 16ft. restoration questions

piperjoe

Chief Petty Officer
Joined
Jul 11, 2013
Messages
563
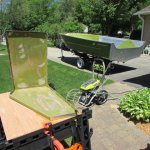
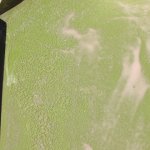
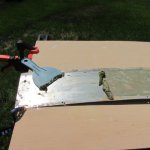
Got the power washer ready to go and am in the process of taking paint off the aluminum parts again! First work on the boat this year that feels like I'm accomplishing something but at least it's a start and step in the right direction. Supposed to be in the upper '60's/low '70's for a week or so and that will be nice outdoor restoration weather. Did have a bit of a laugh, too, as I am using my iPhone for timing the Citristrip applications and was looking at the notification options: one of them was Waves...I had to select THAT one of course. LOL

Safe boating,
Joe
 

Attachments

  • 001.JPG
    001.JPG
    134.2 KB · Views: 17
  • 002.JPG
    002.JPG
    108.6 KB · Views: 17
  • 003.JPG
    003.JPG
    125.8 KB · Views: 17

piperjoe

Chief Petty Officer
Joined
Jul 11, 2013
Messages
563
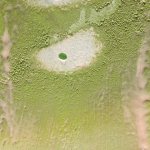
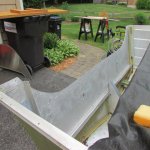
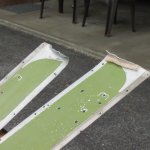
Both aluminum structural pieces, passenger and helm sides, for the walk through area are completely stripped of paint and clean. Also the bow top piece and some of the gunwale pieces at this point. Nice weather albeit quite windy (yesterday had wind gusts at 41 mph) and sunny. Working on the boat restoration outdoors required doing the paint stripping in smaller areas because the Citristrip wanted to dry out if it remained on the aluminum items longer than 40 minutes. Also required a second Citristrip application per area to remove all of the paint. Used LOTS of paper towels, filed a new edge on the plastic scraper as needed, and went through a number of disposable gloves during the process. Bottom line? I am having a lot of fun with this boat! Only thing that bothers me just a bit...wish the paint was a different color than split pea (or whatever it's called) because when I get to scraping the Citristrip and green paint off and it rolls into a mushy mess...reminds me of why I never liked changing diapers when the girls were young!! 😳🤣😁

Safe boating,
Joe
 

ShoestringMariner

Lieutenant Commander
Joined
Apr 18, 2015
Messages
1,602
Well, I will go ahead and hook up the water hose, tip the power washer on its side over a bucket, turn on the hose water 💦 and flush out the extra Briggs&Stratton fluid until I see clean water. Hook up the outlet side hose and wand, flush those out with water, put the wand nozzle on and get on with the paint removal work. That's the plan anyway 'till I see what happens. 🙄

Safe boating,
Joe
I just read this and while I don’t have pressure washer experience, your flush out plan sounds logical
 

piperjoe

Chief Petty Officer
Joined
Jul 11, 2013
Messages
563
Thanks for the support Shoestring Mariner! I had no long term experience with the power washer either (BTW the Ryobi power washer I am using is a really nice tool) so I was on a learning experience. I was surprised at how quickly the water became clean when flushing the system. Glad to have the power washer as it is now quick and easy to remove the cleanup residue after each stage in the paint removal process. Lots of individual steps on lots of aluminum parts so the power washer really comes in handy.

Safe boating,
Joe
 

piperjoe

Chief Petty Officer
Joined
Jul 11, 2013
Messages
563
Something I have been giving a lot of thought to for awhile and I want to take a moment to express my feelings. First off it's no secret that restoration of a boat like my Starcraft 16' SS can be a daunting experience for a 72 year old landlubber like myself who didn't even know why the helm was on the starboard side when I bought the old boat. Because of you folks who have contributed answers to my questions and provided restoration threads of your own restoration work I am able to obtain additional information to help me maintain a good confidence level towards the restoration work on my own boat. Many times, while reading threads on the forum, I have been able to glean information from a contributor who is commenting on someone else's questions. This is appreciated greatly by me and I want you all that have taken the time to offer your thoughts and help so far to know what your continued support can do to help a newbie complete a task and continue on with the next step. There is so much I have no experience with on this project, however, I feel confident that with this forum and the continued support of the experienced restorers, who I consider as friends, this project will be successful. You may not realize just what your thoughts and help can do to help maintain the motivation and fun of the restoration; I want to make sure I offer a heartfelt Thank You to all of you.😀

Safe boating,
Joe
 

piperjoe

Chief Petty Officer
Joined
Jul 11, 2013
Messages
563
Not much to report today. Temps in the mid 50's most of the day, windy and over cast looking like rain clouds. Didn't think it would be a good idea to try and remove paint with the Citristrip...tomorrow's weather looks better. Was thinking about putting the new marine plywood transom into the boat. Has a West Systems epoxy coating on all surfaces (2 coats on everything) and is well cured. Was thinking that if I did this at least I can say I finally put something back on the boat! LOL So...today's question: as the new plywood transom is a friction fit what do you folks use on the aluminum transom mating surfaces to ease the wood transom into place without having to pound the heck out of the top surfaces? And won't have an ill effect on the epoxy coating.

Safe boating,
Joe
 

MNhunter1

Lieutenant Junior Grade
Joined
May 12, 2014
Messages
1,059
So...today's question: as the new plywood transom is a friction fit what do you folks use on the aluminum transom mating surfaces to ease the wood transom into place without having to pound the heck out of the top surfaces? And won't have an ill effect on the epoxy coating.

Safe boating,
Joe
I believe Watermann suggests to use cut up milk jugs between the knee brace and transom for this process. I have always seemed to have enough room where it was never really an issue for me. Just work slow once you meet any resistance and use a putty knife to ensure the bottom edge of the transom slides into the bottom pocket. A few taps with a rubber mallet should seat it without much effort.
 

piperjoe

Chief Petty Officer
Joined
Jul 11, 2013
Messages
563
Thank you MNhunter1. The plastic shim idea for that knee brace sounds like a good call. Much better than using the Possum belly grease the Admiral said the folks in her home state of West Virginia kept for just such a use. 🤣 The new transom fit is snug so I don't want to be removing the epoxy coating if I can help it while sliding the transom into place. Now...where did I put the rubber hammer...

Safe boating,
Joe
 

piperjoe

Chief Petty Officer
Joined
Jul 11, 2013
Messages
563
I do it!! (As my young Granddaughter used to say)
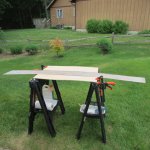
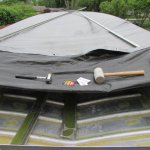
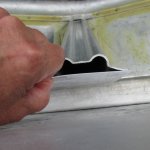
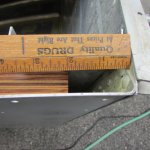
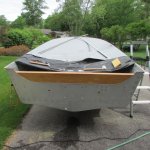
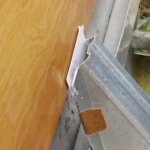
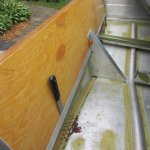
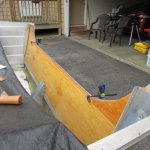
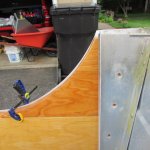
This morning, while letting the Citristrip work on another aluminum boat part, I decided to go for it and install the new plywood transom pieces (3) onto the boat. MNhunter1's reference to Watermanns use of a plastic protection shim at the transom knee brace worked out nicely. It just so happened that I received a piece of junk mail in the form of a plastic card and it was the correct thickness for the required shim. Held it in place with a couple of small tape strips and the shim prevented surface damage to the new wood transom insert. Thanks guys! I also took time to measure the end space at the transom to keep the plywood centered as I used the rubber hammer to set it in place; the hammer handle allowed me to make slight side to side adjustments and the new transom wood went right into place. A big step for me and a real confidence builder...something has now been put back on the boat!! Now I'll continue with the old paint removal and will knock the rear gunwale edges back down carefully (had to lift the edges to get the old transom wood out) prior to stripping the paint off those items.

Safe boating,
Joe
 

Attachments

  • 006.JPG
    006.JPG
    119 KB · Views: 15
  • 001.JPG
    001.JPG
    80.4 KB · Views: 14
  • 005.JPG
    005.JPG
    109.8 KB · Views: 15
  • 007.JPG
    007.JPG
    93.6 KB · Views: 15
  • 008.JPG
    008.JPG
    69.2 KB · Views: 15
  • 009.JPG
    009.JPG
    91.6 KB · Views: 15
  • 010.JPG
    010.JPG
    115.6 KB · Views: 15
  • 013.JPG
    013.JPG
    72.1 KB · Views: 16
  • 015.JPG
    015.JPG
    100.2 KB · Views: 16
  • 023.JPG
    023.JPG
    104.4 KB · Views: 16
  • 022.JPG
    022.JPG
    93.4 KB · Views: 15
  • 024.JPG
    024.JPG
    80.2 KB · Views: 15

piperjoe

Chief Petty Officer
Joined
Jul 11, 2013
Messages
563
Thinking of using Life Seal (from BoatLife) instead of 3M 5200 for coating the various screws and bolt locations i.e. the transom screws for the new wood transom inset that was placed on the boat yesterday. Want to be sure the hardware can be removed if required and I get the impression that 3M 5200 can be a permanent adhesive making hardware removal/change out very difficult. Anyone have experience/comments regarding the Life Seal caulk vs 3M 5200?

Safe boating,
Joe
 
Joined
Jun 7, 2022
Messages
2
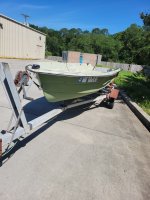
Don't mean to high jack a post..but pretty new to the forum thing..recently acquired a fiberglass boat....all I know is that it's a 1973 starcraft,but don't know which one..any help would be greatly appreciated.
 

Attachments

  • 20220604_100310.jpg
    20220604_100310.jpg
    2.6 MB · Views: 7

BOYS & TOYS

Petty Officer 2nd Class
Joined
Mar 1, 2008
Messages
149
Want to be sure the hardware can be removed if required and I get the impression that 3M 5200 can be a permanent adhesive making hardware removal/change out very difficult.
I use 3M 5200 on all below water line hardware so I can't comment on the others but it is definitely not permanent. It's harder than silicone to remove but engine mounting bolts through the transom come out with little force after a quick spin of the impact gun.
 

piperjoe

Chief Petty Officer
Joined
Jul 11, 2013
Messages
563
I use 3M 5200 on all below water line hardware so I can't comment on the others but it is definitely not permanent. It's harder than silicone to remove but engine mounting bolts through the transom come out with little force after a quick spin of the impact gun.
The 3M 5200 is a product of choice for below water hardware as I have noted while reading various restoration threads. The "permanent" aspect of hard to remove hardware I read about while researching 3M 5200 topics on the web. Hadn't seen anything about using an impact wrench to break a 3M 5200 adhesion bond until now. In my case I was thinking about the screws that I will be putting through the aluminum transom and into the new wood transom insert. Also the other bolts, screws and such that go into or through the transom. Lots to learn as a newbie boat restoration guy! Thanks for getting back to me with your experience and comments regarding your choice of using 3M 5200.

Safe boating,
Joe
 

piperjoe

Chief Petty Officer
Joined
Jul 11, 2013
Messages
563
Don't mean to high jack a post..but pretty new to the forum thing..recently acquired a fiberglass boat....all I know is that it's a 1973 starcraft,but don't know which one..any help would be greatly appreciated.
Welcome aboard! I wasn't aware Starcraft made fiberglass boats like the one in the photo. Hopefully someone with far more knowledge of the Starcraft offerings will be able to help you with the information you need. Enjoy your restoration project!

Safe boating,
Joe
 

MNhunter1

Lieutenant Junior Grade
Joined
May 12, 2014
Messages
1,059
No experience with the Life Seal, but highly recommend the 3M5200. Some might recommend 3M4200 for those less permenant needs, but I have never felt the need to use anything other than the 5200. I'm on my 3rd build and wouldn't even consider anything else.
 

piperjoe

Chief Petty Officer
Joined
Jul 11, 2013
Messages
563
I'm on my 3rd build and wouldn't even consider anything else.
High praise indeed for the 3M 5200 product. So, as an example, let's use those transom screws (8 per end) that secure the plywood transom to the boat. I will drill a pilot hole for each screw location to help avoid splitting the wood at the screw. I will put some 3M 5200 into each pilot hole and some on the screw thread. Then, using my drill, I'll seat the screw and wipe off the excess 3M 5200 from off the top of the screw while smoothing the caulk around the base of the screw head as a sealer. That would sound logical to me as as a good way to keep water from seeping into the wood transom piece. Does this sound like a good idea?

Safe boating,
Joe
 

MNhunter1

Lieutenant Junior Grade
Joined
May 12, 2014
Messages
1,059
High praise indeed for the 3M 5200 product. So, as an example, let's use those transom screws (8 per end) that secure the plywood transom to the boat. I will drill a pilot hole for each screw location to help avoid splitting the wood at the screw. I will put some 3M 5200 into each pilot hole and some on the screw thread. Then, using my drill, I'll seat the screw and wipe off the excess 3M 5200 from off the top of the screw while smoothing the caulk around the base of the screw head as a sealer. That would sound logical to me as as a good way to keep water from seeping into the wood transom piece. Does this sound like a good idea?

Safe boating,
Joe
All the transom hardware should be stainless thru-bolts aside from the splashwell screws on the inside. Several different methods on how to go about sealing up those thru-bolt holes, some go to great extremes. Keep in mind the original transoms weren't sealed at all. I usually tend to take a toothpick or popsical stick to slap the 5200 around the underside of the bolt head before installing. Keeps the threads clean on the inside. Try to avoid turning the bolt head to maintain your exterior seal and do all your tightening on the inside nut. Keep plenty of paper towels on hand and use acetone to clean up any of the excess 5200.
 

piperjoe

Chief Petty Officer
Joined
Jul 11, 2013
Messages
563
All the transom hardware should be stainless thru-bolts aside from the splashwell screws on the inside.

I went back into my photos and sure enough those eight locations that run vertical (4 on port end and 4 on starboard end) are bolts. I had looked at the photos earlier and saw the Phillips style slots in the bolt heads and thought they were screw heads. No wonder I couldn't find the screws! Thanks again for setting me straight. Now I get to see if I can drill the hole straight from the outside aluminum transom through the plywood and make the hole match the aluminum piece that the bolt goes into at the corner; will probably use a smaller diameter drill to make an initial drill path through everything and make sure the three points line up. And do this eight times! This could be interesting!! LOL 😂 I best try this when the Admiral is away and there are no children around...😁

Safe boating,
Joe
 
Top