1972 Checkmate MX-15 Rebuild

WalleyeSniper

Petty Officer 2nd Class
Joined
May 15, 2018
Messages
108
Today I spent some time removing hardware from the cap, while its lowered temporarily on the hull. Small stuff was coming off fine, but the brackets for the ski pylon appear to be adhered with either 5200 or some 2 part adhesive. Xylene didnt budge it, so I ordered DeBond , which was formulated to remove 5200. Pricy for a small can, but if it saves time from fairing ripped gel, it will be worth it.
View attachment 346456
Let me know how this stuff works out for you. I have a HUGE area of 5200 I have to remove on that 270 I'm rebuilding. The previous guys needed the entire toilet wast tank in some weird concoction of foam and 5200. Lol
 

zool

Captain
Joined
Aug 19, 2012
Messages
3,432
I never bought the stuff walleye, I ended up just wacking the bracket off with a 2x4 and blow hammer.

This weekend I did a lot of grinding, cleaned up all the areas that will have carpet, old carpet glue residue and such. With the cap back off and everything back out, I hit most of where i needed.
1629752528585.jpeg

1629752555856.jpeg

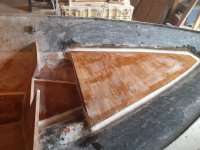
Epoxied the fillets up front to prep for eglass.
1629752646365.jpeg

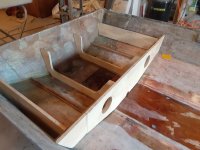
Then reset the tank cradle and additional supports. Also cut out the speaker holes.
1629752717414.jpeg
 

zool

Captain
Joined
Aug 19, 2012
Messages
3,432
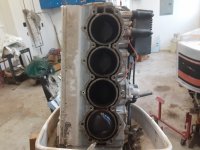
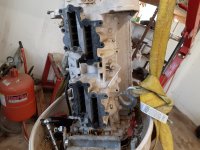
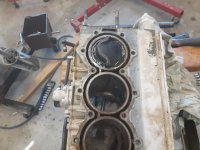
While the fillets were curing, I revisited the Chrysler 105, I figured Id start tearing into it to see whats binding. Removed the head, the bolts came out nice and easy, almost no corrosion on this engine, its complete and clean, so I keep trying to revive it.
1629752974518.jpeg

Everything looks ok, the piston tops are fine, the exposed walls are smooth and not pitted or rusted, but when you rock the flywheel, the top 2 pistons (# 1 and #3 in the firing order) move in about a 1/4 inch, but the bottom two (#2 and #4) dont move. I drenched the bores of those 2 really good now that there is access, then ill try to tap the bottom one with wood and mallet slightly to see if the rings are just frozen. After that, if still no go, ill have to split the case and see the bottom end.
 

zool

Captain
Joined
Aug 19, 2012
Messages
3,432
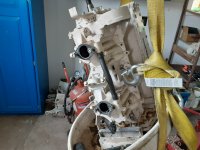
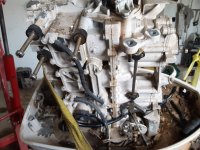
I got some more of the engine torn down, removed the carbs, starter, wrestled the stupid flywheel off with alot of effort, removed the ignition system as a daisy chain, keeping most of the connections in place, so i can label them later. Just have to take out the linkage, a few brackets and vacuum lines. Then I can get the powerhead to the bench and split it.

1630449505311.jpeg

All bolts still came out with no corrosion or breaks.

1630449659644.jpeg

Ill soon know whats hanging up the lower cylinder and why.....
1630449747673.jpeg
 

zool

Captain
Joined
Aug 19, 2012
Messages
3,432
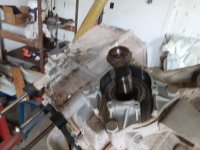
Stripped the powerhead down some more and can already see the motor got flooded in the storm when the bay came over the bulkhead and rusted #4.

With all the penetrant i soaked the cyinder with over the past few years, its just a mush of rust, but not corroded. The cylinder wall is smooth reaching in from the bottom, the crank and end bearings look real clean, the big end bearings look clean. Had to stop to order a 12 pt thin wall socket for the end cap bolts. Then I can remove the crank and pistons and take measurements after a cleanup.
1630692517547.jpeg
After removing the intake covers, i could already see the mush.

1630692570725.jpeg
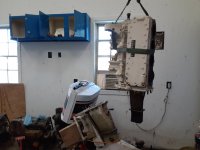
powerhead off.

1630692614417.jpeg
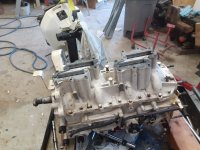
set on cart for teardown
1630692656868.jpeg
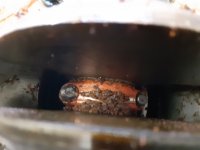
mushy rod end, but clean underneath including big end bearing.
1630692719358.jpeg
Im happy it appears this wasnt a mechanical failure or overheat, just a static flood. Im confident I can save this motor without too much effort.
 

sphelps

Supreme Mariner
Joined
Nov 16, 2011
Messages
11,429
I wish I had the confidence to tear motors down like this .. I tinker then I get nervous .. LOL !
 

zool

Captain
Joined
Aug 19, 2012
Messages
3,432
Teardown doesnt scare me, reassembly is another story lol.....all in all, its just nuts, bolts, and careful measuring....what does bother me is putting too much money into the rotating assembly, then finding out I need lower gear work, or electrical issues, pushing the cost of this old beast too high. I plan to just free up the rotating assembly, maybe have the block machined or just hone it myself, reassemble and get it running. If I can get a few years out of it, that would be fine since I have all the cables and controls.
 

kcassells

Fleet Admiral
Joined
Oct 16, 2012
Messages
8,575
I'm with Sam. The engine redo just bothers the hell out of me is all. When I get to it.
 

zool

Captain
Joined
Aug 19, 2012
Messages
3,432
I'm with Sam. The engine redo just bothers the hell out of me is all. When I get to it.
Have you tried to turn it over yet, or are you dealing with a known dead horse?...you may not have to tear it down.
 

kcassells

Fleet Admiral
Joined
Oct 16, 2012
Messages
8,575
I turned over a couple of dog years ago and Crap what a beast. Neighbors even said "oh you turned it over."
Pooper is more than I want to deal with but so hey... time to learn after I get the rest of the electrical done. Every year I bomb it and turn it.
Horse is good. Soldier is not.
 

zool

Captain
Joined
Aug 19, 2012
Messages
3,432
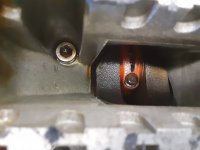
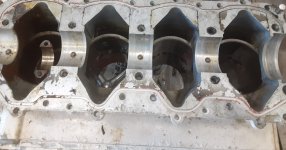
So heres where im at with this big ole Chrysler. Got the crank out, got the top 3 rod/piston assemblies out with little effort. The bores are nice and smooth, not pitting or scraped, just some normal staining, the #4 (bottom) that was under water has some surface rust i can feel, but still havent got the piston out. Still soaking it with pb blaster, tried hammering with a block of wood, but wont budge yet. Theres no way i would have freed this up intact.
1631484403105.jpeg

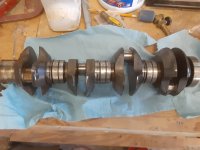
crank has some staining or discoloration, but no real damage to the journals

1631484502307.jpeg

The lower bearing has some rust, so i may have to replace it if it dont clean up.
1631484579689.jpeg

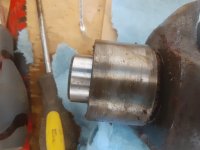
The stuck piston is at tdc and comes out from the top, so theres only an inch or so to clear the rings.

1631484689100.jpeg

Im gonna try to dump a few gallons of pb blaster i have in a pail and submerge the cylinder in it and let it soak for a few days.
Good excuse to work on the CC and prep that for paint.
 

briangcc

Commander
Joined
Jul 10, 2012
Messages
2,089
I'm guessing you're taking a whack at the piston from the back (rod) side? What about laying a piece of wood across the piston and give it a couple gentle knocks from the top side to push it a bit back into the bore? Might get it to move a bit to see what you're dealing with in the bore.

Just tossing it out there as food for thought...
 

zool

Captain
Joined
Aug 19, 2012
Messages
3,432
I'm guessing you're taking a whack at the piston from the back (rod) side? What about laying a piece of wood across the piston and give it a couple gentle knocks from the top side to push it a bit back into the bore? Might get it to move a bit to see what you're dealing with in the bore.

Just tossing it out there as food for thought...
Tried both ways, heavy blow hammer, no dice. A think the solvent bath will get it, if not, then over to the 12 ton press. Im trying to preserve the sleeve, so im not going too crazy....
 

RBoyd1971

Petty Officer 2nd Class
Joined
Oct 20, 2020
Messages
165
Maybe try a few heating and cooling cycles when a propane torch. May be enough to loosen it from the cylinder walls.
 

zool

Captain
Joined
Aug 19, 2012
Messages
3,432
Maybe try a few heating and cooling cycles when a propane torch. May be enough to loosen it from the cylinder walls.
Was gonna heat it, but tho the sleeve is steel, with the block being aluminum, im leary of distorting it.
 

SavinRaven

Petty Officer 1st Class
Joined
Sep 16, 2021
Messages
228
For a windshield check out salvage yards. Found some good ones there for $50.
 

zool

Captain
Joined
Aug 19, 2012
Messages
3,432
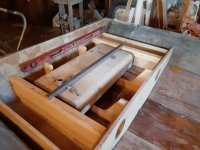
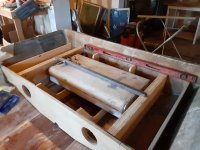
I added a few strips of wood to the top of the transom braces just outside of the tank. I tool piece of square steel tube and planed a piece if pt wood to fit inside the tube, and notched it in to support the rear section of the sunpad that spans the tank. Just have to add a 3/4 ledge to the top of the braces and glass it all in.

1635715119744.jpeg

1635715144047.jpeg

I still havnt gotten the piston out of the block, broke down and tried heat like RBoyd suggested, but no go, so back in the soak tank it went. Gonna pick up some freeze off and try heat, then cold.
 
Last edited:

alldodge

Moderator
Staff member
Joined
Mar 8, 2009
Messages
40,581
If your not trying to save the piston, how about a drill? Start drilling holes thru it.
 

zool

Captain
Joined
Aug 19, 2012
Messages
3,432
I was trying to save the piston and rod, just hone, re-ring, chsnge the lower bearing and put it all back together and see if it runs for a while, but thats looking less likely. This old Chrysler is not worth a trip to the machine shop and full rebuild.

We'll see.
 
Top