1968 StarCraft Holiday restoration

Watermann

Starmada Splash of the Year 2014
Joined
Jan 12, 2013
Messages
13,795
I see you have the keyhole shaped right for the newer Alpha set up but I don't remember if it was discussed that the 2 upper bolt holes were moved to accommodate the Alpha transom assembly.
 

jdvasher

Petty Officer 1st Class
Joined
Jul 10, 2019
Messages
371
I see you have the keyhole shaped right for the newer Alpha set up but I don't remember if it was discussed that the 2 upper bolt holes were moved to accommodate the Alpha transom assembly.

I don't quite follow. When I pulled the motor and drive out of the donor boat, I kept that part of the transom to use as a template. what am I missing?
 

Watermann

Starmada Splash of the Year 2014
Joined
Jan 12, 2013
Messages
13,795
If you used the Alpha donor as pattern rather than the old MC holes in the original transom then it has the right hole pattern with the top 2 bolts being moved up, the bottom holes are the same.
 
Last edited:

SHSU

Lieutenant Junior+Starmada Splash Of The Year 2019
Joined
Mar 8, 2017
Messages
1,744
Smooth is the goal for where the transom assembly mates up to the transom skin around the keyhole. If there's any pitting or such then it needs to be filled and sanded smooth. The skin can be bare but I primed and painted my Chief's transom. The neoprene seal that goes on the assembly needs NO sealant applied to it. The best method is to use some super glue drops to secure the seal to the assembly so it stays in the groove while you're doing the assembly.

I am glad I deferred to others!!!! I just 3M 5200 everything.... LOL

SHSU
 

mickyryan

Rear Admiral
Joined
Apr 18, 2016
Messages
4,214
prime and paint then , i used the original gasket with pl marine lightly skimmed around to prevent ever having a problem i like pl marine better then 3m its less pricey and only takes 24 hrs to cure
 

jdvasher

Petty Officer 1st Class
Joined
Jul 10, 2019
Messages
371
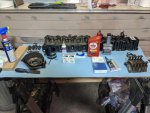
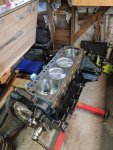
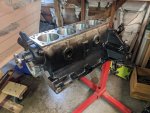
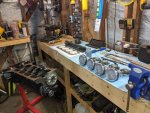
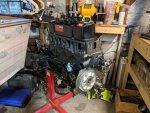
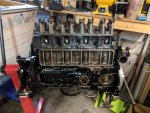
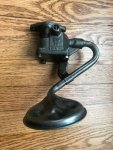
Wow, things have been crazy. Picked up the engine parts from the machine shop and have started to assemble. I made a mistake and threw out the old oil pump assembly because I knew I was going to replace it. I then realized that the pump, the pickup screen and now the pickup screen support are all sold individually. on top of that I cannot find the support anywhere for sale. Does anyone on here have a junk oil pump that they could sell me with the support piece? I can fabricate something for if I need to but I would much rather have the original part.

On a side note, through all of this process with the motor, I have come to the most certain conclusion that some A$$hat must have replaced the block on this engine and used an older version with the older crank, rods, etc. and decided to switch the serial tag so it would still match the head. very frustrating but we finally got everything figured out.
 

Attachments

  • photo327323.jpg
    photo327323.jpg
    124.5 KB · Views: 12
  • photo327324.jpg
    photo327324.jpg
    91 KB · Views: 13
  • photo327325.jpg
    photo327325.jpg
    143.7 KB · Views: 12
  • photo327326.jpg
    photo327326.jpg
    160.6 KB · Views: 12
  • photo327327.jpg
    photo327327.jpg
    150.3 KB · Views: 11
  • photo327328.jpg
    photo327328.jpg
    154 KB · Views: 12

SHSU

Lieutenant Junior+Starmada Splash Of The Year 2019
Joined
Mar 8, 2017
Messages
1,744
Can't speak to finding an oil pump, but know the feeling with taking apart an engine and finding out you have a Frankenstein of a motor...

I settled with the idea of, she runs she stays. Still have her and can say I know every part of her intimately

SHSU
 

Watermann

Starmada Splash of the Year 2014
Joined
Jan 12, 2013
Messages
13,795
Oh man cobbled together motors are a serious pain. Wish you luck finding the part you need. So the oil pump screen mounting bracket isn't tack welded to the pan?
 

jdvasher

Petty Officer 1st Class
Joined
Jul 10, 2019
Messages
371
Oh man cobbled together motors are a serious pain. Wish you luck finding the part you need. So the oil pump screen mounting bracket isn't tack welded to the pan?

Its supposed to mount just like this one in the picture. I'm really annoyed that mercruiser would even sell these parts separately. I have replaced oil pumps in the past and they all have came as a complete unit. Anyways, live and learn I guess. If you are working on a Mercruiser motor, "DO NOT THROW A SINGLE THING AWAY" until fully reassembled and running LOL.
 

Attachments

  • photo327434.jpg
    photo327434.jpg
    69.1 KB · Views: 6

Watermann

Starmada Splash of the Year 2014
Joined
Jan 12, 2013
Messages
13,795
Ah ok, I see. Yeah a guy could fab one of those up from some mild steel.
 

SHSU

Lieutenant Junior+Starmada Splash Of The Year 2019
Joined
Mar 8, 2017
Messages
1,744
Ah ok, I see. Yeah a guy could fab one of those up from some mild steel.

The pump or the support piece could be fabricated? I am pretty sure he needs both.

SHSU
 

jdvasher

Petty Officer 1st Class
Joined
Jul 10, 2019
Messages
371
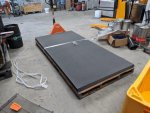
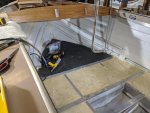
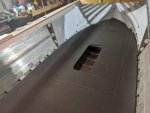
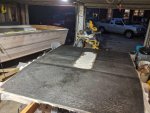
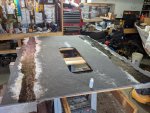
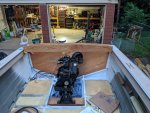
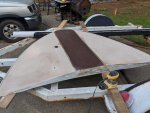
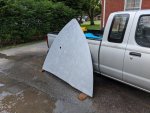
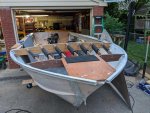
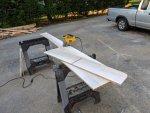
Well, trying to catch up on my progress. Its been slower that I hoped but we are still moving. I ended up going with Coosa Bluewater 26 composite board for the flooring. It was way cheaper going through and actual supplier that the prices you'll find on line. Really nice stuff to work with and really light. I went with 5/8" board and then laminated both side with 1708.
 

Attachments

  • photo335743.jpg
    photo335743.jpg
    131.6 KB · Views: 34
  • photo335744.jpg
    photo335744.jpg
    123.3 KB · Views: 36
  • photo335745.jpg
    photo335745.jpg
    104.1 KB · Views: 37
  • photo335746.jpg
    photo335746.jpg
    146.9 KB · Views: 36
  • photo335747.jpg
    photo335747.jpg
    177.7 KB · Views: 35

jdvasher

Petty Officer 1st Class
Joined
Jul 10, 2019
Messages
371
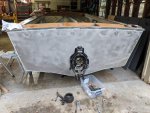
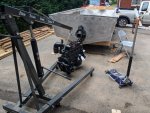
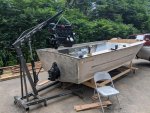
Got the bellows and other misc items replaced including a new shift cable because my boy ran over the other one with the lawnmower. I also was able to set the new power in its place and check for fitment. My front engine mount was about an inch too close to the stern. I'm not sure how or why but it was an easy fix. now she is in there for good.

That old saying, BOAT - Bust out another thousand, doesn't really apply to rest/mods. Is there another saying? you know, like 2 or 3 thousand. LOL
 

Attachments

  • photo335750.jpg
    photo335750.jpg
    148.4 KB · Views: 19
  • photo335751.jpg
    photo335751.jpg
    188.4 KB · Views: 20
  • photo335752.jpg
    photo335752.jpg
    156.5 KB · Views: 19
  • photo335753.jpg
    photo335753.jpg
    196.3 KB · Views: 18

jdvasher

Petty Officer 1st Class
Joined
Jul 10, 2019
Messages
371
I picked up a slab of hard curly maple from a local mill that was big enough to cut all of the pieces from. I already had the dash pieces finished but the figuring in the maple was not very close and I knew it would always bother me. I added new neoprene padding in the front and prepped the bow skin (if that's what its called) I really wanted to replace it completely with a new sheet of 5052 because of the holes that I will have to fill but I couldn't justify the cost. Also I would have had to buy a full 5x10 sheet to do it and I really didn't have any use for the excess.
 

Attachments

  • photo335754.jpg
    photo335754.jpg
    140.8 KB · Views: 23
  • photo335755.jpg
    photo335755.jpg
    159.7 KB · Views: 23
  • photo335756.jpg
    photo335756.jpg
    166.4 KB · Views: 24
  • photo335757.jpg
    photo335757.jpg
    180.9 KB · Views: 23

jdvasher

Petty Officer 1st Class
Joined
Jul 10, 2019
Messages
371
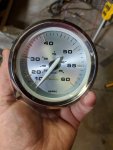
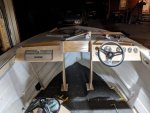
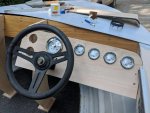
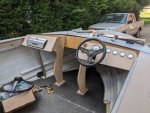
New Gauges came in and am currently test fitting pieces. the two feet blocks are just there as a spacer and I am actually going to trim another 1/4". My plan is to build up a small area with coosa and fiberglass for each leg and then use aluminum brackets on top, keeping an additional 1/4 gap between the base and the bottom of the wooden legs. this should greatly extend the life especially sense the wife wants soft carpet and really I do too.

I am still looking for ideas on what to do between the legs, I'm not really a fan of the factory steps and I really don't see much need for them. I would like to have a nice sound system in the boat so maybe a place to store some of that. not really sure but definitely open for suggestions.

I also opted out of a speedometer, I don't care for the mechanical ones and they aren't very accurate anyways. I figure ill go with a dash mount GPS unit or something later on. Although If anyone likes these Gauges and would like it I would give them a great deal on it. brand new and comes with hardware.
 

Attachments

  • photo335758.jpg
    photo335758.jpg
    60.1 KB · Views: 27
  • photo335759.jpg
    photo335759.jpg
    106.6 KB · Views: 27
  • photo335760.jpg
    photo335760.jpg
    116.4 KB · Views: 28
  • photo335761.jpg
    photo335761.jpg
    148.3 KB · Views: 27

mattsteg

Petty Officer 2nd Class
Joined
Mar 25, 2019
Messages
177
Got the bellows and other misc items replaced including a new shift cable because my boy ran over the other one with the lawnmower. I also was able to set the new power in its place and check for fitment. My front engine mount was about an inch too close to the stern. I'm not sure how or why but it was an easy fix. now she is in there for good.

That old saying, BOAT - Bust out another thousand, doesn't really apply to rest/mods. Is there another saying? you know, like 2 or 3 thousand. LOL
The "thousand" just refers to what is otherwise known as a "boat unit". There is no restriction on the number of boat units that may be spent simultaneously. The saying for (quality) restoration and mods is "Do it for yourself because it will be worth more to you (and involve more boat units) than it is to anyone else".

About how much more affordable is the coosa through distributors? I may need to consider in the future.

On the gauges - you have a speedometer fit but are option out of it? Sweet-looking gauges in either case.
 

classiccat

"Captain" + Starmada Splash Of The Year 2020
Joined
Dec 20, 2010
Messages
3,412
Good progress; that coosa board looks pretty sweet! What's the plan for the final floor covering?

I came to the same conclusion of a spedo...useless in this day and age. Whip out your smartphone if you have to! :lol:
 

jdvasher

Petty Officer 1st Class
Joined
Jul 10, 2019
Messages
371
The "thousand" just refers to what is otherwise known as a "boat unit". There is no restriction on the number of boat units that may be spent simultaneously. The saying for (quality) restoration and mods is "Do it for yourself because it will be worth more to you (and involve more boat units) than it is to anyone else".

About how much more affordable is the coosa through distributors? I may need to consider in the future.

On the gauges - you have a speedometer fit but are option out of it? Sweet-looking gauges in either case.

I like the boat units, good call. I need to convert all of my money to boat units :)

it varies greatly by vendor but I ordered mine from a place in Nashville and it was under 200/sheet including delivery to Louisville. Local price on marine ply is close to 150 so it was a no brainer for me. I was holding the speedometer but I only installed the tach.
 

jdvasher

Petty Officer 1st Class
Joined
Jul 10, 2019
Messages
371
Good progress; that coosa board looks pretty sweet! What's the plan for the final floor covering?

I came to the same conclusion of a spedo...useless in this day and age. Whip out your smartphone if you have to! :lol:

We are going with the heavier weight marine carpet. We will be without shoes most of the time in the boat so I want something comfortable.
 

mattsteg

Petty Officer 2nd Class
Joined
Mar 25, 2019
Messages
177
I like the boat units, good call. I need to convert all of my money to boat units :)

it varies greatly by vendor but I ordered mine from a place in Nashville and it was under 200/sheet including delivery to Louisville. Local price on marine ply is close to 150 so it was a no brainer for me. I was holding the speedometer but I only installed the tach.
Marine ply here is more like 50-80ish so much more manageable. I agree with you on the speedo (More of a potential small leak than a useful instrument for pressure-type. I could see adding a paddle-wheel type if I needed accurate speed through water measurement for trolling or something). I'm electing to go more heavily "modern" in my build and am actually going all-electronic in my dash.

I haven't posted it here yet, but I'm midway through installing a marine vinyl (Nautolex) floor with closed-cell marine carpet pad underlay. It's really nice on bare feet, without the absorbent drawbacks of carpet. I don't have any long-term feedback, but highly recommend some sort of padding if you want bare-foot comfort (even with carpet). I think the padding was a quarter boat unit or so. I feel like this is going to be both comfortable and maintenance-friendly.
 
Top