1963 16' Star Dust I believe

Decker83

Commander
Joined
Apr 5, 2011
Messages
2,593
I just finished reading your thread.. Your doing some awesome work..
I have converted my 18' SS from OMC to Merc.. I added a piece of 3/16" aluminum to the inside of the hull and used 3m 5200 and about 75 countersunk solid rivets. I have filled the boat with water and had no leaks..
You may want to ask the shop that made the stringers to weld the 5" piece in..
If you can tig weld. I would weld it myself.. You will have the transom wood to support that piece.. If you do weld it yourself, Make sure to make short welds
and move from one side to the other so the aluminum does not warp..​
 

StarTed

Senior Chief Petty Officer
Joined
Jul 14, 2015
Messages
694
Thanks oldhaven for the added insight. The potential for voids scares me unless there is some kind of filler material that is pliable enough and will stay in between. Decker83, I also appreciate you stepping in with some other points to consider. I wish I had the experience and confidence to TIG weld it in. The vertical welding part concerns me since I don't have the experience doing that with aluminum. Is there something I could use as a backer to reduce the probability of blow through? I have some fire brick over at the farm that I could pick up and hold behind the aluminum if that would work.

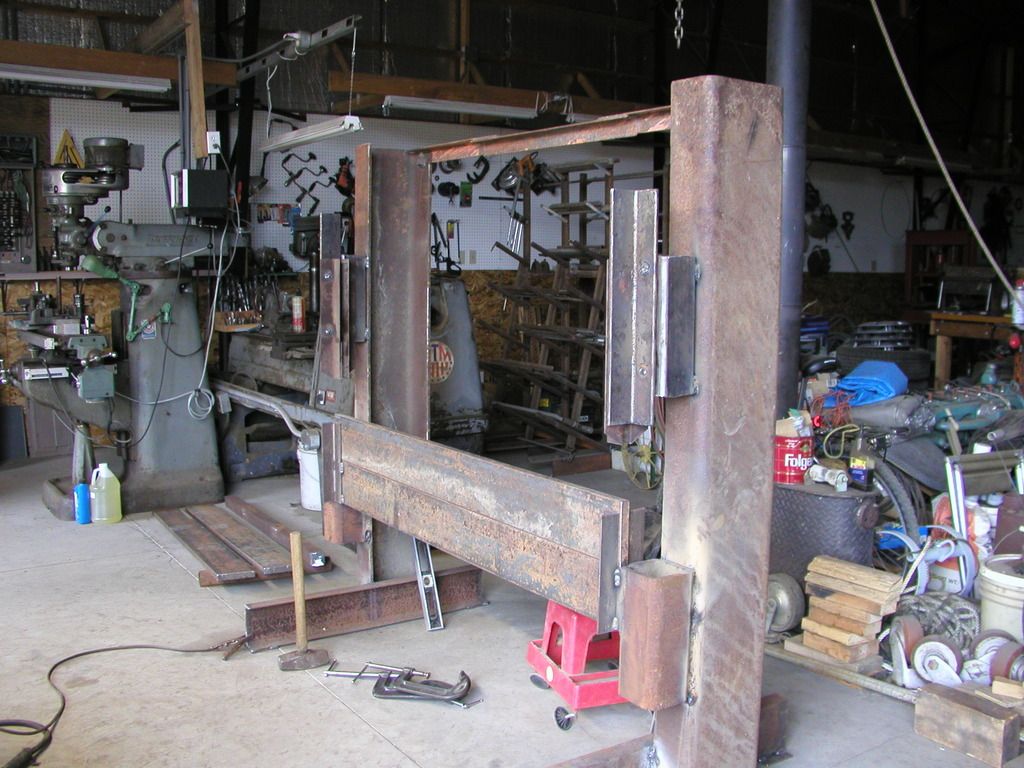
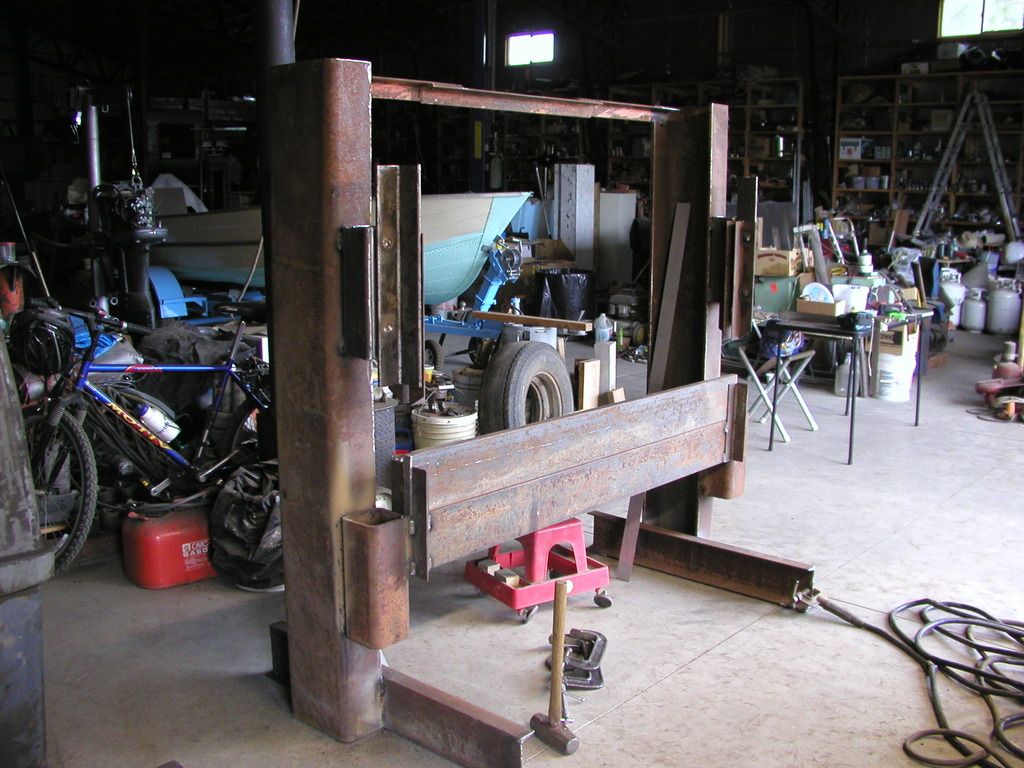
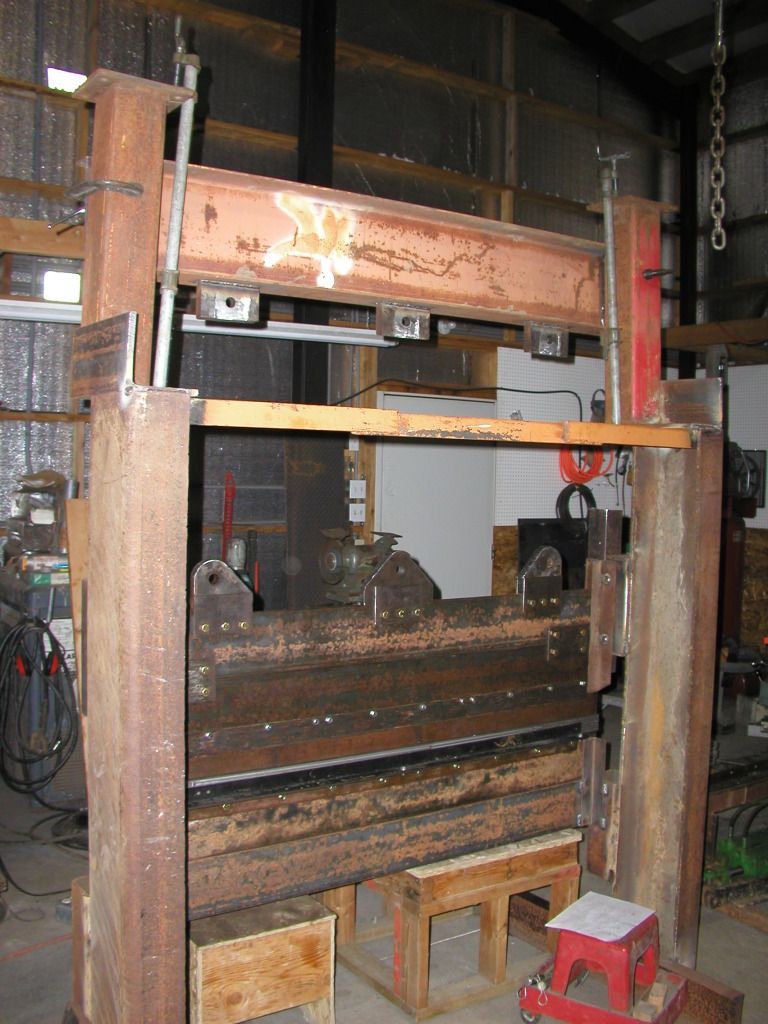
I did some more work to my brake. I added guides for the 2 - 1X6 plates that I'll be using as part of the press blade. The 2 - 1X6 plates at the bottom are in place in the photos. They will be topped with a 2X2 farm tool bar that I hope to mill a V groove in the top. I'm hoping the tool bar isn't too hard making the milling difficult.


Press progress


Press viewed from other angle.

There'll be a little break now because I need to change the starter on one of my wife's cars and change the oil in my pickup. That means I need to move some stuff and move the boat out of the way so I can get the vehicles on the lift. It sounds like work for tomorrow.

By the way, I'm retired and have been so for several years. I'm over 20 years older than my boat. I tell people that "they pay me now to stay away from work".
 

Decker83

Commander
Joined
Apr 5, 2011
Messages
2,593
From what I see on the press brake your building, I would think you can handle some tig welding..
If you have the tig welder, do some practice welds first.
Brass will work for a backer plate for the down hill weld.. I doubt you will need it..
The 3M 5200 will seal the outer aluminum plate on the transom with no problem.. Just trowel it on with a notched 1/16 trowel.​
 

64osby

Admiral
Joined
Jul 28, 2009
Messages
6,826
The 3M 5200 will seal the outer aluminum plate on the transom with no problem.. Just trowel it on with a notched 1/16 trowel.​

Trowel it on both sides, it will never come off.
 
Last edited:

StarTed

Senior Chief Petty Officer
Joined
Jul 14, 2015
Messages
694
Any idea how much 5200 I'll need? I've never used it before but I have a tube available that I got for this project.
 

64osby

Admiral
Joined
Jul 28, 2009
Messages
6,826
I would think one caulk tube should be enough to slather up the transom.

Buy a second just to be sure, you can never have enough of it when working on Tin.
 

g0nef1sshn

Lieutenant
Joined
Feb 24, 2015
Messages
1,291
Any idea how much 5200 I'll need? I've never used it before but I have a tube available that I got for this project.


Keep every thing you value clear when using that stuff, and a wet rag around is handy too. That suff gets everywhere you dont intend it too, My dog still has a spot on her from 3 weeks ago.
 

Decker83

Commander
Joined
Apr 5, 2011
Messages
2,593
I used one caulk tube on my transom.. The plate I added was 48"x24".. Mineral spirts will cut the 5200. Like gone said, keep several rags wet with MS..
 

StarTed

Senior Chief Petty Officer
Joined
Jul 14, 2015
Messages
694
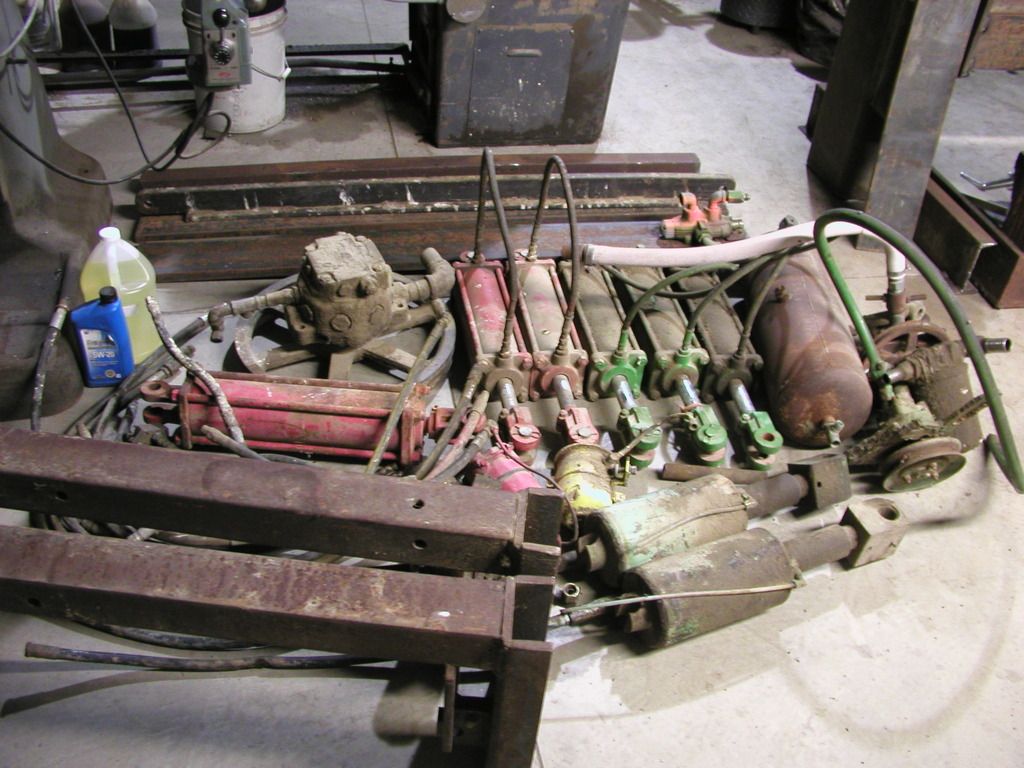
Well I'm back but things are moving slowly. My scrounging trip to the farm netted some usable parts. I got sidetracked by hunting season and now it's into the rainy season so I'm gathering up wood to heat my shop. It's so large that I only attempt to keep it from freezing inside. Fire danger is over so I am picking up down trees from my property. Here in eastern Washington I only have two species of trees, Ponderosa Pine and Aspen. The pine sits on Mima Mounds and the Aspen chooses the lower wetter areas. Otherwise it's all basalt.

Here's a shot of some of the scroungings.


I'm working on my press brake now and also cutting firewood. Be back with more pictures.
 
Last edited by a moderator:

Watermann

Starmada Splash of the Year 2014
Joined
Jan 12, 2013
Messages
13,797
Well I'm back but things are moving slowly. My scrounging trip to the farm netted some usable parts. I got sidetracked by hunting season and now it's into the rainy season so I'm gathering up wood to heat my shop. It's so large that I only attempt to keep it from freezing inside. Fire danger is over so I am picking up down trees from my property. Here in eastern Washington I only have two species of trees, Ponderosa Pine and Aspen. The pine sits on Mima Mounds and the Aspen chooses the lower wetter areas. Otherwise it's all basalt.

Interesting, I didn't know there were mima mounds on the east side of our State. I knew about the mounds over in the Thurston county area but I try to stay on the right side of the state if I can help it. :D
 

StarTed

Senior Chief Petty Officer
Joined
Jul 14, 2015
Messages
694
I just finished cutting my winter's supply of dead trees (I hope). Now it's back to my press brake so I can bend some aluminum for my boat's consoles.

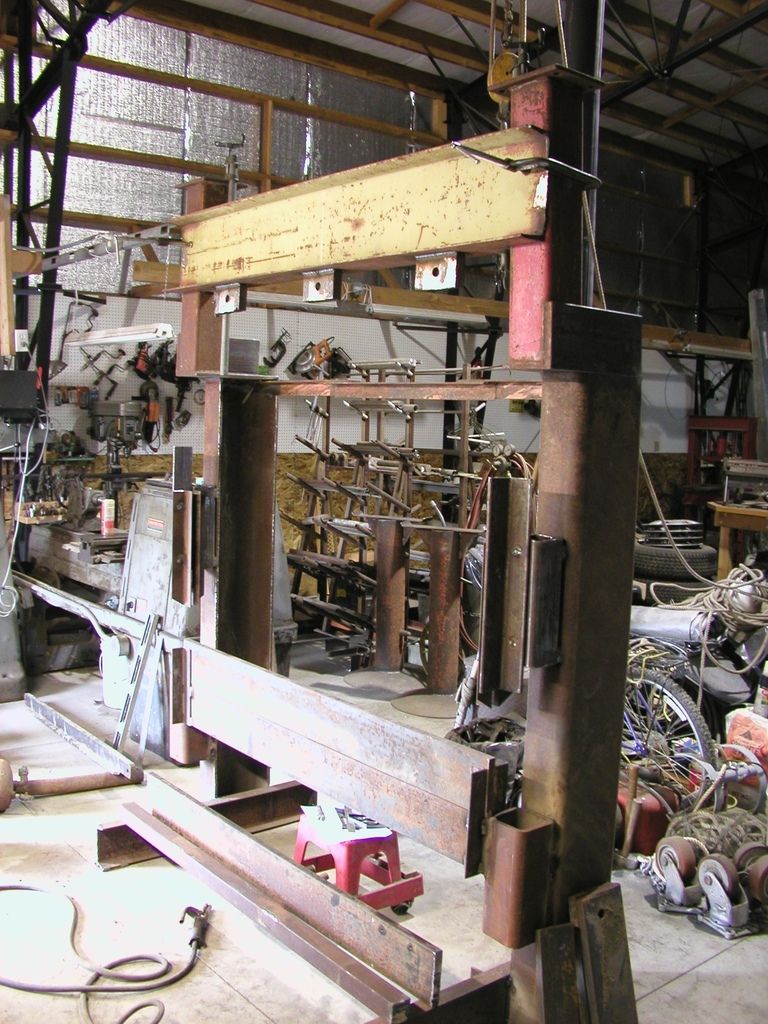
I've added some risers and an I beam to mount the hydraulic cylinders. The cylinders will be out 4 1/2" from the main beams the same as the dies.


Now my concern is a mechanical one. Will the 3 hydraulic cylinders push down evenly or will I need to make some substantial guides to keep them moving down vertically? I have the feeling that they may want to move down at different speeds due to unequal internal frictions. That'll need some guides. I plan to put some extended sliding guides at both ends but am not sure that will be enough. I'm thinking that I may need to add some shafts sliding up into cylinders (pipes). What do you think?
 

StarTed

Senior Chief Petty Officer
Joined
Jul 14, 2015
Messages
694
I don't have any more pictures to post but I'm still plugging away on support for this project. First it was the boat, then the brake and lately it's been the milling machine. I picked up a used Bridgeport a little before I began these posts and set it aside awaiting other things.

Finally decided to get it back up and running. The PO had greased the ways with moly type grease so it had to be all disassembled and cleaned. While at it the lead screw nuts were cut and machined smooth as recommended. The 1/4 turn on the handles got reduced to under 5 units "0.005" as recommended. The mill now runs much better. Next is a coolant system since it came with a couple containers but no systems. Working on the cheap I'm making the parts.

My first project will be cutting 85 degree slots for the brake to fold the metal in. This will require moving the piece since it is 60" long and the mill can only travel 28".

The mill came with quite a bit of tooling and lots of end mills. There are also several other neat tools and a cabinet thrown in.

So many distractions and it's also cold outside staying below freezing all day. It's a chore keeping the shop from dropping below freezing. 16' walls don't help it much from that standpoint.

Well, back to the shop and stoke the stove.
 

StarTed

Senior Chief Petty Officer
Joined
Jul 14, 2015
Messages
694
Made some more progress with the brake. The machining is all done (I hope) and assembly is in progress.

Here is a picture of more parts added.


Today I welded more of it together and welded on more bracing. Hope it's enough, we'll find out soon.

Next will be installing the cylinders and mounting the motor, filter, pump and controls (electrical and hydraulic). I still need to get the hydraulic pipe fittings.

Will report again when more gets done.
 

StarTed

Senior Chief Petty Officer
Joined
Jul 14, 2015
Messages
694
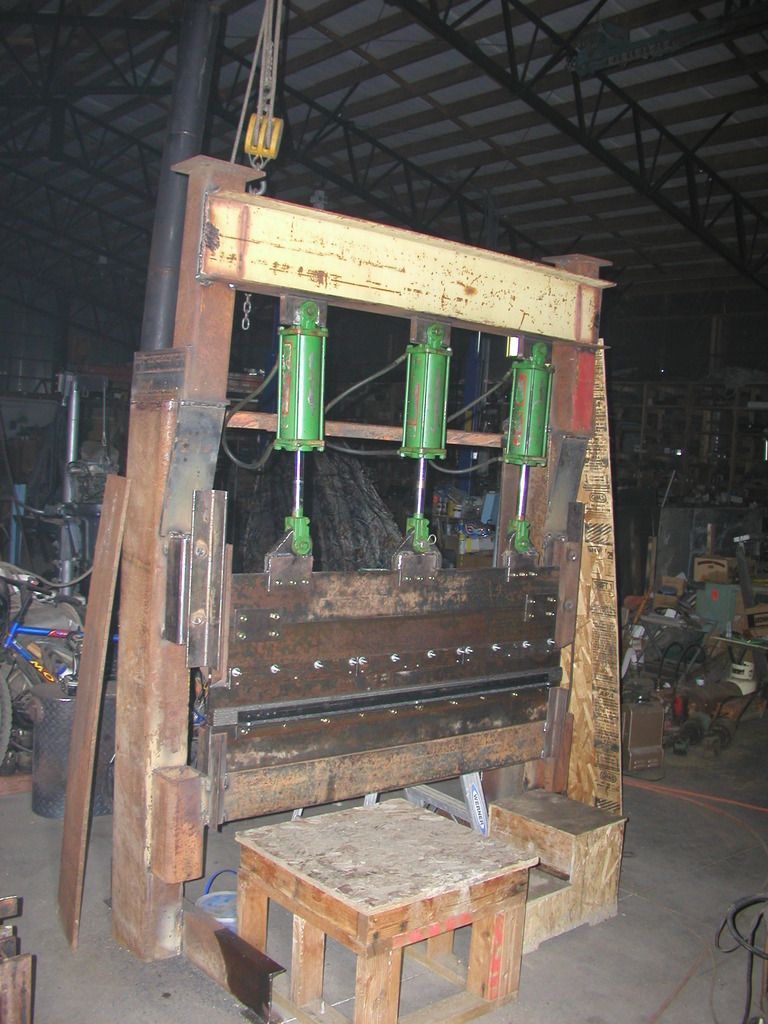
Here's the press with cylinders installed.


Next will be the mountings and plumbing'
 

StarTed

Senior Chief Petty Officer
Joined
Jul 14, 2015
Messages
694
I have a question.

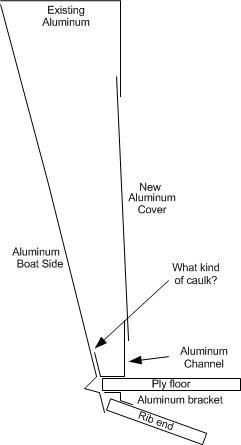
I plan to make some aluminum channels to secure to the floor and side covers. What is the best way to caulk them to the boat sides? I do not want to fasten them with rivets and would like to make them slightly flexible yet keep water from draining down behind.

See the below drawing.


StarTed

Senior Chief Petty Officer
Joined
Jul 14, 2015
Messages
694
I'd like to stay away from more rivets through the hull because I've already painted it and in the event the floor should need future removal. I know that's not much of an excuse but I don't like painting and only do it because it needs to be done to make it look good. I plan to screen the ends to keep critters out. I've grown to hate mice.
 

Watermann

Starmada Splash of the Year 2014
Joined
Jan 12, 2013
Messages
13,797
I'm not sure how effective adhesives would be all by themselves to hold together. If anything will work it would be 5200 but you have to keep it there until it cures and that stuff likes to follow gravity.
 

StarTed

Senior Chief Petty Officer
Joined
Jul 14, 2015
Messages
694
Thanks for the feedback JB & Water

I'm considering your inputs and haven't totally ruled out using rivets but am hoping for some other options before I begin on that phase. What about something like a foam filler with 5200 sealing it in place. I just don't want the 2 pieces of aluminum touching without riveting. I'm sure the best option would be 5200 between with rivets securing the aluminum but that would make any future floor removal almost impossible. Not that I plan to ever remove the floor.
 
Top