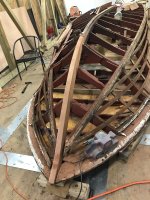
1962 Chris Craft Holiday 20’ bucket list resto

sphelps

Supreme Mariner
Joined
Nov 16, 2011
Messages
11,436
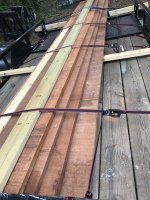
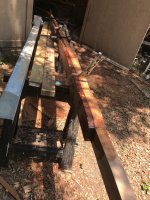
I may not need one .. Nothing to drastic curve wise . I’ll know when I go to dry fit .. This is Sapele .. Not really mahogany but looks real close to the Philippine.
I purchased 5/4 so I’m gunna have to split it in half for the decking ..
99% of this will be painted ..
Once the frame repair and bottom is done then I will decide on just replacing bad pieces or replacing all the side pcs that will be varnished .
The place I got the lumber from was out of the 1/4” marante plywood .
They should have a fresh patch next week .. I got a good bit of work before I’ll be ready for it anyway ..
No work this weekend in it .. Headed down to Winter Haven for a n AOMCI meet at Lake Ship ..
Taking the MFG .. She needs to be run good .. It’s been a good while ..
 

mickyryan

Rear Admiral
Joined
Apr 18, 2016
Messages
4,210
Man I'd love to do a wood boat but even after I have rid myself from those bees the scars of them are still too fresh lol
 

buxmj

Petty Officer 1st Class
Joined
Jun 9, 2018
Messages
294
Hope everyone is enjoying the weekend that was provided by the many that payed the ultimate sacrifice for our freedoms !
Got some dogs and such cooking for lunch 😉..
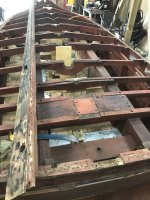
The little tool on the drill was the best 5 bucks ever spent for drilling out filler .. the center point retracts so you don’t screw up the head of the screws .. That and big thanks to Buck for loaning me his infrared paint/ varnish stripper …
Big time savor there ! Thanks Buck !
View attachment 380176View attachment 380177
Sorry for the delayed response Sam, time got away... So glad you are putting it to good use! Can't wait to see the finished project, and mine is getting closer!

Buck
 

buxmj

Petty Officer 1st Class
Joined
Jun 9, 2018
Messages
294
Looking great Sam! I wish I were closer, miss working with wood, putting all those projects off til my boat is splashed.

I think that cut is called a rolling bevel. I saw someone explain it somewhere, sorry I can't remember where I saw it. I was going to have to do it on the bow edge rail on the wooden boat project that was too far rotted. If you measure degree of cut every few inches and transfer that to your new piece and use a band saw and another person helping, one person feeding the board the other person adjusting the angle of the band saw table. Hope this makes sense.

Buck
 

sphelps

Supreme Mariner
Joined
Nov 16, 2011
Messages
11,436
I think I spend more time figuring out my next move than actually doing the work .
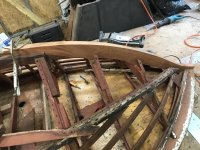
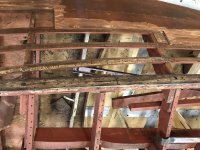
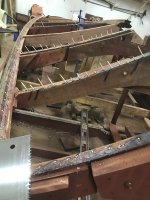
I decided that taking the keel completely off would make things much easier to clean /sand / repair all the frames . I noticed every other frame is not tied to the outside chines for some reason .. They just float in a plywood U bracket .. 🤔
That and are not tied to any vertical dide frames .
F8536E13-10C5-4133-91EF-34292E8FFBB8.jpeg
 

flashback

Captain
Joined
Jun 28, 2002
Messages
3,721
I think I spend more time figuring out my next move than actually doing the work .
I decided that taking the keel completely off would make things much easier to clean /sand / repair all the frames . I noticed every other frame is not tied to the outside chines for some reason .. They just float in a plywood U bracket .. 🤔
That and are not tied to any vertical dide frames .
View attachment 384802
Just a guess but they probably felt that the bottom needed the ribs but topsides were adequate. Save lumber and lofting time, in any case, it works...:)
 

sphelps

Supreme Mariner
Joined
Nov 16, 2011
Messages
11,436
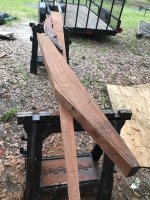
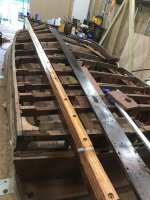
So , the big pink elephant in the room was the comprised port side main stringer . So with the piece of beam I had left with bow stem I figured I’d scarf into the good part on the original beam . 6:1 scarf and I picked up some west system G-flex to make the connection. Got it all cut out and ready to go .. Then in my ever questioning mind while sitting in my contemplating chair I just didn’t like that this scarf was gunna be right under the front motor mount location … Bite the bullet and try and locate a new beam . This was the most frustrating part I’ve had so far . No where locally I could find white oak big enough to work . Ok Sapele will work just as good … The place I got the other wood from had just sold all of the right size stuff they had in stock and didn’t know when they were gunna get more ..,So looking for something/anything I could use was fruitless at every turn . I was willing to take a fairly long road trip if needed . So one of the 20 some odd sources I tried had ask me if I had looked into Red Grandis lumber . He had plenty of that the right size ..,So after a lot of reading on it I figured it would work for a stringer . Plenty rot/water and insect resistant and comparable in strength to WO and Mahogany/Sapele.. So long story short got the beam cut out and a piece of 5/4 Sapele laminated together and drying now ready to install . This one beam is holding up the whole thing .. I’m ready to move on and finish up the framing . At least for the bottom installation that is .
Oh , and to ad insult to injury when I ordered the CEPS I wasn’t paying attention and ordered the cold weather stuff .. Well it’s July in Florida …🤔 Lol !
I’m scared to use it so gunna re-order I guess …..
E942DDC1-BD85-4FB6-A23C-59837B756FDD.jpeg1E8CE2F0-3A13-4D3F-81F0-F2CAA7F3A548.jpeg
 

sphelps

Supreme Mariner
Joined
Nov 16, 2011
Messages
11,436
Started to give the ribs the porcupine treatment to fill the screw holes .. Also the first bit of CPES was put on the whole keel and the new stringer .
16C428CA-8637-4A9D-941C-B888A2E104C4.jpeg66D4314F-F48A-44B7-856E-2CFD3A75514B.jpeg
 

sphelps

Supreme Mariner
Joined
Nov 16, 2011
Messages
11,436
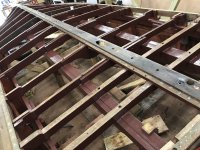
Actually started some Sandusky CC red bilge paint in the stringers and frames ! Getting closer to installing the bottom ! I am taking the outer chines off still . Cleaning them up sealing and re-installing ..Then I should be ready for the inner layer of the bottom ….
F7ABEF90-352F-40DE-9E44-F579FA913C04.jpeg
 

sphelps

Supreme Mariner
Joined
Nov 16, 2011
Messages
11,436
coming along really nice. I am curious how you made out with the stem rabbet?
Still fine tuning that .. It’s actually made in 3 pieces and I was able to use the old stem to get the right slope . A lot of hand work with the angle grinder with a flap disc mostly . I still need to do some shaping at the very top of the stem . I will install the bottom planks and fine tune the stem to the planks .
 
Top