1959 Lone Star El Dorado "Project Texas Tornado" - Winner 2016 Resto SOTY Award

Corjen1

Lieutenant Junior Grade
Joined
Aug 24, 2013
Messages
1,237
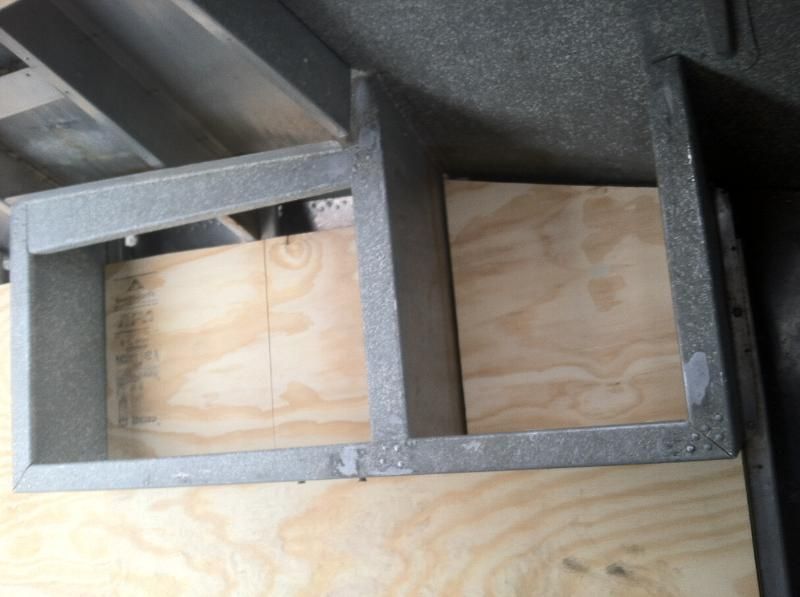
Hate to say it but the right (new) rivet in the third pic above looks a little short. What size are you using?

Luke000, A properly bucked rivet should have a shop head that is a minimum 1.5 D. Meaning the shop head is 1.5 times larger than the diameter of the rivet shank. (at least in aviation world)

Here is a good link for the standards we use...

https://www.vansaircraft.com/public/Specs.htm#TABLE III
 

Luke000

Restoration Forum Splash of the Year 2016
Joined
Aug 19, 2013
Messages
346
Watermann, I did not use any 5200 :cold::blue:, It is a little too cold here in michigan for that stuff to cure anyways. on the others, i will probably use some of the 5200 on the rest if the temp goes above 40.

Corjen, thanks for the good info! I measured some today and I look to be right in spec for the ones I was able to reach with my calipers!
 

Luke000

Restoration Forum Splash of the Year 2016
Joined
Aug 19, 2013
Messages
346
I went to lowes today and picked up 2 sheets of plywood for the floor. Same BC grade as the transom. I am going to cut it so size this weekend and hopefully buck some more rivets. I know i should probably seal the boards before I put them in the boat with some sort of flooring but I am unsure of what to use. I am guessing it is going to depend on what I am going to use as a flooring cover, and again I have no idea of what I am going to use- decisions decisions decisions.... I am completly open to suggustions! The PO put Nautolex vinyl in the boat on some 3/8 plywood but I am not too crazy about it. I am leaning towards marine carpet because I want a cozy/warm feeling to the boat's interior. Again, open to suggestions :)
 

Woodonglass

Supreme Mariner
Joined
Dec 29, 2009
Messages
25,928
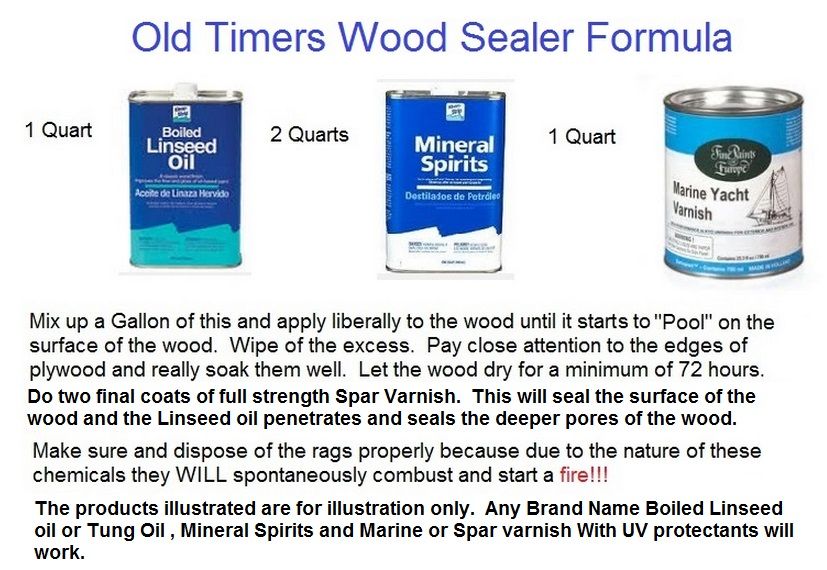
Well the best sealant is Epoxy, Then Poly resin with CSM, After that, I'd recommend this... NOTE: Plywood will only soak up a minimum of this on the top and bottom layers due to the resin between the laminations. The EDGES are the critical areas to be treated. The Two final Layers of Full Strength Spar Varnish are also critical to ensure full sealing of the plywood. I've used this formula with great success on outdoor projects for decades. If you use it on your boat deck and then take reasonable care of her I'm sure you'll get good results and longevity from the plywood. This yields a gallon of the mix for about $40 bucks and it will treat two full 4x8 sheets of plywood.

 
Last edited:

Watermann

Starmada Splash of the Year 2014
Joined
Jan 12, 2013
Messages
13,798
For wood sealing I use Helmsman spar varnish, a few coats on the flat with 5 or 6 ending up on the edges.
 

64osby

Admiral
Joined
Jul 28, 2009
Messages
6,826
WOG - I have used Spar varnish to seal up wood for a boat or two.

How much more penetration of the wood does this provide?
 
Last edited:

Luke000

Restoration Forum Splash of the Year 2016
Joined
Aug 19, 2013
Messages
346
Thanks for the info on the spar/linseed/mineral spirits! I will probably go pick some up soon. Before I do this on everything, would it be possible to either paint (possible for the transom) or glue down carpet over the spar varnish?

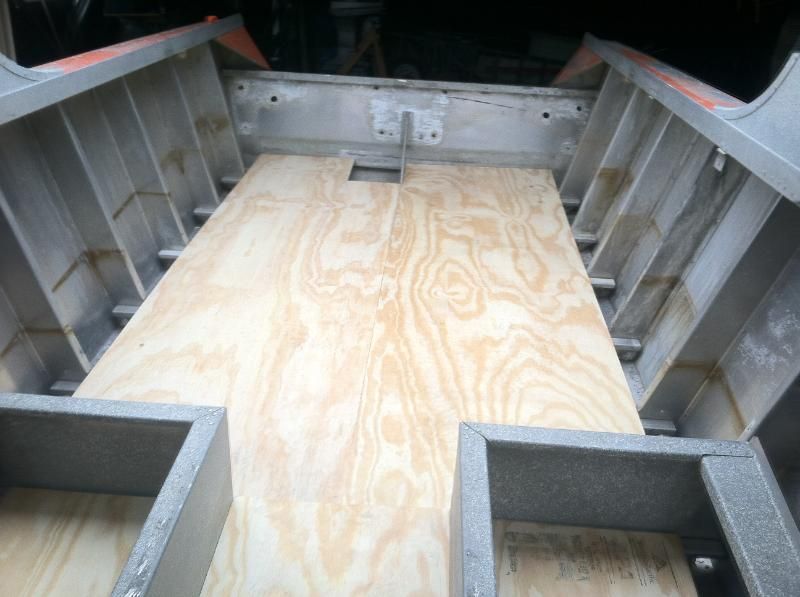
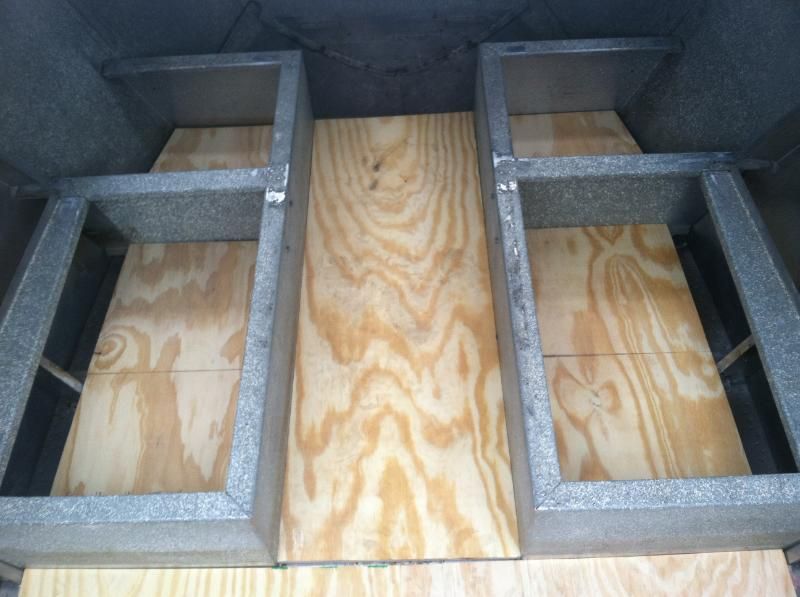
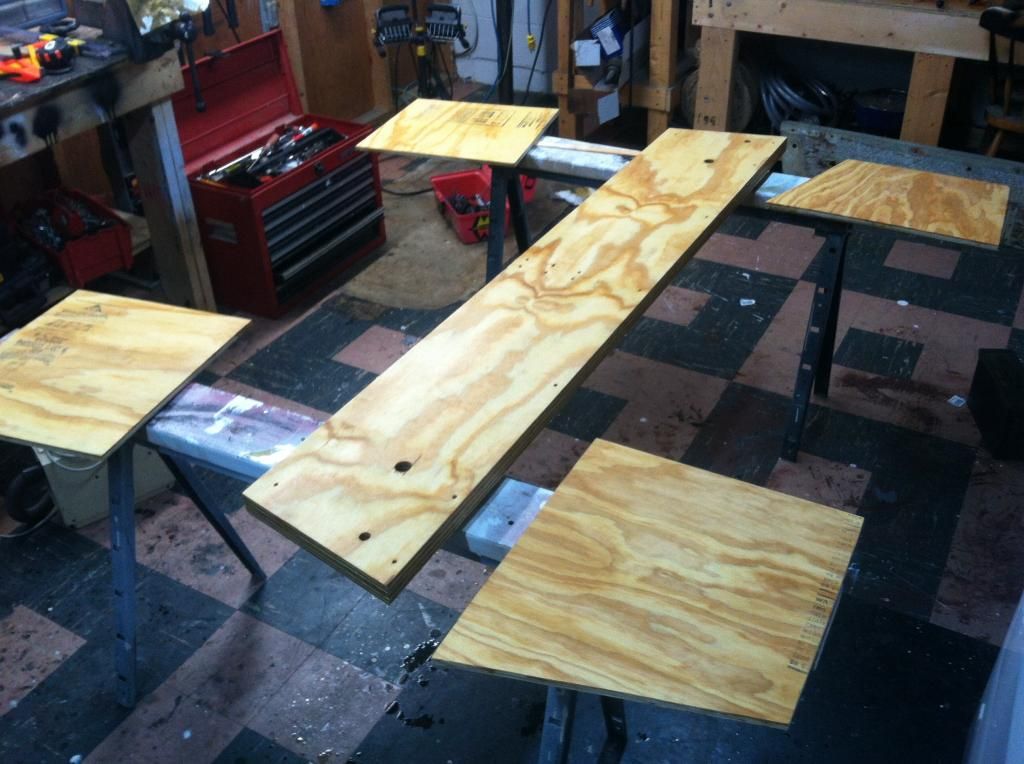
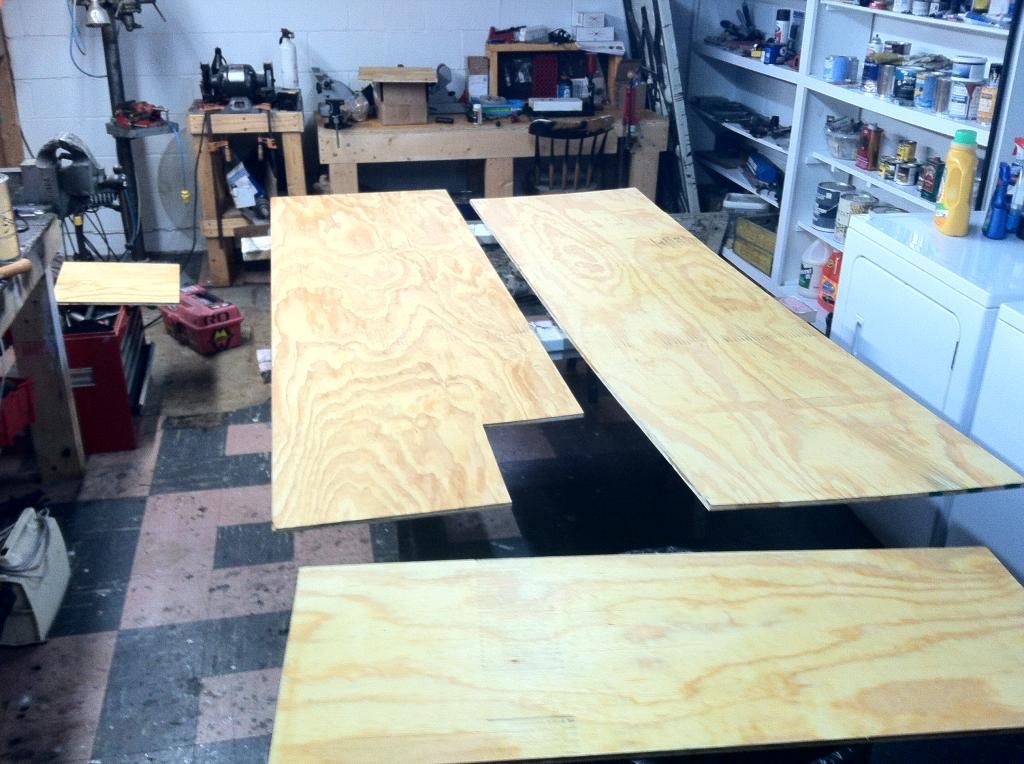
I got some of the floorboards cut up and fit today before I ran out of wood, it all fits very nicely. There is some very minor warping in the wood but it should all go away once I screw it down.


Woodonglass

Supreme Mariner
Joined
Dec 29, 2009
Messages
25,928
Yep, When the spar varnish dries, the surface will be very similar to an epoxy finish. It will be somewhat glossy and "Plastic" looking. Carpet glue will stick to it very well.
 

Woodonglass

Supreme Mariner
Joined
Dec 29, 2009
Messages
25,928
WOG - I have used Spar varnish to seal up wood for a boat or two.

How much more penetration of the wood does this provide?

Spar varnish, out of the can, only penetrates the wood minimally. The Old Timers wood sealer has some added benefits. Tung Oil or Boiled linseed oil contains a lot of "Solids". Using the MS to thin it will carry these solids much deeper into the pores of the wood and when the mix dries these solids expand and fill the pores of the wood. Since they're oil based this adds to their water resistance. The spar varnish is carried deeper as well and provides a water barrier as well. The final full strength coats of the Varnish are the Primary Barrier for keeping water out but if they fail due to nicks and scratches this formula does give the wood a better chance to survive. Wood boat builders have used this for Decades and I've used it for over 30 years with SUPER results. I currently have some CRAP wafer board nailed to the side of my house that's been soaked in this formula that's been there since April 1st. I'm using it as a Torture Test piece so I can show the forum how it holds up to the Torturous conditions of Oklahoma's severe weather patterns of Rain, Snow, Ice, Heat etc... Stay Tuned!!!!!
 
Last edited:

monriverguy

Petty Officer 2nd Class
Joined
Oct 28, 2013
Messages
190
The floor is looking good luke, what was the overall size for the cook pit ? like i said the po had a sheet of plywood 4x8 and two little strips on the side, the wood was only 17/32 what thickness did you go with? also i see you got the drain plug out , Was it bad. and where do you plan on putting your pump at if you plan on putting one in? And then there are the seats....lol i also plan on doing as much as i can till the weather gets better here too luke..... COME ON SPRING !!
 

Luke000

Restoration Forum Splash of the Year 2016
Joined
Aug 19, 2013
Messages
346
The floor is looking good luke, what was the overall size for the cook pit ? like i said the po had a sheet of plywood 4x8 and two little strips on the side, the wood was only 17/32 what thickness did you go with? also i see you got the drain plug out , Was it bad. and where do you plan on putting your pump at if you plan on putting one in? And then there are the seats....lol i also plan on doing as much as i can till the weather gets better here too luke..... COME ON SPRING !!

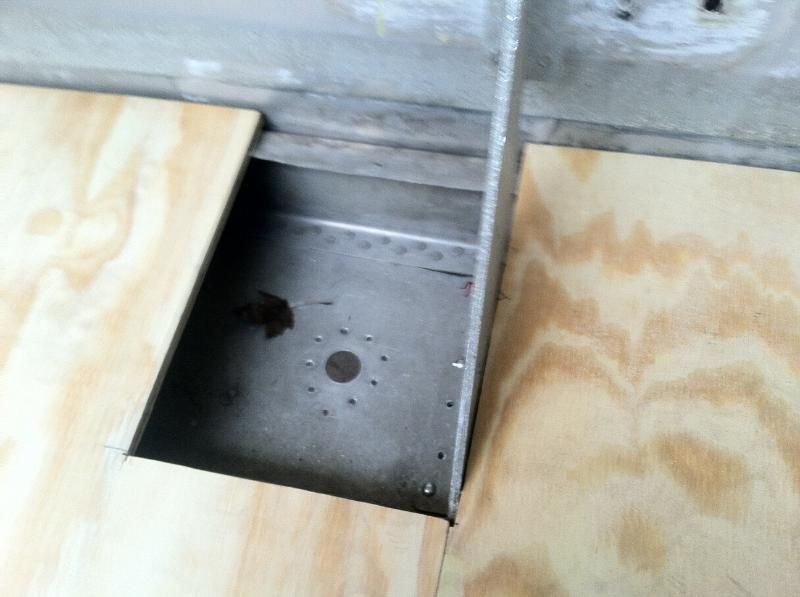
I did two pieces for the rear section, I THINK they were 27-3/4 by 94 inches each but you would want to double check your hull first. I used the 17/32 plywood for mine and it will be fine for this boat, I can feel no soft spots but the 3/4 ply would be perfect and if I ever have to do it again, I would use 3/4". For me, my PO used 3/8 ply and that felt soft.
I took the drain plug out because some of the rivets that were holding it in had started to rot and flake away so I decided to drill all of them out and just re-attach it with new rivets. There were 6 others along my transom seam that I did that for as well. I think I might put a pump in too, just for that nice modern touch. I am now waiting for warm weather again so I can paint the dang boat and after that there is probably not much left. But there are some things I need to do before I get to that point.

I got my transom completely coated with the spar/linseed oil/spirits, and I did the undersides of all the floor boards that I have cut so far. I have never worked with spar varnish before (I have always been a sikkens person) but I like this stuff, it's a lot cheaper and it smells nice!


Tnstratofam

Commander
Joined
Aug 18, 2013
Messages
2,679
You are making good progress. All the floor pieces, and the transom will be very well protected using Woods formula. When I did my transom my garage smelled like spar varnish for a good two weeks afterword. You can go outside right now, and pull back my cover on the boats and still smell it. I finished my transom in May so the smell sticks around for a while.
 

Woodonglass

Supreme Mariner
Joined
Dec 29, 2009
Messages
25,928
If you want the smell to "Go Away" sprinkle some Baby Powder Around the Area and It'll absorb some of that odor!!!
 

64osby

Admiral
Joined
Jul 28, 2009
Messages
6,826
I think the Admiral would shoot me If i did that in the laundry room, or anywhere in the house.:faint2:
 

Tnstratofam

Commander
Joined
Aug 18, 2013
Messages
2,679
My Admiral says the smell of the varnish reminds her of all the hard work we put into splashing our Starcraft this year. Thank goodness our garage is detached, because I'm sure she wouldn't say that if the odor was in our house.:eek::faint2::D
 

Watermann

Starmada Splash of the Year 2014
Joined
Jan 12, 2013
Messages
13,798
I got some of the floorboards cut up and fit today before I ran out of wood, it all fits very nicely. There is some very minor warping in the wood but it should all go away once I screw it down.


Looking good with the nice grade of ply and the smell of spar makes me want to grab my respirator. :lol:

I do have a couple suggestions for you on your decking set up. I know the deck wood came out of your LS with it running length ways when you got the boat although that doesn't mean it was the best way to have done it. For strength the ply should run cross ways and the seams fit over a support. The way it is now there are unsupported seams all the way between each of your floor supports. The craft relies on decking to add longitude structure and support to the AL hull, the unsupported seams will also sag at different rates. That's not to say you can't do something about it without starting over. You can always add ply tabs in between the each of the unsupported seams so there's more support and the 2 ply pieces become basically one piece.

I would also suggest that you mirror the cutout on the other side of the ply over the bilge. Doubling the size of the bilge cutout will allow you to install pumps way easier and on the opposite side of the knee brace away from the drain plug hole.
 

nurseman

Lieutenant Junior Grade
Joined
Jun 2, 2013
Messages
1,045
Ditto on watermann's suggestion to block the seams, but you DO have the panels running in the correct direction. Plywood should run across (at 90deg) the supports for maximum strength.

The smell of boiled linseed oil reminds me of growing up. My dad would coat his hog trailer floor boards with that stuff, they lasted for many years exposed to the elements and everything else.
 
Last edited:

jbcurt00

Moderator
Staff member
Joined
Oct 25, 2011
Messages
25,057
There arent longitudinal stringers in the LoneStar, there port/starboard ribs that support the plywood, correct? If so Nursemans right, i cant remember the layout and on my cell surfing multiple pages of a topic gets iffy...

If they are fore aft stringers, Watermanns correct. I dont think there are though... On the Starcrafts we're more familiar w/, yep fore aft stringers....
 

64osby

Admiral
Joined
Jul 28, 2009
Messages
6,826
Ribs no stringers.
transomin_zpsf39a84a0.jpg

As others have said add splice plates for the sides. Once it is covered no one will ever know.

I would also install the other two rivets on the knee brace.
 
Last edited:
Top