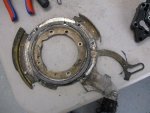
1976 Johnson 40 HP Outboard Complete Rebuild

gm280

Supreme Mariner
Joined
Jun 26, 2011
Messages
14,605
This is a repost from my project: http://forums.iboats.com/boat-resto...n-outboard-who-knows-what-trailer-586483.html

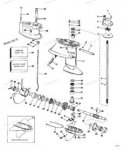
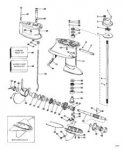
I have never built an outboard, but after completely disassembling this Johnson 40 HP, it seems a little easier then all the 4 cycles I've rebuild thus far. I have already ordered most of the parts (seals, "o" rings, gaskets, bearings and such). I also have stripped, sand-blasted and cleaned all the individual parts in preparation for primer (either etching, Zinc Chromate, or Epoxy haven't decide on that yet either) base coat and top coats of clear. That does bring me to another question concerning the lower foot to this engine. I know there is a bushing and two "O" ring seals installed in the foot for the shifter rod to pass through per the IPB (Illistrated Parts Breakdown);
43210.jpg

If you look at part numbers 18, 19, and 20 you will see what I'm questioning. In the actual engine factory manual they show and say to knock these parts out from the top through to the bottom as pictured. My question is these parts look to be installed from the top and therefore should be removed from the bottom up in my uneducated opinion. Has anybody removed these or some similar in there past and know which way to punch them through? The bushing looks bigger in diameter and would never punch through to the bottom. The really odd part about the manual is that it later says to install these through the bottom of the casing as well. Just seems impossible to do that. Any help and/or ideas so I don't damage the case?
 

Attachments

  • Lower Foot for Johnson 40HP enlarged.jpg
    Lower Foot for Johnson 40HP enlarged.jpg
    11.7 KB · Views: 2

gm280

Supreme Mariner
Joined
Jun 26, 2011
Messages
14,605
Re: 1976 Johnson 40 HP Outboard Complete Rebuild

Sorry I can't seem to get a large enough picture to show what I am talking about...:blue:
 

64osby

Admiral
Joined
Jul 28, 2009
Messages
6,826
Re: 1976 Johnson 40 HP Outboard Complete Rebuild

I've worked on a few older motors and as I recall the shift rod bushing and seal are removed from the bottom up.

On the ones I've repaired you need to make or buy a "special tool" to remove it. I used a 5" long 5/16ths bolt with the threads and part of the head ground off.
 

gm280

Supreme Mariner
Joined
Jun 26, 2011
Messages
14,605
Re: 1976 Johnson 40 HP Outboard Complete Rebuild

I've worked on a few older motors and as I recall the shift rod bushing and seal are removed from the bottom up.

On the ones I've repaired you need to make or buy a "special tool" to remove it. I used a 5" long 5/16ths bolt with the threads and part of the head ground off.

Thanks for the info. I was thinking that it had to come through the top because the brass bushing is about a half inch in diameter (looking at it from the top) and the lower hole is only around what you stated, 5/16" in diameter (I was actually able to get a 9/32" drill bit in there so 5/16" would certainly work. I am making such a punch myself because I need to replace those parts to make sure the foot is properly sealed when it is finished. Thanks again. I'll reply once it is removed...:joyous:
 

gm280

Supreme Mariner
Joined
Jun 26, 2011
Messages
14,605
Re: 1976 Johnson 40 HP Outboard Complete Rebuild

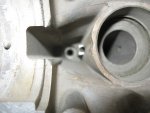
Hello everybody. I have an apology to make concerning my first question and observation as to which way to punch out this gasket, "O" ring seal and brass (bronze whatever) bushing for the shifter rod pass through in the foot of this 1976 Johnson 40 HP outboard (40E76R). I stated that it looked like the Johnson shop manual for this engine was wrong with their directions to punch out this bushing. Well I was WRONG in my assumptions. I guess what tricked me was that fact the the engine manual shows these parts as coming in from the top of the foot when in actuality they are installed via the bottom of the foot exactly like the manual states to install them. It does punch out from the top towards the botton afterall. So their manual is wrong showing these parts coming in from the top.

I actually used "64 osby's" idea using the 5/16" bolt method and after some gentle tapes nothing happened. So I gave it a few pretty hard wacks with a fairly heavy ball pen hammer and it popped out nicely. I was hesitent to hammer it too hard not wanting to break anything, but that IS what you have to do sometimes to get things moving. Especially a motor this old...:D And this makes sense too because the bushing comes in from the bottom and therefore any pressure is going to force the bushing even harder into the foot casing from all the moving parts and hence should stop any foot oil leaks.

Boat-31.jpgBoat-32.jpgBoat-33.jpgBoat-34.jpg

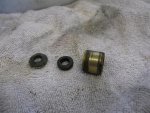
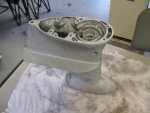
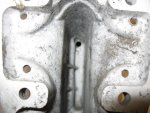
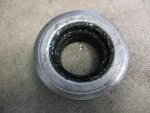
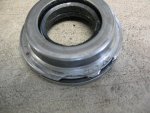
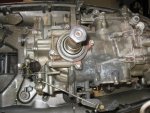
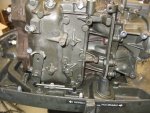
Here are the pictures of the bushing, "O" ring and gasket removed from the foot. And I also posted a few of all the engine parts after disassemled and sand blasted as well. While it looks like a huge rats nest of parts and such. I do have everything (i.e. bolts, washers, screws, and such) in their own zip-locked bag for reassemle too. I am near completion of cleaning everything in preparation for initial priming and then top primer coat and follow with base coat or four of PPG base paint only to finish with many coats of clear to top everything off. I'll post additional pictures as I get more to post...:joyous:

Thanks again 64osby for your suggestion. :cool: It did the trick...:joyous:
 

gm280

Supreme Mariner
Joined
Jun 26, 2011
Messages
14,605
Re: 1976 Johnson 40 HP Outboard Complete Rebuild

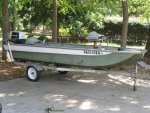
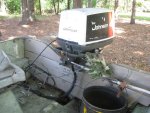
Okay I'll try to post these pictures of the 40 HP 76 Johnson rebuild again. Here is what it looked like initially;

Boat-1.jpgboat-7.jpg

And after removing the foot because it was frozen up, I was able to turn the engine over and did a compression test. If I remember correctly the two cylenders read 112 and 115. So I thought everything else was okay...WRONG!

I removed this engine from the boat to work on the rotter transom and floor as usual on boats this old. It is a Tom Boy 14' 1" tri-hull and built also in 1976. SO I was expecting such with the boat.

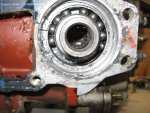
SO as the motor sat on the engine stand, I got a gut feeling to remove the powerhead for some strange reason. So glad I did. Here is what was hiding from obvious view;

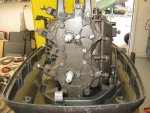
Boat-27.jpgBoat-28.jpgBoat-29.jpg

I was scared that the missing ball out of the ball bearing had worked up into the powerhead now. So I power washed the entire engine off and started opeing it up.

Next port!
 

gm280

Supreme Mariner
Joined
Jun 26, 2011
Messages
14,605
Re: 1976 Johnson 40 HP Outboard Complete Rebuild

Continuing with pictures and info;

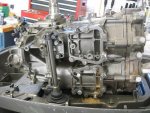
Boat-38.jpgBoat-39.jpgBoat-40.jpgBoat-41.jpg

It actually looks pretty good from the cleaning thus far, but there is more!
 

gm280

Supreme Mariner
Joined
Jun 26, 2011
Messages
14,605
Re: 1976 Johnson 40 HP Outboard Complete Rebuild

Still continuing;

Boat-37.jpgBoat-42.jpgBoat-43.jpgBoat-44.jpgBoat-37.jpg

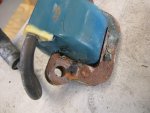
So I now have this motor totally disassembled and most of all the parts cleaned and examined for reassembly or replacement. I'll post more picutres as I get them resized. It loosk like this outboard will live on. Seems the lower main bearing and seal holder assemblies were the only damaged parts thus far. Of course the entire foot bearings, seal, "O" rings and bushing were trasshed and new parts already purchased with new water pump complete assembly. I desided to replace the water pump housing, bottom plate, and impeller and all rubber fittings as to not wanting any problems on the water for a long time after this complete rebuild. I have never rebuilt any outboard, but it seem a lot easier then car engines so far. Will keep you all posted and take more picture as well... :D

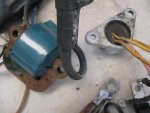
Does that coil look like toast? :facepalm:

Already bought all the entire ignition system parts too... :watermelon:
 

TN-25

Chief Petty Officer
Joined
May 27, 2008
Messages
619
Re: 1976 Johnson 40 HP Outboard Complete Rebuild

It appears you are investing wisely. Indeed the 2-stroke motors have far fewer parts in the powerhead, and are easier to work on. I am a fan of those old 40s. As a young boy back in 1974 I was at an Evinrude dealer and I commented to the dealership owner that the 40 was an ancient design. He almost got defensive, but then I countered with what a good solid and simple design it was. And they are.

I am always a little scared of using too much force to drive out a bushing because it can and has cracked housings.
 

oldman570

Lieutenant Commander
Joined
Mar 25, 2011
Messages
1,615
Re: 1976 Johnson 40 HP Outboard Complete Rebuild

Cleanning the coils up and testing them should be done. Then new coils can be bought as needed. Now would be the time to add a tell tail if the motor dose not have one. Makes it alot easier to check the cooling system for water flow. Directions to put on a tell tail can be found here using the fourm search. A web search for LeeRoys Ramblings will give you good insight as your motor has several componets simrl to the ones he describs for the smaller motors. Setting the points as he describes is one of the best ways to kepp things in time. JMO
Oldman570
 

gm280

Supreme Mariner
Joined
Jun 26, 2011
Messages
14,605
Re: 1976 Johnson 40 HP Outboard Complete Rebuild

Yes TN-25, you can easily break things by wraping on them too hard. But it is the only way to remove that bushing and didn't have any problems with it. I have built too many engines and automatic transmission and differentials and this motor seems so easy to work on. So it is giving me even more initiative to maybe rebuild more outboards now too.

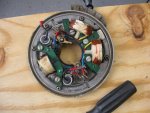
oldman570, I have all ready purchased the two ignition coils to replace the old ones even thought one did look very good and was obviously changed before. I know somebody changed one of them because there were two different colors...a give away. The one I posted the picture about I didn't even try to ohm it out, it is obvious toast. As far as the other coils under the fly-wheel are concerned, I ohmed them all out per the original 1976 40 HP Johnson shop manual for this motor and they read exactly in the limits. So I am assuming they are good at this point. I also bought new points, condensors and even though the old points and condensors read good, I am changing them also. This engine will mimic a new motor when it is done. I don't like problems when i'm out on the water to enjoy a day of fishing. SO anything I can fix now will make that happen all the more easier.

I will post more pictures as I get them sized and start with the priming and painting. That does lead me to another question. What type of initial primer are folks using on sand-blasted bare aluminum engine parts these days? I hear Zinc Chromate, or Self Etching, and even epoxy primers followed by sandable primer before base coats of paint with clear top coatings. But which initial is the better. Not trying to open a can of worms, but would be interesting to know.

Thanks everybody for the replies and info. I can use any and all ideas anybody is willing to post... :joyous:
 

gm280

Supreme Mariner
Joined
Jun 26, 2011
Messages
14,605
Re: 1976 Johnson 40 HP Outboard Complete Rebuild

I have another interesting question about this Johnson outboard. When I was disassembling this outboard I notice a red coat of what I thought was some type of primer paint that was painted on by the manufacturer. Is that what it was or was it a coat of something to allow better flow of fuel/oil mix into the chambers? And if it was either one of those things, does it have to be painted back on or not? Like I stated before, I have built many many car engines and automatic transmissions and this seems a lot easier. But I surely don't want to over-look things like that if it was painted on there for a special purpose. Thanks again for any and all ideas and answers... :joyous:
 

oldman570

Lieutenant Commander
Joined
Mar 25, 2011
Messages
1,615
Re: 1976 Johnson 40 HP Outboard Complete Rebuild

I use the yellow zinc chromate for a base primer on the bare metal and go from there, and go from there as you wish. I usually just with the factory color over the zinc chromeate atleast with two or more light coats of paint then do the clearcoat for a more shiney finish. While looking at the bottom of the stator plate the nylon ware ring looks like it might need some attention, as it looks mighty dirty and worn. If it is to bad it will let the stator plate move more than it should and can cause trouble with setting the points and the timming of the motor." FR" on here makes a ring and timming pointer for the older OMC motors that work for getting the pickup coils set correct and setting the points. He has alot of knowledge about those old motors and might chime in to help out. One thing about it is if it is done right the first time, you woun't be doing it again for quite awhile. It's the best way and cost more but it''s worth it down the lake.
JMO
Oldman570
 

gm280

Supreme Mariner
Joined
Jun 26, 2011
Messages
14,605
Re: 1976 Johnson 40 HP Outboard Complete Rebuild

I use the yellow zinc chromate for a base primer on the bare metal and go from there, and go from there as you wish. I usually just with the factory color over the zinc chromeate atleast with two or more light coats of paint then do the clearcoat for a more shiney finish. While looking at the bottom of the stator plate the nylon ware ring looks like it might need some attention, as it looks mighty dirty and worn. If it is to bad it will let the stator plate move more than it should and can cause trouble with setting the points and the timming of the motor." FR" on here makes a ring and timming pointer for the older OMC motors that work for getting the pickup coils set correct and setting the points. He has alot of knowledge about those old motors and might chime in to help out. One thing about it is if it is done right the first time, you woun't be doing it again for quite awhile. It's the best way and cost more but it''s worth it down the lake.
JMO
Oldman570

Hello again Oldman570, yes I think I will go with the zinc chromate as a base primer and then apply some very good PPG K36 sandable primer and start sanding all the little imperfections out before applying PPG "Shopline" base color followed with a few more coats of PPG Clear. What do you think was the red paint on the bottom of the powerhead where the main crankshaft bearing was screwed up (picture #boat-27) in an earlier post? The red coating was inside the engine in the intake areas as well. I was wondering if it was some sort of paint to assist in fuel flow or if they just got carried away with some primer of some sort? :confused:

As far as the wear ring you were referring to (I think they call it the derlin armature plate bearing ring in the manual), that picture was pre-cleanup stage. That ring did clean up perfectly and looks like it will work very well yet. However, If I do have any problems with irratic timing issues, I'll keep your suggestion in mind for a possible fix. I will not cut corners rebuilding this motor because I want a totally prefect running engine that I don't want to worry about for a looonnngggg time. SO any part that just doesn't look correct is gone and replaced. I do appreciate your input and suggestions and will try them as well. That IS what I do like about this iboat forum, so many folks so willing to help with experienced knowledge. That my friends is getting harder to fine these days. So thanks once again Oldman570, and to everybody else that reads and/or posts ideas and suggestions. I do read them all and heed the advice... :joyous:
 

oldman570

Lieutenant Commander
Joined
Mar 25, 2011
Messages
1,615
Re: 1976 Johnson 40 HP Outboard Complete Rebuild

Iam not sure just why the red primmer paint is on the inside of the crankcase, but could be for a coating to help prevent corrision an seal the pours in the castings better. It would also make the inside of the crankcase smoother and allow for better fuel flow and mixing. On older motors the fuel/ oil mix was 25-1 where the newer motors are 50-1. Of corrse the oil today is alot better than of years ago. I would try the old mix first as it is a total rebuil and the most it woud do is smoke bad and maybe foul the plugs , till the motors rings are set befoer going to a leaner fuel oil mix. JMO
Oldman570
 

gm280

Supreme Mariner
Joined
Jun 26, 2011
Messages
14,605
Re: 1976 Johnson 40 HP Outboard Complete Rebuild

I have a general question or two about this outboard rebuild for some input. When installing this motor back together, should I use any anti-seize on all the bolts being how they are steel bolts going into aluminum? :confused: Second question is, what is everybody's thoughts about repainting this 1976 Johnson 40 HP outboard? What I actually mean is not the type of paint (I already have that all figured out) and such but the colors to spray back on it. I think most would simply spray it back to original color scheme but I was wonder if another paint scheme, to more match the boat rebuild, would look better. I really not that crazy with the original green color myself. I have an idea for a very great looking layout, but just want other folks' inputs... The outboard is presently all disassemblied (and I mean every little bolt, screw, wire and nut too) cleaned, sand blaster and ready for final cleaning to get going with the priming now. Thanks all, still working on everything and will post some new pictures soon... :joyous:
 

64osby

Admiral
Joined
Jul 28, 2009
Messages
6,826
Re: 1976 Johnson 40 HP Outboard Complete Rebuild

Not to be insulting, but a 76 is not one of the all time collector motors, not using factory colors will not effect the value.

It's your motor do what you want.

I think matching up a color scheme with boat and motor can look great if done right.
 

gm280

Supreme Mariner
Joined
Jun 26, 2011
Messages
14,605
Re: 1976 Johnson 40 HP Outboard Complete Rebuild

Not to be insulting, but a 76 is not one of the all time collector motors, not using factory colors will not effect the value.

It's your motor do what you want.

I think matching up a color scheme with boat and motor can look great if done right.

Are you sure a 1976 Johson 40 HP outboard isn't a collectors item? Really?? :confused: I mean afterall it is over 20 years old... :lol:

Just kidding. I was wondering what most think about color changes to older motors. I see a few post where they talk about the motor color to verify the exact year of manufacture. But like I said, the 76 Johnson green was not my favorite color. I'll post pictures when I get her finished. It is very good looking to everybody that has seen the layour thus far.

As to the anti-seize compound issue. I don't see anybody actually instructing others to use it. But these motors have steel bolts going into aluminum cases and such all the time and was wondering if anti seize compund was supposed to be used. My Johnson shop manual doesn't state anything either way. Just wondering out loud. A lot of vehicle engines also tell the builders to use oil on the threads of the head bolts to get the correct torque spec. Again I see nothing in these threads to do any of those things with outboards. I guess building outboards are different in those respecs...
 

oldman570

Lieutenant Commander
Joined
Mar 25, 2011
Messages
1,615
Re: 1976 Johnson 40 HP Outboard Complete Rebuild

The OD green color was not one of my favoriets neither. What you might consider is to paint just the exposed parts what ever color you wish an paint the rest the factory color. That way if you ever wanted to go back to orginal colors all you would have to paint would be the outside parts. A check of the Johnson web site might show that 1976 module was the last year for that paint scheme also. I belive that never size is not to be used on the bolts as it has a tendancy to seize or weld the bolts when used with alluminum from what I've heard. I just use lightweight oil on the motors I work on to help with the torquing of any bolts. Most all the bolts used are made of stainless and have been for quite sometime now. Just for your info, you can change the motor over to a CDI ingnition by useing parts from a 1977 to 1984 motor if you ever want to. I just have done this on a 1976 35 Johnson. JMO
Oldman570
 

gm280

Supreme Mariner
Joined
Jun 26, 2011
Messages
14,605
Re: 1976 Johnson 40 HP Outboard Complete Rebuild

WOW oldman570. I certainly do appreciate that info for the CDI change over. I may just incorporate that into this rebuild even though I already purchased everything new for the internal timming circuits. I was wondering if anybody has ever done that type of swap. Last evening I was designing a system (in my head) to install a lobe over the existing crankshaft one that would give me a trigger option to fire such a circuit. I didn't know there was such a system already available. Before I retired I designed circuits for older outdated ones and built prototypes for verification before having circuit boards made and production runs for such new redesigns. I reverse engineered many old circuits that had no schematics and figure out how they functioned for newer cheaper replacement designs. So this does come as a good news. Thanks again...I will look into this. Also thanks for the anti seize info. I was wondering about the dissimilar metal problems too. :joyous:
 
Top