1976 Johnson 40 HP Outboard Complete Rebuild

gm280

Supreme Mariner
Joined
Jun 26, 2011
Messages
14,593
Re: 1976 Johnson 40 HP Outboard Complete Rebuild

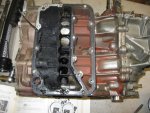
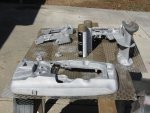
Okay folks, it is back to this project now as well. I have been working some other home projects that took time from this motor rebuild, but I am now back to working on this motor now again. I have completely primed most all the aluminum parts now with Zinc Chromate primer and am waiting for the temps to get around 65 to 70 degrees to spray the K36 PPG sandable primer and start sanding out any imperfections. I had a very hard time locating that zinc chromate primer and the only place I was able to find it (not counting the web) was at our NAPA Auto parts dealer. A bit pricy but well worth it. I should be able to spray the K36 primer in the next week it seems according to the weather reports around here. In the mean time I have cleaned almost all the hardware in preparation for the reassembly as well. Every nut, washer and bolt have been cleaned and wire brushed on my grinder/wire brush grinder setup to get all the old dried up oils, grease, and sealer material out of the threads. So I will post some new pictures showing this stage in a few days. I did drill and tap the top of the cylinder block to install a tell tale outlet and all worked out very nice too. I still have to rework the wiring harness for the engine with new connector ends and wire as needed. Old cracked insulation on some of the wires is worn and needs to be replaced with new wires. Then rewrapped with new tape to seal the harness. But this is the stuff I like to do so no big problem. Every part I came across that was not in like new condition has been ordered and replaced. I want this rebuild to go like a new motor when finished. Considering the cost of a new 40 HP engine these days, I’d say I am getting a super good deal as well... I now am looking at other boat and motor projects and I haven’t even finished this one yet...Go figure! I do have one question for anybody reading. I have completely cleaned and even sand blasted all the parts to metal and priming and repainting them back to new finishes with the exception of the carb. I want the carb to look new as well but not sure what finish to apply. Anybody have a good idea to deal with the carb finish? Should clean it and then apply just a clear coat finish or spray it with some new type carb finish spray? Wondering...:confused:
 

oldman570

Lieutenant Commander
Joined
Mar 25, 2011
Messages
1,615
Re: 1976 Johnson 40 HP Outboard Complete Rebuild

Have you ever thought about using one of the ultrasonice tank cleaners to clean small parts? They can be alot easier than doing the cleaning the old way with wire brush and alot of elbow grease. Habor Frieght has one that's fairly cheap, and will get the job done in a matter of a few hours of running. I have used one, and it dose take some work but that only was the rinsing an drying of the the parts in distled water an blow drying them down. Just a thought. As for coating the carb, I think just a cleaning and nothing else shoul be best as allummium and potmetal create thier own coating as they age. It might be bright as an shiney, but itis what most of people recommend for it
Oldman570
 

gm280

Supreme Mariner
Joined
Jun 26, 2011
Messages
14,593
Re: 1976 Johnson 40 HP Outboard Complete Rebuild

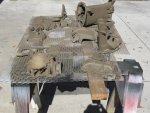
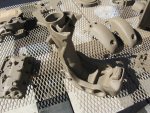
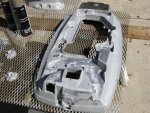
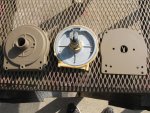
Thanks oldman570. It has been a while since I posted on this part of the boat, motor and trailer rebuild. I had a few house projects that took precedence and now they are finish too. So I'm back to working the motor and trailer before working the boat any further. The reason is the trailer needs new bunkers installed before I remove the actual boat to start that effort. The super short bunks on it now are too small and seriously completely rotted beyond anything useful. And the trailer need two more added to stabilize the boat correctly. So I’m doing that effort in getting them located and sized before I remove the boat to build a cradle to work that section of the total build. The carb is still untouched while every other part of the motor has been completely disassembled and cleaned and primed now. I do know way more about this motor then I ever thought I would. I keep the carb for last so I can take my time and do it correct without any rush. I will replace any and all defective and now perfect parts if I do find them while I rebuild that carb too. I have attached a few pictures off the primed parts...Boat-48.jpgBoat-49.jpgBoat-50.jpgBoat-51.jpgboat-52.jpg
 

gm280

Supreme Mariner
Joined
Jun 26, 2011
Messages
14,593
Re: 1976 Johnson 40 HP Outboard Complete Rebuild

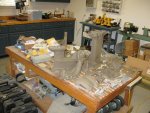
Here are a few more pictures...boat-53.jpgboat-54.jpgboat-55.jpgboat-56.jpg

As you can see I have motor parts sitting all around and waiting for a nice day to start with the sandable primer now.
 

gm280

Supreme Mariner
Joined
Jun 26, 2011
Messages
14,593
Re: 1976 Johnson 40 HP Outboard Complete Rebuild

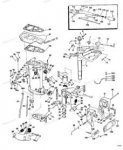
Still another question. I have built many automotive engines and transmissions in my time and know my way around tools very well. But I have come across a part in this 1976 Johnson 40 HP outbard that has me wondering. Part number 63 in the diagram shows a triangler shaped metal part that is supposed to be an exhaust cover and is attached with three 1/4 X 20 short bolts. What is this part supposed to do? I mean since it is located so low in the exhaust housing and there are other outlets for the exhaust as well, what does this parts actually accomplish? When I took this engine apart for cleaning and complete refurbishing, one of those three bolts were bent. And I know the previous owner never ever even knew that part was there so the bent bolt had to occur from the factory. I am replacing it but still have no idea its purpose... Any ideas? :confused:

Johnson 40 HP.jpg
 

oldman570

Lieutenant Commander
Joined
Mar 25, 2011
Messages
1,615
Re: 1976 Johnson 40 HP Outboard Complete Rebuild

It is a exhause blocking plate that restricsthe flow of the exhaust and holds some backpressure on the motor from the looks of it. Motors of that vintage often used the same block and had diffrent modifications that would create diffrent HP from the same block. This would be my best guess, as The 30 and 35 of that year were the same as was the 18,20,and 25 blocks. 1976 was the last year of that design and some of the midsection parts were changed.JMO
Oldman570
 

gm280

Supreme Mariner
Joined
Jun 26, 2011
Messages
14,593
Re: 1976 Johnson 40 HP Outboard Complete Rebuild

oldman570, thanks for the reply and possible reason. I guess that could be its possible reason to create a little back pressure. It just seems so low in the exhaust housing and there are other exhaust outlets before this plate I just couldn't figure out what it was there for. Your idea sounds as good as any though. Two cycle engines are a lot different then four cycle auto engines, but they are a lot simplier to rebuild. I'm just not very familar with their simplistic designs I guess. I just need a nice warm day to continue with the painting efforts before reassembling this outboard now. Should look completely new then...
 

gm280

Supreme Mariner
Joined
Jun 26, 2011
Messages
14,593
Re: 1976 Johnson 40 HP Outboard Complete Rebuild

A little update on this ongoing motor rebuild. When I took this motor apart I measured the ring end gap to see if it needed to be rebored and new pistons and rings. Now the compression was 115 psi in both cylinders before I took it apart after it sat for a lot of years before I bought it. But as I stated before the lower main bearing and seal housing and “O” ring were totaled trashed. So I was seriously glad I did have the gut feeling to tear in down and checked everything. The end gap is supposed to be between .007" to .017" thousands. My rings were reading .026" end gap but the cylinders themselves were reading near perfect in bore diameter and no egg shaping or out of round conditions that I could detect. So I ordered in a ring set to verify the bore to see if it was in need of a bore job and new pistons. The new ring set measured .015" end gap. While that is towards the upper gap limit, it isn't time for it to be bored. So I will reassemble with new rings after cross-hatching the cylinder sides and get it running again. I suspect many more years before a rebore in needed as well...

Now I need some decent weather to continue witht he paint job...
 

gm280

Supreme Mariner
Joined
Jun 26, 2011
Messages
14,593
Re: 1976 Johnson 40 HP Outboard Complete Rebuild

Hello again. Is there ever going to be decent weather again to get things moving along? Here in middle Georgia we are having rain upon rain upon rain and when it isn't raining the temps are too low to do any painting. I do have everything primer coated with Zinc Chromate primer (all the aluminum parts anyway) and just waiting to spray the K36 PPG sandable primer. So since I can't continue with the motor painting I switched my attention to the wiring harness now. Being how the wiring harness is so old, the wire colors are near faded to who knows what colors now. So I am actually looking to refurbish the motor harness wires that are hard and have bad insulation with new wires and terminals. So I started with this part of the refurbish of this Johnson outboard. Since I already bought new coils, points, condensers, switches and rectifier assembly and they came with nice new terminal ends the only thing I will have to do is buy the terminal ends for the harness side and some new wires to match the schematic diagram colors in the owner’s manual. It is a pretty simple setup and will not take very long to have everything ready for some nice weather again to continue with the paint. Just a little update and I will supply some pictures soon too... This motor does have a neutral safety switch that will keep you from starting it if it isn’t in neutral. Good safety option IMO. However, somebody just wired around that switch by connecting the control section of the starter solenoid to ground opposite the key wire, thereby allowing it to start in any position...SMH! I also want to install a neutral light at the control center as well. So I need to install another wire for that option to the front of the boat at the stick steering position. I will install that in the harness at the same time I rebuild this engine harness. This is actually a lot of fun doing all this to such an old engine though...
 

gm280

Supreme Mariner
Joined
Jun 26, 2011
Messages
14,593
Re: 1976 Johnson 40 HP Outboard Complete Rebuild

Okay it has been a long time since last time I posted any progress on this engine rebuild. I finally received (I think) all the internal parts now to get back to work on this rebuild. WOW there is a lot of little unique "O" rings and things like that that I had to buy. Now that they are here I can finish with the priming (weather is nice finally) and base coat top coat paint. While I was waiting for both nice warm weather to paint and the parts to get here, I did some work on the trailer. But that is another story for later. I do have a question for those in the know. On this 1976 40 HP Johnson outboard there is a little control/plate/push lever, for lack of a more descriptive name, that you have to press down on the front of the outboard to lock the outboard when you put it into reverse so the outboard won't lift out of the water. But you then have to release that same lever when in forward so if you hit something the outboard will flip up instead of breaking the foot. Is there a way to adjust that setup so when in reverse it can SLOWLY move backward without the motor flipping out of the water? Being how this is on a front stick steering setup, I would have to get up and walk to the back each time I want to go in reverse otherwise. Any ideas? Can't find a picture of that exact lever or I would post it...but it is dead smack in the middle of the front lower engine...and allows a locking lever to latch a locking lever so that the outboard can't flip up...
 

oldman570

Lieutenant Commander
Joined
Mar 25, 2011
Messages
1,615
Re: 1976 Johnson 40 HP Outboard Complete Rebuild

I have to do some fact checking tomarrow, and will get back to you. I belive the newer motors1980's had thr tilt release hooked to the shift lever, and that you might be able to convert your motor to use those parts. JMO
Oldman570
 

oldman570

Lieutenant Commander
Joined
Mar 25, 2011
Messages
1,615
Re: 1976 Johnson 40 HP Outboard Complete Rebuild

Sorry but I am affraid your stuck with it as it is. I have not found anything anywhere that evens looks close for making it lock down when shifted into REV. from a remote possition control. You can try to make a linkage that hooks to the shifting arm on the inside of the motor that would work or place a long old shifting cable to the tilt lever and make a lever at the remote so you could move it from the front of the boat when need be. JMO
Oldman570
 

nwcove

Admiral
Joined
May 16, 2011
Messages
6,293
Re: 1976 Johnson 40 HP Outboard Complete Rebuild

The tilt lock should disengage in the event you should hit a submerged object.
 

gm280

Supreme Mariner
Joined
Jun 26, 2011
Messages
14,593
Re: 1976 Johnson 40 HP Outboard Complete Rebuild

Thanks oldman570 for trying. You do seem to help out the most it seems. I am wondering, since there is a tensioning screw on the outboard to loosen or tighten the tilt ability, I could try to adjust that option and see if I can get by with reverse at very slow speeds. The only time I would be using reverse anyway would be unloading the boat from the trailer and slowing the boat as coming towards a dock to tie up at the end of the day to get the trailer backed in to load the boat. So maybe just maybe it won't flip up and allow me to do those things.

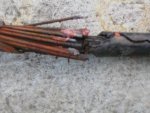
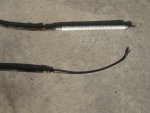
On another subject, I just received an email from Great Lakes Skipper Company telling me they no longer stock a stick steering cable for my Morse Command 2 stick steering assembly in this boat I’m refurbishing. So maybe somebody in iboat land can suggest some place to buy one. If not I guess I’ll have to replace the entire stick steering unit with a more modern new assembly. I posted pictures of it in my other project but will post those same pictures here hoping somebody will respond with some good idea from either project...
Thanks again oldman570. I do seriously appreciate your input and time...

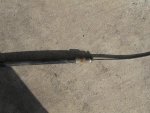
Boat-30.jpgboat-57.jpgboat-58.jpgboat-59.jpgboat-61.jpg

As you can see the first picture is the reason I have to replace that steering cable. I still think it was pretty dangerous to put three pieces of heat shrink tube over this area so nobody would see the serious damage that was there. If I hadn't been going over every little inch of this boat, it could have been tragic...
 

oldman570

Lieutenant Commander
Joined
Mar 25, 2011
Messages
1,615
Re: 1976 Johnson 40 HP Outboard Complete Rebuild

Yes I would think that the cable is bad and would surely replace it being that it is the steering cable and it could brake at any time. You can contact TexFlex and see if they have a replacement cable for your unit as they handle Morris controls. You can get a contact PH#, or email them, by a web search for Morris marine controls. If they cannot supply one, and you have to buy a new one, do a web search for EZ Glide steering systems and you can compair prices and get the one you want. The EZ Glide can be bought for around 350 hard earned bucks and includes everything needed to get the job done. After reading Nwcoves reply about the motor tilting, he is correct and the motor can be left in the run position and work fine. I belive that the tilt lever is so the motor will go to the shallow drive and stay there if you know that the water might not be deep enought to run in the full down possion. JMO
Oldman570
 

gm280

Supreme Mariner
Joined
Jun 26, 2011
Messages
14,593
Re: 1976 Johnson 40 HP Outboard Complete Rebuild

Yes I would think that the cable is bad and would surely replace it being that it is the steering cable and it could brake at any time. You can contact TexFlex and see if they have a replacement cable for your unit as they handle Morris controls. You can get a contact PH#, or email them, by a web search for Morris marine controls. If they cannot supply one, and you have to buy a new one, do a web search for EZ Glide steering systems and you can compair prices and get the one you want. The EZ Glide can be bought for around 350 hard earned bucks and includes everything needed to get the job done. After reading Nwcoves reply about the motor tilting, he is correct and the motor can be left in the run position and work fine. I belive that the tilt lever is so the motor will go to the shallow drive and stay there if you know that the water might not be deep enought to run in the full down possion. JMO
Oldman570

Thanks once again oldman570. I did exactly what you suggested and emailed Teleflex about that stick steering cable. IF they don't carry one or know where I could get one, I guess I'll flush the entire Morse Command 2 stick steering assembly all together and look at buying an EZ Glide or some equivalent type of replacement stick steering system... These old boats do have some unique obsolete parts it does seem. But it does make it all the more interesting learning about such parts. I am enjoying this huge project though... :D
 

gm280

Supreme Mariner
Joined
Jun 26, 2011
Messages
14,593
Re: 1976 Johnson 40 HP Outboard Complete Rebuild

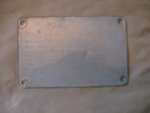
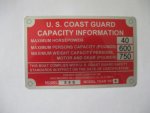
Okay folks, here is a little update to this rebuild project of the old 1976 Tom Boy boat. Since the weather again isn't cooperating (being either too cold/windy to paint or raining) I turned my effort to different items that would have to be done some time in the future anyway. I had the boat's specification plate for this Tom Boy boat, but like so many other folks on here state, you simply can't read it anymore because it was beyond faded. So I got a 10X eye peace (monocular) and very carefully read the wording that was nearly gone and made a reprint in a Microsoft Program called Visio Pro. Visio Pro is a drawing type program that you can make exact one to one layouts and once you print them they will be exactly the dimensions you plotted on the grid screen of the Visio Pro drawing program. That is a very helpful thing to be able to do because it allows you to print those drawings on any type printer for comparison before going further. After I finished that drawing and verifying it was exact, I than transferred that output file to another program that would allow it to be vectored and rastered into the correct pattern to print in a process called Sublimation. Sublimation prints are in true color and allows a high heat transfer to metal. Here is what I started with and the final metal plate ready to be placed back on the boat again...

boat-62.jpgboat-63.jpg

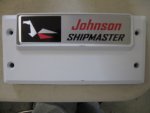
Here is another plate I designed using the same process for the old Johnson Control Unit. I had to redesign the Johnson Sea Horse logo, but it came out pretty close. I think they both turned out very nice and will complement the rebuild quite well...

boat-64.jpg

This Johnson Control plate is only laying on the primed but not sanded or finished control box at this time. But I think it look nice as well.

Now if it will only stop blowing and turn warmer I can finish up the outboard and trailer work...
 

willard887

Seaman
Joined
Jan 30, 2012
Messages
64
Re: 1976 Johnson 40 HP Outboard Complete Rebuild

Very well thought out rebuild, I like your attention to detail. Can't wait to see finished product.
 

gm280

Supreme Mariner
Joined
Jun 26, 2011
Messages
14,593
Re: 1976 Johnson 40 HP Outboard Complete Rebuild

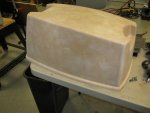
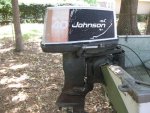
Here is a little more on the outboard rebuild. This is what I started out with on the Johnson 40 HP outboard cowling....

boat-70.jpg

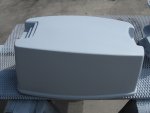
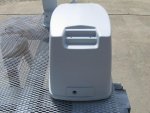
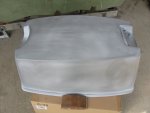
Here are a few pictures showing the completely sanded down cowling before and the after the first coat of PPG K36 primer coats sprayed. I’ve since sanded down that primer coat and am waiting now for decent weather to spray the second primer coat for a wet/dry sanding to then spray the base coat. I’ll post more as the weather gives me the option to continue. Hard to spray any type primer or paint when the outside temperature never gone about 48 degrees yesterday. But there is hope, they are talking about 70 degrees towards this weekend. So maybe I can get more accomplished...I hope! I presently have all or nearly all (probably 95%) of the engine parts sprayed with Zinc Chromate primer AND PPG K36 sandable primer on top of that. I used Zinc Chromate primer because I sandblasted all the parts back to bare metal and most of the parts were aluminum. So to have any chance for paint to stay on those parts, I used the Zinc Chromate primer for the first coat in the painting process.

boat-65.jpgboat-66.jpg

On these pictures I used what is called a guide coat. What this does is allows you to see where the high and low spots are in the primer coat so you can sand them out for a better finish. The guide coat is nothing more then a dry powdery black powder that you use a clothe pad to apply. It changes the color a little towards a gray or blackish tone. Then as you sand you can easily see the low spots. It is a good product for exactly this process...

boat-67.jpgboat-69.jpg
 

gm280

Supreme Mariner
Joined
Jun 26, 2011
Messages
14,593
Re: 1976 Johnson 40 HP Outboard Complete Rebuild

Just another little update on this engine project. I finally got a little warmer day today and after priming and sanding down the primer on the upper and lower foot and cowling, I noticed a few spots that would need some finishing epoxy filler before priming again. So I mixed up some and applied it to the lower and upper foot sections and the cowling. Now I will wait for it to harden and sand again.

I did a little interesting thing a few weeks ago that maybe could help other engine builders as well. I ordered a complete engine overhaul gasket set for my/this 1976 Johnson 40 HP engine. Not sure why they call it a complete overhaul gasket set and then specify that it doesn't include the head gasket. However, when it did arrive I noticed that not one gasket was anything special in their composition, and that gave me an idea. I have both a printer/scanner and I decided to scan every one of those gaskets into my computer. I took each gasket (I think there were 20 some) and laid each one in the scanner bed alone with a ruler and scanned away until all were done. Now I can easily print a one to one perfect sized gasket out onto regular printer paper if I ever need a replacement and lay that print on top of some standard gasket material you can easily buy at most any auto parts store and make a copy of the gasket needed without having to order one separately and wait... I also own a huge flatbed LASER cutter and can easily cut one out using that same print with the gasket material. That is why I scanned the gaskets with a ruler. That way I can adjust the size to exact size before printing... Either option to make a new gasket is possible even if you don’t have a LASER cutter...
 
Top