transom leak

Rick Stephens

Admiral
Joined
Aug 13, 2013
Messages
6,118
AllDodge is often a pessimistic curmudgeon. Unfortunately he is usually right and worth listening to. At this point you have pretty good access to transom, stringers and motor mounts. It would best serve if the very next thing you do is drill a bunch of test holes around the lower half of the transom, around the transom plate. Then do a few test holes up the stringers with one or two into each motor mount as well. The number one job you have right now is a survey of structure.

If you leave this until later, then you will work many times as hard. Having a full structure survey around the engine bay will allow you to plan what needs repair and what all needs removing to access. Even on much smaller boats, the process of removing mechanical and electrical components to access more structure can drag on and on, and lead to damage of components that should have been removed at the start of the project. As well, it is much harder to reassemble when disassembly is done piecemeal.

Just my 2¢ worth. AllDodge is pretty savvy. He's helped me over the years with a lot of insight.

Rick
 

rickasbury

Senior Chief Petty Officer
Joined
Jul 13, 2011
Messages
787
So I guess I'm drilling holes looking for hard wood instead of mush...I can do this after I remove the gimbal so it is not obvious or do I need to do this across the transom? I see stringers along the bottom, well one anyway at the end of the fuel tank. I do not see anything going up the sides. I backed out the screws for the motor mounts and they seemed solid. If I have damage or rot I assume what I'm looking for, once the transom assy is off, I would see it right at the key hole cut out as that is were it would have started from? I don't see any cracking in the gelcoat anywhere on the boat.
 

alldodge

Moderator
Staff member
Joined
Mar 8, 2009
Messages
42,082
OK, guess I'm a grumpy old guy :)

Start low, if the bottom and near key hole is wet, need to go higher, if not your probably OK.
 

rickasbury

Senior Chief Petty Officer
Joined
Jul 13, 2011
Messages
787
Well, that is a little more up beat Dodge! I'll get down from the roof now...
 

Rick Stephens

Admiral
Joined
Aug 13, 2013
Messages
6,118
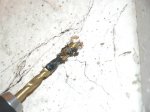
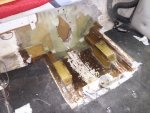
Drilling holes is pretty easy. I did it a couple years ago because I was re-engining. AllDodge kept me on track. Started out looking like my transom was in really good shape, and in fact wasn't too bad. But I feel pretty good about having cutout and replaced all of the wood that had gotten wet for years from a a set of leaky transducer mounting screws. At first I didn't think it needed anything. Then I started drilling holes. First I used a 3/8th bit and the wood came out dark. So I switched to a 1 inch hole saw so I could really see what was in there. It is not hard to patch up holes, so I made a few. And the dark wood area kept expanding. I had already removed engine and transom plate since I was doing a complete exchange to a newer Gen2 and glassing in different motor mounts. Here's a pic giving an idea of where to drill a first look see hole. The keyhole is upper right, the drain hole right below it. Cheap blow in glass job.

fetch?photoid=10060635.jpg
 

rickasbury

Senior Chief Petty Officer
Joined
Jul 13, 2011
Messages
787
wow, that's pretty scary. My boat is an 05, I sure hope that extensive a repair is needed...oh my....
 

Bayou Dave

Lieutenant Commander
Joined
Dec 13, 2012
Messages
1,780
Not sure if anyone has mentioned this. Only drill into the inside of the transom about a 1/2" deep.
 

rickasbury

Senior Chief Petty Officer
Joined
Jul 13, 2011
Messages
787
no, they did not...that's the problem we people that know what they are talking about, talking to people that don't know much! Thanks! I assume you would not drill through the transom but was going to ask how far to drill...also, so your looking at what the drill is pulling out, if it is dark it's wet and if it is light colored I assume it is dry with nothing really inbetween? As the plywood ages it gets kind of dark does it not? Guess I will know it when I see it...
 

alldodge

Moderator
Staff member
Joined
Mar 8, 2009
Messages
42,082
As the plywood ages it gets kind of dark does it not?

40+ year old plywood will look like new if kept dry and and the glass encapsulation of the wood remains intact
 

Rick Stephens

Admiral
Joined
Aug 13, 2013
Messages
6,118
All I did was wrap some electrical tape around the drill bit at the depth I wanted to safely hit without getting to the outer hull. Also made are collets that can clamp to the bit to set depth, but for just a few holes, the tape is fine. Note, once I hit dark wood my hole size got enlarged by using a hole saw without the center drill installed. Reason being I didn't believe what I saw, the wood seemed solid and dry, just really dark or grey. So taking a core with the hole saw was to get chunks I could evaluate better than shavings.

In the end evaluation, I probably could have gotten years of service out of the transom, but I was doubling horsepower and decided now was the time to make it right. Like you, my boat has never been left in the water, always on a trailer. Doesn't take much to get water damage if there is water present. Rot is an active bacterial event. It is possible to inject antibacterials like glycol into wood that was gotten wet, then was dried out. AllDodge guided me through the thought process and helped me plan a rebuild of transom and creation of new motor mounts. I enjoyed myself greatly. The only rule here is 'reality is'. Don't assume anything, do your own test survey and safely get back to boating.

All here, me especially, hope all the tests come up negative. That would really make this a best case exercise. Best of luck!

Click image for larger version  Name:	fetch?photoid=10060345.jpg Views:	1 Size:	106.1 KB ID:	10544446

Click image for larger version  Name:	fetch?id=10073746&d=1447026734&type=full.jpg Views:	1 Size:	229.4 KB ID:	10544447
 
Last edited:

rickasbury

Senior Chief Petty Officer
Joined
Jul 13, 2011
Messages
787
I hope so as well....my boat is a 9'1" beam, an express cruiser....that's a lot of transom!
 

rickasbury

Senior Chief Petty Officer
Joined
Jul 13, 2011
Messages
787
So if the manifolds are coolant, would they typically need to be replaced along with the risers?
 

alldodge

Moderator
Staff member
Joined
Mar 8, 2009
Messages
42,082
So if the manifolds are coolant, would they typically need to be replaced along with the risers?

NO, they should be good. Still need to remove riser to check surface for pitting and corrosion
 

rickasbury

Senior Chief Petty Officer
Joined
Jul 13, 2011
Messages
787
well that's some good news...the risers where they connect to the boot are crumbling...but first things first.

Thanks Dodge for all the help so far, I appreciate it. I assume I can buy the parts through Iboats.
 

alldodge

Moderator
Staff member
Joined
Mar 8, 2009
Messages
42,082
Did look at iboats but don't see your kind in after market like Barr and GLM. The Merc part number is 864309T02 (dry joint type) and have been able to find them at several places like ebay, Amazon and other marine places. Note the one found on ebay is aftermarket.
 

rickasbury

Senior Chief Petty Officer
Joined
Jul 13, 2011
Messages
787
So, trying to get the Y pipe bolts loose....3/8 little to big....10MM a little to small...is this a special merc tool for that bolt?
 

rickasbury

Senior Chief Petty Officer
Joined
Jul 13, 2011
Messages
787
It is 3/8- or at least the replacement bolt says it is....they are just locked on there...I have some blaster soaking them and the other threads on the back side....so, when I take the transom asy apart, do I have to remove the bell housing and all or just take the inner transom plate off and the steering pin so seperate and remove them??
 
Top