Douglasdzaster
Petty Officer 1st Class
- Joined
- Sep 11, 2020
- Messages
- 315
Thought I’d start a new thread since this is a new subject for me.
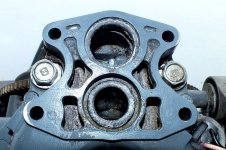
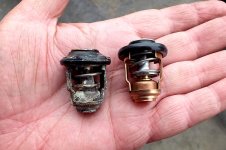
1992 40 MSHQ Yamaha. I’ve been doing a lot of maintenance catching up since I bought the boat. Also learning as I go. Today I was replacing the old thermostat and I noticed this hole in the housing behind the thermostat. I need to know if it’s supposed to be there (I hope). I’m posting a picture of what I have.
I want to thank everyone that’s helped me with this project I have learned a lot on this adventure. I just hope it’s not over due to this.