Stringer repair

Scott Danforth

Grumpy Vintage Moderator still playing with boats
Staff member
Joined
Jul 23, 2011
Messages
49,578
increase the height of the vertical loop to help prevent water ingestion.

you also want the vent to not have a dip in it as a slug of fuel will be trapped. you want a constant downhill from the P-trap to the tank.
 

bjf66

Chief Petty Officer
Joined
Dec 6, 2016
Messages
406
Scott, thanks for suggestion,
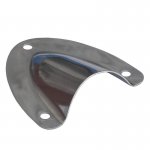
I was surfing last night and noted you can get a stainless steel clam shell that could cover the vent
 

Attachments

  • photo315104.jpg
    photo315104.jpg
    29.6 KB · Views: 0

mickyryan

Rear Admiral
Joined
Apr 18, 2016
Messages
4,214
i actually installed a second fuel vent on mine up front because i realised air would get trapped and push it out of the rear vent , i had heard of boats doing that sitting nose up in storage so i figured i would try to avoid that, it took some work but i was glad i did.
 

bjf66

Chief Petty Officer
Joined
Dec 6, 2016
Messages
406
Micky
what size was vents, 5/8" (16mm), not sure whether this is standard or on the larger size?
 

Scott Danforth

Grumpy Vintage Moderator still playing with boats
Staff member
Joined
Jul 23, 2011
Messages
49,578
5/8" is standard for fuel vents
1-1/2" for petrol fill
2" for diesel fill
 

bjf66

Chief Petty Officer
Joined
Dec 6, 2016
Messages
406
seems last post was on 22/6, been travelling overseas in Europe last 6 weeks been home 1 week in between and noticed the good lady hasn't been working on boat when I was away
I'm sure many of you have same issues to deal with
well good news is managed to find some other closed water 30 degree risers for the BBC powerflow plus manifolds I am going to use as the 85 degree risers but the turbos to far towards transom.
Actual chap on East coast of USA had 2 sets so I grabbed them both, since they I picked up both sets for a fraction of the US$1300+ price for new pair
good to pick up a few bargains now and then
http://www.imcomarine.com/cal_store/exhaust-systems/powerflow-plus.html


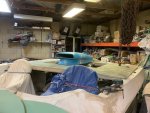
managed to get some time last night to have a think about how I'm going to fit the engine hatch
Have decided to use the Gurit board 6mm and 12mm which I used on floor, as it's easy to work with
frame rails will be 30x18mm hardwood
Plan to use 600CSM and 17oz multi-weave biaxle cloth and the vinyl ester which I've been using on the hull

Not sure how it will finish up, but will give it a go
will have 2 raised humps in the hatch to allow for the height of risers
I'll end up running a large scoop

Not sure whether to use 2 gas struts or go with 2 electric 12v linear actuators to lift the hatch

I suppose it will depend on the finished stroke needed and the weight of the hatch, Will try and get the weight below 60lbs
may even run some foam in between the fibreglass skins to strengthen the hatch as would like to walk on it

Looking at the hinges and what to use
Thought might need 3 hinges as cover is 76" wide x 41" long

these have concealed bolt holes
https://www.ebay.com.au/itm/REX-MAR...m1eff505b87:g:Q3IAAOSwqO1cx-j2&frcectupt=true


bolt head will show
https://www.ebay.com/itm/Sea-Dog-Ne...577721?hash=item2f3189ce39:g:taIAAOSw0A1c8SRn

https://www.ebay.com/itm/HEAVY-DUTY...553104?hash=item4d61d0c2d0:g:zJQAAOSwBlxZnHYd

as always suggestions taken on board as I'm sure many have gone before me
 

Attachments

  • photo314969.jpg
    photo314969.jpg
    98.7 KB · Views: 0
  • photo318370.jpg
    photo318370.jpg
    90.6 KB · Views: 0
  • photo318371.jpg
    photo318371.jpg
    104.3 KB · Views: 0

Scott Danforth

Grumpy Vintage Moderator still playing with boats
Staff member
Joined
Jul 23, 2011
Messages
49,578
go hydraulic and get a different pump for your trim tabs (with the center tap for the hydraulic hatch lift).

electric actuators are slow as heck.
 

bjf66

Chief Petty Officer
Joined
Dec 6, 2016
Messages
406
scott

that will be 4 hydraulic pumps ion boat
2 for the K-planes
1 for the arneson
1 for the hatch

what do you mean by
with the center tap for the hydraulic hatch lift
 

bjf66

Chief Petty Officer
Joined
Dec 6, 2016
Messages
406
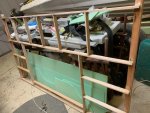
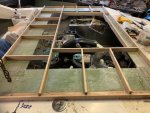
started making frame
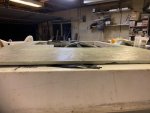
decided to use 40x12mm tassie oak (hardboard), not as heavier as the merbu I was thinking of using
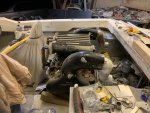
to use as border around outer edge of frame I glassed up 6mm gurit with 600csm, and 17oz biaxle cloth,
one layer of each side as need the strength

Then will lay up the 12mm Gurit with 600csm/17oz to form the under side of the hatch
will leave hole for scoop and sort this out latter
 

Attachments

  • photo318540.jpg
    photo318540.jpg
    107.5 KB · Views: 0

bjf66

Chief Petty Officer
Joined
Dec 6, 2016
Messages
406
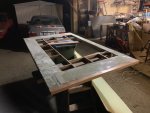
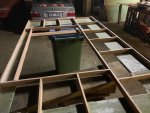
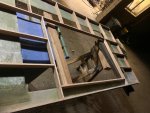
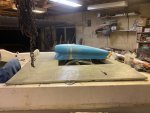
hatch started to take shape
finished first part
as is weighs 11kg
will be laminating 12mm gurit board with 600oz CSM and 17 oz biaxle cloth on both sides of board and then glued to the laminated 6mm gurit board to form the base of the hatch


sides of the timber framing needs tapering down and then gurit board / laminated glued on to sides

then top will be another 12mm guit board,, laminated with 600oz CSM and 17oz on both sides of board then glued to frame
target is < 30kg in weight
 

Attachments

  • photo318659.jpg
    photo318659.jpg
    88.4 KB · Views: 0
  • photo318660.jpg
    photo318660.jpg
    96.3 KB · Views: 0
  • photo318661.jpg
    photo318661.jpg
    106.2 KB · Views: 0
  • photo318662.jpg
    photo318662.jpg
    114.5 KB · Views: 0
Last edited:

Scott Danforth

Grumpy Vintage Moderator still playing with boats
Staff member
Joined
Jul 23, 2011
Messages
49,578
I think for a hatch its overkill. the sole of my cockpit is 1/2" balsa with 1/8" worth of glass on both sides spanning 30" and its solid as a rock.

not sure you need that much ribbing.
 

bjf66

Chief Petty Officer
Joined
Dec 6, 2016
Messages
406
Scott i want to be able to walk on the hatch
Having not built to many structures like this in past in fibreglass I only wanted to do this once
There are plenty of nice pictures of hatches on the web, but not much detail on actually how they were constructed
 

bjf66

Chief Petty Officer
Joined
Dec 6, 2016
Messages
406
back from working overseas looking forward to getting back into finishing fibreglass the hatch

I have a question on sizing blowers for evacuating the fumes around bulge

1. what cfm size inline blower to use?
2. Is there a standard blower as appears to be a few out the centrifugal and inline?
2. what size hose to use?
3. use one or two blowers
4. where and how to duct them
5. in coming air will be through scoop on top of hatch
6. where is best location to position them

cheers
Brett
 

Scott Danforth

Grumpy Vintage Moderator still playing with boats
Staff member
Joined
Jul 23, 2011
Messages
49,578
there are both 3" and 4" blowers as standard for small boats

I have two 3" in-line blowers on port side that push out the vent. one with a hose extension that drops to the bottom of the bilge, one without

the two hoses on the starboard side, one drops to the bottom of the bilge, one about half-way down.

you want to move the air from bottom of bilge, that is where fuel vapors would sit.
 

bjf66

Chief Petty Officer
Joined
Dec 6, 2016
Messages
406
scott
so the 4" blowers would be low around the engine sump aft down between stringers then connected with flexible hose venting to outside of boat possibly through hatch or rear of deck, rear side

In coming air could be the air scoop that will feed engine, or there needs to other air vents into engine hatch
anyone got some nice pictures?
cheers
 

bjf66

Chief Petty Officer
Joined
Dec 6, 2016
Messages
406
ordered 2* attwood 4" blowers and 3m hose should be sufficient
2* 16mm breather elbow traps arrived for the fuel vents
 

bjf66

Chief Petty Officer
Joined
Dec 6, 2016
Messages
406
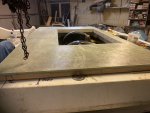
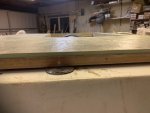
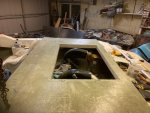
back on the engine hatch
changed my mind regarding the design
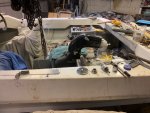
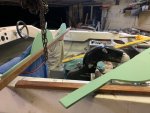
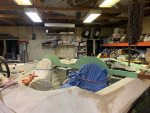
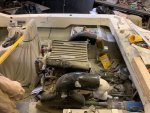
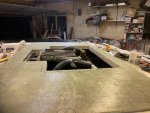
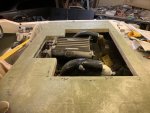
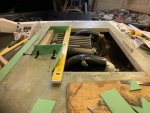
had to modify cut out as have 2 different turbo intercoolers, so figured if I figured might as well make the hatch to suit both
the Gale Banks intercooler sits up Team G dominator manifold
The PFM intercooler sits on top of Tunnel ram manifold so its much taller
not much difference between height of exhaust risers and intercooler now

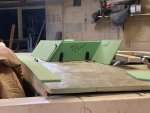
adding 4" in height in front, and 5" at rear, to build the height of hatch then will place scoop on this
may increase width of scoop by 3-4"
scoop can be lowered to suit

a little more work than originally thought
need to look at rear ventilation some how

looking at different stainless steel hinges, and will most probably end up going with 2*gas struts to lift the hatch, and some method to lock/close the hatch in case it lifts when under way
plenty of more hours left in this to finish
 

Attachments

  • photo320485.jpg
    photo320485.jpg
    91.7 KB · Views: 1
  • photo320486.jpg
    photo320486.jpg
    69.2 KB · Views: 1
  • photo320487.jpg
    photo320487.jpg
    105.4 KB · Views: 1
  • photo320488.jpg
    photo320488.jpg
    100.1 KB · Views: 1
  • photo320489.jpg
    photo320489.jpg
    86.1 KB · Views: 1
  • photo320490.jpg
    photo320490.jpg
    114.5 KB · Views: 1
  • photo320491.jpg
    photo320491.jpg
    108.7 KB · Views: 1
  • photo320492.jpg
    photo320492.jpg
    111.4 KB · Views: 1
  • photo320493.jpg
    photo320493.jpg
    81.9 KB · Views: 1
  • photo320494.jpg
    photo320494.jpg
    110.2 KB · Views: 1
  • photo320495.jpg
    photo320495.jpg
    95.3 KB · Views: 1
  • photo320496.jpg
    photo320496.jpg
    111 KB · Views: 1
  • photo320497.jpg
    photo320497.jpg
    88.8 KB · Views: 1
  • photo320498.jpg
    photo320498.jpg
    94.7 KB · Views: 1
Top