Stringer Design Question

Meames1

Petty Officer 2nd Class
Joined
Dec 14, 2020
Messages
157
Another alternative from using any spacers is to make a quick jig to hold the stringers in position while bedding. See my post here >> https://forums.iboats.com/threads/restoring-a-1990-larson.741569/page-2#post-5640304
I made jigs to hold and support all the bulkheads and stringers in the correct location and about 1/4" off the hull, (you can see the daylight under the stringers in the post above). Then you just tool in the PB under the stringer / bulkhead and do your fillets.
Doing it this way will save you the step of cutting the stringers to the correct height afterword's which can be cumbersome. Any way you choose will be the "right" way for you. Good Luck !
 

Baylinerchuck

Commander
Joined
Jul 29, 2016
Messages
2,726
Also, using the disposable pastry bags makes it very easy and clean to squeeze the thickened resin under the structure when bedding. I highly recommend adding Some 1/4” chop strands to your thickened resin. Hairy PB as it’s called is very strong, and doesn’t crack in large fills. Use a tool of some sort to smooth the PB for a nice transition for your glass. A large spoon works good for this, but most times I just used my thumb, covered in a nitrile glove of course.
 

todhunter

Canoeist
Joined
Sep 15, 2020
Messages
1,311
I agree with Chuck on all fronts - spend the money on REAL pastry bags and don't try to get by with a zip lock bag with the corner cut out. The angle of the pastry bags makes piping much more controllable. Definitely put milled fibers in your PB. I like my PB mixed on the thicker side - your forearms will hate you from all the mixing, but it "tools" really nice and holds it's shape. I use tongue depressors to shape all my fillets.
 

76SeaRay

Lieutenant Junior Grade
Joined
Aug 24, 2017
Messages
1,071
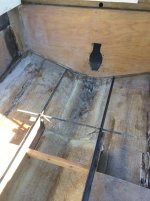
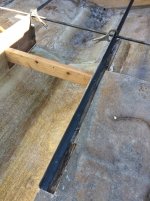
Here is the progress on getting ready to install the rib (bulkhead) in front of the engine bay stringers and mounts. The 2x4 in the foreground is holding the forward stringers at the correct width so that the angle steel attached to them is held straight for reference. The angle steel gives me the reference line for the top of the stringers and bulkhead. The cross piece of angle steel will be used to clamp the bulkhead in the right spot while the peanut butter sets up.

The stringers in the engine bay forming the stepped engine mount areas (see pics at the start of the thread) are actually wider than the forward stringers so the stop against the bulkhead. I plan to glass in the engine bay once I set the bulkhead so I have a solid reference point when I pull out the forward stringers.

Engine Bay Fixture 1.jpg

Engine Bay Fixture 2.jpg
 

76SeaRay

Lieutenant Junior Grade
Joined
Aug 24, 2017
Messages
1,071
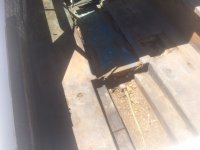
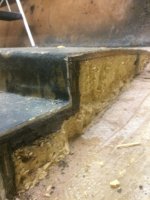
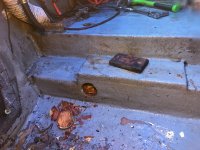
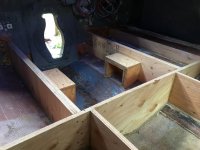
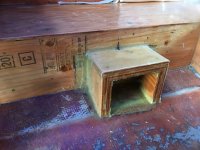
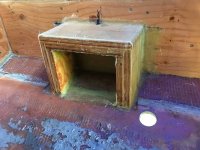
So, finalizing the design of the engine bay stringers and motor mounts. The first two pictures are the factory originals on my boat. The next 4 pictures are from another SeaRay that had a similar engine bay, stringers, and motor mounts and what I am thinking about doing with my boat. The boater changed the design in picture 1 to what you see in pictures 2 through 4 to create the new motor mounts. Looking for comments on the design the other boater used and if anyone sees a problem with the change. Although the new design provides better support to the outer stringer (where mine was floating - picture 2), I am concerned that the support would be weaker at the inner stringer (closer to the engine centerline) where it would be removed.My SeaRay 1.jpg


My SeaRay 2.jpg


Other SeaRay 1.JPG


Other SeaRay 2.JPG


Other SeaRay 3.JPG


Other SeaRay 4.JPG
 
Top