Sport-craft restore

Bill3434

Petty Officer 1st Class
Joined
May 29, 2011
Messages
398
Re: Sport-craft restore

I wouldn't notice; I have had my eardrums shattered and have constant ringing, hehehehe. I hoping the shock of bouncing should be reduced, I'm hoping anyway. Then again it is a tri-hull.
 

Bill3434

Petty Officer 1st Class
Joined
May 29, 2011
Messages
398
Re: Sport-craft restore

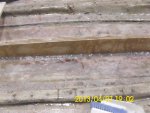
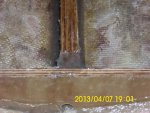
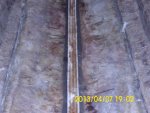
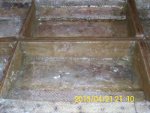
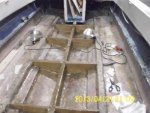
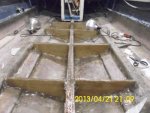
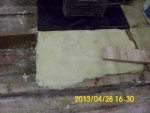
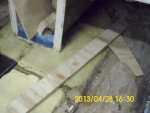
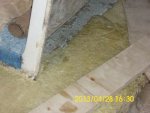
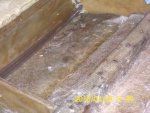
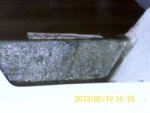
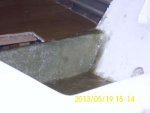
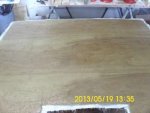
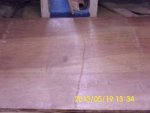
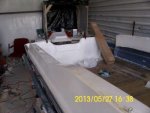
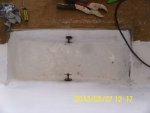
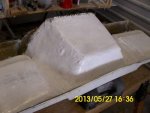
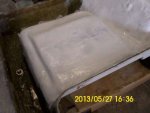
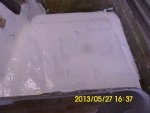
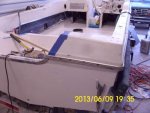
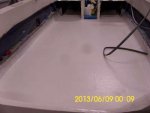
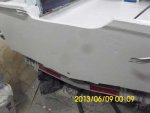
Well the weather god was nice to me again this weekend. I got my main stringer in place along with the structure around the rear part of the boat. I had to replace part of the outer stringers with shaped plywood because they were completely rotted away.

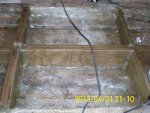
The rest of the outer stringer I repaired with what I'm sure is not an iboat approved method but I have to get this done. I sanded, vacuumed and wiped with acetone the outer stringers. Then I mixed some cabasol and resin, not enough to make it thick. I spread it over the old glass and let it soak in, I did this 3 times until it couldn't soak up anymore, which was about 45oz. This afternoon I did the big boy test (215lbs). I jumped up and down on it several times, no breaking or cracking. So it seemed to work quite well.

For the main stringer I laid hairy pb in the bottom of the boat then I laid the stringer and filleted along the sides. Looked pretty nice, I'll see how it works out in about 48hrs. Then I can get to work on some ribs.

DSCI0215 (Small).JPGDSCI0212 (Small).JPGDSCI0213 (Small).JPGDSCI0214 (Small).JPG

Now my question is: do I need drain channels and if so how do you create them.
 

Bill3434

Petty Officer 1st Class
Joined
May 29, 2011
Messages
398
Re: Sport-craft restore

Another productive weekend. I got both sides of main stringer glassed with 1708, I didn't do the top. Had more air bubbles than I wanted but I think I did a better job than the manufacture, darn sure used more resin on the glass than they did.

Any ideas on doing the top without air bubbles? Can I top with CSM and 8oz cloth? 1708 just doesn't want to drape over the stringer.

Also cut the ribs and pre-coated with resin, now just waiting on cloth that supposed to be here tomorrow. I'll take some pics when it gets dried.

Hoping for some thoughts on the need for drain channels especially since I will be using modern foam.
 

Woodonglass

Supreme Mariner
Joined
Dec 29, 2009
Messages
25,924
Re: Sport-craft restore

check the link in my signature on how to cap your stringers. If you're getting air bubbles try using a bit less resin. Using to much has a tendency to Float the 1708 and cause air. Precoat the wood then put a bit of resin on your roller and start rolling from the bottom of the stringer to the top do NOT roll back down. Go back to the bottom and roll up again. Use a chip brush to dab not brush the cloth at the fillet point. This will help cut back on the air bubbles.
 

Bill3434

Petty Officer 1st Class
Joined
May 29, 2011
Messages
398
Re: Sport-craft restore

check the link in my signature on how to cap your stringers. If you're getting air bubbles try using a bit less resin. Using to much has a tendency to Float the 1708 and cause air. Precoat the wood then put a bit of resin on your roller and start rolling from the bottom of the stringer to the top do NOT roll back down. Go back to the bottom and roll up again. Use a chip brush to dab not brush the cloth at the fillet point. This will help cut back on the air bubbles.

The fillet weren't to bad, just every place else. I guess I used to much resin. I'll figure out how bad it is tomorrow. I'll probably leave it, I had put on a layer of CSM before the stringer was placed in the boat.

So would it be easier to use several layers of 8oz cloth on top?
 

Bill3434

Petty Officer 1st Class
Joined
May 29, 2011
Messages
398
Re: Sport-craft restore

The fillet weren't to bad, just every place else. I guess I used to much resin. I'll figure out how bad it is tomorrow. I'll probably leave it, I had put on a layer of CSM before the stringer was placed in the boat.

So would it be easier to use several layers of 8oz cloth on top?

Never mind WOG, I just looked at your link again.
 

jk33

Seaman
Joined
Mar 28, 2013
Messages
61
Re: Sport-craft restore

Bill,
I just stopped by to check out your progress. Thanks for your advise on my rebuild. Your new transom core looks very solid. That is one sweet little boat you've got there.
 

Bill3434

Petty Officer 1st Class
Joined
May 29, 2011
Messages
398
Re: Sport-craft restore

Bill,
I just stopped by to check out your progress. Thanks for your advise on my rebuild. Your new transom core looks very solid. That is one sweet little boat you've got there.

Thanks jk. I can pound on the transom and it doesn't vibrate at all. I weigh almost as much as my engine and I can't get it to flex at all. I over built my transom. I tabbed with with 2 layers of 1708. First layer going vetical and the second layer small strips (about 6in) going horizontal and overlapping.

My main stringer is the same way and I'm not even done with it yet. I cheateted on my outer stringers though.

I talked to my mom's neighbor Bill Kenner of K2 boats (formally Kenner Boats) he told me if they were to build my boat today it would have a lot more bulkheads (ribs) than original manufacture. So I'm in the processing of putting some in every 2ft with the thicker ones where the deck pieces come together, hope to be done with that this weekend. I'll take pictures when I get done.

My boat is ugly, but she's gong to be built like a tank when I get done with her. Most places I'm using more or better quality fabrics than the manufacture and darn sure using more resin on them. Some places on my stringer weren't tabbed in just cloth laid over the top and looked like they just brushed a thin coat of resin on the fiberglass. My work will be tabbed and with plenty of resin.
 

Woodonglass

Supreme Mariner
Joined
Dec 29, 2009
Messages
25,924
Re: Sport-craft restore

Bill, I know you want her to be strong but...Boats are like planes you want them to be Strong AND Light. I would think twice about adding to many additional bulkhead/Crossmembers and Pouring on additional resin. Resin rich mixes can actually weaken the mix and allow it to crack and let water to penetrate to the wood. If you use CSM and 2 layers of 1708 she'll be much stronger than the original factory layup and still be light too! Stick with the original design and make sure and do a good job with the glass work, keeping it free of air bubbles etc and you'll have a strong, light craft that will last for decades.
 

Bill3434

Petty Officer 1st Class
Joined
May 29, 2011
Messages
398
Re: Sport-craft restore

Bill, I know you want her to be strong but...Boats are like planes you want them to be Strong AND Light. I would think twice about adding to many additional bulkhead/Crossmembers and Pouring on additional resin. Resin rich mixes can actually weaken the mix and allow it to crack and let water to penetrate to the wood. If you use CSM and 2 layers of 1708 she'll be much stronger than the original factory layup and still be light too! Stick with the original design and make sure and do a good job with the glass work, keeping it free of air bubbles etc and you'll have a strong, light craft that will last for decades.

WOG, I'm only adding three more bulkheads to help support and to keep the deck from flexing. The original two bulkheads were spaced 8ft apart, there was no support where people would be walking or moving around on the deck.

I'm only using enough resin for a complete wet-out something the original manufacture didn't do in some places in my boat.
 

Bill3434

Petty Officer 1st Class
Joined
May 29, 2011
Messages
398
Re: Sport-craft restore

Well sorry for the delay in updates in case anyone is following. Mother nature has been a beast this your. First let me start I got my bulkhead/ribs in. Turned out really nice. When I put my unfinished deck pieces in I could really tell the difference and they weren't even screwed or tabbed in yet.DSCI0219-400.jpgDSCI0216-400.jpgDSCI0217-400.jpgDSCI0218-400.jpg

The points where my deck pieces came together the bulkheads were made 1.5 in thick so they could take screws. The mid-points were .5 of plywood. The pieces were coat with CSM before being glassed in the boat. They were attached with hairy peanut butter then 8+oz cloth. I also cut my drain holes prior to installation.
 

Bill3434

Petty Officer 1st Class
Joined
May 29, 2011
Messages
398
Re: Sport-craft restore

The second thing I got done which was a pain. Pourable foam is the most unpredictable thing I have used thus far. I tried guessing the right amount for each compartment and if was a failure. I found small pours much better as far as lest waste. I started at the bow. I used my template and covered it with a piece thick plastic and sprayed it with PAM (yes the non-stick spray). I poured amount I thought would work but not to much since this was my first pour. Once poured I placed the template over the compartment and placec two old batteries on top. It worked great. When i tried doing the other compartments which where all the same size I tried geting the right amount in one pour which was a failer.

To create my drainage space, I place some platic tubing in the drain holes in the bulkheads from one hole to the next. I then covered with thick plastic the compartment being foamed. I sprayed the plastic with PAM. Then started pouring as soon as poured the foam I placed a piece of plywood covered with plastic and coated with PAM on top of the compartment and placed my batteries on top. It work gteat especially with the small pours.

One the foam was cured I was able to pull the foam block out and removed the plastic off. The blocks fit right back in the compartment with a nice drainage channel.

DSCI0224-400.jpgDSCI0220-400.jpgDSCI0221-400.jpgDSCI0222-400.jpgDSCI0223-400.jpg


The best way I found to shape excess foam was to use my belt sander. Sometimes foam clogs it up, I didn't mind cleaning it out; I needed a break from the heat. In case some goes what the heck, I only paid $20 for it. Got my moneys worth. I started off using a hand saw it works but a pain and a mess.
 

Bill3434

Petty Officer 1st Class
Joined
May 29, 2011
Messages
398
Re: Sport-craft restore

Now to rebuilding my splashwell. I placed my cap back on the boat and seated it. I place some thick plastic between the hole and the transom and used duct tap to hold it in place. I then worked CSM in the hole. I place piece of plywood covered in front to make sure it was flat when cured. Didn't worked to well. I then took the cut cap off and placed it on my work space and righted it where the front face was paralell (sp) to the floor. I then took some hair PB and spread it across the front face creating a flat surface. I then used several layers of 8oz cloth wet on wet for the final glassing. Once cured I did the back side the same way. What a pain, but it worked out rather nicely.

DSCI0230-400.jpgDSCI0229-400.jpg
 

Bill3434

Petty Officer 1st Class
Joined
May 29, 2011
Messages
398
Re: Sport-craft restore

Because Mother Nature wasn't cooperate (cold) I finished my deck pieces out of the boat. I was going to finish them in the boat with them screwed in place. Anyway I used CSM with 8oz cloth on top. Once cured I took one of the pieces and placed it in the bed of my truck on the fender wells and stood on top just to see how strong it was. I weigh 215lbs. No cracking, creeking or flexing. I didn't jump up on it though, I'm not the crazy. I was impressed with how if fit on the bulkheads, stringers and foam; walking on it just laying there felt really nice.

DSCI0228-400.jpgDSCI0227-400.jpg


I got more to post after the pics get compressed.
 

Bill3434

Petty Officer 1st Class
Joined
May 29, 2011
Messages
398
Re: Sport-craft restore

Finally, I got my drain plugs in both of them. The inner plug before I started the restore was nothing but a big hole that allowed as much water in as it allowed out. I got the deck pieces screwed-in and the rear piece has been tabbed. I boat mechanic loaned me his flaring tool for drain plugs so I had to get at least the first coat of gel-coat on. I have to have the tool returned Tuesday morning. It worked great. first coat of gel-coat went on nice for a first time user. Now more sanding but the Ole Girl has a nice white butt:embarassed: oops I mean stern.

I also gel-coated the underside of the cap that I had cut off. I did this for two reasons, one I needed the practice with gel-coat and second eventually I will install some lights underneath for night fishing and to be able to see what is underneath if I have to check something out. Originally it was a dark blue and it was like looking into a black hole even with a flashlight and in the daytime.

DSCI0235-400.jpgDSCI0231-400.jpgDSCI0232-400.jpgDSCI0233-400.jpgDSCI0234-400.jpg
 

Bill3434

Petty Officer 1st Class
Joined
May 29, 2011
Messages
398
Re: Sport-craft restore

I have almost finish gel coating the splash-well. What you are seeing is the second coat wet.

DSCI0239-400.jpgDSCI0238-400.jpg

Looks fairly decent but not as good as a proffessional.
 

Bill3434

Petty Officer 1st Class
Joined
May 29, 2011
Messages
398
Re: Sport-craft restore

Well the Ole Girl is now towable. I have gotten several more coats of gel-coat on the deck and the stern. She still needs some touch up and sanding but she is going to the boatman next Saturday to get her engine put on. Then I can clean my work area up and find all the small parts need to finish putting her back together. I'll be nice to the boatman and leave the seats out so he can easily get everything hooked up.

DSCI0245-400.jpgDSCI0241-400.jpgDSCI0242-400.jpgDSCI0243-400.jpgDSCI0244-400.jpg

I had some foam left over and found some space up in the bow area where it could be poured, seemed to make the bow area more sound. I definately enjoyed jumping up and down on my deck and knocking on it with my fist; makes a great sound:clap2::rockon:
 
Top