Some Milky Oil from the Outdrive . . .

tpenfield

Moderator
Staff member
Joined
Jul 18, 2011
Messages
18,090
Re: Some Milky Oil from the Outdrive . . .

Well I started to work on the starboard outdrive today . . . using tool 91-8053741 to get the prop shaft retainer off. I believe that this would be the first time it has come off in its 18 year life. So, it is not budging. I would image that I will have to apply a fair amount of heat to the lower unit in order to get the thing to free up :noidea: I only have a heat gun with me . . . no torch.

Any advice to get the retainer out ? It is a reverse thread, according to my understanding ??? Correct ?
 
Last edited:

tpenfield

Moderator
Staff member
Joined
Jul 18, 2011
Messages
18,090
Re: Some Milky Oil from the Outdrive . . .

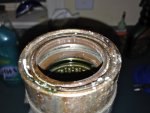
Never mind . . . I got it :)

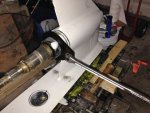
I used the heat gun some more to expand the housing a bit and it finally loosened up.

IMG_4169.jpg

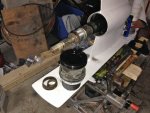
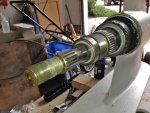
Out came the bearing carrier . . .
IMG_4173.jpg

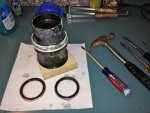
I took out the old oil seals . . . looks like the originals.
IMG_4174.jpg

The bearing carrier is showing a fair amount of corrosion, so I was not sure if it would take the new seal, which is the larger style with the nylon flange. But it worked!
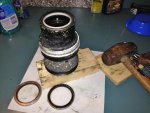
IMG_4176.jpg

The new oil seal is installed in the bearing carrier. I still have the inner shaft seal to replace. It was not leaking, but I figured that I should do both at the same time. It will have to be next weekend's project though.
 
Last edited:

tpenfield

Moderator
Staff member
Joined
Jul 18, 2011
Messages
18,090
Re: Some Milky Oil from the Outdrive . . .

I managed to finish up the oil seals on the starboard outdrive today. . .

I could not find a slide hammer/puller in town . . . I guess most of this stuff is sold over the Internet these days. I tried several methods to pop out the oil seals and finally came up with a method using an open ended wrench and a hammer.
IMG_4179.jpg

Here is a photo of the old oil seals on the outer most prop shaft. You can see no oil in between the oil seals, so it looks like these seals were not leaking, but might as well replace them anyway.
IMG_4182.jpg

The bigger (new version) seals seem a bit harder to get started into the shaft, but eventually they set and you can tap them in place.

I got the starboard drive put back together, but I did not have time to pressure test it. Here is a photo of the prop shaft with the new seals
IMG_4186.jpg

The port outdrive is being a real PITA . . . so that will have to wait for another day.
 
Last edited:

achris

More fish than mountain goat
Joined
May 19, 2004
Messages
27,468
Re: Some Milky Oil from the Outdrive . . .

Did you follow Alldodges' thread when he stripped and sealed him B3?
And why is your housing white? Merc changed to black as their colour in 1965... And as far as I know, there was no Bravos around in them days..:noidea:

Chris....
 

tpenfield

Moderator
Staff member
Joined
Jul 18, 2011
Messages
18,090
Re: Some Milky Oil from the Outdrive . . .

Did you follow Alldodges' thread when he stripped and sealed him B3?
And why is your housing white? Merc changed to black as their colour in 1965... And as far as I know, there was no Bravos around in them days..:noidea:

Chris....

Yes, That's who's thread I used as a reference.

As far as the white, yes I am trying to bring back the 'white Mercury' days :D. I think the white Merc's were around in the early 1960's and only for a few years.

Actually, that is a primer coat that I am trying out. The black is going on as an anti-fouling coat.
 

MarkSee

Lieutenant Junior Grade
Joined
Sep 10, 2010
Messages
1,172
Re: Some Milky Oil from the Outdrive . . .

Marketing to try and get some of the old Evinrude/Johnson guys to switch?????

Mark
 

tpenfield

Moderator
Staff member
Joined
Jul 18, 2011
Messages
18,090
Re: Some Milky Oil from the Outdrive . . .

A quick update . . .

It looks like I neglected to get the port outdrive properly re-filled with gear lube after pressure testing it last Fall. Seems like the drive shaft bearings got some rust on them over the winter. Probably got to take things apart and maybe replace a few bearings :facepalm:

Note to self . . . "make sure you get the outdrives filled with oil"
 
Last edited:

tpenfield

Moderator
Staff member
Joined
Jul 18, 2011
Messages
18,090
Re: Some Milky Oil from the Outdrive . . .

Quick update:

I am out in sunny (hot) California for the next 5 days, so no more work on the outdrives until I get back to the east coast. Flight went well, hotel check-in not so much, but everything is all set now.

I ordered a 12-ton hydraulic press online, since I will need to take apart the drive shaft assembly and inspect and possibly replace the bearings. The pinion gear is pressed on to the bearings, so, I hope 12 tons will do it to pull them apart and press them back together.

achris has a nice video of setting the rolling torque on the bearings, so that will come in handy.

I also ordered a new set of oil seals for the port outdrive, as I plan on taking the lower unit apart to inspect the lower bearings. I am finding that most, if not all of the bearings in my outdrive are Timken brand. I have been looking for a full cross-reference list online, but have only found bits and pieces. It looks like the drive shaft bearings are Timken '387' roller bearings with a '382' cup. . . :noidea: . . . Anyone know of a full cross reference list?
 
Last edited:
tpenfield

Moderator
Staff member
Joined
Jul 18, 2011
Messages
18,090
I have been on the west coast for the past 6 days and am heading back as I type. Airline has WiFi :thumb: , so I can post enroute, and now that the new forum is up and running. It looks like my hydraulic press got delivered today. So, when I arrive at home it should be there.

My plans are to finish up the starboard drive and take apart the port outdrive to get a better look at everything inside. The hydraulic press should come in handy taking the driveshaft assembly apart and maybe even with the u-joint replacement.
 
Last edited:
tpenfield

Moderator
Staff member
Joined
Jul 18, 2011
Messages
18,090
Well, my trip back from California started out OK, but thunder storms delayed flights getting in and out of the Chicago airports. So, we got stuck at Midway airport for a few hours. . . Finally landed in Boston at 3:30 AM. . . home at about 5:00 AM. I had 2 heavy packages waiting for me though . . .

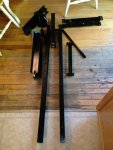
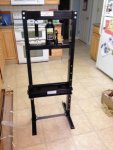
After a few hours of sleep this morning, I managed to put the hydraulic press together . . .

The pieces . . .

IMG_4294.jpg

Assembled . . .

IMG_4295.jpg

Looks OK for the money . . . $150 . . . . I got it at Summit Racing and they were having a free shipment promotion. . . total weight was over 100 lbs, but they only added a nominal surcharge. I figured that between the boat and the cars, this thing will come in handy over the years.
 
Last edited:
tpenfield

Moderator
Staff member
Joined
Jul 18, 2011
Messages
18,090
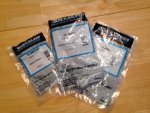
Also got the oil seals and o-ring for the port drive today. So, hopefully, I will have enough 'stuff' for the weekend. :thumb:

IMG_4297.jpg
 
Last edited:
tpenfield

Moderator
Staff member
Joined
Jul 18, 2011
Messages
18,090
A quick update . . .

I have taken apart both outdrives to various extents . . . ended up doing the oil seals on both outdrives. The port outdrive looked to need a new driveshaft bearing, which is a double tapered roller bearing. After searching for the correct Timken bearings online and coming up a bit short on one of the two bearings, I just ordered the GLM replacement set (GLM 21525), figuring that even an aftermarket bearing set would be better than what I have.

The bearing set arrived today, and to my surprise, it is made of the same Timken bearings as the original :thumb: :D . I was figuring the GLM version would have some other, less expensive brand of bearing.

Anyway, Today, I am going to put together both outdrives, do a pressure test, and hopefully, get them back on the boat tomorrow. :)
 

tpenfield

Moderator
Staff member
Joined
Jul 18, 2011
Messages
18,090
"
Re: Some Milky Oil from the Outdrive . . .


I did not see any rust coming out of my u-joints when I did the annual lubing but I'm sure my B3 will be in need of new ones in the near future and I've never replaced u-joints before so if you can make notes/pics for how you did yours or any tips that would be great Ted.
thanks

Mark
"

I did the u-joints today . . . it took a while (4 hours), but they are done.

I have a bunch of pictures on my web page . . . probably too many to post on the forum . . so see the link below.

http://www.tpenfield.com/Formula330/OutDrive_U-Joints.html
 
Last edited:
tpenfield

Moderator
Staff member
Joined
Jul 18, 2011
Messages
18,090
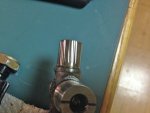
here is a quick peek at one of the u-joints that I removed . . . interesting cupping pattern. I am surprised that I did not notice more vibration from the outdrive. (I noticed a slight vibration last summer).

IMG_4380.jpg

So, my theory about the rusty u-joint, is that there was some moisture in the bearing (probably had not been lubed often enough), combined with excess metal from the cupping, and you get rusty grease.
 
Last edited:
tpenfield

Moderator
Staff member
Joined
Jul 18, 2011
Messages
18,090
I finished up the outdrive work today by installing the drive shaft bearing for the port outdrive and putting it all back together. Between doing the u-joints and the bearing, it is pretty tedious work, but probably not the sort of thing to rush through.

Here are a few pictures from the day.

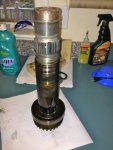
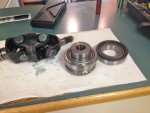
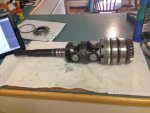
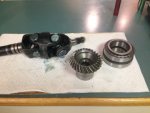
The u-joint assembly, pinion gear and bearing set
IMG_4393.jpg


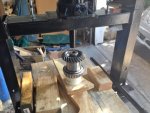
Pressing the inner bearing onto the pinion gear. The bearings are about a 0.001 interference fit.
IMG_4395.jpg

Here is the inner bearing pressed onto the gear.
IMG_4397.jpg

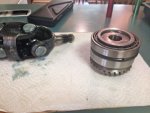
Then it was a matter of loosely pressing the outer bearing onto the gear. They will get tightened up during the step of setting the rolling torque.
IMG_4399.jpg

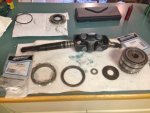
Here are all the parts to complete the driveshaft assembly laid out. The new parts are the bearings, the oil seal and the o-ring.
IMG_4400.jpg

* * * Continued on Next Post * * *
 
Last edited:
tpenfield

Moderator
Staff member
Joined
Jul 18, 2011
Messages
18,090
Here is the whole business put together . . .
IMG_4402.jpg

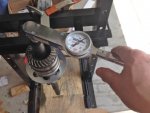
I finally got to use my fancy dial torque wrench. The specification for the rolling torque is 6-10 in-lbs. I set the bearings to about 9 in-lbs, since they are new.
IMG_4409.jpg


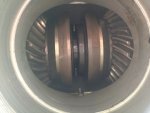
Then you have to synchronize the gearing in the upper unit before inserting the drive shaft assembly. The service manual says to align the gears by removing the rear plate from the upper unit housing. I aligned the gears from the front opening where the driveshaft goes . . . Is that cheating :noidea:
IMG_4411.jpg

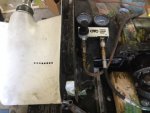
Then I pressure tested both outdrives. They are good to go :thumb:
IMG_4413.jpg

I did not get a chance to install the outdrives today, probably will do that in the AM . . .
 
Last edited:
ktbarrentine

Lieutenant
Joined
Dec 12, 2011
Messages
1,296
Just curious.... what process did you use to upload your photos? Seems there are alot of people who cant get it right in this new format. You could produce a new tutorial!
 

tpenfield

Moderator
Staff member
Joined
Jul 18, 2011
Messages
18,090
I use "IMG" tags around the links to the pictures. I usually link to pictures on my web site or on photo bucket, rather than uploading them to the site. Under the new software, I have found that the picture tools do not work with any consistency, so, I just use the tags

It works like this . . . "
"
 
Top