No Title
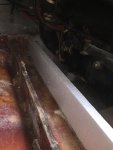
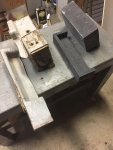
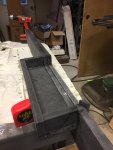
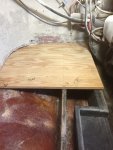
I haven't seen a lot of posts of people working with Coosa board, so here are a couple of things I did. I fabricated a new engine mount block. I used a table saw to rip the boards to width. I used the West System epoxy to glue the lamination together. A couple of pipe clamps provided clamping force. I doubled up and epoxied the stringer too. I'll get a picture of stringer later today. Some comments on working with the Cossa; Based on FAQ on their site, I used a fine tooth carbide tip blade in my table saw. Cuts like butter but makes more dust than wood. Respirator was used at all times. The dust itches like fiberglass, a big duh on my part, it has fiberglass strands embedded. My wood tools are on second floor of my garage and it was hot, so I was cutting boards with t-shirt and shorts on. I wont do that again. The board is expensive, but the shipping is killer. UPS can ship a 48 by 31.5 piece reasonably. If you need longer, you need to scarf or sister an extension. I did the latter to tie into a section of good stringer. I did not buy another board for the decking that the batteries sit on. I am using marine grade plywood for that. I'll be adding limber holes for drains so I don't expect water to get as high as the deck material.
Sorry about lack of pictures. I usually use the phone as a radio so I kill the battery and/or just forget to get pictures.