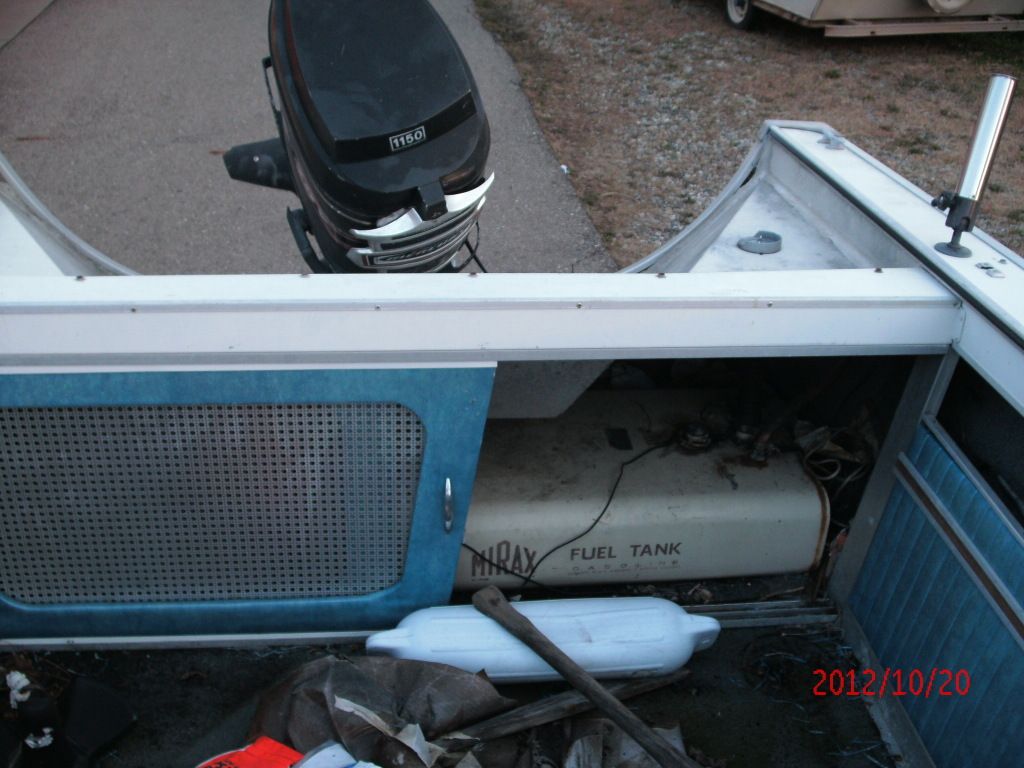
Rough and ready '74 Starcraft Chieftan 18' rebuild

laurentide

Lieutenant Commander
Joined
Jul 24, 2011
Messages
1,869
Re: Rough and ready '74 Starcraft Chieftan 18' rebuild

There are Differnet 4" foam rollers. Did you use the Ultra Fine Cabinet rollers like these...
Home Depot - 4 in. Ultra-Dense Foam Roller Covers (5-Pack) customer reviews - product reviews - read top consumer ratings

Yep. I think a few environmental factors weren't right (it was a hot day, the paint should have been thinned more) and it went really wrong when I went back for a second coat...probably too soon. I just pulled all the tape and it looks fine, though it's an obvious DIY job, which I'm very much OK with at this point. It'll look really good when I put all my pitted chrome hardware back on :)
 

laurentide

Lieutenant Commander
Joined
Jul 24, 2011
Messages
1,869
Re: Rough and ready '74 Starcraft Chieftan 18' rebuild

So guys, after a torturous several hours attempting to bend and install the cabin windshield, I got it done, with caveats. The base piece of weather stripping was shot, so I went without it on the re-install. Also, while trying to carefully bend the piece with a heat gun without getting a bunch of bubbles and waves, I put a bit too much pressure on it and it cracked right at the top bend. I drilled out the end of the crack and, while it was disappointing, I don't think it'll be an issue going forward.

Here she is with the cabin glass back in:

xCpFioD.jpg


So without the piece of stripping, I've got a kind of good sized gap on the bottom here:

Wd6yPyN.jpg


Would you guys recommend 4200 for this application...build a dam with tape on the inside, and seal it up?

My very inelegant method of securing the bottom piece of trim to the wood bow support:

WfOhAaL.jpg


Foam plan for the cockpit bilge:

V7oLJPd.jpg


Does this piece look to you guys like the side trim piece for splashwell sliders?

PGlzlPx.jpg


Like so:

8ivzLBd.jpg


I couldn't get a decent shot of the crack in fading light, but it's not that noticeable and hopefully I'll forget about it. Getting that plexi back in was a major pain...but I'm overall pretty happy with the result.

Thanks for checking it out.
 

GA_Boater

Honorary Moderator Emeritus
Joined
May 24, 2011
Messages
49,038
Re: Rough and ready '74 Starcraft Chieftan 18' rebuild

Does this piece look to you guys like the side trim piece for splashwell sliders?


8ivzLBd.jpg

Yes. The angle edge points forward just like you are holding it. Can you squeeze some more foam in? Could be the pic.

The W/S looks good. I can't see anything wrong.
 

laurentide

Lieutenant Commander
Joined
Jul 24, 2011
Messages
1,869
Re: Rough and ready '74 Starcraft Chieftan 18' rebuild

Yes. The angle edge points forward just like you are holding it. Can you squeeze some more foam in? Could be the pic.

The W/S looks good. I can't see anything wrong.

Cool, I'm glad I have those pieces. And yeah, I'll get some more foam in on either side of the stringers. I plan on using all the scrap pieces inside the splashwell and under the berth hatches and bow area as well. All told it'll be the equivalent of 4 4x8 2" sheets in the boat. Ya think that'll float 'er in a swamping situation? I can obviously get more. Many thanks!
 

laurentide

Lieutenant Commander
Joined
Jul 24, 2011
Messages
1,869
Re: Rough and ready '74 Starcraft Chieftan 18' rebuild

Just another shot of the foam, so you can see the profile:

X6TKTXM.jpg


EDIT: I'm holding off on putting the top glass back on because I need to back the trailer under a low tree limb when I go to put the OB on, which will be hoisted on another tree limb. Very sophisticated engineering going on here.
 

GA_Boater

Honorary Moderator Emeritus
Joined
May 24, 2011
Messages
49,038
Re: Rough and ready '74 Starcraft Chieftan 18' rebuild

That's a better foam shot, Chem. I crammed the stuff everywhere. In fact, it was slightly proud of the stringer (only one in mine) and it compressed a little with the flooring in place. I put it under the side panel like you have. I don't know how much is needed, just that I have it under any covered spot.
 

Teamster

Lieutenant Commander
Joined
Nov 8, 2010
Messages
1,923
Re: Rough and ready '74 Starcraft Chieftan 18' rebuild

No such thing as to much foam,............
 

laurentide

Lieutenant Commander
Joined
Jul 24, 2011
Messages
1,869
Re: Rough and ready '74 Starcraft Chieftan 18' rebuild

That's a better foam shot, Chem. I crammed the stuff everywhere. In fact, it was slightly proud of the stringer (only one in mine) and it compressed a little with the flooring in place. I put it under the side panel like you have. I don't know how much is needed, just that I have it under any covered spot.

No such thing as to much foam,............

OK, I'll see how far my scrap pieces get me, and grab another sheet or two if necessary. The pics are obviously just an idea of what I might want before the deck panels go down, so I'll err on the side of "too much" prior to that installation.
 

laurentide

Lieutenant Commander
Joined
Jul 24, 2011
Messages
1,869
Re: Rough and ready '74 Starcraft Chieftan 18' rebuild

Dumb question time, but better than dumb mistake time. I didn't have a deck in the boat when I got it, so no templates. Also, the stringers are a little out of shape, so I'm not sure how the deck should line up with the sides of the hull. Should the deck panels be resting on the inside bottom of the lifting strake, just barely, or should they go just far enough to rest on the rib ends?

And if it's just on the rib ends, I'm then assuming that the seams all need to be on a rib? I did a search, but it's just really hard to filter through all the threads to get to the relevant pics. Thanks very much.

Through some kind of miracle of hack carpentry, I managed to get the transom cut pretty accurately, and it's now glued and clamped up. Moving along, slowly....
 

jasoutside

Supreme Mariner
Joined
Dec 20, 2009
Messages
13,269
Re: Rough and ready '74 Starcraft Chieftan 18' rebuild

or should they go just far enough to rest on the rib ends?

This ^^^^

That is until you get closer up towards the bow. Up there you'll need to cut out "scallops" to accommodate the ribs.

Check into one of the more detail oriented Chief threads and you out to see some photos of whats going on there
 

laurentide

Lieutenant Commander
Joined
Jul 24, 2011
Messages
1,869
Re: Rough and ready '74 Starcraft Chieftan 18' rebuild

Thanks Jas. I don't think I have to worry about the forward scalloped pieces, 'cause it's just a square piece between the berths, probably similar to your Islander's original layout.

Hopefully I'll be done dry fitting all the ply by this evening. Maybe even pics....
 

GA_Boater

Honorary Moderator Emeritus
Joined
May 24, 2011
Messages
49,038
Re: Rough and ready '74 Starcraft Chieftan 18' rebuild

Chem - like Jason said - the floor rests on the ribs. Don't try to match the joints to the ribs. First, you waste a lot of wood cutting down for a match and second, the rib ends aren't really big enough to support the joint and rivets/screws. If you still have the AL joiner strips, they tie the floor pieces together. If you don't, make some plywood doublers to fit under the floor to tie the pieces. A lot of the rests used the doubler method.
 

laurentide

Lieutenant Commander
Joined
Jul 24, 2011
Messages
1,869
Re: Rough and ready '74 Starcraft Chieftan 18' rebuild

GB, would the bent up strips of 3"ish aluminum on the left in the photo be the joiner strips? Unfortunately, the guy I purchased from wasn't very delicate with most of the trim removal...the transom cap is a mess, too.

If anyone can ID the other pieces here, I'd be greatly appreciative:

A7dw5u6.jpg


Profile shot of those angle pieces (we had a rainstorm while I took my wife to the airport...and I'm under a messy tree here):

3fgVn9Y.jpg


If those are in fact the strips, do they go on top of the seam? Messy tree again, not caterpillars in the bilge:

PQYycx4.jpg


...and just some stuff that I got done today, nothing epoxied or fastened yet. You can see the gaps and lack of true in the bulkhead pieces, as I still need to trim the gunwale contour a bit:

XvsO96C.jpg


jB6MDCT.jpg


Hy0Dx2c.jpg


As always, thanks for the help. (and yeah, that's a glue mess on top of the transom).

EDIT: In that last photo, you can see that I kind of flubbed the width of the first transom ply I cut, but the ply behind it is snug, and all the bolts will go through both sheets without being too close to an edge. I considered re-doing it, but didn't want to waste the wood, and I think it'll be plenty strong. I'll use some fairing compound in that disparity when I epoxy.
 
Last edited:

jbcurt00

Moderator
Staff member
Joined
Oct 25, 2011
Messages
25,047
Re: Rough and ready '74 Starcraft Chieftan 18' rebuild

Yep, this is the UNDER the seams strip, that's riveted to the bottom side of the 1st sheet. After it's laid the next sheet is laid, and along the seam, the 2nd sheet is then riveted to the strip. That's why it's a fairly evenly space double row of holes:
PQYycx4.jpg


I think the 1 pcs in the lower left are the upper & lower track for the splashwell sliding doors:
3fgVn9Y.jpg


The next 2 pcs maybe to support the bottom of the side panels that run forward from the splashwell below the gunwale.

You can just kind of see it behind the date stamp on my Holiday:
 

ezmobee

Supreme Mariner
Joined
Mar 26, 2007
Messages
23,767
Re: Rough and ready '74 Starcraft Chieftan 18' rebuild

Yeah, the Z shaped ones are for the base of the side panels:


GA_Boater

Honorary Moderator Emeritus
Joined
May 24, 2011
Messages
49,038
Re: Rough and ready '74 Starcraft Chieftan 18' rebuild

Ya got all the answers from JB and EZ. L-R - joiner, S/W track, side panel to floor plate.

I can't place the L-shaped piece on the right. Does it have wood stuck on the rivets?
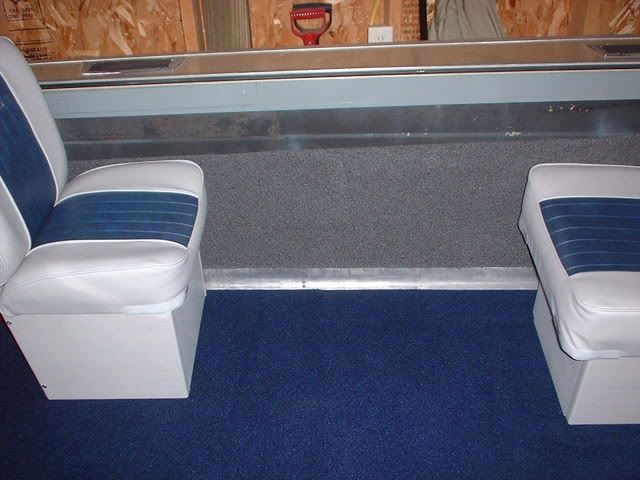
Just had an idea. Does it fit between the stringers by the cabin door? Support for the forward edge of the floor going into the cabin?
 

laurentide

Lieutenant Commander
Joined
Jul 24, 2011
Messages
1,869
Re: Rough and ready '74 Starcraft Chieftan 18' rebuild

JB, EZ, and GB...that was some very helpful trim id for this virgin Starcraft owner. The only thing that's still a mystery are those strips that look like the slider bases, but they're too long to fit in the boat laterally. No biggie, I can get the angle pieces for that.

I'm also thinking that there must have been boxes under the seats, because the side panel supports are too short for my plan, which is to have fold down seats (fold down onto the gunwale, sideways) and side panels all the way to the bulkheads...more deck space if I can drop the seats down. I'll just figure that out with some Lowe's angle pieces as well.

I'm going to try to get some of these panels sealed before we get rain for the next several days. Cheers.

EDIT: Yeah, GB, I think that 90 degree piece you were referring to does go under the deck and attaches to the drop down piece for the cabin, which in turn attaches to the aluminum berth frames.


While it was nice to not have to tear the deck out of this one, it would have been a lot easier to have taken this all apart myself.
 
Last edited:

laurentide

Lieutenant Commander
Joined
Jul 24, 2011
Messages
1,869
Re: Rough and ready '74 Starcraft Chieftan 18' rebuild

So my latest "progress" report is basically a comedy of errors, both of the human kind and some bad luck at the hands of nature. On Tuesday, I got the top sides of all my wood epoxied in 3 coats. However, the temperature dropped well below 60 (don't trust the weather reports in VT) as the third coat was curing, so that sat out all night as a gel/liquid. The next morning, sunny, but windy. This is also the time of year when every tree is dropping its seeds. So, of course, now I've got tree trash embedded in all the epoxy on that side of everything. No big deal, I can sand it out. Then, yesterday, still sunny, I get the bottom sides done with the last of my epoxy, basically one heavy coat on everything, three lighter coats on the transom. 10% chance of showers, so of course it rains hard for 20 minutes before the stuff kicks.

I was just checking everything out this afternoon, and I think it should all be fine, even the sides that got wet. After all day tomorrow in the sun (so they say) while I'm at work I think it'll all be cured enough to sand on Saturday.

So my question after this long-winded tale of resin tragedy is: what's a good grit to smooth out the junk? I don't care what it looks like, it'll all be covered in vinyl or painted, so I don't have to take it back to wood, just smooth it out. Should I use a sander, or hand sand?

Many thanks. No pics of this work, as I'm not too proud of it, though it'll be plenty functional I think.

EDIT: No way I try a boat rebuild in the future without a heated, indoor work space. It's just way too frustrating most of the time.
 

jasoutside

Supreme Mariner
Joined
Dec 20, 2009
Messages
13,269
Re: Rough and ready '74 Starcraft Chieftan 18' rebuild

Palm sander with 60/80 grit should take care of that mess. You could even pull out the belt sander if ya like eh.
 

laurentide

Lieutenant Commander
Joined
Jul 24, 2011
Messages
1,869
Re: Rough and ready '74 Starcraft Chieftan 18' rebuild

^^cool, I'll give that a go with the palm sander. My first attempt at skimming fairing compound was a mess too, but I think I'll be pretty level with a quick aggressive sanding. Cheers.
 
Top