Rotten 1982 Beachcraft

Beachcraft170E

Seaman Apprentice
Joined
Jul 8, 2021
Messages
37
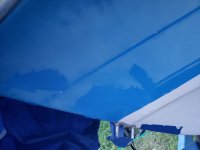
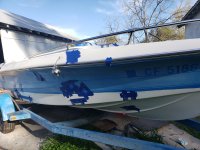
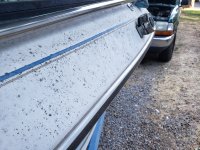
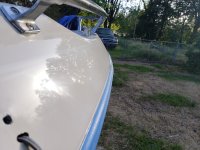
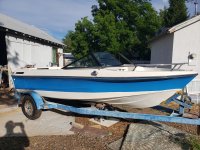
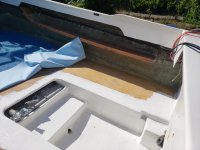
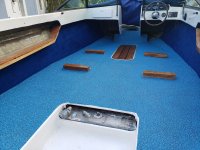
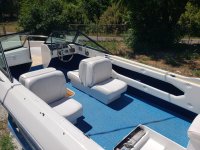
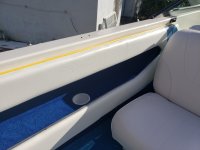
So at this point in our recap, it's late November, and I started the build in late June, so right at 5 months worth of pretty obsessive work, when I'm not at regular work. In hindsight, it cracks me up how close I thought I was at this point. I figured a wash, cut and rub the gelcoat, pop the interior in and we're on the water baby. šŸ¤£ Oh my young, naive self. Now I realize that about every 3 weeks I say, "about 2 more weeks." Anyway, I figured better start on the gelcoat. It had some keel rub, as I mentioned earlier, some big gouges, lots of rashes and dings, and oxidation. There were also holes to repair and the glove box area. I spent a fair amount of time on it, and though it's far from perfect it has really come out nicely.
 

Attachments

  • 20220329_194146.jpg
    20220329_194146.jpg
    8.5 MB · Views: 18
  • 20220329_172522.jpg
    20220329_172522.jpg
    8.4 MB · Views: 18
  • 20220405_102803.jpg
    20220405_102803.jpg
    9.9 MB · Views: 17
  • 20210625_192423.jpg
    20210625_192423.jpg
    4.3 MB · Views: 16
  • 20220501_184109.jpg
    20220501_184109.jpg
    8.1 MB · Views: 18
  • 20220515_181913.jpg
    20220515_181913.jpg
    9.9 MB · Views: 17
  • 20220403_191221.jpg
    20220403_191221.jpg
    8.6 MB · Views: 17

Beachcraft170E

Seaman Apprentice
Joined
Jul 8, 2021
Messages
37
Munching popcorn with anticipation as the story unfoldsā€¦..
Thank you for checking it out. I know most of these build documentations are usually more engaging if its real time and question and answer. I do hope anyone who happens along and sees how I or the factory did something can be helped in figuring out their own solution.
 

buxmj

Petty Officer 1st Class
Joined
Jun 9, 2018
Messages
294
Great work! Thanks for taking the time to go back and post your journey. I have had those same thoughts about how long things should take and how long each step actually takes, very frustrating initially but in the end the boat looks better and is safer than when it was built, yours definitely falls in this category.
 

Beachcraft170E

Seaman Apprentice
Joined
Jul 8, 2021
Messages
37
The motor got a clean up while it was out of the boat, new gaskets, paint etc. The outdrive got a new impeller, seals, fluid change, pressure test, etc. There was also some prop damage, so I had that repaired locally. It's a stainless prop, so worth it. And it was only like $100. We got take out Chinese food this weekend and it was like $73. So if my wife asks how much the prop repair cost, I'll just tell her "A Peking dinner for 4 with extra egg rolls." šŸ¤£šŸ¤£It should make about as much sense to her as the rest of the stuff I mutter under my breath to myself.
 

Attachments

  • 20220212_110305.jpg
    20220212_110305.jpg
    1.4 MB · Views: 3
  • 20220306_184555.jpg
    20220306_184555.jpg
    8.9 MB · Views: 4
  • 20220816_080007.jpg
    20220816_080007.jpg
    8.8 MB · Views: 4
  • 20220118_135610.jpg
    20220118_135610.jpg
    8.7 MB · Views: 4

Beachcraft170E

Seaman Apprentice
Joined
Jul 8, 2021
Messages
37
I wanted to get the flooring in, so that the epoxy resin wouldn't be exposed to too much sunlight. I went with a pebble grain marine vinyl glued down with contact adhesive. Contact adhesive gives me anxiety. If I were to do it over again, and I may in the future, I would probably do a textured gelcoat. I dread the day I decide to remove the old contact adhesive. I also got the sides of the hull carpeted, and the seat mounts sorted out.
 

Attachments

  • 20220517_163624.jpg
    20220517_163624.jpg
    8.6 MB · Views: 11
  • 20220522_192347.jpg
    20220522_192347.jpg
    6.9 MB · Views: 11
Top