Restoring 1988 19’ bayliner capri

88 Capri (2022 SOTY)

Master Chief Petty Officer
Joined
Aug 25, 2019
Messages
824
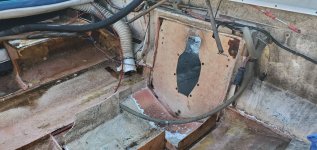
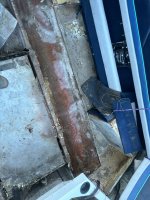
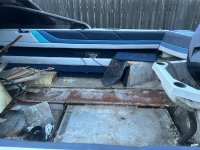
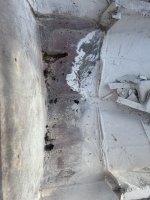
I have an I/O in my 1750 so the procedure for the transom may be different, I didn't need to remove the cap but did leave a very small ridge of glass from the old one for a guide to install the new one. (No more than 1/4") I still had alot more grinding to do after this picture was taken to get all mating surfaces clean.

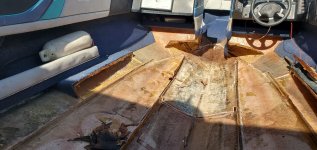
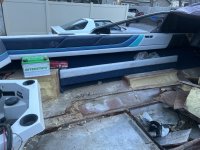
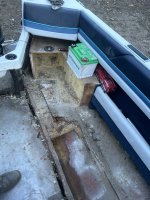
I attached a picture of how I removed my seat boxes to replace the floor/stringers, I was able to remove them in one piece and reuse them due to no rot. Using a multi-tool was priceless.

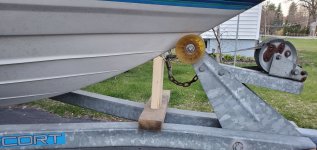
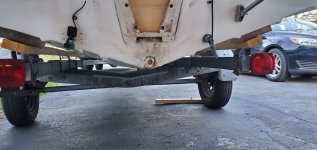
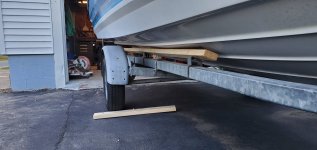
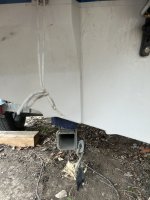
I left my boat on the trailer but added a couple of blocks so it wasn't resting on the bunks, the last picture is showing how much room I had above the bunks with the blocks.
 

Attachments

  • photo328820.jpg
    photo328820.jpg
    438.7 KB · Views: 17
  • photo328058-2.jpg
    photo328058-2.jpg
    557.6 KB · Views: 18
  • photo328823.jpg
    photo328823.jpg
    393.9 KB · Views: 18
  • photo328397.jpg
    photo328397.jpg
    288 KB · Views: 16
  • photo328398-1.jpg
    photo328398-1.jpg
    321.6 KB · Views: 16
  • photo328399.jpg
    photo328399.jpg
    251.1 KB · Views: 16
Last edited:
Acamper88

Cadet
Joined
Feb 24, 2024
Messages
15
I have an I/O in my 1750 so the procedure for the transom may be different, I didn't need to remove the cap but did leave a very small ridge of glass from the old one for a guide to install the new one. (No more than 1/4") I still had alot more grinding to do after this picture was taken to get all mating surfaces clean.

I attached a picture of how I removed my seat boxes to replace the floor/stringers, I was able to remove them in one piece and reuse them due to no rot. Using a multi-tool was priceless.

I left my boat on the trailer but added a couple of blocks so it wasn't resting on the bunks, the last picture is showing how much room I had above the bunks with the blocks.
Okay, thank you those pictures are very helpful. I suppose just letting it rest on the bunks after taking the stringers out would deform the hull?
 

Acamper88

Cadet
Joined
Feb 24, 2024
Messages
15
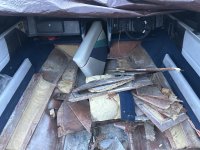
Well I worked on getting some of the foam out after work today for a little over an hour and feel like I made pretty good progress, probably won’t touch it again until this weekend because there is supposed to be some rain coming tomorrow and Thursday. Have a little more cutting to do, need to get the junk wood out of it and do some more foam removal. Also hoping to remove the engine this weekend tooIMG_1192.jpeg
 

Attachments

  • IMG_1196.jpeg
    IMG_1196.jpeg
    3.2 MB · Views: 10
  • IMG_1193.jpeg
    IMG_1193.jpeg
    2.1 MB · Views: 11
  • IMG_1194.jpeg
    IMG_1194.jpeg
    2.3 MB · Views: 11
  • IMG_1197.jpeg
    IMG_1197.jpeg
    3.4 MB · Views: 11

lgaytan

Petty Officer 2nd Class
Joined
Jul 15, 2015
Messages
106
How did you end up doing the drain for the poor, did you just put in a brass tube?
I filled the complete transom and drilled again the drain, this material will not get damaged if drilled and exposed to water again.
 

88 Capri (2022 SOTY)

Master Chief Petty Officer
Joined
Aug 25, 2019
Messages
824
Would you have still lifted yours off the boat if the bunks were under your stringers or is that even more reason to do so?
I would have lifted it either way because everything in the boat has a structural purpose and even though a cradle would have been best I had no way of doing so. The way I had to do it seemed to work well as I had no issues on the lake operational wise.
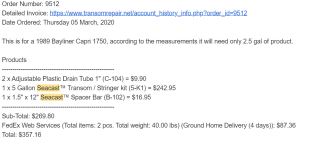
The cost of materials has in some cases has risen three fold since I had started my project.
I started with 10 gallons of resin plus the 1708 and mat plus various other supplies. I did make alot of mistakes that I redid so I used more material than most would have (first boat).
The thing is I didn't have a payment and had the luxury of spending when I could, I can't find my original order invoice so unfortunately I can't give you a price.
With a project like this don't rush and don't do the (have to be done by this date) you will burn yourself out.
I can't really give you an overall cost because I was working on the engine and drive also.
The only reason I did this was because the boat met my needs and I liked it, this definitely is not the way to go to flip a boat!
 

Acamper88

Cadet
Joined
Feb 24, 2024
Messages
15
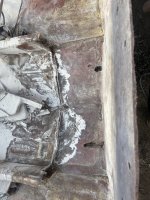
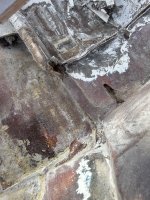
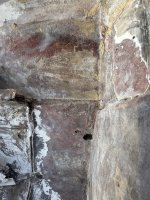
Howdy guys, sorry it’s been a while. Weather hasn’t been cooperating lately until the last few days. I’ve made a bit of progress. Got the transom cut out along with the foam removed from the rear. Today I was sanding around the transom area and got to the bottom and found wood in these bottom low spots. Does anyone know its purpose? Do I just leave it along and glass over it?
 

Attachments

  • IMG_1313.jpeg
    IMG_1313.jpeg
    2.4 MB · Views: 19
  • IMG_1314.jpeg
    IMG_1314.jpeg
    2.9 MB · Views: 19
  • IMG_1315.jpeg
    IMG_1315.jpeg
    3.2 MB · Views: 18
  • IMG_1316.jpeg
    IMG_1316.jpeg
    3.1 MB · Views: 19

kcassells

Fleet Admiral
Joined
Oct 16, 2012
Messages
8,732
I believe they are called "Strakes" and or "Chines" they help stiffen up the hull. I removed all the wood in mine and filled with pb/glass. No wood to rot out.
Here' a description;
 

Acamper88

Cadet
Joined
Feb 24, 2024
Messages
15
I believe they are called "Strakes" and or "Chines" they help stiffen up the hull. I removed all the wood in mine and filled with pb/glass. No wood to rot out.
Here' a description;
Okay, lol sounds like I have more sanding to do than I thought then. Thank you for the info
 

Acamper88

Cadet
Joined
Feb 24, 2024
Messages
15
Might be a stupid question but the laminating resin I got dries tack free evidently. I didn’t even notice but it says it dries tack free without the need for wax which is my bad for not paying attention. But I already have the new transom covered in the resin. So I know I need to sand it, my question is how much do I need to sand off in order to laminate properly. Just enough to scuff it up?
 

froggy1150

Master Chief Petty Officer
Joined
Nov 3, 2017
Messages
846
If it has no wax (dont sound right.... probably has wax in it and don't require more...)rubbing acetone on a spot and see if it gets soft and tacky. If so you could probably just go over it after a full wipe down. You would need to do a full wipe down with acetone before sanding anyway if it had wax in it or you would just sand the wax Into the glass. I would assume it has wax in it to be safe if you are not sure.
 

Pmt133

Chief Petty Officer
Joined
Jan 6, 2022
Messages
595
The 435 non waxed I am using from US composites dries tack free after a few hours as well... Quick dab of acetone brings it right back though. Seems like if it is warm enough, it'll dry tack free. I am keeping the garage around 85 degrees while working so layup times are reasonable.
 

Acamper88

Cadet
Joined
Feb 24, 2024
Messages
15
The 435 non waxed I am using from US composites dries tack free after a few hours as well... Quick dab of acetone brings it right back though. Seems like if it is warm enough, it'll dry tack free. I am keeping the garage around 85 degrees while working so layup times are reasonable.
Okay, sounds good. Thanks guys I’ll give that a try later
 
Top