Restoring 1986 Sea Nymph SS155 (pics)

Todd4

Petty Officer 2nd Class
Joined
Feb 11, 2012
Messages
111
Re: Restoring 1986 Sea Nymph SS155 (pics)

Piece,

Where (how) are your steering cables run (to the back of the boat)? Can you use the same path for your wires? The boat had to run the original wires somewhere. Something else to think about: if you add a piece of PVC under your gunwale and run your wires inside, it'll make for a much neater install (especially if visible) and keep your wires from sagging over time and looking like Christmas garland. It's harder to do, but I think well worth the effort in the long haul. Remember to use a rubber grommet for any wires going through any sharp holes (especially on an aluminum boat) or you'll wear through the wire insulation surprisingly quickly. Glad things are moving along for you. Good luck.

Todd
 

Piece715

Senior Chief Petty Officer
Joined
Jan 26, 2009
Messages
757
Re: Restoring 1986 Sea Nymph SS155 (pics)

Thanks Todd as always. Im gonna check out the best setup today when im out buying my batteries. Once question though... wants the best way to crimp the lugs for the power wires? Really not wanting to spend 40-60 dollars just for some heavy duty crimpers. Any suggestions?
 

Todd4

Petty Officer 2nd Class
Joined
Feb 11, 2012
Messages
111
Re: Restoring 1986 Sea Nymph SS155 (pics)

"Power wires" - meaning your 2 AWG cables? There are several options available from crimp on (as you know), to a screw down type, to a screw on (kinda like a screw together hydralic fitting), or solder type connector, and pre-made. You may be able to find and electrical wiring shop locally that will crimp on your end connectors for you. Do NOT use pliers, etc. Pre-made are the easiest for you , but require that you send them your cable cut to length (or tell them your cable lengths and buy it all from them). If you want to do it yourself (without a crimping tool), then I recommend the solder on type for this installation. Inexpensive kits are available that include the correct size lug end connector with preformed solder plugs. You can "tin" the wire ends and use a heat gun or propane tourch to melt the solder in the lug, and then insert the wire (hold still till solidified). Get a few extra to get over your "learning curve". In any event, Don't forget the adheasive heat shrink afterwards.

Todd
 

Piece715

Senior Chief Petty Officer
Joined
Jan 26, 2009
Messages
757
Re: Restoring 1986 Sea Nymph SS155 (pics)

"Power wires" - meaning your 2 AWG cables? There are several options available from crimp on (as you know), to a screw down type, to a screw on (kinda like a screw together hydralic fitting), or solder type connector, and pre-made. You may be able to find and electrical wiring shop locally that will crimp on your end connectors for you. Do NOT use pliers, etc. Pre-made are the easiest for you , but require that you send them your cable cut to length (or tell them your cable lengths and buy it all from them). If you want to do it yourself (without a crimping tool), then I recommend the solder on type for this installation. Inexpensive kits are available that include the correct size lug end connector with preformed solder plugs. You can "tin" the wire ends and use a heat gun or propane tourch to melt the solder in the lug, and then insert the wire (hold still till solidified). Get a few extra to get over your "learning curve". In any event, Don't forget the adheasive heat shrink afterwards.

Todd

Im thinking about getting the wires cut to the right length then heading to autozone or napa... They will usually allow u to use their tool or do it for ya... Just didn't know if there was a DIY method like a blunt cold chisel and hammer; I do understand that those connections need to be put together well
 

Todd4

Petty Officer 2nd Class
Joined
Feb 11, 2012
Messages
111
Re: Restoring 1986 Sea Nymph SS155 (pics)

Yeah, I understand. DO NOT use a chisel, hammer, pliers, etc - you won't get the contact beetween the wire and the lug you need and, besides, it'll look like crap (and likely pull out on you). Watch this video (if I'm allowed to post a link):

http://www.youtube.com/watch?v=SXDkNMDDrBs

This is what I recommend = best homemade connection for wet environments. It really is easy. The only tricky part is not burning your insulation with the flame while heating (if more heat is needed while inserting wire, be sure to point flame away). Borrowing a crimping tool or having someone crimp it for you will work fiine also. I highly recommend adheasive heat shrink tubing, regardless. Take a pic of how they turned out!

Todd
 

Piece715

Senior Chief Petty Officer
Joined
Jan 26, 2009
Messages
757
Re: Restoring 1986 Sea Nymph SS155 (pics)

Yeah, I understand. DO NOT use a chisel, hammer, pliers, etc - you won't get the contact beetween the wire and the lug you need and, besides, it'll look like crap (and likely pull out on you). Watch this video (if I'm allowed to post a link):

http://www.youtube.com/watch?v=SXDkNMDDrBs

This is what I recommend = best homemade connection for wet environments. It really is easy. The only tricky part is not burning your insulation with the flame while heating (if more heat is needed while inserting wire, be sure to point flame away). Borrowing a crimping tool or having someone crimp it for you will work fiine also. I highly recommend adheasive heat shrink tubing, regardless. Take a pic of how they turned out!

Todd


Ill check that video out in a sec... had a patient just show, but all the terminals I bought are marine grade crimp style and also bought adhesive shrink wrap for the lugs. All other terminals are the crimp and heat shrink kind. All from gregs marine. Great stuff!
 

Piece715

Senior Chief Petty Officer
Joined
Jan 26, 2009
Messages
757
Re: Restoring 1986 Sea Nymph SS155 (pics)

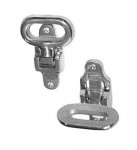
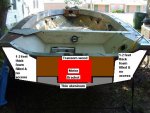
Another question... How do yall get in and out of ur nymphs?! I bought these a while back STEPHM003500.jpgthey are stainless and was going to mount them on the transom. Not to mention i picked them up at a sale got four for like $25 dollars. They are mast steps. The issue is the set up of the transom/splashwell. Lets see if i can doctor a pic to explain...
Transom View.JPG So in order to mount those steps they would have to be really close to the motor bracket which would make climbing in and out very tough.... An over the side ladder would work but don't want one that rests against hull... i like my paint too much. The outboard swim platform one would be great but how to mount it since i cant access the far sides of the transom due to it being boxed in and foamed so bolts wont work and i feel any type of screw will eventually rip out. Suggestions? lemme have em
 

carpedium

Petty Officer 1st Class
Joined
Jun 20, 2011
Messages
258
Re: Restoring 1986 Sea Nymph SS155 (pics)

The splashwell is just riveted together, if you took the top off you could chisel out the foam adjacent to the transom to bolt on. When your done add some pour-in foam back in there and be good to go!

I took my splashwell apart for running new bilge pump hoses.

When needed, I get in the boat by stepping on the lower unit of the motor and then into the splashwell. It actually works pretty good. The other alternative is an over-the-gunwale ladder that you stow when not in use.
 

bouttime007

Chief Petty Officer
Joined
Apr 21, 2007
Messages
546
Re: Restoring 1986 Sea Nymph SS155 (pics)

I use my trusty 6ft step ladder to get aboard on dry land.
 

Piece715

Senior Chief Petty Officer
Joined
Jan 26, 2009
Messages
757
Re: Restoring 1986 Sea Nymph SS155 (pics)

Parts parts.... waiting on parts.... AHHH THE ANTICIPATION!!!! After wiring its SPLASH baby!! Yep... excited.... ok im done now thanks for listening
 

carpedium

Petty Officer 1st Class
Joined
Jun 20, 2011
Messages
258
Re: Restoring 1986 Sea Nymph SS155 (pics)

Exciting! I am also waiting on parts. Sucks when they get backordered
 

Piece715

Senior Chief Petty Officer
Joined
Jan 26, 2009
Messages
757
Re: Restoring 1986 Sea Nymph SS155 (pics)

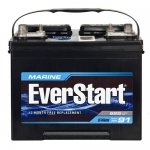
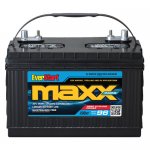
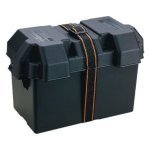
Well just an update... which isn't much of one seeing that I'm still waiting on parts... but i was able to finally make it to Walmart and pick up my batteries and boxes. I bought the EverStart 24MS-6 Marine Battery 0068113131907_500X500.jpgrated @ 625 cranking amps at 32 degrees Fahrenheit and 500 cold cranking amps (think that's right) for ~$76. Also picked up EverStart Maxx Group size 29 DC 0060538802282_500X500.jpg rated @ 875ca, 675cca, and 125ah (again I believe this is correct) for ~$95ish. Total came out to $186 for the two with tax... thank goodness I had $150 in wally world gift cards :D. I also picked up two Attwood Power Guard battery boxes; 41OTdKnqytL._SL500_AA300_.jpg one was 8 dollars and the other was 9. They are nothing special just a plastic box with a strap to keep it closed. This will work find right? I don't need any of those 40 dollar out side terminal fused ones do i? was thinking of getting a small foam kitchen sink floor matt and cutting a square to sit underneath each box to soften the bumps and keep them from sliding around
[h=1][/h][h=1][/h]
 

Piece715

Senior Chief Petty Officer
Joined
Jan 26, 2009
Messages
757
Re: Restoring 1986 Sea Nymph SS155 (pics)

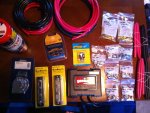
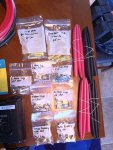
Ok got my goodies on Friday! Pretty nice little haul if I do say so!

photo(3).jpgphoto(4)rezie.jpg

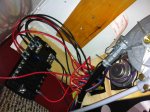
Also did a bunch of the wiring... All in all i would say I'm about 90% done with it. Taking my battery cables to an auto store today to get the lugs crimped. After the power wires go in all the wiring will be done besides the coax speakers which will literally take 10 min. After everything is wired only remaining items are bow nose piece coaming pad, plug old speedo, fish finder screw holes in transom with 5200, and hide all wiring then I can officially call her done. Plan is to splash next weekend; well at least a soft splash! Can't WAIT!

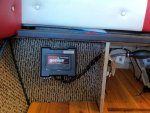
some pics of the wiring

resice.jpgphoto.jpg

Ok gonna throw some engine questions at everyone. I had the motor thoroughly checked when I first started this project. Now it has not been started since. Things that were overhauled when I had it done 3-4 years ago was the impeller was changed, lower unit oil, carbs cleaned, plugs were changed, and pretty sure fuel assembly. Do I need to go ahead and do this all again since its been sitting? What are ur recommendations, everything again or just things here and there? Also I have read the sticky on reattaching the throttle cables, How hard is it to tune the engine? Something i could tackle? btw I STILL CANT find my original manual for the motor and I'm angry about it; its also driving me slightly insane.
 

GT1000000

Rear Admiral
Joined
Jul 13, 2011
Messages
4,916
Re: Restoring 1986 Sea Nymph SS155 (pics)

Ok got my goodies on Friday! Pretty nice little haul if I do say so!

View attachment 142298View attachment 142299

Also did a bunch of the wiring... All in all i would say I'm about 90% done with it. Taking my battery cables to an auto store today to get the lugs crimped. After the power wires go in all the wiring will be done besides the coax speakers which will literally take 10 min. After everything is wired only remaining items are bow nose piece coaming pad, plug old speedo, fish finder screw holes in transom with 5200, and hide all wiring then I can officially call her done. Plan is to splash next weekend; well at least a soft splash! Can't WAIT!

some pics of the wiring

View attachment 142301View attachment 142302

Ok gonna throw some engine questions at everyone. I had the motor thoroughly checked when I first started this project. Now it has not been started since. Things that were overhauled when I had it done 3-4 years ago was the impeller was changed, lower unit oil, carbs cleaned, plugs were changed, and pretty sure fuel assembly. Do I need to go ahead and do this all again since its been sitting? What are ur recommendations, everything again or just things here and there? Also I have read the sticky on reattaching the throttle cables, How hard is it to tune the engine? Something i could tackle? btw I STILL CANT find my original manual for the motor and I'm angry about it; its also driving me slightly insane.

Great score on the electrical goodies...almost there...Looking Grrrrrr-8!

From what I have read, the only item I would MAYBE concern myself with is to throw in a fresh impeller...fairly quick and painless to do, cheap insurance against overheating, and if the old one is still serviceable, you can keep it as a spare...

As far as the rest of the stuff, I'll let the guys who know better give you some advice...

Best of Luck on getting it finished up and may the weather smile kindly upon you when it's time to get it wet...
 

Piece715

Senior Chief Petty Officer
Joined
Jan 26, 2009
Messages
757
Re: Restoring 1986 Sea Nymph SS155 (pics)

Great score on the electrical goodies...almost there...Looking Grrrrrr-8!

From what I have read, the only item I would MAYBE concern myself with is to throw in a fresh impeller...fairly quick and painless to do, cheap insurance against overheating, and if the old one is still serviceable, you can keep it as a spare...

As far as the rest of the stuff, I'll let the guys who know better give you some advice...

Best of Luck on getting it finished up and may the weather smile kindly upon you when it's time to get it wet...


Thanks GT!!! This has been 4 years in the making... well three of actual work... but i did have to stare at it daily sitting next to the house just waiting to be worked on for year while i collected money; it was torture!

I was hoping that was the case but im no engine mechanic. Also figured I change the impeller, change the lower unit fluid, and possibly the fuel filter. I see what the masses say. Thanks again GT!
 

Todd4

Petty Officer 2nd Class
Joined
Feb 11, 2012
Messages
111
Re: Restoring 1986 Sea Nymph SS155 (pics)

AAARG! I got back into town and thought for sure I'd read that those lighted switches were working perfectly! :) :) Don't worry about the lower case oil - that'll still be fine - the unit hasn't been submerged, yet. Definitely change the water pump impeller - they take a 'set' if they haven't been turned for a while - and 4 years is a while. It may still pump enough water to keep your engine cool, but then again maybe not. Was the engine set up for storage? (Was the gas drained out of the carb bowls, etc?) This would be my main concern (after the pump impeller). The gas will evaporate leaving behind debri (like sandy grit and varnish). You might want to have the carbs looked at (cleaned) to make sure you don't run a cylinder lean and burn it up. I don't think I'd re-overehaul the carbs again - just clean it all up and make sure no orfices are clogged. Fuel filters are cheap. As an alternative, you can always try it first and just run some TECHRON Fuel System Cleaner in your first tank (double the amount recommended) and see how she runs. If it soon won't run smooth on all cylinders, then stop and don't push it. Certainly, do not try to run at speed with the motor bogging down. My 2cents.

Todd
 

Piece715

Senior Chief Petty Officer
Joined
Jan 26, 2009
Messages
757
Re: Restoring 1986 Sea Nymph SS155 (pics)

AAARG! I got back into town and thought for sure I'd read that those lighted switches were working perfectly! :) :) Don't worry about the lower case oil - that'll still be fine - the unit hasn't been submerged, yet. Definitely change the water pump impeller - they take a 'set' if they haven't been turned for a while - and 4 years is a while. It may still pump enough water to keep your engine cool, but then again maybe not. Was the engine set up for storage? (Was the gas drained out of the carb bowls, etc?) This would be my main concern (after the pump impeller). The gas will evaporate leaving behind debri (like sandy grit and varnish). You might want to have the carbs looked at (cleaned) to make sure you don't run a cylinder lean and burn it up. I don't think I'd re-overehaul the carbs again - just clean it all up and make sure no orfices are clogged. Fuel filters are cheap. As an alternative, you can always try it first and just run some TECHRON Fuel System Cleaner in your first tank (double the amount recommended) and see how she runs. If it soon won't run smooth on all cylinders, then stop and don't push it. Certainly, do not try to run at speed with the motor bogging down. My 2cents.

Todd


As always thanks for the input Todd. My plan was a test run in the water this weekend but some factors may have to delay that. First I have called every auto shop, hardware store, and boat repair shop in the area and no is capable of attaching lugs to 2 or 4 AWG cable WTF?!? excuse the french.... does no one make their own battery cable anymore?! I really didnt want to go buy the 60 dollar set of hydraulic crimpers from harbor freight but thats where im heading today... im tired of sitting around. Another factor that has had me down was the 103 fever and bleeding throat ive been dealing with for 3 days. It was about 10:30-11 on Sunday when my throat started hurting, woke at 4 the next morning with 101 fever. Spike to 103 that day; stayed heavily medicated on Nyquil and slept literally all day. Tues was about the same and i could feel the other side of my throat starting to ache as well and still blood when i cleared my throat. To the doc i went. Strep test negative, blood culture neg, still waiting on the throat culture should be in today or tomorrow but i am currently 24hrs into my antibiotics and feeling better. Fever is on the down and out sitting at 99, still blood in my throat but very little. I am actually able to eat for the first time in 2 days, lost damn near 10 lbs. Now i know how those glasser junkies feel :D thank the big man upstairs im a tinny owner:rolleyes:

I got this thread in PM as i had asked the OP some questions on LED lighting a while back. He told he was starting a thread and well sure enough... its a great resource and thought id post it here as a quick reference if anyone wants to take a look. Chriscraft254 did a bang up job on this. Its posts like these that makes iboats such a valuable resource. Here's to you fellow iboaters! Smooth Waters to all!

http://forums.iboats.com/showthread.php?t=544182
 

Piece715

Senior Chief Petty Officer
Joined
Jan 26, 2009
Messages
757
Re: Restoring 1986 Sea Nymph SS155 (pics)

WOW!! Called harbor freight to save me a 30 min trip to see if they had the set of crimpers i was looking at in store. According to their computer system they should have 3. The stocking manager couldn't find them on the shelf or where they are stocked in the back. Soo thats a Negative on the crimpers... I CANT WIN!!!!
 

carpedium

Petty Officer 1st Class
Joined
Jun 20, 2011
Messages
258
Re: Restoring 1986 Sea Nymph SS155 (pics)

That sucks man, either way I hope you're feeling better!

Another place to try:

Grainger industrial supply

Any electrical or motor supply place (Elliot is nearby?)

You could also call your local utility (electrical company) to see if one of their guys will crimp for you. Sometimes each town has their own, and I know mine would be willing to help.

Either way, get well soon!
 

GT1000000

Rear Admiral
Joined
Jul 13, 2011
Messages
4,916
Re: Restoring 1986 Sea Nymph SS155 (pics)

Question...do you have a propane or map gas torch...the kind they use for plumbing repairs?

If so, I know this may not be the 100% accepted way to do this, but go to your local hardware store, get a 5 dollar tin of flux, some good solder, if you want you can splurge for some silver solder... slide a piece of heat shrink tubing on the wire...far away for the joint so it doesn't shrink when you apply the heat...glob on some flux to the wire inserted in the eye ring, heat up the eye ring enough that the solder starts to flow into the joint...apply enough solder to fully coat the connection, remove the heat and let it sit for a few minutes to completely cool down...this next part is optional, but if you like, take a small flat chisel and go along the top of the terminal where the wire is inserted and crease it down on itself, that will form a very solid, soldered crimp...slide the heat shrink tubing over it and warm it up to shrink it on...less than ten bucks, less than ten minutes per connection, and you can do them all this way...

Best of Luck...

PS- I hope you got the crud under control and are feeling better...
 
Top