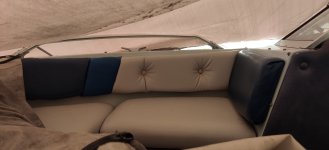
Re-upholstery Job on Cruisers Yacht 338 Bowrider

Status
Not open for further replies.

nola mike

Vice Admiral
Joined
Apr 22, 2009
Messages
5,362
I was so proud of my upholstery work in my boat...now I feel like my stuff looks like a 2 year old trying to color inside the lines.
 

Scott Danforth

Grumpy Vintage Moderator still playing with boats
Staff member
Joined
Jul 23, 2011
Messages
49,537
These brass grommets are to provide access to a buried fastener that hold the back of the seat on the backrest frame.
.
and to let the seat breath when water gets on it and soaks thru the stitching
 

tpenfield

Moderator
Staff member
Joined
Jul 18, 2011
Messages
18,039
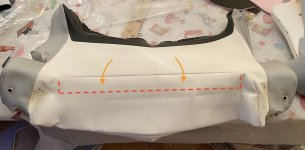
I have been stitching away at the helm seat backrest, while the Admiral worked on the paint removal from the aluminum frames.

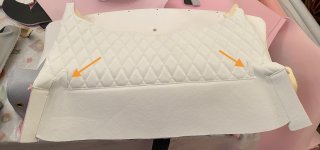
As I mentioned earlier, I made a pattern change 'on-the-fly' to get the diamond pleated section to wrap around the bottom of the backrest.
.
IMG_2940B.jpg
.
Of course stitching that new shape proved to be a challenge, and it is one of those things that you realize after the fact why the manufacturer did it a certain way. Anyway, after a bit of a struggle, I 'cheated' the stitching on those triangular areas you see. . . . doing top-stitch only (but don't tell anybody 🤪 )
.
IMG_2941.JPG
.
Hopefully the skin will go on OK when the cover is all done.
.
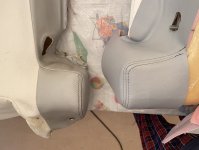
Another change I made was to the french seam on the lower portion where the screw access holes are located. The original piece has the french seam abruptly stop at a 90˚ corner. I thought to soften the curve a bit and extend the french seam to its entirety.
.
IMG_2943.JPG
.
Looks OK . . . not sure how it will look in the finished piece.

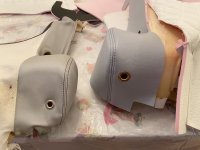
Also the access grommet for the back panel's lower screws is bigger. Hopefully I can located and align the screw holes better when I put the back panel on.
.
IMG_2944.JPG
.
The plan for the day is to finish up the back rests, leaving the base pieces for next weekend.
 

tpenfield

Moderator
Staff member
Joined
Jul 18, 2011
Messages
18,039
I got the first helm seat backrest done. . .

Some bungees came in handy to hold the cover in place during stretching and stapling.
.
IMG_2945.JPG
.
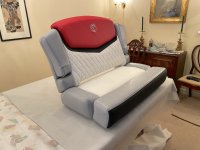
Here are a couple pictures of the helm seat . . .
.
IMG_2948.JPG
.
IMG_2950 2.JPG
.
I like that the diamond pleating wraps underneath, which is the adjustment I made to the patterns. Without that change, you'd be seeing a seam right across the bottom of the backrest.

Maybe this evening, I'll work on the other helm seat.
 

southkogs

Moderator
Staff member
Joined
Jul 7, 2010
Messages
14,919
You might be pleasantly surprised to find that not having that seam on the bottom is a little more comfortable too.

Looks great Ted.
 

tpenfield

Moderator
Staff member
Joined
Jul 18, 2011
Messages
18,039
Judge away. Taken today. Haven't cleaned anything since the boat got dunked. (But your boat is worth 50x mine, so it should be 50x better 😛 )
I did find a Google link to the pictures of your boat. (y)
 

tpenfield

Moderator
Staff member
Joined
Jul 18, 2011
Messages
18,039
Quick Update. . .

I was working on the other helm seat . . . which is really the first class passenger seat :ROFLMAO:. I got to the part where the armrest backing plate goes on . . . it fastens by 3 small (3/4") screws. . . nowhere to be found. 🥴

So, I'll be making a run to the hardware store in the AM. But that's it for tonight.
 

tpenfield

Moderator
Staff member
Joined
Jul 18, 2011
Messages
18,039
I got the other helm backrest made this morning and also had some time to do the 'hidem gimp' on the seat bases that act as hatches, etc.
.
IMG_2957.JPG
.
The gimp gives it a nice finished look.
.
IMG_2958.JPG
.
Next up is the helm seat bases and then I'll be traveling for a while. Won't get to install the seats until May.
 

tpenfield

Moderator
Staff member
Joined
Jul 18, 2011
Messages
18,039
Update . . .

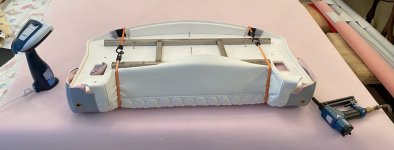
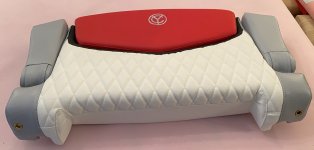
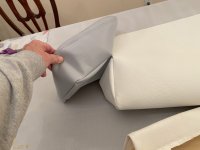
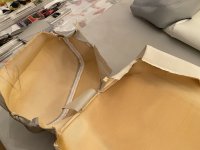
I am working on the helm seat bases, which are the last pieces to be made. There are flip-up bolsters, which are a 'boxed' type of cover. I really had to heat the vinyl skin up with steam on these covers to get them on, since the cover needs to stretch a bit in order to get a nice taut result.
.
IMG_2974.JPG
.
IMG_2975.JPG.
Of course with all if the stretching, the end of the seam started to unravel. I got to use my hook needle to fix it.
.
The main portion of the base in fairly complicated for such a piece, mainly because of the bolster mechanism goes in between segments of the cushion. This results in an interesting sewing . . . 2 sidewall panels joining together partway along a main seam of the cushion.
.
IMG_2978.JPG
.
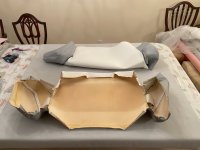
Since there are 2 identical seats for the helm area, I saved one of the skins intact for reference while sewing the new skin.
.
IMG_2976.JPG
.
Lots of details to consider before stitching.
.
IMG_2977.JPG
.
The first one is almost done (background in photo below), it just needs some top-stitching, and the second skin is not far behind.
.
IMG_2976.JPG

.
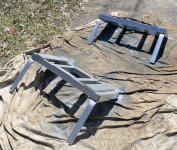
I hope to be assembling the seats later today. I got the frames all painted in preparation.
.
IMG_2973.JPG
.
 

tpenfield

Moderator
Staff member
Joined
Jul 18, 2011
Messages
18,039
Sunday Update . . .

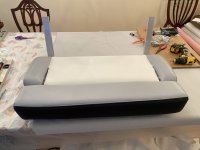
I got one of the helm bases done . . .
.
IMG_2979.JPG
.
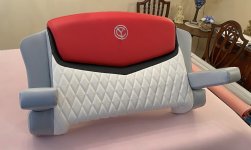
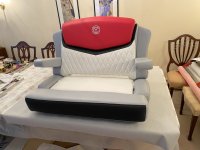
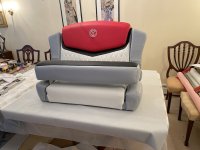
Here is the seat put together . . .
.
IMG_2985.JPG
.
IMG_2984.JPG
.
IMG_2983.JPG
.
I'll be working on the remaining helm seat later today. Then it is a matter of installing them all in the boat. :unsure:
🤪
 

tpenfield

Moderator
Staff member
Joined
Jul 18, 2011
Messages
18,039
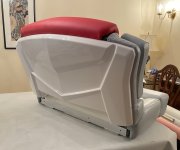
I was able to attach the plastic molded backing to the seat . . . which was a bit of a challenge. 5 hidden screws and not sure if they would line up to the backing.

Anyway . . . done. I'll do the other one in the AM.
.
IMG_2986.JPG
.
I noticed a slight difference in the base of the two frames, so I think this one is actually going to be the starboard side, whereas I thought it would be the port side. :unsure:
 

tpenfield

Moderator
Staff member
Joined
Jul 18, 2011
Messages
18,039
I got the other helm seat assembled, but not without a fight. To @Scott Danforth 's point about the labor intensity of boat seating, I think these seats have demonstrated (to me) some of the issues.

It seems to be that the seats are designed for appearance with not enough regard to the manufacturability of the design. It takes me back to my younger days (in the 1980's) as a manufacturing engineer in the electronics industry, where 'DFM' (design for manufacturability) and '6-Sigma' (manufacturing precision) were a thing. I guess it never made it to the boating industry. :unsure:

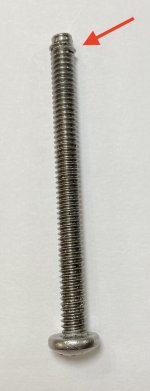
On top of all that . . . I found one of the bolts that secures the base cushion to the frame to have an interesting 'feature/defect' . . . The first main thread after the starter threads was visibly larger (in diameter) than the rest of the bolt. I discovered this when the bolt would only go in about 1/2 turn before seizing up. So as not to force it, I took a closer look.
.
IMG_2988.JPG
.
Most likely a defective bolt. Certainly could not be a thread cutting bolt based on the larger diameter. Better yet, there would be no way that this bolt could have been properly fastened during the original manufacturing of the seat. So, the base must have been fastened with 3 bolts instead of 4, and the manufacturing person did not realize that this bolt did not really go in much.

I had another similar bolt lying around, so I used that one instead. - All good. :D
 
Last edited:

Scott Danforth

Grumpy Vintage Moderator still playing with boats
Staff member
Joined
Jul 23, 2011
Messages
49,537
looks like the machine screw threads galled and deposited some material on the threads.
 

tpenfield

Moderator
Staff member
Joined
Jul 18, 2011
Messages
18,039
Update . . .
I have been traveling for the past month, but now I'm back at the summer house and finishing up the upholstery.
.
IMG_3040.JPG
.
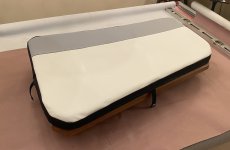
This is the bow filler curtain to form a sunpad. Next steps are to:

Remove the winter cover from the boat
Do a little bit of prep work and repairs on the seat mechanisms
Install the seats.
 

tpenfield

Moderator
Staff member
Joined
Jul 18, 2011
Messages
18,039
I meant to say 'cushion' in the above post (not curtain) . . . spell checker :rolleyes:

Anyway, I am not as practiced at 'boxed' cushions as I am with the other stuff. So, the cushion is not quite as good as I'd like, but the filler cushion tends not to be used all that often.
 
Status
Not open for further replies.
Top