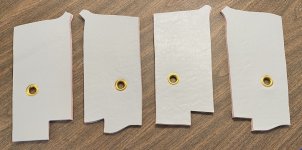
Re-upholstery Job on Cruisers Yacht 338 Bowrider

Status
Not open for further replies.

tpenfield

Moderator
Staff member
Joined
Jul 18, 2011
Messages
18,039
Here is the port sidewall cushion for the bow. I added another red racing stripe, so the boat should go even faster than with just one stripe :ROFLMAO:
.
IMG_2898 2.JPG
.
That wraps it up pretty much for the bases and backrests . . .
Next up is the helm seats which will be a whole lot of 'fun' 🤪
 

tpenfield

Moderator
Staff member
Joined
Jul 18, 2011
Messages
18,039
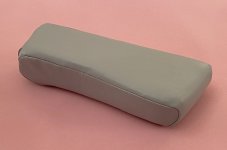
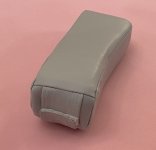
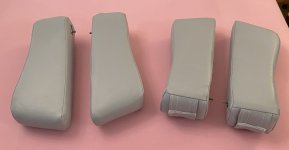
I am onto the helm seats. . . Up first is the 4 armrests ( 2 for each seat)

The armrests have a bunch of velcro on the back portion to provide access for installing the skin and fastening the hardware.
.
IMG_2899.JPG
.
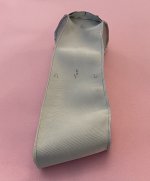
Here is the first armrest . . . I had to adjust the stitching as initially it was too loose.
.
IMG_2900.JPG
.
IMG_2901.JPG
.
IMG_2902.JPG
.
I may re-make this one, since it does not look as good as could be.
 

tpenfield

Moderator
Staff member
Joined
Jul 18, 2011
Messages
18,039
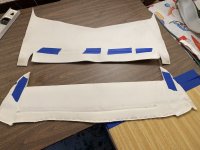
I've done some re-engineering of the vinyl panels for the armrest, in hopes of getting the more precise fit that is needed.
.
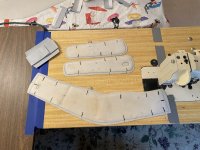
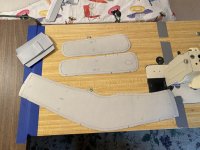
I thought to cut down the original vinyl skins that I'm using as a template to the outline of the original stitching, then trace that onto the new material patterns. Normally, I would (and have been) making the new material from the original skins with the seam allowance intact and add allowance as needed. That approach works fine for much of the seating, but not with the armrests.

Original material (templates) cut down to the seam lines. . .
.
IMG_2903.JPG
.
New material patterns with the seam lines from the original and 3/8" seam allowance.
.
IMG_2904.JPG
.
Hopefully this will get a more precise fit, equal to the original armrest skins. :unsure:
 

tpenfield

Moderator
Staff member
Joined
Jul 18, 2011
Messages
18,039
Another 'trick' that I've come up with and thought to share with those who also do upholstery . . .

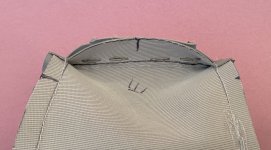
Some areas of a skin/cover are subject to a bit of stretching during installation, usually in the areas of wrap-around corners. Since the thread is PTFE (ie Teflon) is is prone to slipping at the ends of a seam, even with back-stitching. the seam can/does start to come apart.

As a solution, I have added 'staples-as-rivets' in some of the stress areas. The armrests need to be turned right-side out after sewing and that puts a bit of stress on the velco flaps, as does the actual fitting of the skin to the armrest itself.

I placed 4 SS staples and closed them up on the back-side to keep the stress from tearing out the seams during handling.
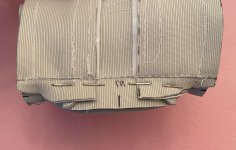
IMG_2905.JPG
.
IMG_2906.JPG
.
IMG_2907.JPG
.
This skin is for the captain's helm seat (identical), which is still in the boat, and may be an afternoon project to remove.
 

tpenfield

Moderator
Staff member
Joined
Jul 18, 2011
Messages
18,039
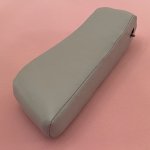
The armrests are done . . . :D

Here is a picture . . . after doing 3 of them, I figured out how to get the covers, which are skin tight, on effectively. Some steam and some silicone spray. Slides right on. (y)
.
IMG_2917.JPG
.

i decided that the first one I made is OK . . . not worth re-making.

Onto the next part of the helm seats . . . Whatever part that is going to be :unsure:
 

tpenfield

Moderator
Staff member
Joined
Jul 18, 2011
Messages
18,039
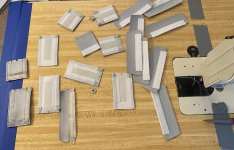
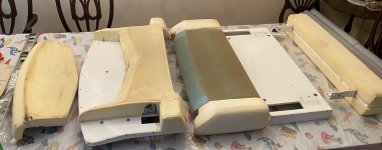
here are the major pieces to the helm seat . . .
.
IMG_2923.JPG
.
It took a while to get everything apart and remove the 1.5 million staples 🤪

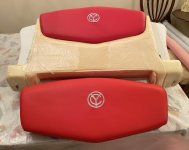
There are 2 of these seats. So, I'll be seeing and doing double for a while. I already did the armrests as per the prior post. Now moving onto the piece on the left in the picture, which will be RED and have the embroidered CY logo.

These helm seats have something for everybody . . .

Boxed covers w/ velcro closures (armrests and base flip-up)
Top-Stitching
French Seams
Tack Strips
Fasteners galore
Mega staples

I am hopeful to have both seats re-made by early April. Probably will do the actual installation in the boat early May.
 

Reserector_

Chief Petty Officer" & 2021 Splash of the Year Win
Joined
Oct 15, 2019
Messages
607
Quite a challenge, there. Not for the faint of heart.
 

tpenfield

Moderator
Staff member
Joined
Jul 18, 2011
Messages
18,039
Here is the day's work. The red inset pieces are done.
.
IMG_2924.JPG
.
These are the last of the red pieces. They went together fairly easy. I think I'm getting better at dealing with the french seams.

The helm seats have to go together in a certain sequence, so some of the pieces get partially done awaiting for the next piece in order to be secured in place. The upper back portion of these cushions are loose, waiting to be fastened to the backrest . . . AFTER the main backrest cushion is installed.

Next up is the main portion of the backrest that has the diamond quilt.

The Admiral has been assigned the task of paint removal on the aluminum frames for these 2 seats. Much of the paint has flaked off (making a mess). So, the game plan is to remove the old paint and sand the frame. Then re-paint with etching primer and a topcoat. The original frame painting was white, but I might go with a silver instead.
 

tpenfield

Moderator
Staff member
Joined
Jul 18, 2011
Messages
18,039
It was my day to wake up the rooster :LOL: , so I've already started to work on the helm seat cover.

I noticed that the original skin had a seam right where the vinyl would start to tuck under/around the base of the foam. The panel is going to be the diamond pleat and the other backrests with the pleating had the pleating portion wrap under the cushion base a couple of inches. Sooo, in order to get a consistent look among the seats, I altered the original pattern a bit, extending the pleated section.

IMG_2925.JPG
.
Here is the pleated panel with its new pattern. Hopefully it all works out. :unsure:
 

Scott Danforth

Grumpy Vintage Moderator still playing with boats
Staff member
Joined
Jul 23, 2011
Messages
49,537
If it doesnt work out, repattern until it does
 

tpenfield

Moderator
Staff member
Joined
Jul 18, 2011
Messages
18,039
These brass grommets are to provide access to a buried fastener that hold the back of the seat on the backrest frame.
.
 

tpenfield

Moderator
Staff member
Joined
Jul 18, 2011
Messages
18,039
IMG_2927.JPG
.
The original ones were a bit smaller, and 'finding' the screw amongst the foam cushioning was a bit tricky. These bigger grommets might make it easier. :unsure:

The Admiral spent this morning cleaning the interior of the boat in preparation of re-installing the seats and sidewall trim. Also, I'm having her remove all the paint from the helm seat frames (aluminum) as it was flaking off like Maple leaves in the Fall. Hopefully, with some finish sanding, etching primer, and a top-coat, they will be better than new. 😃
 

tpenfield

Moderator
Staff member
Joined
Jul 18, 2011
Messages
18,039
The Admiral's handy work with cleaning the interior (which had a lot of dirt behind where the seats and trim were. Also the paint removal on the helm seat frames.
.
IMG_2936 2.JPG
.
IMG_2928.JPG
.
IMG_2931.JPG
.
IMG_2932.JPG
.
IMG_2933.JPG
.
IMG_2934 2.JPG
.
IMG_2935 2.JPG
.
So the interior is ready for seat installation once the weather warms up a bit.
 
Status
Not open for further replies.
Top