Random

gm280

Supreme Mariner
Joined
Jun 26, 2011
Messages
14,593
Yesterday I was installing a ball valve in our sprinkler system to allow me to turn off the water supply at the distribution manifold instead of at the water meter out in the front of the yard. It makes it a lot easier then running back and forth when a leak is detected. However, as usual my PVC pipe glue is rock solid as always. I only use a fitting or two worth of glue every year. but each time the previous year's full can of glue is solid. I've tried everything I can think of to make it last until at least half a can is used up. But that is never going to happen. Up-side down, tin fold under the screw on cap, suck the air out of a zip lock bag it is stored in taped up and even a combination of all the above, nothing seems to work.

Anybody has a cleaver way to store PVC type glues to get maybe two years out of them? Not so much the cost, but you have to travel to a Lowe's type store to buy a new can every time. And you CAN"T buy a smallish can. You have to buy what they want you to buy. A large enough can to do many many projects. What a waste.
 

oldrem

Commander
Joined
Nov 7, 2013
Messages
2,002
I can usually get mine to last 3-4 years. I always clean everything before recapping then tighten with a pipe wrench. You will definitely need that wrench to unscrew it next time.
 

redneck joe

Supreme Mariner
Joined
Mar 18, 2009
Messages
10,287
i freeze my 5200 for up to a few years.

on my PVC stuff I just always check before I go buy whatever for the current project. Mine seems to make it about a year. I buy the small cans so I'm not wasting a big can.
 

gm280

Supreme Mariner
Joined
Jun 26, 2011
Messages
14,593
Usually I have most all the fittings I need from buying parts over the years and an extra one here and there for backups or mistakes. And then thinking, Oh, I have a can of PVC glue so I don't have to go buy any. Well I do have a can of PVC glue, but solid as a rock. Not the cost that gets me, but that trip to the Lowe's type store for glue every time...

Don't know if you know this or not, but you can take apart old fittings with a heat gun. Point the heat gun into the fitting until it gets like rubber, and then take a needle nose pliers and twist the old part out. It comes out really easy and the part you removed it from can be used again it you want to. Works pretty well if you don't want to run to the store for a new part. However, if you got to go to the store for glue, get the new part. Most are really cheap and nice to glue up new parts together if you are already there.
 

redneck joe

Supreme Mariner
Joined
Mar 18, 2009
Messages
10,287
i hope he had his underwear on

yvfyIZ2.jpg
 

gm280

Supreme Mariner
Joined
Jun 26, 2011
Messages
14,593
skinniest is 21". Gonna make a nice desk

smZkWwF.jpg

Looks like a funny grown pine tree. Odd how it widens out and then back a few places. Nice slab for sure.

I am very lucky to own a few TRUE 2" x 4" by however long they are, heart pine studs from an old historic house that was being refurbished. Truly amazing how very hard they are. And like I stated, they actually are 2" by 4" in size, not the 1 1/2" by 3 1/2" studs used today.
 

redneck joe

Supreme Mariner
Joined
Mar 18, 2009
Messages
10,287
My neighbor has a barn full of oak true dimension lumber including six and eights. They wear out my planer blades rather fast. And for sanding 80 grit.

No resin on this, nothing to fill but his mom want me a table and she's thinking about it. I've not poured resin.
 

gm280

Supreme Mariner
Joined
Jun 26, 2011
Messages
14,593
Redneck joe, years ago I bought my DeWalt planer and an extra sets of knifes for it. And since I was planning a lot of rough cut wood at that time, I bought a wet slow speed sharpener. Not sure of the manufacturer of that sharpener off the top of my head right now, but it sharpens blades like you use in joiner and thickness planers amazingly sharp.

It has been a while since I've used that sharpener, but it drips water onto a slow turning grinding wheel to sharpen the blades. There is an adjustable angled section that you can micro adjust to set the precise angle to sharpen any blade. If you don't have a sharper, you may look into such a thing. You can keep the edges amazingly sharp and not have to buy blades all the time. Just a thought.
 

redneck joe

Supreme Mariner
Joined
Mar 18, 2009
Messages
10,287
thanks, but as little as I do the $18 for two sets of blades per year works. THe biggest thing is to clean all the 100 years of dirt and grime off first. I pressure wash it and since its so hard of a wood I don't worry about gouging anything I can't plane out.
 

southkogs

Moderator
Staff member
Joined
Jul 7, 2010
Messages
14,796
I've not poured resin.
I did some resin tables for family presents a couple years ago. It was tricky the way I did it, and turned out "okay." The piece you're using would work better, and I would probably follow the way I see most guys on YouTube do it.
 

redneck joe

Supreme Mariner
Joined
Mar 18, 2009
Messages
10,287
so if I have two separate boards , i just put a piece of ply underneath for the pour? What about long term stability - keep the ply or does the epoxy hold? I'm planning on a underneath frame of welded L bar stock, maybe 2". (then faced with cut offs of the live edge.
 

southkogs

Moderator
Staff member
Joined
Jul 7, 2010
Messages
14,796
so if I have two separate boards , i just put a piece of ply underneath for the pour? What about long term stability - keep the ply or does the epoxy hold? I'm planning on a underneath frame of welded L bar stock, maybe 2". (then faced with cut offs of the live edge.

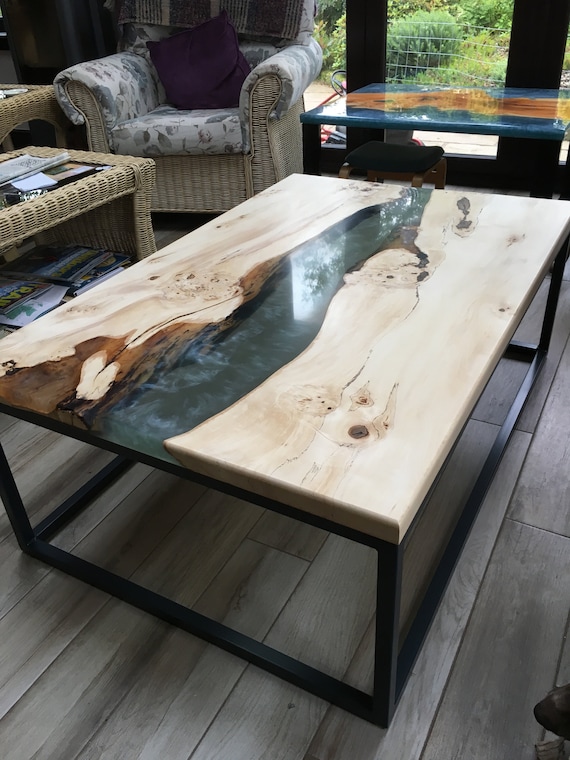
Most of what I've seen are like this:
il_570xN.1917601728_4imu.jpg


But I've seen a couple where the living edge was out:
coffee-table-proglas-1000-kevin.jpeg
 

southkogs

Moderator
Staff member
Joined
Jul 7, 2010
Messages
14,796
What I did was (and I wouldn't do it the same way again):

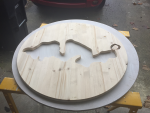
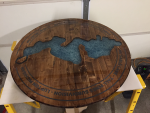
I cut the shape of the lake our cottage is on into a round table top: 01.png
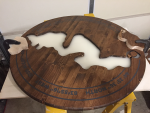
Then I stained the wood, added some vinyl (I should have painted it in there with inks, but I didn't have time). I set the table on some wax paper, and clamped it down to a piece of plywood. I did my resin pours in stages. Stage one, I mixed a smaller batch and added some "glow in the dark" powder. poured that and let it sit for 24 hours:
02.png Then I filled the cutout with some colored glass
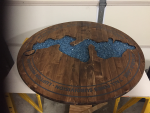
03.png After that sat for 24 hours, I did 3 more floods. The first filled in the glass. The second filled in the rest of the cutout. and the last covered the top and sides of the table.
04.png The problem I had was I didn't have a good way to build a form, and I was making these as outdoor deck type of tables for the family (I made three of them). The round table wanted to bow up on me, so my flood wasn't even at the edges of the cutout. And I had a booger of a time cleaning the edges of the table like I wanted them.

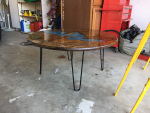
But: put some simple legs on, and they worked. They're sealed up enough to be used outdoors, and the glow powder kinda' works. It ain't great, but still looks interesting at night.
05.png
 

gm280

Supreme Mariner
Joined
Jun 26, 2011
Messages
14,593
Can't tell by the picture. but is the lake area filled even with the top of the table? I see a shadow and can't tell if it is filled even or not. But very interesting project for sure. Looks really nice...
 

southkogs

Moderator
Staff member
Joined
Jul 7, 2010
Messages
14,796
It was supposed to be even all across the top; but that's one of the "wouldn't do it that way again" issues. The wood used for the table top was pine, and I wasn't particular enough about the wood I got (another lesson learned). Something along the way caused the wood to bow. It's not perceivable until you're trying to get it PERFECTLY level.

When they pour the tables like in post #2357, you fill over the height of the wood and flood up and over the edges using your form to dam up the resin (like you would with concrete). I didn't make a good enough form, and I had routered edges on the table top so I couldn't hold the right flood.

In the end, certain portions of the shore line edge have a drop of maybe an eighth of an inch. I'm no master wood worker either, so that didn't help things. :rolleyes: But the family liked 'em. They're unique. I find different fun ways to make unique presents at least every other year. I've done custom board games, paintings and such with significance for the fam. It's fun.
 

redneck joe

Supreme Mariner
Joined
Mar 18, 2009
Messages
10,287
I like to make projects for the family too.none of the other brother in laws do anything like it so i get bunches of brownie points. Add in my canning skills, i'm a sho' in.

on your round maybe a smaller round of 1/2 to 3/4" ply underneath would have helped. Why the three pours after the glow in the dark? And i'll quit talking about this here and start another thread when i get started assembling the desk then it can progress to the table build.
 
Top