Project Sea Sprite

Cougar_15

Petty Officer 3rd Class
Joined
Aug 11, 2008
Messages
93
Re: Project Sea Sprite

OK guys, I need some help. I?ve been reading everything I can find about fiberglass and the more I read the more confused I?m getting. I?m trying to figure out what type and weight of fiberglass to use and what resin and how many layers and? I was toying with the idea of using Epoxy but I?m afraid that it will be too expensive at the end of the day so now I?m back to thinking Poly. After some more reading I realized that I still don't know enough to decied what would work best. Oh well, guess I'll read some more until I get it right.
 
Last edited:

Cougar_15

Petty Officer 3rd Class
Joined
Aug 11, 2008
Messages
93
Re: Project Sea Sprite

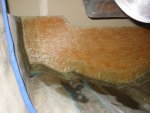
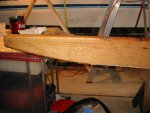
Wow, I can't believe it's been over 4 month since my last post... Well, things were slow for a while but their moving now. I've got most of the grinding done and have a new transom almost ready to be installed. I glued the 2 pieces of ply together last night (PL Premium) it just needs a little more shaping (fine tuning) and I'll be ready to get it in the boat.

attachment.php


Earlier this week I was able to pick-up my fiberglass and resin, going to be using Polyester resin, 1.5 oz mat and 1708 biax.

I'm planning to get the new transom in the boat this weekend (going to use PL Premium to attach it to the outer skin and for bedding) and get it all glassed next weekend.
 

Attachments

  • transom.jpg
    transom.jpg
    57 KB · Views: 0

redfury

Commander
Joined
Jul 16, 2006
Messages
2,655
Re: Project Sea Sprite

With the cost of epoxy, I went the poly route and PL premium to adhere the transom to my boat. So far so good. The poly resin is actually pretty easy to work with once you get past the little bit of a learning curve.

I worked with 500cc/ml batches of resin and a 3" chip brush for all the fiberglass work I've done so far. A notched fiberglass roller is a good idea to have also to work the bubbles out of both mat and the cloth.
 

Cougar_15

Petty Officer 3rd Class
Joined
Aug 11, 2008
Messages
93
Re: Project Sea Sprite

The new transom has been attached to the boat. I will need to do a little clean-up and then make some nice fillets then it's on to fiberglass. The plan is to get it glassed in next weekend. I'm going to do the first tab with 1.5 oz CSM then a tab with 1708, then 2 complete covers with 1708.

Yea, redfury I'm hoping I can get the hang of using poly pretty quickly. I am going to mix up a small batch to practice on some scrap wood before I start in to the transom for real...

I picked up a case (36) of 2" chip brushes on the cheep and I'm making a roller out of fender washers following instructions I found here on the forums. I also picked up a 4" foam roller and covers to try on the large areas. I am going to try using a wet out table for the tabs but will wet out the complete covers in place.
 

Cougar_15

Petty Officer 3rd Class
Joined
Aug 11, 2008
Messages
93
Re: Project Sea Sprite

The transom is glassed. The fillets made using the PL Premium ended up being pretty rough so I smoothed them out with some resin thickened with Cabosil. While this was still wet, I layed in the first layer of CSM (2 inches wide).

First Layer:
attachment.php


The second layer was a 4" wide tab of CSM:
attachment.php


The third layer was a 7" wide tab of 1708:
attachment.php


The fourth layer was a complete cover of 1708:
attachment.php


The last layer was a second complete cover of 1708:
attachment.php


All in all I think it went pretty good (especially since this was my first go at fiberglassing...). I am now working on cutting the main stringer and hope to get it bedded this weekend....
 

Attachments

  • IMG_0329.jpg
    IMG_0329.jpg
    34.6 KB · Views: 0
  • IMG_0332.jpg
    IMG_0332.jpg
    38.5 KB · Views: 0
  • IMG_0335.jpg
    IMG_0335.jpg
    38.4 KB · Views: 0
  • IMG_0345.jpg
    IMG_0345.jpg
    36.7 KB · Views: 0
  • IMG_0352.jpg
    IMG_0352.jpg
    38 KB · Views: 0

Cougar_15

Petty Officer 3rd Class
Joined
Aug 11, 2008
Messages
93
Re: Project Sea Sprite

Don't know if anyone is still following but I made some good progress over the past weekend. First I pre-glassed and capped the main stringer with 1.5oz CSM

attachment.php


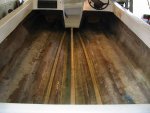
I then bedded it in the hull with PL Premium. When that cured I used some homemade peanut butter to create the fillets then tabbed with a 4" layer of 1.5oz CSM, then a second 6" tab of 1708, then a complete cover with 25" wide 1708. Next came the side stringers. They were also bedded with PL and filleted with peanut butter, then a 5 1/2" cover of CSM and an 8" cover of 1708.

attachment.php


One of the tips I read here on the forum that was very useful was to apply the first tab while the peanut butter is still wet. It is much easier to get the tab to lay down nice that way. I also took the advice to use a wet out table. I pre-wet all of the glass before laying it down, worked great. When I was doing the stringers I didn't want to have to climb in and out for every piece so I assembled a make shift wet out table right on the transom.

attachment.php


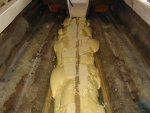
Once the stringers had cured I poured in the foam. I used 1 16lb kit of 2lb foam from US Composites. It ended up being about twice the amount that was there originally.

attachment.php


I purposely ran it up to the top of the stringer so it would provide a little extra support for the deck too.

Once all this was in the hull felt nice and solid. The last thing I did was to pre-glass and bed the rear bulkhead.

attachment.php


Originally this boat did not have any bulkheads but I decided to add one for two reasons; the first was to give some added support to the deck and the second was to stop bilge water from being able to move forward in the hull. I am planning on installing an automatic bilge pump and with the bulkhead in place the pump will kick in much sooner that it would have with the entire hull open.

My next steps are to finish glassing in the bulkhead then paint the bilge area. Once that is done I'll move on to the deck.
 

Attachments

  • IMG_0371.jpg
    IMG_0371.jpg
    69.7 KB · Views: 1
  • IMG_0402.jpg
    IMG_0402.jpg
    70.2 KB · Views: 1
  • IMG_0414.jpg
    IMG_0414.jpg
    72.4 KB · Views: 1
  • IMG_0387.jpg
    IMG_0387.jpg
    46.5 KB · Views: 1
  • IMG_0411.jpg
    IMG_0411.jpg
    72.7 KB · Views: 1
Top