My Rotten Lady

Woodonglass

Supreme Mariner
Joined
Dec 29, 2009
Messages
25,927
I'd just use some Poly and a layer of .75oz CSM and some 6oz cloth. The cheap stuff from Lowe's or HD will be plenty good enuf.
 

kramerpage

Chief Petty Officer
Joined
Jul 26, 2010
Messages
447
I'd just use some Poly and a layer of .75oz CSM and some 6oz cloth. The cheap stuff from Lowe's or HD will be plenty good enuf.

Hi WOG. I have two packs of 3m stuff from auto zone that I've had for years. I don't know if it's 6 oz but I think it's what you are referring too. I'll check it out. I will do the build with 3/8 ply. Thanks I'm trying to get ready for a new years eve construction start. Thank you.
 

kramerpage

Chief Petty Officer
Joined
Jul 26, 2010
Messages
447
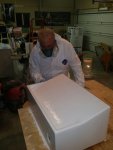
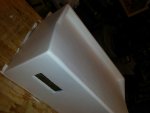
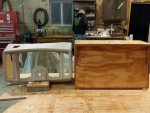
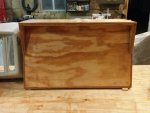
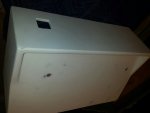
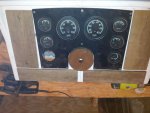
Well my progress has been slow at best due to a family member had a stroke, but I did manage to get a little done over the holiday.
I'm wondering what the plan for lay up would be... Do you cut panels of CSM and cloth for each side and do a side at a time? Then cover the edges last?
I did round everything with a router bit but forgot to take a picture.
I also purchased another purple gun from HF and want to drill it out as WOG suggests for the final gelcoat. Gotta love the 25% one day sale.
rps20160103_210026.jpg
rps20160103_210234.jpg
 
Last edited:

kramerpage

Chief Petty Officer
Joined
Jul 26, 2010
Messages
447
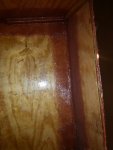
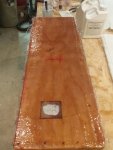
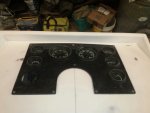
Here is where I'm at now. Gauge face has csm and cloth. I used 19 ounces of resin for just that.. Like 18 x 20 area. That's a lot.

rps20160104_141550.jpg


kramerpage

Chief Petty Officer
Joined
Jul 26, 2010
Messages
447
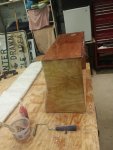
Got some more work on the steering console last night. I got the interior tabbing completed so it should be good and strong. Im kinda stuck on how to complete the rounded corners thou. I used 1708 on the interior since I have a boat load of it and its easier to work with. I used CSM and then 1708 on top. The outer fields are CSM and thin cloth.
rps20160105_101320.jpg
rps20160105_101229.jpgrps20160105_101419.jpg

This is my first fiberglass project in my lifetime. I hope to move up from being a "hack" so lessons learned can be applied to the stringer work in the spring. Thanks
 

Woodonglass

Supreme Mariner
Joined
Dec 29, 2009
Messages
25,927
Uhmm...Yeah, I'd say yer doin some "Resin Rich" lay ups!!!!!:eek: Here's some tips fer ya!!! Always Always Always pre coat the wood with resin and let it tack up first. Then lay down more resin and while it's wet lay your CSM or Fabric down on the wet resin and then use a wet roller to roll the CSM or Fabric into the resin. This will force the resin UP into the glass from the bottom up and from the top down. If you use a Brush and CSM DON"T brush it DAB it with the brush and KNOCK the resin into the mesh. Keep doing this till the glass goes Clear!!! With resin, Less is more!!! It takes a lot less than you think. Always work from the Middle out to the edges. This will help alleviate air bubbles. Don't over work it. Once the glass goes clear it has enuf resin and enuf rolling/dabbing for the first coat. Let it tack up. Check for air bubbles and then add the next coat of resin and glass. For edges, tear/rip/shred it at the edge and make it fuzzy. It will wrap around the edges much easier that way. Get a single rose flower vase to hold your bubble buster roller in. Fill it with acetone. That way it won't ever set up on ya and get ruined. Either that or a cookie sheet with acetone in it to constantly roll it in. It also helps to roll the edges right when the poly starts to kick and get a bit tacky. If it's to wet it just keeps wanting to lift and bubble when it gets tacky and sticky it'll stay stuck down better. It's a timing thing.;)
 

kramerpage

Chief Petty Officer
Joined
Jul 26, 2010
Messages
447
Hi WOG
I finished all the fields tonight. I have the edges left to do as you instructed. I've been applying the resin from the top only on the 1.5 csm. Use squeegee to spread and move around. Then the metal roller and finally apply the cloth on the wet mat and roll it out with the roller. Geee Whizz. I'm a hack. Lol
I was thinking more was better.... so do I need to do a second coat as you suggest above? I'm gonna gelcoat it. Also is there a concensus on how this resin rich layup will perform? Like cracking and what not... thanks such for your help.
Oh one more thing. Are there specific methods for cutting out the gauge cluster and switch panels. Like use tape on cut line? I planned on drilling a 5/16 drill bit and then cut out with a 20 tooth scroll blade on a jig saw.
 
Last edited:

kramerpage

Chief Petty Officer
Joined
Jul 26, 2010
Messages
447
Hello Americans...Stand by for News...
Well the vinyl and piping finally showed up at my door. I took it and the pieces to be covered and the old skins to the trim shop. There labor rate is $65 an hour. I told them to just make the skins and Ill cover them and install piping. I asked them if they had marine grade bonded poly thread and they laughed at me. I was just making sure they did since 98 % of their work is auto trim. I had my seats recovered there in 1978 on my Dodge Cornet RT. Boy that place brought back memories. The son has taken over business.

The marina started on the outdrive work replacing the u-joints and yoke seal, shift seal and waterpump. Then I have to pick it up for paint and decals.
They give a 20%discount on all work from Jan 1 to March 15 so why not do it now.

The engine will be placed on a stand and steam cleaned and receive a new oil and filter, alternator, starter, main engine crankshaft pulley, water pump pulley, power steering pulley and belt set. They said I had a complete tune up in 2012 so the wires plugs cap rotor carb filter and timing has all been done. I didn't use the boat in 2013 and only twice in 2014 due to my Fathers death in May of 2013. "Fish On" Pappy

Later...The Rest of the Story....
 

kramerpage

Chief Petty Officer
Joined
Jul 26, 2010
Messages
447
I talked to the third generation owner of Insta Trim Company which used to be called Boat Leveler Company today on the phone. I was in search of a rocker switch plate trim cover since mine was cracked and faded. He had them for 16.00 but insisted he send it out at no charge since I told him I have had his product on 5 boats in my lifetime. He also sent out a pint of new bio oil for the new installation. I was truly amazed and appreciative of his kind gesture.
12610_1.jpg

13001.jpg
 

kramerpage

Chief Petty Officer
Joined
Jul 26, 2010
Messages
447
Now that the steering console is wrapped in fiberglass mat and cloth how do I smooth and fill all the lows and tapers? Can I skim coat with a filler like Bondo then sand and apply gel coat?
 

Woodonglass

Supreme Mariner
Joined
Dec 29, 2009
Messages
25,927
Resin rich layups are actually weaker than ones that are not. They do tend to crack easier. The more glass work you do the better you'll get. You can always add more resin, but it's hard to remove it. If you'll start to always wet out the substrate first you'll make great progress in your work. I make my own fairing compound using glass bubbles and a bit of cabosil. Prolly a ratio of something like 1 part resin, 1.5 parts glass bubbles .25 parts Cabosil. I use about a .75% to 1% hardener ratio which gives me plenty of working time. I like to keep it the consistency of Mayonaise so it spreads and fills easily. It'll sand like a dream.
 

kramerpage

Chief Petty Officer
Joined
Jul 26, 2010
Messages
447
Hi WOG
Ill have to look into the glass bubbles since I don't have any and my local West Marine is closed for the ENTIRE month....Didn't even bother to put a sign on the door but its on their phone recording.

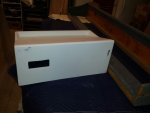
So I did some sanding and ended up with a non perfect substrate and decided I was obsessing over this project so I decided to wash her down with acetone twice using painters cotton towels folded into fourths changing the surface area very frequently.
Coat one
I then brushed on no wax gel coat. I found it very hard to work with. It doesn't level at all. So I brushed it up and down then side to side. By then it started dragging so I had to leave it be. So the brush marks stand high like peaks of the Andes. Let it dry for 24 hours.
Coat Two
I rolled on no wax with a premium SW 4 inch foam. Gel coat applied much better with good coverage. Again. The gel coat can only withstand a few passes before it starts to pull. It did not level out either. So the brush marks were only reduced by 40% from the first coat.

My plans for the third coat (tomorrow) is to again roll it with foam roller using waxed gel coat. Lord knows what that will look like...LOL I do know this...It looks a hell of a lot better than yellow UV damaged cracked plastic. But its a lot of time and money to build this console.

I may sand out coat 3 and install a coat 4 if the brush strokes don't go away.

Heating the garage is part of that large expense. The working temp was been between 74.5 and 76.5 I am mixing gel coat at 1.35 % Here are some pics...

Coat ONE
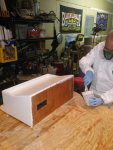
rps20160111_225840.jpg

rps20160111_225915.jpg

Coat TWO

rps20160111_230005.jpg
 

kramerpage

Chief Petty Officer
Joined
Jul 26, 2010
Messages
447
Coat THREE has been applied with wax. The brush strokes are still visible. I think now I'm going to do a light 220, 400 , 600, 800, 1000 wet sand with soap and water to remove the peaks but still leave it that stippled look which I actually like. Wax it and call it complete. Ill have it done by the end of the week.
 

Woodonglass

Supreme Mariner
Joined
Dec 29, 2009
Messages
25,927
GelCoat ALWAYS leaves the brush marks, roller stipples and a lot of orange peel when sprayed. That's why to need to put on a LOT of coats. It needs to be about as thick as a penney or a nickel. that way you can sand off about Half of it to get it down to a smooth highly polished surface and still have a thick enuf surface to be durable. I'd recommend you start sanding what you have once it's cured and then see how it goes. If you can get it down to a smooth lustre finish without sanding thru the surface then OK if not wipe it down with acetone and put down 2-3 more coats. You can thin the final coat with about 10% acetone to get it to flow a bit better but don't get to carried away. Also on the final coat use a bit less hardener to give it a bit more Kick Time This will also allow it more time to flow out and settle out the brush/roller marks. Keep after it...You'll make it look NEW with a bit more work!!!:D;):rockon:
 

kramerpage

Chief Petty Officer
Joined
Jul 26, 2010
Messages
447
Well it was thick as a dime..lol So I took your advice and sanded it sown with 220 grit. Im waiting on a new shipment from US Composites so Im at a stand still. My desired finish is not a smooth finish but rather a knocked down stipple look as the original one was. I achieved the look I desired when I began the sanding process but those brush strokes were in the background.

So my question is can I laminate several coats one after the other? I did them one at a time last time with 24 hours in between coats. So that's a long process. Seems like you cant laminate cause the roller pulls on the previous coat. Here are some pics of the console smooth as can be.

rps20160114_094025.jpg

rps20160114_094057.jpg
 

kramerpage

Chief Petty Officer
Joined
Jul 26, 2010
Messages
447
No Title

I called US Composites and they state 2 hours between coats when applied with their roller cover. He suggested a styrene thinner at 7 % .

So I drove to the marina where my engine and outdrive is. I dropped of all the parts I want them to install on the motor. New starter alternator pulleys filter oil aux heater fittings.
They had to replace the Yoke shaft due to wear on the seal race and installed new yoke seal and U joints.

My plan was to pick up the drive for painting which they had split in half for ease of painting. The service tech, glass repair man and service manager ganged up on me saying not to paint it. I told them I have a plan and explained the tractor paint and harder. They stated they have tried everything to paint drive with little success.
So I heard their warning and left town without the drive.

So now I'm just puttering around waiting on gel coat to arrive. Lol Geee Whiz
I'm down to refinishing the magazine rack for the head. Now that's puttering. Lol
 

Attachments

  • photo236637.jpg
    photo236637.jpg
    107.7 KB · Views: 0

Woodonglass

Supreme Mariner
Joined
Dec 29, 2009
Messages
25,927
Well, All I can tell ya is...My OB with the TP paint and Hardener is Holding up Just fine!!!
As Long as the Gelcoat doesn't have wax in it, you can put down another layer just as soon as the previous one has tacked up enuf to allow the next one to roll out. If you thin the next coat a bit with acetone it'll flow a bit better an fill those brush marks and give you the stippled look you want.
 

kramerpage

Chief Petty Officer
Joined
Jul 26, 2010
Messages
447
Well you know how opinions go... I guess I was intimidated. There intentions were good. They are really a group of great guys. I've painted a drive with Rustoleum spray and it lasted several years. I got it... Well I got bored and drove out to work on the console.

My brother talked me into placing Teak Wood trim pieces on it to make it POP. LOL I don't care for the teak look.
The right and left pieces are for the rocker switches and the bottom strips are for 12v accessory plugs, audio jacks
and whatever else I may add.
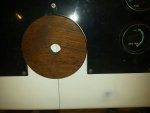
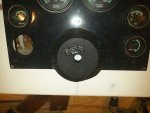
Only the round steering bezel has been finished.

PLEASE let me now which look you guys like so I can decide. I'm leaning towards NO Teak at this point. The boat does have a lot of visual Teak on it.

post_image1.jpg

rps20160117_114719.jpg


rps20160117_115145.jpg

rps20160117_115051.jpg

rps20160117_114850.jpg

rps20160117_114804.jpg
 

Woodonglass

Supreme Mariner
Joined
Dec 29, 2009
Messages
25,927
I'm a sucker for wood but...It can be a PITA on a Boat. Maintenance and upkeep!!!! I like both looks so not much help from me!!!
 
Top