my new old 1988 ss20v

ab59

Ensign
Joined
May 10, 2017
Messages
979
Ok, i kinda gave in to replacing the transom a few days ago . i guess the dark area around where the transom plates are bolted in is showing a problem , although it seems to be alright it is an indicator of worse things under the plates.
i should have listened to you in the first place and replaced it the first time around but it just looked so dang solid i would never have believed it to be rotten at the core.
i'm certainly too far in to turn back now so it's full speed ahead and damn the torpedoes .:)
 

Watermann

Starmada Splash of the Year 2014
Joined
Jan 12, 2013
Messages
13,787
Quite the job alright, been there and done it... not fun.
 

ab59

Ensign
Joined
May 10, 2017
Messages
979
Man, what a day. i would have a few bones to pick with Starcraft after seeing the way the transom is screwed down. I had to take a 15" crescent wrench and peel the tops of the gunnels back to e able to let the transom pass by and there were two screws boxed inside the gunnels that had to come out as well with no access other than the lip that i peeled back. i wound up taking my oscillating plunge cutter and cutting the heads off to get them out. if they had turned the brackets to the outside it would have been no problem .
Everything is out except there are two more 1/4" bolts in the bottom of the transom that are below the deckline and i can't get through to the back side to backup the nut without cutting access holes in the new deck that i just put in.
bummer but that is what i am going to do in the morning.
The transom itself is loose . i can flop it around and it is not stuck to the aluminum transom skin . I have a floor jack and a 2x4 in the keyhole with a few hundred lbs of load on it hoping that i can split the two remaining bolts out of the bottom of the transom but not holding my breath. One way or the other it will come out tomorrow morning .
 

ab59

Ensign
Joined
May 10, 2017
Messages
979
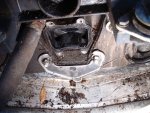
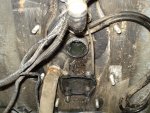
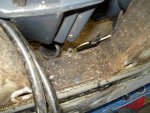
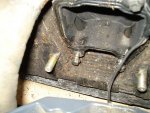
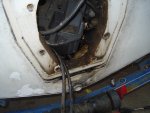
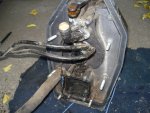
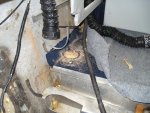
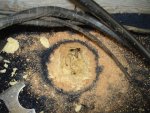
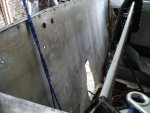
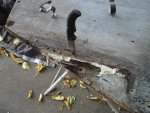
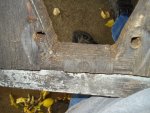
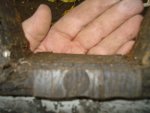
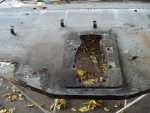
had to cut access holes in the deck to get the last 2 bolts out . transom out and no sign of a leak at the keyhole. the only real rot is at deck level beside the engine where my knife is stuck. Looks like 80 bucks a sheet for 3/4 " marine ply so guess ill be out 160 for the wood but this is such a major pain in the backside that i can't see doing this much work and putting something in there that won't hold up as long.


DSC02556.JPGDSC02555.JPGDSC02558.JPGDSC02561.JPG

The white looking carp is pour in foam residue .
 

ab59

Ensign
Joined
May 10, 2017
Messages
979
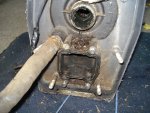
The bottom of the keyhole is cut at a slight angle , is this normal or was it just cut wrong to begin with ??? Tried to get a good picture of it but don't know if you can see it .-----

DSC02562.JPGDSC02563.JPGDSC02560.JPG
 

Watermann

Starmada Splash of the Year 2014
Joined
Jan 12, 2013
Messages
13,787
No idea bout the angle cut at the keyhole but I don't see why it would be needed. Put the transom assembly back in there and check out the fit.
 

ab59

Ensign
Joined
May 10, 2017
Messages
979
I will give that a try WM but it will have to wait a day or two because the first rains of the year are here so looks like the game is called because of rain . i sure would like to have been able to see where the leak was on this transom. i keep thinking that i may have the same leak after i install the new one , hope not.
 

MTboatguy

Fleet Admiral
Joined
Jul 8, 2010
Messages
8,988
They had that angle cut on a lot of them that I have seen and I don't believe it is needed, but have come to the conclusion it was done by a new "At the time" automation machine they may have been using. My buddy that owns the RV shop bought a new machine for his shop and when he first set it up for some of his cuts had the same situation happen, it took us a good two weeks to get the blades set correctly so it would not cut at an angle, it was a real pain in the backside to get it calibrated correctly.

But I have seen this on a lot of the old Starcrafts as well as other aluminum boats.
 

ab59

Ensign
Joined
May 10, 2017
Messages
979
Well i finally figured out where to get the money from to pay for the transom repair but I'm out a handful of gold rings that I had stashed from the days that I thought i might become a jeweler . If i had not bought them when gold was under 400 an ounce I would be upset
350 bucks just for gaskets and a shift cable was a little hard to deal with after the other 5 grand i put into this but it is too late to look back now.
Tomorrow I go to buy 2 sheets of 3/4" Marine grade ply (another 175.00 ) to begin making the transom. Bought the tight bond today to stick em together . I have been reading several posts about cutting the bolt holes and keyhole and i am a little concerned about the angle of the cut for my Cobra.
All I can think is just to take my jig saw and match it up to the angle of the old keyhole and start cutting. I guess i'll poke a piece of rebar through the old holes and use my angle finder to match the angle on those as well. I dunno .
I keep forgetting to find some solid rivets to put the stern cover back on as well so that's on the to do list as well.
Dang , was so close to splash time and did not pass go or collect 200 dollars. Sure spent 500 though .:eek:
 

ab59

Ensign
Joined
May 10, 2017
Messages
979
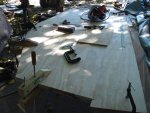
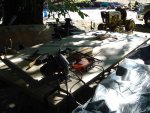
Screw it. Some wood , some saws, a traced pattern a little time.

wAAACH5BAEKAAAALAAAAAABAAEAAAICRAEAOw==


Tonight or tomorrow i will glue this together . I am going to wrap the bolts at the keyhole in saran wrap use them in place of a clamp in that area and they will keep everything lined up while the glue dries .
 

Watermann

Starmada Splash of the Year 2014
Joined
Jan 12, 2013
Messages
13,787
Hey the pics didn't come through on that post.

Yeah money and hard work is what it takes to have anything worth while. I had at least 6k into my Chief and I've got every penny back out of her.
 

ab59

Ensign
Joined
May 10, 2017
Messages
979
got to say that your chief is a beauty and done right. I don't know if the pictures are still screwed up but they show as usual on my end. I dunno. if they are still bad let me know and i'll ask the forum what the deal is.
 

Watermann

Starmada Splash of the Year 2014
Joined
Jan 12, 2013
Messages
13,787
Thanks, it was the most fun so far rebuilding the old Chief that was destined for the scrap yard.

I think you can see the pics because they're cached on your system. Still just 4 little empty boxes on my end.
 

ab59

Ensign
Joined
May 10, 2017
Messages
979
DSC02568.JPGDSC02569.JPGDSC02571.JPG been getting a lot of pictures like this on CL as well. Don't know what the problems is unless another windows 10 " update " has loaded another software conflict into my computer again.
 

Attachments

  • DSC02573.JPG
    DSC02573.JPG
    1.4 MB · Views: 2

ab59

Ensign
Joined
May 10, 2017
Messages
979
Looking ahead to the main seal replacement I'm a little concerned about the seal itself. The original seal looks like it is a one piece seal. the one that came in the transom seal kit is a rope type seal that I guess i will have to use gasket maker to seal the crack that will be left where the two ends meet . Does your Mercruiser have a rope gasket and if so how did you install it when you put you transom plates and gimbal back together ?
 

Watermann

Starmada Splash of the Year 2014
Joined
Jan 12, 2013
Messages
13,787
Mine was a one piece neoprene type material. I used my bellows adhesive to stick it into the groove. It could also be used to glue the 2 ends together and just make sure the seam is on top.
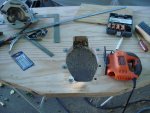
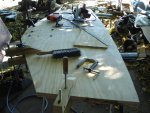
That's some really nice looking ply you got for the transom. :thumb:
 

ab59

Ensign
Joined
May 10, 2017
Messages
979
yep the ply is nice and solid but i keep thinking that there should be some golden threads running through it for 80 bucks a sheet .:joyous:. I hope that since the last transom made of Marine ply that was in it lasted 27 years that this will as well.
Did you torque your transom down ? I believe it was Kenny Nunez that said something about torquing to 12-14 ppf . Don't sound like much but it is Aluminum skinned after all. I think that i will tighten it up at least twice , maybe 4 times to be sure the wood has compacted over a couple of days and will not loosen up later.
Did you treat or coat the inside of the transom skin ?? I'm going to do a CLR wash job on it and then I wonder if i should coat it with something before the wood goes back in.
 

Watermann

Starmada Splash of the Year 2014
Joined
Jan 12, 2013
Messages
13,787
I filled any voids around the edges with JB water weld and sealed with 3 coats of Helmsman spar urethane, then oil based primer and 2 coats of tractor enamel paint after cutting and drilling all the through holes.
 
Top