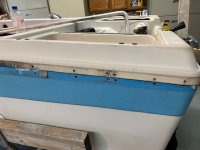
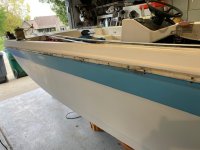
Multiple layers of fiberglass and laminating PE resin

cpo1

Seaman
Joined
Apr 24, 2010
Messages
54
When adding multiple layers of fiberglass with non-waxed resin, is it okay to add PVA to only the last layer, even though layers below may have started to cure prior to adding the PVA? I'm speaking about adding multiple (2-3) layers at the same time, working resin into each layer as I go. Finally, about how much PVA should be added. It is hard to tell how much PVA is being applied when sprayed. Thanks for your help.
 

Scott Danforth

Grumpy Vintage Moderator still playing with boats
Staff member
Joined
Jul 23, 2011
Messages
49,568
I normally try to do all my layup and then after gel, spray PVA over the area to get the last layer of gel to fully kick

Then again, in the Florida heat, sometimes the resin kicks fully in the bucket and melts the bucket
 

Woodonglass

Supreme Mariner
Joined
Dec 29, 2009
Messages
25,927
When adding multiple layers of fiberglass with non-waxed resin, is it okay to add PVA to only the last layer, even though layers below may have started to cure prior to adding the PVA? I'm speaking about adding multiple (2-3) layers at the same time, working resin into each layer as I go. Finally, about how much PVA should be added. It is hard to tell how much PVA is being applied when sprayed. Thanks for your help.
What area of the boat are you glassing? Normally PCs is not required for structural glass work. Normally used for gelcoat application
 

cpo1

Seaman
Joined
Apr 24, 2010
Messages
54
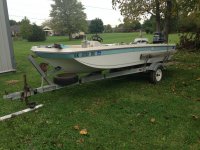
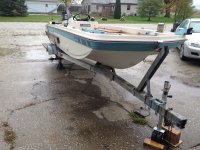
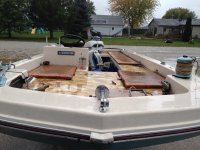
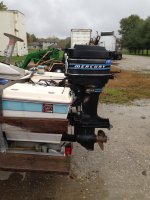
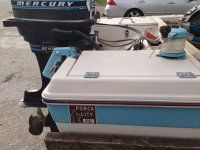
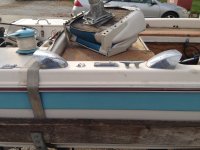
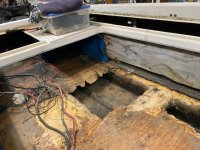
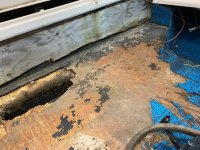
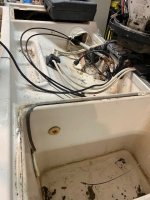
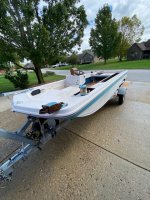
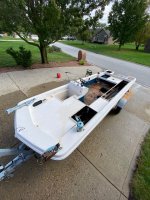
I have started my project (perhaps ###-backwards), by laminating new wood and in some cases reinforcing existing wood on the various deck lids, two live-well lids, three storage lids, and one long rod holder lid. All of this work, so far, will be covered with carpeting down the road. I will still have to spray gel coat on the inside of the lids, but I think I can manage that with a little practice. I have nearly all the tools and equipment needed for this work. I think I'll invest in a hand held band sander, and maybe a good gel gun, but otherwise, I think I'm ready, except for being old. I had some old resin and thought this would be a good place to use up what I have. My resin, from a well known boat resin supplier, did not stay tacky; hence my original question. The resin was clearly marked non-waxed. I also applied gel coat to parts of the lids, again trying to use old resin since I'm a couple of years late getting started with this project. Anyway, I'm almost ready to start tearing into the deck flooring and see what troubles lie ahead. My first question. It appears that I will need to remove the top cap to really see what the issues are under the deck and to check the transom. Hopefully, the transom is not rotted, but whatever. Once the motor if off, does it make sense to remove the top cap? The boat is a 1977 Chrysler Pro Bass Runner 16' with a 1972 Mercury Thunderbolt 80 HP outboard. My experience with resin has been from the prosthetic world for many years. But we vacuum bagged all of our work, so PVA spraying was not involved. I'm attaching photos. Any opinions? Thanks for your reply Woodonglass. Appreciated.
 

Attachments

  • Chrysler 1.jpg
    Chrysler 1.jpg
    2.9 MB · Views: 14
  • Chrysler 1-2.JPG
    Chrysler 1-2.JPG
    3.3 MB · Views: 14
  • Chrysler 2.JPG
    Chrysler 2.JPG
    2.4 MB · Views: 14
  • Chrysler 3.jpg
    Chrysler 3.jpg
    1.3 MB · Views: 13
  • Chrysler 4.jpg
    Chrysler 4.jpg
    2.2 MB · Views: 13
  • Chrysler 5.jpg
    Chrysler 5.jpg
    997 KB · Views: 12
  • Chrysler 6..jpg
    Chrysler 6..jpg
    2 MB · Views: 12
  • Chrysler 7.jpg
    Chrysler 7.jpg
    2 MB · Views: 12
  • Chrysler 8.jpg
    Chrysler 8.jpg
    1.8 MB · Views: 12
  • Chrysler 9.jpg
    Chrysler 9.jpg
    2 MB · Views: 12
  • Chrysler 10.JPG
    Chrysler 10.JPG
    2.1 MB · Views: 12
  • Chrysler 11.JPG
    Chrysler 11.JPG
    2.1 MB · Views: 12
  • Chrysler 12.jpg
    Chrysler 12.jpg
    127 KB · Views: 12
  • Chrysler 13.jpg
    Chrysler 13.jpg
    127.6 KB · Views: 12
  • Chrysler 14.jpg
    Chrysler 14.jpg
    137.3 KB · Views: 12
  • Chrysler 15.jpg
    Chrysler 15.jpg
    152.1 KB · Views: 12
  • Chrysler 16.jpg
    Chrysler 16.jpg
    76.1 KB · Views: 14

cpo1

Seaman
Joined
Apr 24, 2010
Messages
54
I normally try to do all my layup and then after gel, spray PVA over the area to get the last layer of gel to fully kick

Then again, in the Florida heat, sometimes the resin kicks fully in the bucket and melts the bucket
Thanks Scott. I think I'm ok now with the unwaxed resin. Why mine did not get tacky, I don't know. Maybe because it was old resin; 18-24 months old likely. Anyway, you can read my post below and thanks for your reply. I too am a grumpy old guy. Maybe that's why one of my favorite movies is Grumpy Old Men.
 

Lectro88

Petty Officer 1st Class
Joined
Oct 24, 2020
Messages
303
Your project will make a nice boat for Sure.
That boat was built about my 1st. grade year.
I'm Curious as to what you find.. when you get elbow deep.
Good or Bad, maybe some of both. Who knows...
Keep posting.
 

cpo1

Seaman
Joined
Apr 24, 2010
Messages
54
Your project will make a nice boat for Sure.
That boat was built about my 1st. grade year.
I'm Curious as to what you find.. when you get elbow deep.
Good or Bad, maybe some of both. Who knows...
Keep posting.
Lectro88, I'll continue to post as work progresses. With Indiana winter coming and my work is in the garage where my furnace is, I have to be very careful with dust (furnace off basically). But I'll be working both inside and out as weather permits. Grind and cut outside, scratch head inside. But I'll post as I'm able. Thanks for your reply.
 

froggy1150

Master Chief Petty Officer
Joined
Nov 3, 2017
Messages
843
When i started my project i was getting my resin from a boat shop across from where i worked. Super cheap because they were a vendor and made good money on us... they would pump me out 5 gal buckets from their drums so i am sure it was fresh and they did alot of stuff there. That resin would not cure tacky. I wound up with alot of extra wax....
 

Lectro88

Petty Officer 1st Class
Joined
Oct 24, 2020
Messages
303
Lectro88, I'll continue to post as work progresses. With Indiana winter coming and my work is in the garage where my furnace is, I have to be very careful with dust (furnace off basically). But I'll be working both inside and out as weather permits. Grind and cut outside, scratch head inside. But I'll post as I'm able. Thanks for your reply.
I have pondered clearing out the basement, but just have a hard time tempting that demon, for several reasons....
I know I would end up sanding indoors with a half attempt and vacuum, same, furnace in basement.
(I'm just going to sand this little area real quick.... Then it Grows.....)you all know.. fiberglass forever, everywhere..
So I just leave and keep covered outside. our winters are a little milder in NC.
Mine is a long project anyway.
 

cpo1

Seaman
Joined
Apr 24, 2010
Messages
54
I have pondered clearing out the basement, but just have a hard time tempting that demon, for several reasons....
I know I would end up sanding indoors with a half attempt and vacuum, same, furnace in basement.
(I'm just going to sand this little area real quick.... Then it Grows.....)you all know.. fiberglass forever, everywhere..
So I just leave and keep covered outside. our winters are a little milder in NC.
Mine is a long project anyway.
Years ago I was spray painting either in my unattached garage or outside (forgot) that was at least 50 feet from the house and one day I looked up at an upstairs window air conditioner. To my surprise, I saw yellow paint on the air conditioner filter. That taught me a lesson about airborne stuff. Anyway, as I grind (mainly sand and use an oscillating cutter/scraper/etc.) outdoors now, I am still amazed at how much dust collects on nearby equipment. I even shut my furnace/air off while I work outdoors because I know some of the dust is going to make its way into the garage furnace. So I can appreciate what you are saying; fiberglass everywhere.
 

cpo1

Seaman
Joined
Apr 24, 2010
Messages
54
When i started my project i was getting my resin from a boat shop across from where i worked. Super cheap because they were a vendor and made good money on us... they would pump me out 5 gal buckets from their drums so i am sure it was fresh and they did alot of stuff there. That resin would not cure tacky. I wound up with alot of extra wax....
Thanks Froggy. I purchased my resin from a well known boat resin supplier, but the resin was old (maybe 2 years, or so) and I thought that might be part of the issue. However, the container was clearly marked as unwaxed. Since I used this old resin for the under-carpet boat lids, etc., I figured it was not going to be a big issue since there is not much structural pressure involved beyond wave banging and vibration. That lid work is now pretty much completed and things seem fine at this point. I even used up some old waxed resin, knowing another layer was not going to be applied and that too seems fine. But I did sand everything prior to laying the glass.
 

cpo1

Seaman
Joined
Apr 24, 2010
Messages
54
I have started my project (perhaps ###-backwards), by laminating new wood and in some cases reinforcing existing wood on the various deck lids, two live-well lids, three storage lids, and one long rod holder lid. All of this work, so far, will be covered with carpeting down the road. I will still have to spray gel coat on the inside of the lids, but I think I can manage that with a little practice. I have nearly all the tools and equipment needed for this work. I think I'll invest in a hand held band sander, and maybe a good gel gun, but otherwise, I think I'm ready, except for being old. I had some old resin and thought this would be a good place to use up what I have. My resin, from a well known boat resin supplier, did not stay tacky; hence my original question. The resin was clearly marked non-waxed. I also applied gel coat to parts of the lids, again trying to use old resin since I'm a couple of years late getting started with this project. Anyway, I'm almost ready to start tearing into the deck flooring and see what troubles lie ahead. My first question. It appears that I will need to remove the top cap to really see what the issues are under the deck and to check the transom. Hopefully, the transom is not rotted, but whatever. Once the motor if off, does it make sense to remove the top cap? The boat is a 1977 Chrysler Pro Bass Runner 16' with a 1972 Mercury Thunderbolt 80 HP outboard. My experience with resin has been from the prosthetic world for many years. But we vacuum bagged all of our work, so PVA spraying was not involved. I'm attaching photos. Any opinions? Thanks for your reply Woodonglass. Appreciated.
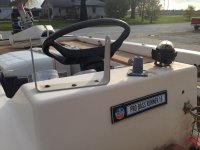
Work is progressing. All of the deck lids are now glassed and ready for carpet on one side and renewed gel on the other. Basically had to waterproof the old deck lids with new wood and some glass. Still need to touch-up some yet, but they are 98% done with glass at this point. Motor is removed and sitting at the boat motor repair facility - Merc 800 Thunderbolt - getting repaired. Picking the boat up today, minus the motor, and will start on the cap removal. I've been scratching my head about the cap removal and here's my idea at the moment. I'm planning to drill through the garage ceiling rafters and hang HD threaded eye bolts in the ceiling of the garage. I can also lay reinforcement 2x4 or 4x4's across the floor in the attic to spread the load out a bit more over multiple rafters. Doubt that will be necessary, but it is an option. I'm thinking 2 or 3 centerline ceiling eye bolts (rings), fore and aft, but might use 4 or 6 if necessary for better weight distribution for the cap. Once lifted, I can frame the top cap to keep it from warping, spreading, etc. With a block and tackle or pulley system, I think I can make this a one or two man job. I can also suspend the top cap inside the garage and still open the garage door, provided I keep the eye bolt hangers short of the opened door and the cap lower than the open door. I'll have about 12" of extra room after lifting the live wells, etc., high enough to clear the hull. Hopefully the fore-aft center of gravity is not too far forward (and interfere with the garage door) since the boat will be backed into the garage. But I guess I could hang a counterweight at the rear of the boat if necessary. The boat weighs 600 pounds dry without a motor. I'm guessing the top cap with live wells, steering box, etc., all still attached, the weight might be 250 pounds, or so. My other option is to take the top cap to an empty 10' x 30' storage building, but moving it seems like it would be more trouble than hanging it in the garage. Sound too crazy? Opinions will be greatly appreciated. Thanks. I'll attach more pictures soon.
 

cpo1

Seaman
Joined
Apr 24, 2010
Messages
54
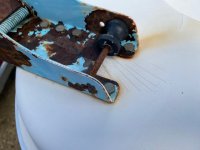
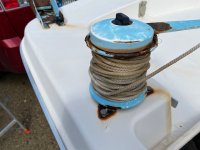
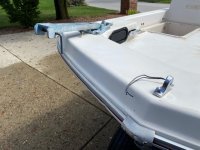
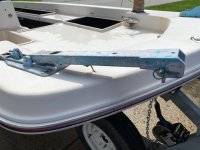
Found screw-in eye bolts that will hold 380 pounds, so 4 of those should work for the suspension of the top cap in the garage. Sure beats drilling through the attic floor joists. Pressure washed the boat today and it actually cleaned up much better than I expected. Pulled the rub rail and drilled 1/2 of the top cap rub rail screws in preparation for lifting the cap. Finish other half tomorrow and start on the lift project. I want to get the hull outdoors as soon as possible so I can get some of the nasty grinding (cutting) done to expose the problems lurking inside the hull. Won't know about the transom until I get access to the hull. I have the original anchor crank and bracket, as well as the original trolling motor. Haven't decided if I'll reuse these in keeping with the original stuff or replace with new. Kinda thinking about reusing them for the effect. My use of the boat is primarily for crappie fishing and I'm not too particular about set-ups. Just like to be out there and enjoy the outdoors. I also like to eat crappie. Top cap needs lots of stress crack and spider repair. The rub rail fiberglass also needs some attention. Here are a few more pictures. More to come.
 

Attachments

  • Boat 1.jpg
    Boat 1.jpg
    109.3 KB · Views: 4
  • Boat 2.jpg
    Boat 2.jpg
    97.2 KB · Views: 4
  • Anchor 1.jpg
    Anchor 1.jpg
    70.7 KB · Views: 4
  • Anchor 2.jpg
    Anchor 2.jpg
    72 KB · Views: 4
  • Troll 1.jpg
    Troll 1.jpg
    91.4 KB · Views: 4
  • Troll 2.jpg
    Troll 2.jpg
    87.8 KB · Views: 4

Lectro88

Petty Officer 1st Class
Joined
Oct 24, 2020
Messages
303
Sorry, I didn't see your post yesterday.
Agree, cap hanging in garage, rather than rental or moving it.
I have only pulled 2 caps, 1975 Pisces 15'. Was a piece o cake to get apart.
2 people handled it easily.
The 1969 Mako 19' cap was easily 400#'s or more.. Heavy! but it was Ocean boat. totally different.
I figure you will use wrachet straps or chain fall to lift.
So far as Eye lags or bolts, Remember 380# bolts x 4= total 1520 # You're better than plenty good..
Do you know if you have floatation foam in gunnels. If you do.. You may find you lift entire boat off trailer by the cap, if there if foam.
My mako was super tough to get apart, and transom was fused to cap "securely" to say the least. Took 3 neighbors and more time than I wish to admit, to get apart. And I used an excavator to lift cap.
Once you get the cap loose, if it's floppy or saggy/ing. You could slip 2x board under to help support.
You don't want it sagging bad or to give it a chance to buckle during lift.
Looking at your pic's.. It looks like cap should support itself fine at 2 points on each side. you should be able to tell once you start.
If it's over stressing the early sounds of crackling is a warning. you don't want to hear "verbal warnings" from fiberglass. I always heard the light "clicking" working things loose, when you get aggressive or sloppy.. the warnings get louder then "snap" Thanks to my gung ho help.
Most times glass is forgiving and will more than support itself. every boat is different. age, care, brand. build method, etc.
You may need 3 points or more of lift on steering side.
I had trouble with windows swagging cap at pass through, it was leverage thing, saying this to pay attention to steering area.
Not sure how much of this you have done, Just giving some basics in case you needed beforehand. and a few things to look out for.
If you don't have foam, You're Home Free,. maybe. depends on transom..
Enjoy.
 
Last edited:

cpo1

Seaman
Joined
Apr 24, 2010
Messages
54
Sorry, I didn't see your post yesterday.
Agree, cap hanging in garage, rather than rental or moving it.
I have only pulled 2 caps, 1975 Pisces 15'. Was a piece o cake to get apart.
2 people handled it easily.
The 1969 Mako 19' cap was easily 400#'s or more.. Heavy! but it was Ocean boat. totally different.
I figure you will use wrachet straps or chain fall to lift.
So far as Eye lags or bolts, Remember 380# bolts x 4= total 1520 # You're better than plenty good..
Do you know if you have floatation foam in gunnels. If you do.. You may find you lift entire boat off trailer by the cap, if there if foam.
My mako was super tough to get apart, and transom was fused to cap "securely" to say the least. Took 3 neighbors and more time than I wish to admit, to get apart. And I used an excavator to lift cap.
Once you get the cap loose, if it's floppy or saggy/ing. You could slip 2x board under to help support.
You don't want it sagging bad or to give it a chance to buckle during lift.
Looking at your pic's.. It looks like cap should support itself fine at 2 points on each side. you should be able to tell once you start.
If it's over stressing the early sounds of crackling is a warning. you don't want to hear "verbal warnings" from fiberglass. I always heard the light "clicking" working things loose, when you get aggressive or sloppy.. the warnings get louder then "snap" Thanks to my gung ho help.
Most times glass is forgiving and will more than support itself. every boat is different. age, care, brand. build method, etc.
You may need 3 points or more of lift on steering side.
I had trouble with windows swagging cap at pass through, it was leverage thing, saying this to pay attention to steering area.
Not sure how much of this you have done, Just giving some basics in case you needed beforehand. and a few things to look out for.
If you don't have foam, You're Home Free,. maybe. depends on transom..
Enjoy.
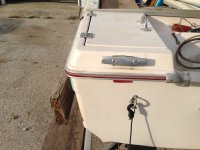
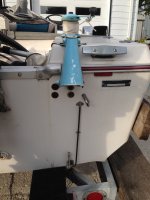
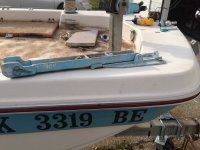
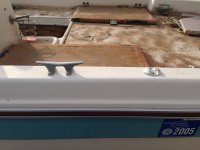
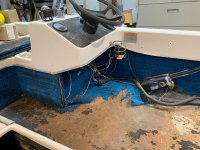
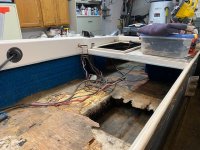
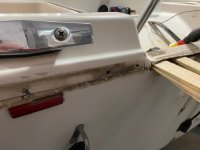
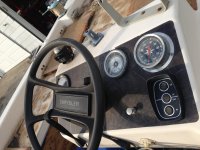
Thanks for your help. This is my first go at this. I really appreciate your comments. I worked like the devil trying to get the steering supports and carpet loose in that area. Problem was nuts on the back of bolts with virtually no access. Ended up cutting them all loose. Was going to add new wood anyway, so no problem. I now have all the rivets out of the rub rail and have started to lift the cap. Each corner had been glued and the rear port corner is stuck in one small place. I used some heat on it today, but no luck. Hopefully, I don't have to cut it loose and re-glass that area. I added my first ceiling hook, attached a small block and tackle, plus some hydraulic jack pressure underneath, but still no luck in one small area. The rear starboard corner came loose after some mild and over time persuasion with a hydraulic jack. As you can see from the hole displacements in the pictures, the sides are free and both rear corners are free with exception of the one spot. Tomorrow afternoon I'm going to try to crawl (tight) back to the transom and see if I can find some adhesive to remove. Thanks again for your help and, as always, comments are greatly appreciated.
 

Attachments

  • Cap 1.jpg
    Cap 1.jpg
    63.2 KB · Views: 2
  • Cap 2.jpg
    Cap 2.jpg
    71.6 KB · Views: 2
  • Cap 3.jpg
    Cap 3.jpg
    84.3 KB · Views: 2

Lectro88

Petty Officer 1st Class
Joined
Oct 24, 2020
Messages
303
I didn't find that heat did anything for me, as it was all polyester resin doing most of the holding. and yes... My mako cap seemed it was sealed or polyestered in places too along the seam , more in some places than others.
Back to heat, this is probably no help, the foam where heat would have "maybe" helped.... I couldn't get access to if that makes sense.
The mako was so tough to get loose, I ended up cutting the boarder of the floor out 1"- 1-1/2"off gunnel and removing the entire floor and the raised casting area, Leaving an "L" lip to tie the new floor back into. So this just left the cap/gunnel in place.
Then I bought several diston type saws,(old wood hand saws) different lengths and long sawzall blades, and worked, cut, jabbed from bottom up to break adhesion in the corners, up the sides and everywhere I could work a short blade in then follow with a longer saw and so on... (all knuckles raw and missing outer covering)
I ended up having to cut the transom part of the cap out as it was just inaccessible. So the cap ended up being a open "U" or "V" if you looked at it from a top view down, at the transom.
It was not a deal breaker for me as my transom was not only shot/rotten and indented but I hand planned to raise transom from 20" to a 25" high/tall. So it was a total rebuild and Modification anyway.
Even as rotten and mushy as it was, the cap was still locked into and holding to the rotted transom.. It still amazes me how it well it held. and it was gone, there was no structure there to speak of. but it was locked in enough to keep the cap from coming loose.
And yes an oscillating or vibratory cutter is a must in boat building/demo.
 
Top