Monmouth's 1979 Starcraft Kingfisher Rebuild

MD28

Petty Officer 1st Class
Joined
Sep 1, 2016
Messages
222
Looks good. Mechanic bills are never fun to pay, but at least you can know it was done right. Have fun in Europe.
 

Monmouth00

Petty Officer 2nd Class
Joined
Nov 26, 2017
Messages
198
Here's a really dumb question for you guys....

I bought new seat base swivels, and I can't seem to remember how the ones I had attached to the bench top. They were through-bolted, but I can't seem to find the hardware.

Anyone have any suggestions of what I should use?

The benchtops are 3/4 plywood, plus a layer of glue and carpet.

Suggestions are appreciated.
 

MD28

Petty Officer 1st Class
Joined
Sep 1, 2016
Messages
222
Most have a backer under the deck to make it 11/2” thick with t nuts and ss machine screws. I don’t know what the circumstances are with the bench though. The backer is to make things a little more beefy as the pedestal post puts a lot of torque on the deck when you are sitting on it and hitting waves.
 

Monmouth00

Petty Officer 2nd Class
Joined
Nov 26, 2017
Messages
198
Most have a backer under the deck to make it 11/2” thick with t nuts and ss machine screws. I don’t know what the circumstances are with the bench though. The backer is to make things a little more beefy as the pedestal post puts a lot of torque on the deck when you are sitting on it and hitting waves.

So it's not a pedestal, thankfully. It's just an Attwood swivel.

And, because my local lakes are small, waves are not a concern. We're limited to 9.9Hp, so it's a slow crawl between fishing spots.

The benches are 3/4" thick, so i was thinking 1 1/4" threaded stainless bolts. I just don't know if they need to be hex-head, or what diameter they should be.

Any suggestions?

Thanks!
 

Attachments

  • photo287336.jpg
    photo287336.jpg
    21.7 KB · Views: 1

Watermann

Starmada Splash of the Year 2014
Joined
Jan 12, 2013
Messages
13,754
1/4" dia machine screws should be fine and head type depends on how you install the swivels. Attach the swivel to the base first you could use phillips head and then hex heads to attach the seats.
 

BWR1953

Admiral
Joined
Jan 23, 2009
Messages
6,052
So it's not a pedestal, thankfully. It's just an Attwood swivel.

And, because my local lakes are small, waves are not a concern. We're limited to 9.9Hp, so it's a slow crawl between fishing spots.

The benches are 3/4" thick, so i was thinking 1 1/4" threaded stainless bolts. I just don't know if they need to be hex-head, or what diameter they should be.

Any suggestions?

Thanks!
I used hex heads in mine. Barely cleared each other. You might be able to use screw heads for the bolts going down into the bench. That would give a bit more clearance I think. But the bolts up into the seat would have to be hex heads.

Oh sure, WM posted while I was typing. But I was distracted by a squirrel outside! :lol: :rolleyes:
 

Monmouth00

Petty Officer 2nd Class
Joined
Nov 26, 2017
Messages
198
Very excited to be back in the United States after two weeks in Europe, but even more excited that I can get working on the boat again soon.

I was able to drop it off at the metal guy before I left. He took his sweet time with it, and despite promising he would have it done before I returned, it wasn't done. The good news is that it's minor button-up stuff.

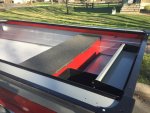
There will be a new rear bench that spans the width of the beam. The front of the console will be skinned in AL now, as opposed to 3/4" plywood. I'm closing off the area under the bow cap, and putting a door and some vents in so I can stow my anchor when not in use.

On the advice of those wiser than me, I'm reinforcing the new solid douglas fir transom wood with a piece of AL both inside and out - just under the O/B. For good measure, I'm adding a small plate where my TM hangs, just to prevent putting depressions in the wood.

All that new AL needs to get painted before I rivet and screw it in. While that's happening, I get to fit all the accessories.

I've got LED strip lighting for under the rails. I've also got these really cool directional LED lights that each have an on/off switch on them. I figure I can use them at night to tie lines without turning on all the lights in the boat. New LED bow and stern lights too.

In the dash, I'm putting a new 6-gang switch/fuse panel, voltage meter (with a toggle for checking each battery), a 12 volt receptacle, and a USB receptacle. I'll also have a manual switch for the automatic bilge I'm installing.

I have to find space for the fuel/water separator too.

Last, the brand new battery switch goes in the back - it's one of the fancy Blue Sea Systems ones that's made to run a starting and bank battery system.


Look for updates soon!
 

Watermann

Starmada Splash of the Year 2014
Joined
Jan 12, 2013
Messages
13,754
Glad to see you had safe travels. I remember how nice it was to have parts on stand by waiting to get put in, shopping parts is half the fun of the resto process.
 

66Holiday924

Chief Petty Officer
Joined
Aug 21, 2017
Messages
526
shopping parts is half the fun of the resto process.

Yeah, regardless what you tell the admiral, you know we all enjoy every last dime being spent. Sorry if anybody's wife reads this thread regularly...
:behindsofa:

Monmouth00 it sounds like you have a hell of a plan. I am looking forward to following along with your progress!
 

oscarvan

Petty Officer 3rd Class
Joined
Mar 28, 2018
Messages
87
Sorry if anybody's wife reads this thread regularly...

Triple password protection, retina scan and verification code sent to drop phone. She'll never find me here. Just kidding lol. As long as I take care of her toys I can do whatever I want. Just don't to anything stupid.... (again).....:watermelon:
 

Decker83

Commander
Joined
Apr 5, 2011
Messages
2,592
Yeah!! keeping the Admiral happy keeps the house happy..
Looking forward to seeing all the new work your doing.. Sounds great.
 

Monmouth00

Petty Officer 2nd Class
Joined
Nov 26, 2017
Messages
198
Well, I'm blessed enough that my Admiral has given me free reign on the boat.

As I said before, she was the driving force behind me buying a boat. I never wanted one - I have friends who can take me fishing whenever I want! She insisted.

Also, she knows this boat project is a drop in the bucket compared to the old Jeep I almost bought as a project.

I've got lots of goodies to install. Forgot to mention the rod holders, attaching the bench tops (with hinges), insulating the back bench so coolers and fish stay chilled, some wet sanding, and WIRING!!

It's actually going to be a beautiful weekend, so I'm really looking forward to getting back to work.
 

Monmouth00

Petty Officer 2nd Class
Joined
Nov 26, 2017
Messages
198
Boom! Benches in and tops installed!

I probably paid too much money for not a lot of metal to be fabricated, but whatever. None of this has been cheap, so what's another couple hundred bucks, right?

As promised, I hinged the middle sections of each so I could have some storage.

The rear bench was lined with 1" foam board to give a little bit of insulation. I'll use this to store some soft-sided coolers, and a fish bag.

​​​​​​​There will be one seat mounted on each of the front and rear benches - right in the middle of each of the flip-up sections.

You can also see the small tray (splash well?) in the back, which had the ends capped.

While I had the metal guy make another transom plate for the outside of the stern, I also followed some friendly advice and asked for a plate to be made to reinforce and protect the transom wood on the inside. I threw in a small plate to protect against the T/M while I was at it.

All of this got painted very quickly. Thankfully it was 70 degrees and sunny all weekend in NJ. It's amazing how quick the drying time is in the hot sun in late April, versus in a 55 degree garage in early January.
 

Attachments

  • photo289033.jpg
    photo289033.jpg
    770.6 KB · Views: 9
  • photo289034.jpg
    photo289034.jpg
    894.3 KB · Views: 9
  • photo289035.jpg
    photo289035.jpg
    940.7 KB · Views: 8
  • photo289036.jpg
    photo289036.jpg
    719.7 KB · Views: 9
Top