Mid 1960's OMC Evinrude gull-wing, a work in progress.

Quantumn

Petty Officer 2nd Class
Joined
Jul 17, 2012
Messages
142
So as far as progress, I was able to remove the motor and get its new home on the stand.


Thankful my brother in law showed up to help, I really needed it.


Temporary home:


Now to start repairing/restoring the Evinrude Sports16.
 

MTboatguy

Fleet Admiral
Joined
Jul 8, 2010
Messages
8,988
That is smart thinking on the way you did the motor stand, now if you need to work on the motor, you can drop it in a tank of water and start tinkering away, good idea, I will have to do one of those up for me!
 

Quantumn

Petty Officer 2nd Class
Joined
Jul 17, 2012
Messages
142
That is smart thinking on the way you did the motor stand, now if you need to work on the motor, you can drop it in a tank of water and start tinkering away, good idea, I will have to do one of those up for me!

Yeah, its going to work out quite nice. Though I can not take credit for the stand or the procedure to pulling the motor, Puddle Jumper posted this http://forums.iboats.com/forum/engi...ler-outboards/547945-force-125-hp-lifting-eye and It worked like a champ. I actually added more support for the motor but the main design is perfect. Also his idea of lifting the motor worked like a champ as well.
 

Quantumn

Petty Officer 2nd Class
Joined
Jul 17, 2012
Messages
142
I will have to say this, separating the hull form the top is more than I expected. With this boat, it was not a simple apply adhesive then sandwich the two halves together. NO<<<< They had to fiberglass between the layers. I guess that is good and bad. For the good, it breeds longevity of the structure, for the bad, it makes separating a chore. Slowly I am making it happen though, ughhh, I need a beer!!!
 

MTboatguy

Fleet Admiral
Joined
Jul 8, 2010
Messages
8,988
It was not uncommon for some of the companies to laminate them together, I guess they figured none of us would ever take them apart, I have run into a few of them done that way, but when I put them back together, I fixed any spot that had broke, taking it apart, then I put it back together with larger rivets with back up plates on them, I put a rivet in about every foot, then put the rub rail channel back on. That way if I had to take something apart again, I would not have to pry it apart.
 

Quantumn

Petty Officer 2nd Class
Joined
Jul 17, 2012
Messages
142
Thanks MT for the insight, I will most certainly note that. While I expect this to be the first and last time of doing this, your option is on par with my goals. I managed to separate the two halves, mind you, not the whole length, enough to facilitate replacement of the transom and if the floor/stringers need replacement, then the floor can be removed without even thinking of removing the top front half, whew.... Pictures to come of progress, and feel free anyone to chime in and offer suggestions.
 

Woodonglass

Supreme Mariner
Joined
Dec 29, 2009
Messages
25,924
I will have to say this, separating the hull form the top is more than I expected. With this boat, it was not a simple apply adhesive then sandwich the two halves together. NO<<<< They had to fiberglass between the layers. I guess that is good and bad. For the good, it breeds longevity of the structure, for the bad, it makes separating a chore. Slowly I am making it happen though, ughhh, I need a beer!!!

If it were my boat I wouldn't take the cap off entirely. I'd cut it just behind where the rear rail attaches and only remove the splashwell. That'll give you more than enough room to to the transom repair and ensure the hull stays in shape.;) Lot's less hassle in the long run.:encouragement:
 

Quantumn

Petty Officer 2nd Class
Joined
Jul 17, 2012
Messages
142
Here is a look at how OMC decided to connect the splashwell and hull together. If you look closely, you can see the 1/4 inch of fiberglass pb. I attempted to use an airsaw=fail, briefly attempted my sawzall=epic failure, then resorted to my skillsaw. It took a couple hours but was a success.


And as WOG recommended, I removed only the splash well for the most part and I will have plenty of room to work on the transom.


Looking over the transom, it should be easy to replace and glass in. Straight across the top and down the sides. Once I get the flooring removed, I hope to find out the shape of that edge as well. Also they added a 2X8 across horizontally for additional support. This vessel was built like a tank.


I suppose for being 50 years old, the original transom, though was built solid, is need of replacement. Should have no issues holding the 125 hp monster outboard. No work on the boat today, took a day off, but hope to have more progress tomorrow and wednesday. Any suggestions?
 

sphelps

Supreme Mariner
Joined
Nov 16, 2011
Messages
11,440
Are ya sure that 2x8 was installed factory ? Just seems a bit odd ....
 

Quantumn

Petty Officer 2nd Class
Joined
Jul 17, 2012
Messages
142
Are ya sure that 2x8 was installed factory ? Just seems a bit odd ....
That is a great question and one that I pondered for a couple months. But looking over the installation of fiberglass, it looks factory. I take it that this is not the norm for oem boat manufacturing?


Quantumn

Petty Officer 2nd Class
Joined
Jul 17, 2012
Messages
142
So we have some progress though not nearly done. Will post some updates real soon, but as a teaser, I present this. For everyone out there that believes their hull is sound and the bottom deck is not rotted/water logged, I bring this to light.


And just a little closer.....


There is enough hidden water below my deck to float another boat. So please be careful and understand that this is a possibility for everyone. Though I am not afraid, and glad I found it, it will lengthen the rebuild a bit. Lets Do This!!!
 

Quantumn

Petty Officer 2nd Class
Joined
Jul 17, 2012
Messages
142
As promised, we really need to replace the transom. The PO thought he could nurse it along with some outside bracing. While that probably helped, it never addressed the safety factor of a floating boat:


Here is the resulting factor and damage to the integrity of the hull:


And the process begins. Time to replace the transom, check the flooring for rot and also inspect the underlying foam to see if that will need to be replaced as well. Fingers crossed but gut feeling is that the complete flooring/foam will need to be replaced.
While I enjoy working with my hands and also have most of the tools to accomplish this task, it is new territory for me. Hoping to get some guidance from everyone here, let's breath new life into this vintage vessel.
 

sphelps

Supreme Mariner
Joined
Nov 16, 2011
Messages
11,440
You just invented another test to see if your boat is waterlogged ... The ol marshmallow man floating in a boat in a boat test !! :lol:
 

saginawbayboater

Senior Chief Petty Officer
Joined
Mar 8, 2012
Messages
677
Tagging along Quantumn. That is an interesting transom! At first glance the 2x8 looks like an added support, but those tabs on each end sure look like original glass work. Nice job on the deconstruction! :thumb: That sure looks like the marsh mellow man is ice fishing? Is it still that cold where you are? :smow:
 

Quantumn

Petty Officer 2nd Class
Joined
Jul 17, 2012
Messages
142
Tagging along Quantumn. That is an interesting transom! At first glance the 2x8 looks like an added support, but those tabs on each end sure look like original glass work. Nice job on the deconstruction! :thumb: That sure looks like the marsh mellow man is ice fishing? Is it still that cold where you are? :smow:
Though we had a 10" snow fall yesterday, I believe that was the last for the season. Today it hit mid 50's and tomorrow should hit 60's. Our lake still has about 24" of ice but should flip soon. And yeah, that 2 x 8 was factory installed, as I have seen it in other omc sports16 pictures. I will most certainly reinstall a new one, coated of course.
 

Mikeopsycho

Senior Chief Petty Officer
Joined
Feb 6, 2014
Messages
738
And just a little closer.....


I refrained from commenting earlier because I didn't want to get banned for any "little man in the boat" comments. :boink:Anyway, great visual, you're doing a good job showing us what's up with your build. :thumb:
 

Quantumn

Petty Officer 2nd Class
Joined
Jul 17, 2012
Messages
142
I refrained from commenting earlier because I didn't want to get banned for any "little man in the boat" comments. :boink:Anyway, great visual, you're doing a good job showing us what's up with your build. :thumb:
Thanks Mike, while there was absolutely no intention of anything except to show how much water I had under my floor, I thought this picture would be a perfect example of what others might find. Pray they don't. :angel:
Many more milestones to conquer but with some elbow grease and time permitting, it shall be done. :grouphug:
 

Quantumn

Petty Officer 2nd Class
Joined
Jul 17, 2012
Messages
142
So prepared with the proper PPE, tools, and a few beverages, its time to get serious.


As long as you are comfortable on how deep you can cut, a router with a 1/4" plunge bit makes short work of the flooring. Its one of those very seldom moments when you can just go gonzo and cut til your floor is a giant jigsaw puzzle. It makes pulling the floor out super easy, not to mention your scrap pile a little smaller in size.


Another favorite is a reciprocating saw with the right attachments, these allow you to get up close and personal with the hull for those end cuts.


Quantumn

Petty Officer 2nd Class
Joined
Jul 17, 2012
Messages
142
Foam? We don't need no stinking foam, especially if its completely waterlogged and weighs a ton. Not for the light of heart, but a standard hand saw works wonders to slice it into manageable chunks. Be real careful when you are nearing the hull, slow and easy and its easy peasy. :pop2:


Good thing is that the foam lifts off the hull with little coaxing, bad thing is that it weights about a 100 times what it should with all the water embedded. Which makes filling up contractor bags a repeated business. Out with the old.
Anyone have a great source for pour in foam? Hit me up :beaten:
 

Quantumn

Petty Officer 2nd Class
Joined
Jul 17, 2012
Messages
142
The process is coming along, slowly but moving in the right direction. I think it was said by another Iboats member, that he spends alot of time just looking at the rebuild and thinking. Well, I have done my fair share of that as well. Here is a few photo's of the progress. Feel free to comment, good or bad, as I take advice freely and without judgement, lol.

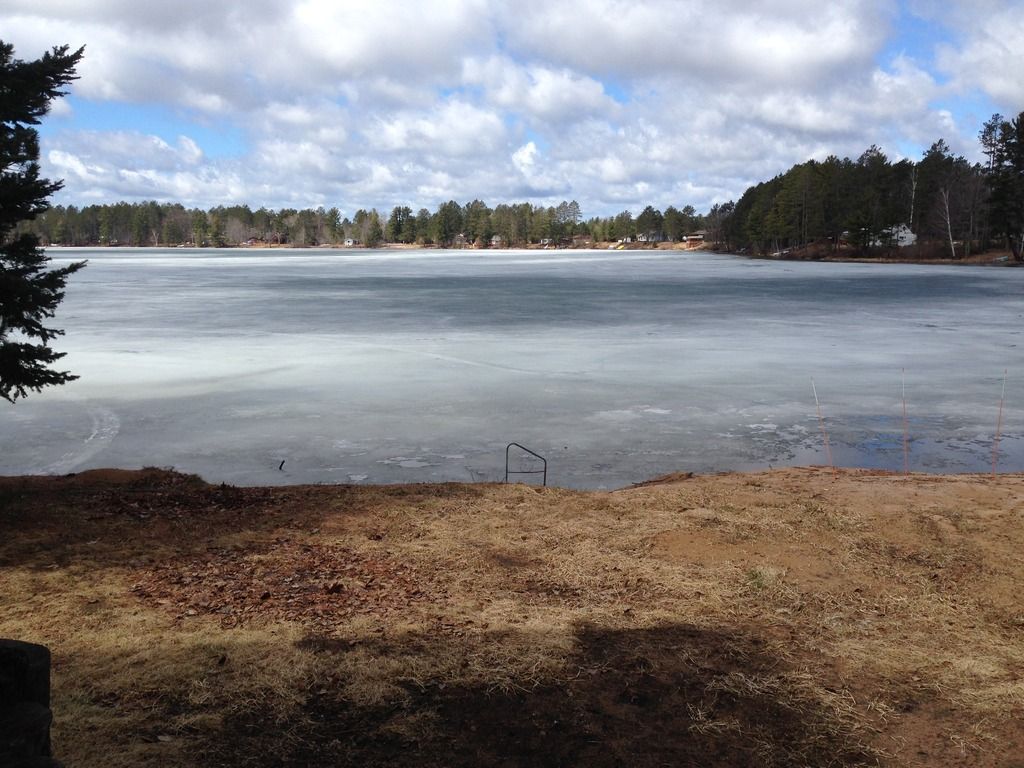
First of all, the good news is that though it will take a while to have ugly betty sea-worthy, goal is to have the main structure completely done by the 4th of july. The status of our lake, shows that any boat would float in its current state, though she is ready to flip very soon:


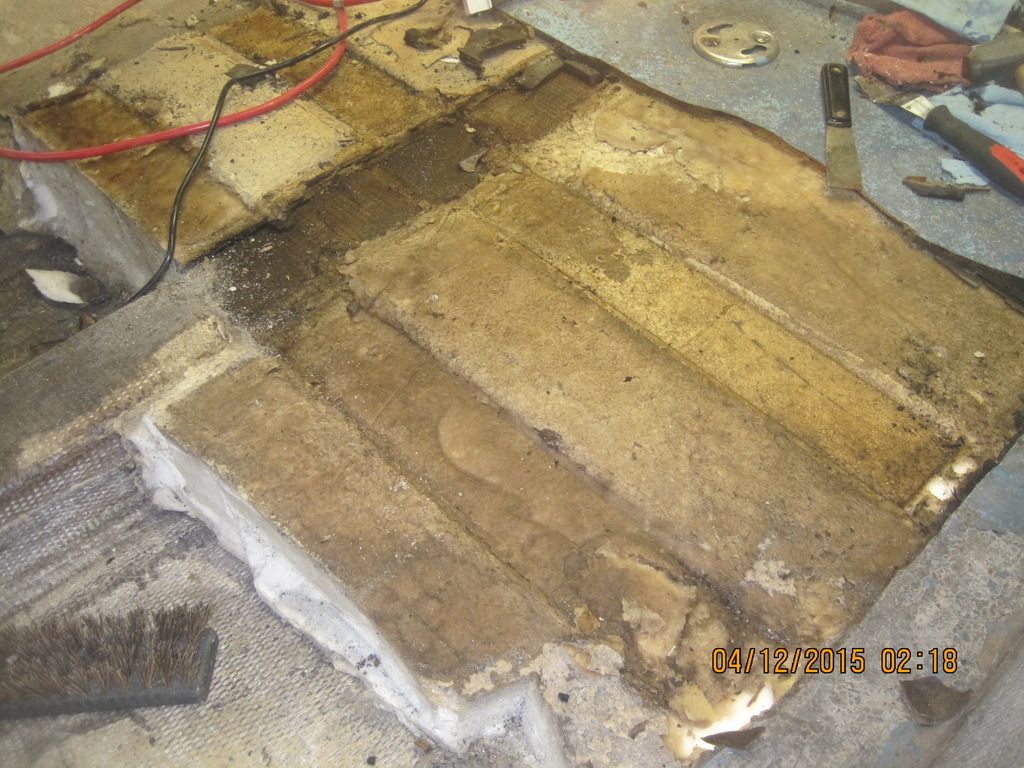
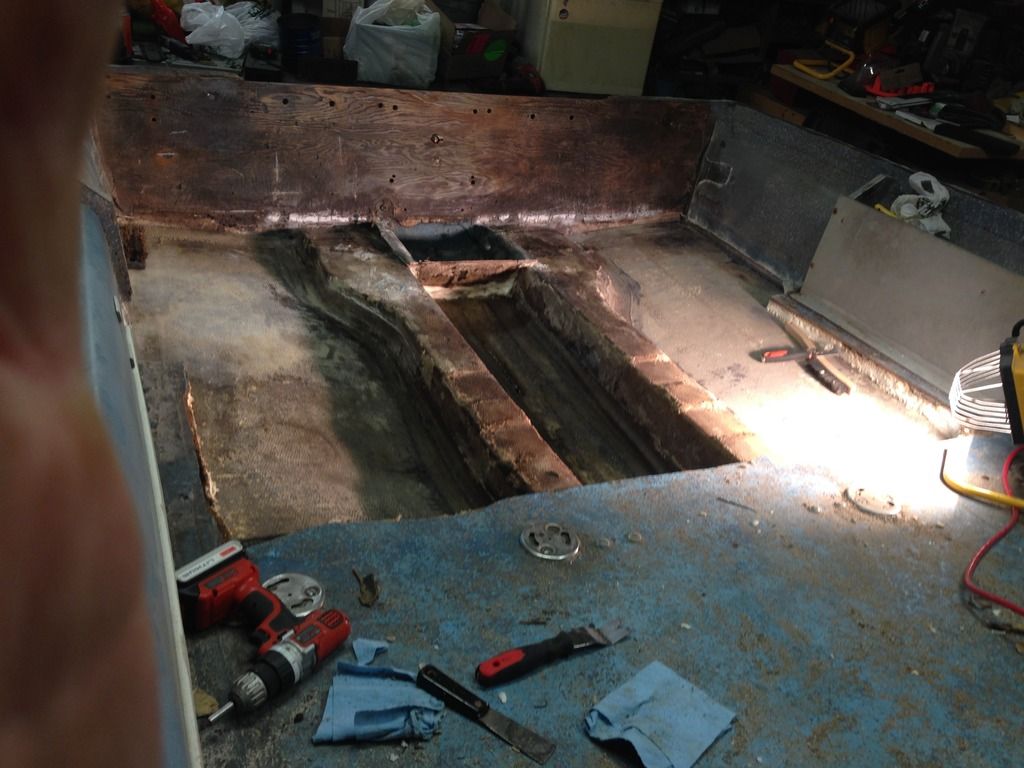
We have the back 1/3rd of the deck removed exposing the water hoarding foam:


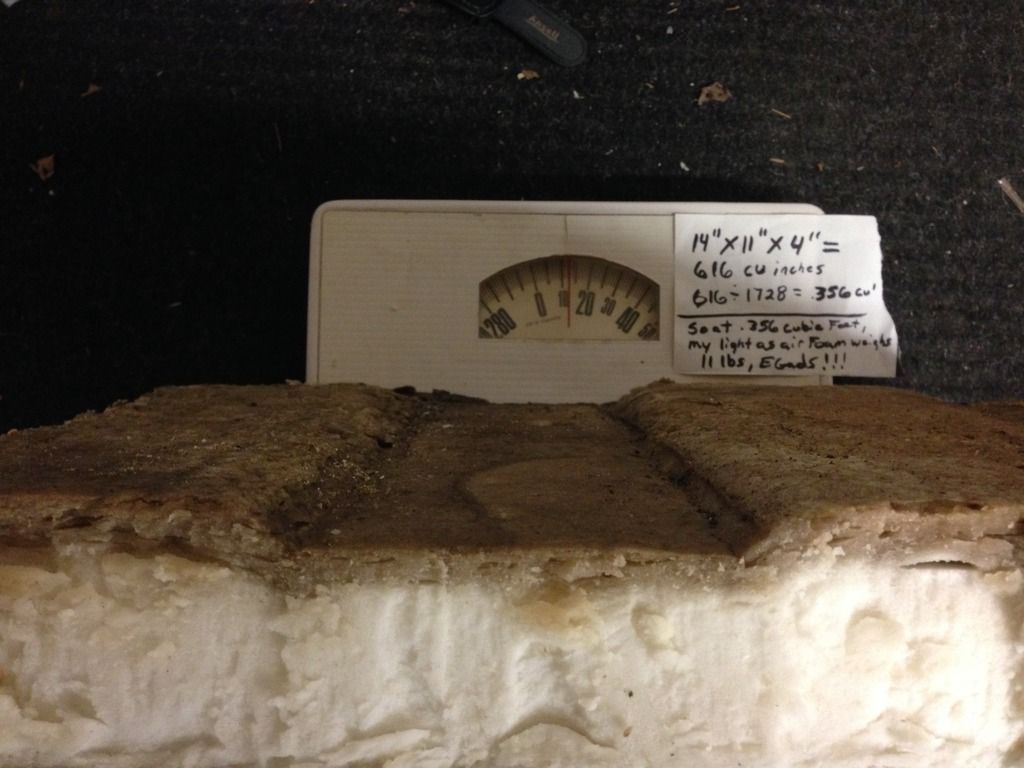
Being of the curious nature, I removed a .35 cubic feet of foam and weighed it, egads, thats alot of extra weight:


And the process continues, cut, pound, rip, tear, and just demolish:


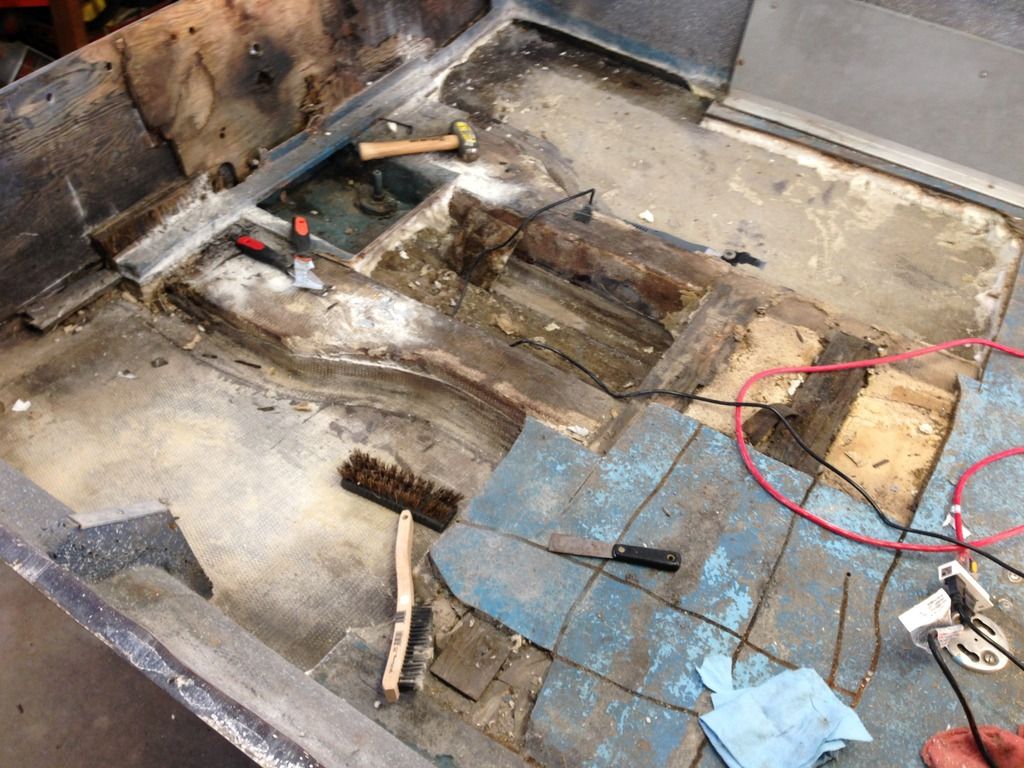
Current status as of today, though I have my gloves on and about to continue. Should have most of the floor and foam out today:


Only thing I am contemplating atm, is once I remove the floor/foam/water, the hull is not capable of supporting my weight. The stringers should provide support but only down the center of the gull-wing. Hmmm, might need to build a simple stand that is supported by the stringers.
 
Top